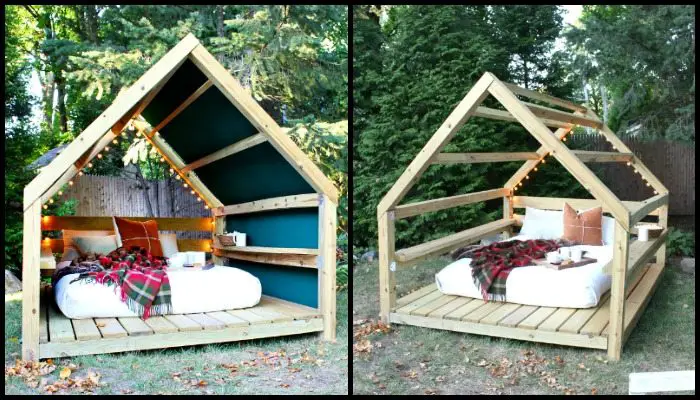
Got a beautiful garden that’s ideal for spending downtime but don’t have the furniture to complement it? Perhaps this outdoor cabana lounge would be a perfect fit!

This little DIY backyard cabana lounge is especially perfect for those who love going to the beach since the structure resembles a cabana/palapa.
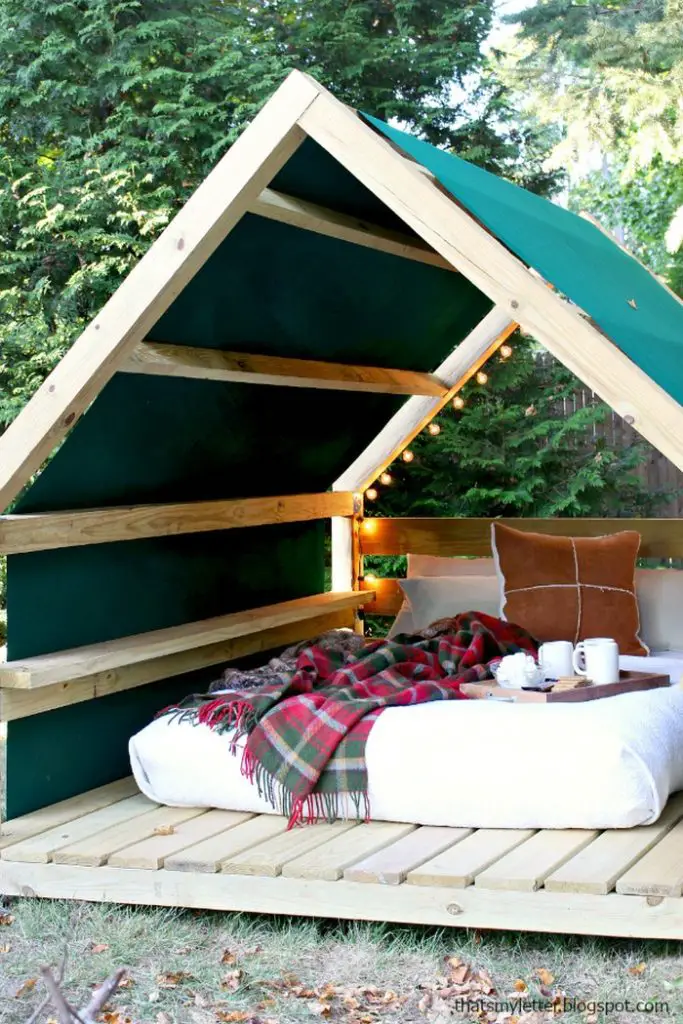
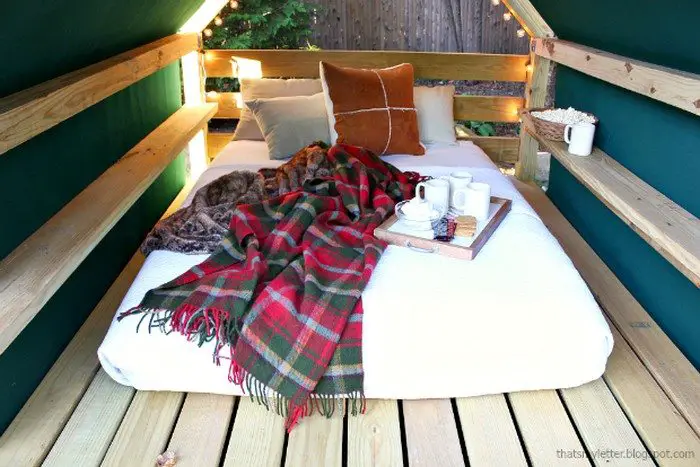
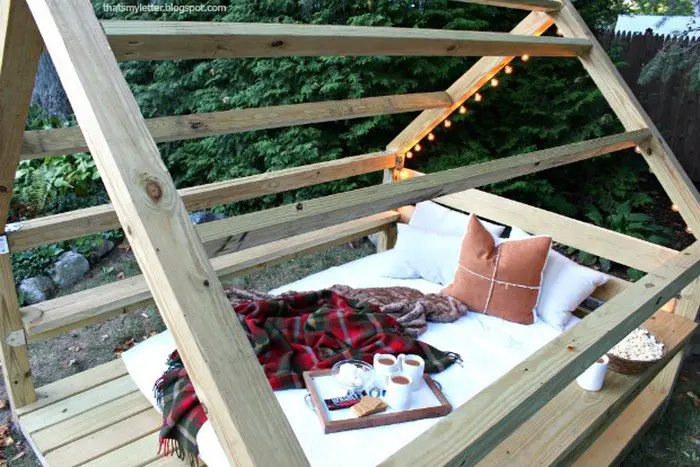
Measuring 8 ft long, the deck fits a queen size mattress and even allows for a small walking space in front. Each side has a narrow counter top so you can place your mugs, books and items that you want to be within your reach while relaxing on it.
The awning fabric cover can be removed easily since it’s simply secured in place by the weight of the conduit pipes inserted at both ends.
It’s beautiful, cozy and simple to build! So if you want to make your outdoor space feel like a vacation, then start building your own outdoor cabana lounge now!
Do you know someone who’d love to have this in their backyard too?
Contents
Building a Cabana Lounge
Materials
- 6 pcs – 8′ long 4×4 Timber
- 12 pcs – 8′ long 2×4 Timber
- 16 pcs – 8′ long 2×6 Timber
- 2 pcs – 8′ long 2×8 Timber
- 3″ Exterior Decking Screws
- 2-1/2″ Exterior Pocket Hole Screws
- Strong Tie Post Connectors
- Concrete Pier Blocks
- 2 pcs Conduit Pipes
- 80″ wide Awning Fabric
Tools
- Measuring Tape
- Speed Square
- Safety Glasses
- Kreg Jig
- Power Drill
- Spirit Level
- Wood Clamps
Instructions
1. Prepare the Site:
- Clear the area where you will set up the cabana lounge. Ensure it is level and free of debris.
- Place the concrete pier blocks evenly spaced where you will install the 4×4 timbers.
2. Construct the Base:
- Using the 4×4 timbers, create a square frame for the base. Secure the corners with strong tie post connectors.
- Check with the spirit level to make sure the base frame is level.
3. Install the Floor Joists:
- Place the 2×6 timbers across the base frame at 16-inch intervals to act as floor joists. Secure them with 3″ exterior decking screws.
4. Build the Decking Surface:
- Lay the 2×4 timbers across the floor joists to create the deck surface. Attach each board with 3″ screws, ensuring no gaps between them.
5. Construct the Roof Frame:
- Use the remaining 2×6 and 2×8 timbers to build the roof frame. The 2×8 timbers should be used for the ridge beam and the 2×6 timbers for the rafters.
- Attach the rafters to the ridge beam and secure them to the top of the 4×4 posts using the strong tie connectors.
6. Install the Awning Fabric:
- Attach the awning fabric across the top of the roof frame using the conduit pipes to weigh down the fabric on both ends.
- Ensure the fabric is stretched tight and secured to resist wind and rain.
7. Finishing Touches:
- Use the Kreg Jig to create pocket holes for attaching the narrow countertop along the sides of the cabana.
- Secure the countertops with the 2-1/2″ pocket hole screws.
- Sand any rough edges to prevent splinters.
8. Inspection and Adjustment:
- Inspect the entire structure for stability and make any necessary adjustments.
- Check that all screws are tightened and that the fabric is secure.
9. Enjoy Your Cabana Lounge:
- Add cushions, small furniture, and other decorations to personalize your new outdoor cabana lounge.
Click on any image to start lightbox display. Use your Esc key to close the lightbox.![]()
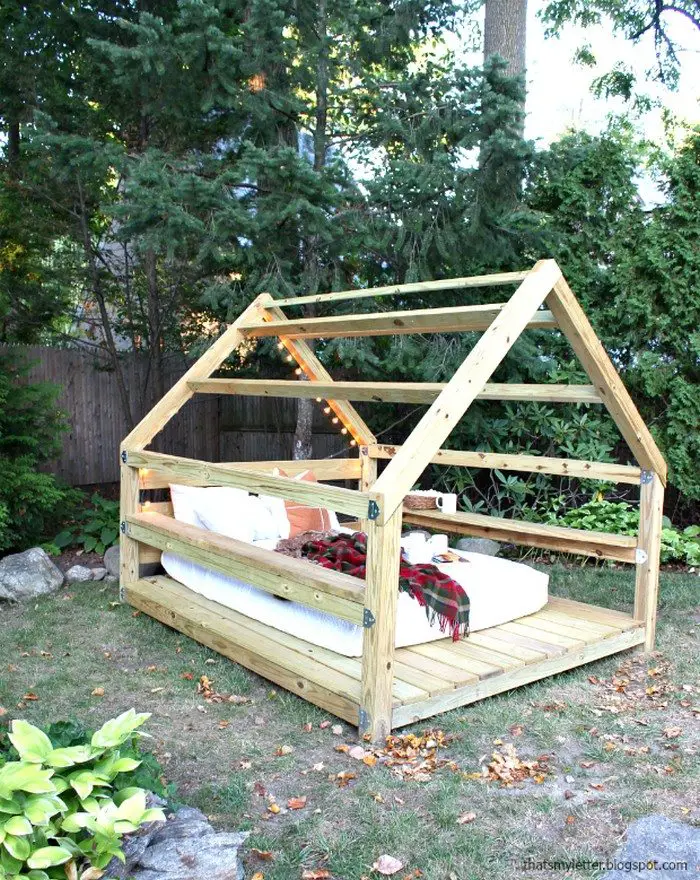


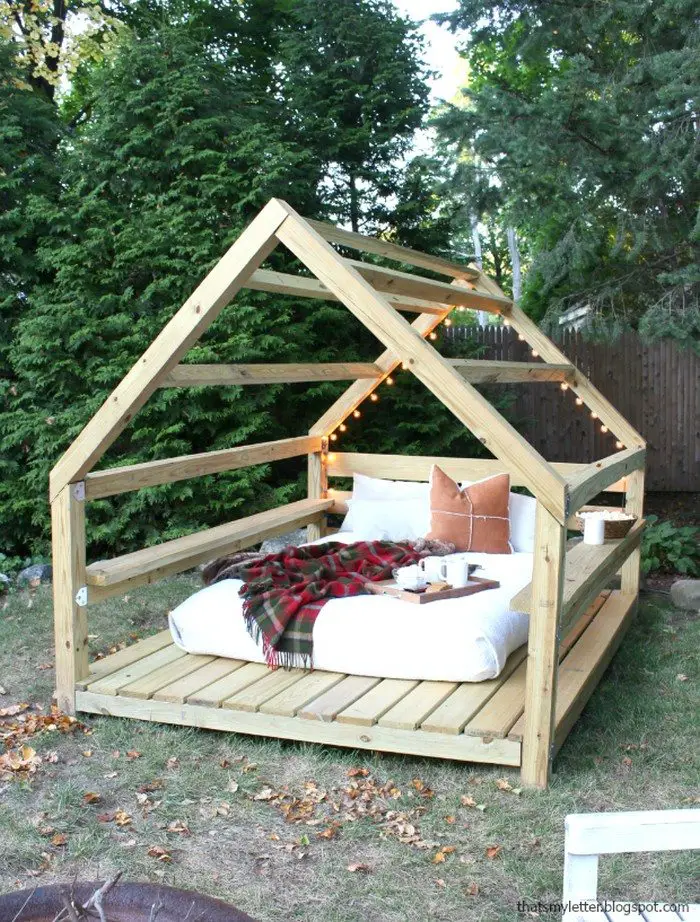

You can get more step-by-step instructions here…
Customization Ideas for Your Cabana Lounge
Creating your own DIY outdoor cabana lounge is not just about building a structure; it’s about tailoring it to fit your lifestyle and enhance your outdoor space. Whether you’re aiming for a cozy reading nook or a vibrant party hub, here are some customization ideas to make your cabana lounge uniquely yours.
Add Privacy with Roll-Up Curtains
Functionality: Install roll-up curtains around your cabana lounge. Choose durable outdoor fabrics in colors or patterns that complement your garden. These curtains can provide privacy, shade, and protection from the elements, making your lounge a perfect retreat at any time.
Adjustable Roofing Solutions
Flexibility: Consider adding a retractable awning or adjustable louvers to the roof of your cabana. This allows you to control the amount of sunlight entering the lounge, perfect for adapting to different weather conditions and times of day.
Mood Lighting
Ambiance: String lights or solar-powered lamps can be installed around the perimeter or across the ceiling of the cabana. Lighting not only extends the usability of the cabana into the evening but also adds a magical, inviting glow.
Install Solar Panels
Eco-Friendly Power: Integrate solar panels into the roof of your cabana lounge. This sustainable solution can power LED lighting, charge mobile devices, or even run small fans, all while reducing your carbon footprint and saving on electricity costs.
Add a Mini Fridge
Refreshments at Hand: Equip your lounge with a mini fridge to keep drinks and snacks cool and within easy reach. This is perfect for hot days when you want to stay hydrated or have a chilled beverage without needing to go back to the house.
Built-In Sound System
Ambient Audio: Install a weatherproof sound system to enjoy your favorite music or podcasts without needing to bring out portable speakers each time. A built-in system enhances the atmosphere and makes your lounge an ideal place for relaxing or entertaining.
Water Features
Soothing Sounds: Consider adding a small fountain or water feature nearby. The sound of flowing water can enhance the tranquil ambiance of your cabana, making it even more of a peaceful escape.
Outdoor Heating
Year-Round Enjoyment: Extend the usability of your cabana lounge into the cooler months by incorporating outdoor heaters or a built-in fire pit. These elements add warmth and create a cozy environment that invites longer conversations and stargazing nights.
Cozy Furnishings
Comfort: Equip your cabana with plush, weather-resistant cushions, throw pillows, and blankets. Opt for furnishings that offer both comfort and style, turning the cabana into an irresistible escape within your garden.
Multipurpose Storage Solutions
Convenience: Build in storage solutions like built-in benches with hidden compartments or side tables with storage. This helps keep the area tidy and ensures that books, gardening tools, or drinkware are always within reach.
Thematic Decor
Style: Theme your cabana lounge to reflect a specific style such as tropical, bohemian, or modern chic. Decorate with items that match the theme, like tiki torches for a tropical vibe or macramé wall hangings for a bohemian touch.
Entertainment Features
Leisure: Incorporate entertainment options like a built-in sound system, a small outdoor projector screen, or a mini-bar. This makes your cabana lounge the perfect spot for hosting movie nights or casual get-togethers.
Each of these customization ideas can help transform a basic cabana lounge into a personalized highlight of your outdoor living space, enhancing both its functionality and aesthetic appeal.
Maintenance and Care Tips for Your Cabana Lounge
Ensuring the longevity and beauty of your cabana lounge involves regular maintenance and care. Here are essential tips to help you keep your outdoor cabana in top condition, so you can enjoy its comfort and style for years to come.
Regular Cleaning
- Keep It Clean: Regularly sweep the deck and wipe down surfaces to prevent dirt buildup. For the timber structures, use a mild soap and water solution to clean without damaging the wood. Allow the timber to dry completely after washing to prevent moisture damage.
Timber Treatment
- Protect the Wood: Treat the timber with a waterproof sealer or wood stain annually. This not only enhances the appearance of your cabana lounge but also adds a layer of protection against UV rays and moisture, which are common causes of wood degradation.
Fabric Care
- Maintain the Awning: If your cabana lounge includes fabric elements like awnings or cushions, clean them according to the manufacturer’s instructions. Consider using fabric protectants to resist water and stains, and store cushions inside during bad weather or when not in use.
Check Structural Integrity
- Annual Inspections: Before and after each season, check the structure for any signs of wear or damage. Look for loose screws, weakened timber, or potential rot spots. Promptly address any issues to prevent further damage and ensure safety.
Pest Control
- Avoid Pests: Keep an eye out for signs of termites or other wood-boring insects. Regularly applying a safe, appropriate pest repellent around the base and joints of your cabana can help deter these pests from causing structural damage.
Cover When Not in Use
- Use Protective Covers: When your cabana lounge is not in use, especially during off-season months, cover it with a waterproof, breathable cover. This helps protect against weather damage and keeps the cabana clean and ready for use.
Adjust for Weather Conditions
- Be Weather-Wise: If you live in an area with severe weather conditions, make additional preparations such as securing the cabana to the ground more robustly, using sandbags or anchors during high winds, and removing any detachable parts before storms.
By following these maintenance and care tips, you can ensure that your cabana lounge remains a beautiful and functional part of your outdoor living space, ready to provide comfort and relaxation year after year.
Conclusion
One of a kind chances to design a customized getaway in your backyard is to build your own cabana lounge. A little imagination and the correct supplies and equipment can allow you to create a comfortable, fashionable area perfect for entertainment and leisure. Have fun creating a useful outdoor sanctuary that improves your house and way of life.

