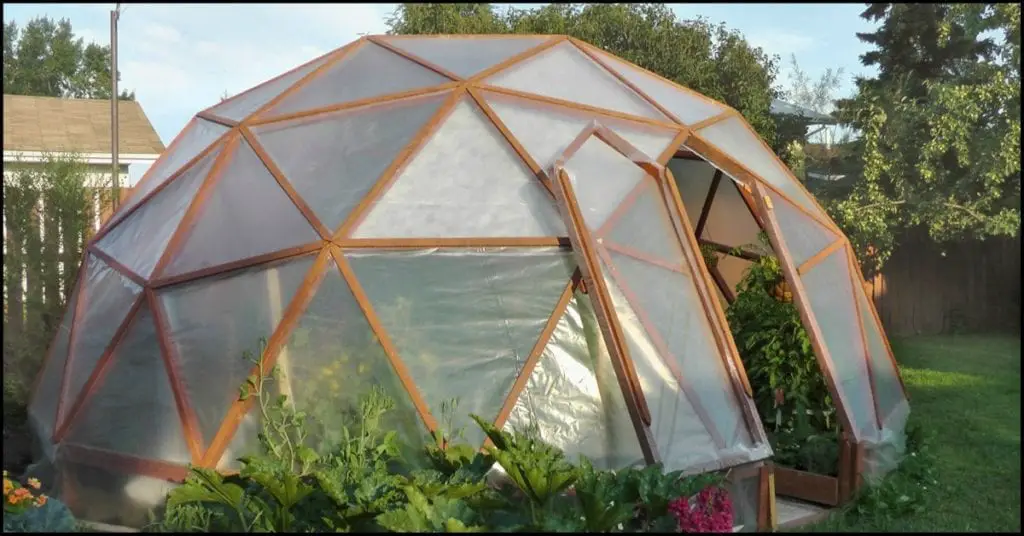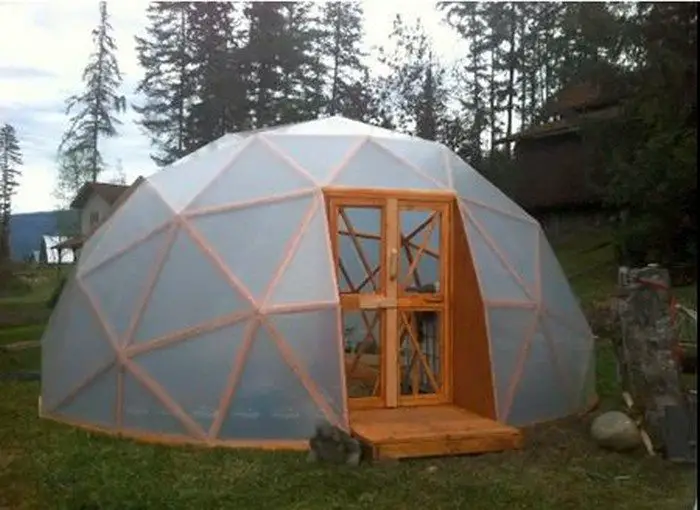
A greenhouse can provide a stable, warm environment where you can grow plants all year. You can also use a greenhouse to get a jump start on the season, where you can grow tomatoes and peppers early and later move them out to the garden.
Do you need a greenhouse design that can be built in a small garden? But at the same time, one that will still give you abundant produce despite the limited space?
One that is not a permanent structure? And one that can withstand harsh weather?
A geodesic greenhouse is all that!
Indeed, the geodesic dome structure makes a great greenhouse because of all of these features and more! :)
As mentioned, a geodesic greenhouse lets you easily grow abundant produce as they provide one of the best atmospheres for plants to grow. This is because the structure has the least amount of surface area and yet generates the most volume in terms of yield. Meaning heat does not easily escape the greenhouse, providing a nice environment that plants love. Here, you are saving on energy, materials, and labor cost. And by growing your plants vertically, you can definitely maximize the space in your greenhouse and get as much harvest as possible.
Another reason to love a geodesic greenhouse is it allows for optimal light absorption. Since it is a sphere, it catches light no matter where the sun is. This is perfect for places that get very minimal exposure to the sun as one would have to grab every chance that sunlight is shining on their area!
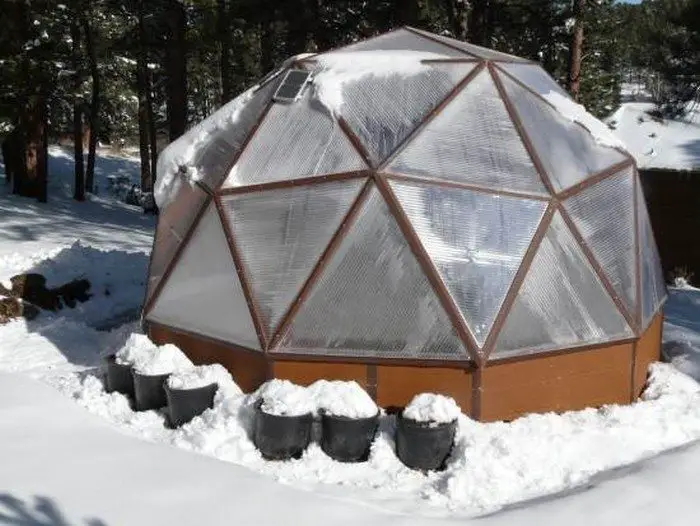
The third good thing about a geodesic greenhouse is its ability to stay strong and stable under strong winds and even during snow. This structure is really sturdy that even taking one triangle out of it will not weaken the whole structure.
Now this strong build basically requires just two major materials to make: timber and greenhouse plastic. No concrete work, no thick walls to build, no heavy posts, no roofing concerns – you know, the usual process that’s involved in building a structure. So in that sense, a geodesic greenhouse is one of the easier greenhouses to build. ;)
Because of this, your greenhouse is movable as well! Meaning that should you move to a new house or place, you can take your geodesic greenhouse with you!
And last but not the least, it’s a stunning structure – definitely the type of greenhouse for those particular with aesthetics!
So is this the kind of greenhouse that you would like to have in your yard?
Contents
Building a Geodesic Greenhouse
Materials
- Untreated Spruce Timber
- 1 lb Screws
- Greenhouse Plastic (or Shrink Foil, Polycarbonate or Bubble Solawrap Foil)
- Automatic Window Openers and Hinges
Tools
- Measuring Tape
- Square
- Pencil
- Safety Glasses
- Hearing Protection
- Drill
- Radial Arm Saw or Dual Bevel Miter Saw
- Level
Instructions
Step 1: Plan and Prepare
- Determine Size and Location: Choose the size of your geodesic greenhouse and a suitable location. Ensure the site is level and has good sun exposure.
- Gather Materials and Tools: Collect all necessary materials and tools. Wear safety glasses and hearing protection during construction.
Step 2: Cutting the Timber
- Measure and Mark: Use the measuring tape and pencil to mark the lengths of the timber. You will need to cut the timber into specific lengths to form the triangles of the dome.
- Cut the Timber: Using the radial arm saw or dual bevel miter saw, cut the timber according to your measurements. Ensure that each piece is cut precisely to maintain the integrity of the dome structure.
- Tip: Typically, a geodesic dome uses a combination of shorter and longer struts. Confirm the correct measurements from your blueprint.
Step 3: Assemble the Dome Frame
- Lay Out the Base: Arrange the longest pieces of timber in a circle on the ground where you plan to build the greenhouse. This forms the base of your dome.
- Construct the Triangles: Begin assembling triangles by connecting the pieces of timber using screws. Drill pilot holes first to prevent the wood from splitting.
- Connect the Apex: Once the triangles are assembled, start connecting them at their apex (top points) to form a section of the dome.
- Build Upwards: Continue assembling and attaching triangles, working your way up from the base to form the dome shape. Use the square to ensure all angles are correct and the level to keep the structure even.
Step 4: Secure the Frame
- Reinforce Joints: Double-check all joints and connections, adding extra screws if necessary for stability.
- Check Stability: Ensure the dome is stable and secure. Walk around the structure and gently push against it to test its integrity.
Step 5: Cover the Dome
- Prepare the Plastic Covering: Lay out the greenhouse plastic, shrink foil, polycarbonate, or bubble solawrap foil. Measure and cut the material to fit over the dome, leaving some extra for overlapping and securing.
- Attach the Covering: Start from the top of the dome and work your way down, securing the covering with screws or staples to the timber frame.
- Overlap Edges: Overlap the edges of the covering to ensure there are no gaps. This helps maintain a stable internal environment.
- Seal the Seams: Use additional strips of the covering material or strong adhesive tape to seal any seams or overlaps.
Step 6: Install Windows and Ventilation
- Cut Openings: Use the saw to cut openings for the windows and any ventilation systems you plan to install. Be careful to make precise cuts that fit the size of your automatic window openers and hinges.
- Install Window Openers and Hinges: Attach the automatic window openers and hinges according to the manufacturer’s instructions. These will help regulate temperature and humidity inside the greenhouse.
- Test the Mechanism: Ensure that the windows open and close smoothly.
Step 7: Final Checks and Adjustments
- Inspect the Structure: Walk around the completed greenhouse and check for any loose screws or gaps in the covering.
- Adjust as Necessary: Make any final adjustments to ensure the greenhouse is secure and ready for use.
Step 8: Enjoy Your New Greenhouse
- Move In Plants: Start transferring plants into your new geodesic greenhouse. Arrange them to make the best use of the space.
- Monitor Conditions: Keep an eye on the temperature and humidity levels inside the greenhouse, adjusting ventilation as needed.
Click on any image to start the lightbox display. Use your Esc key to close the lightbox.![]()
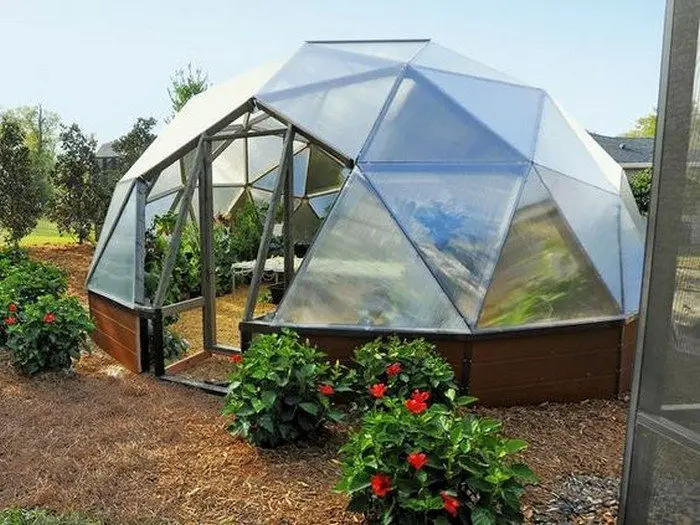

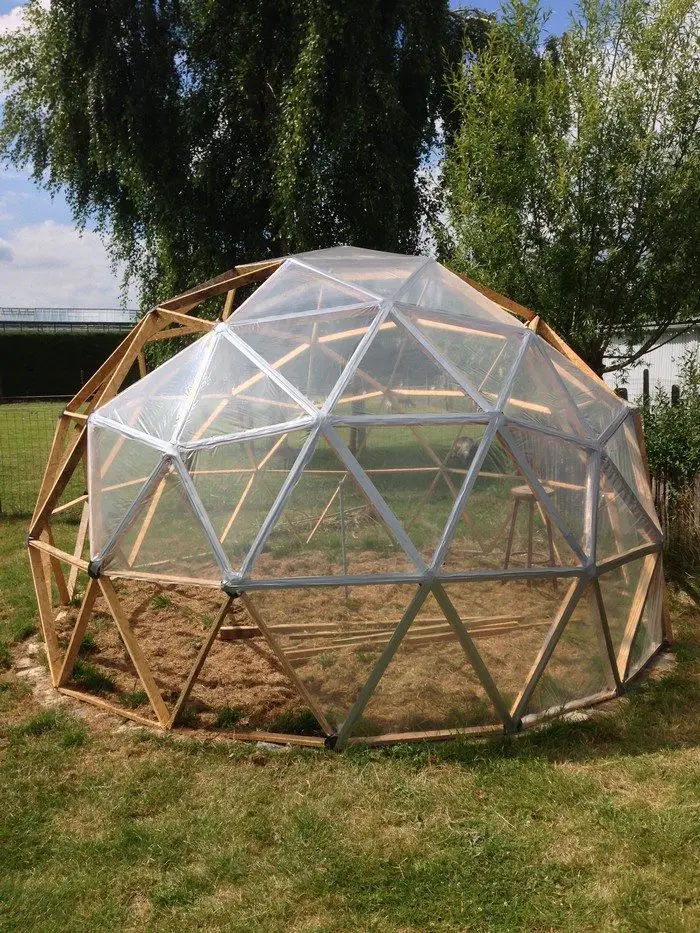

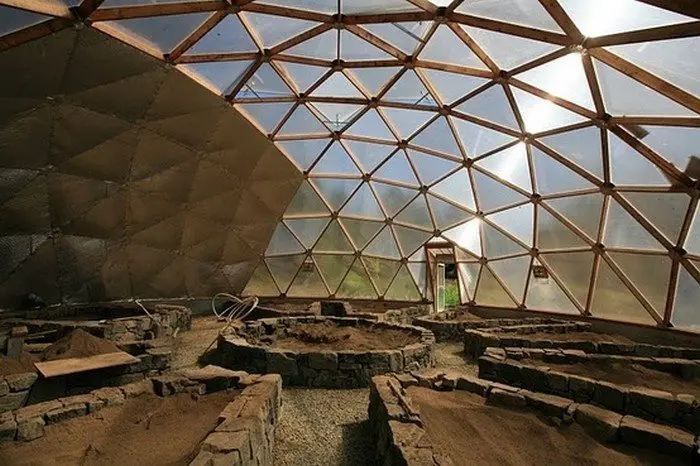
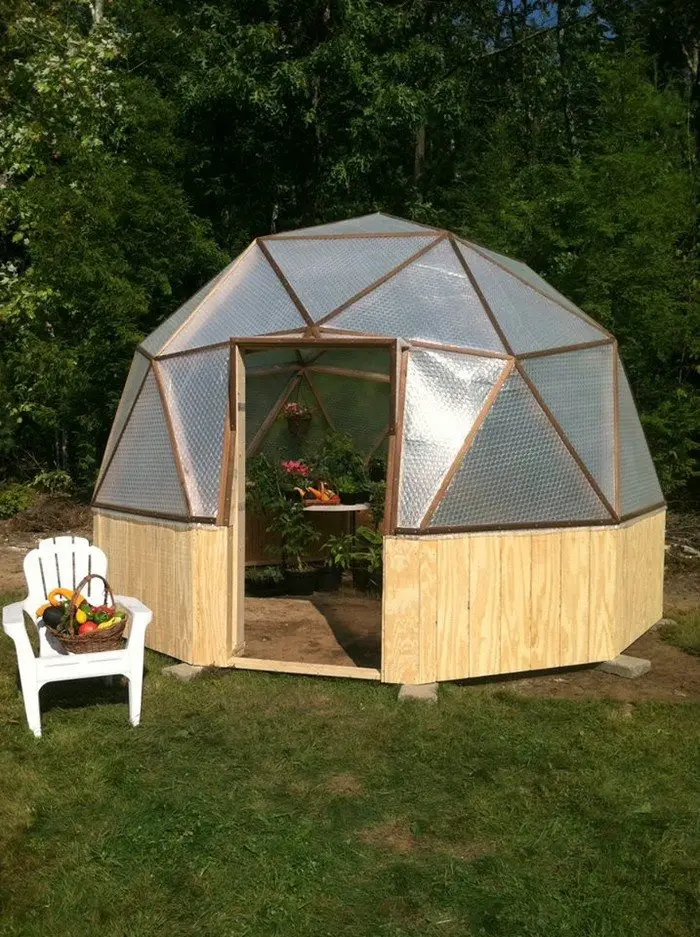
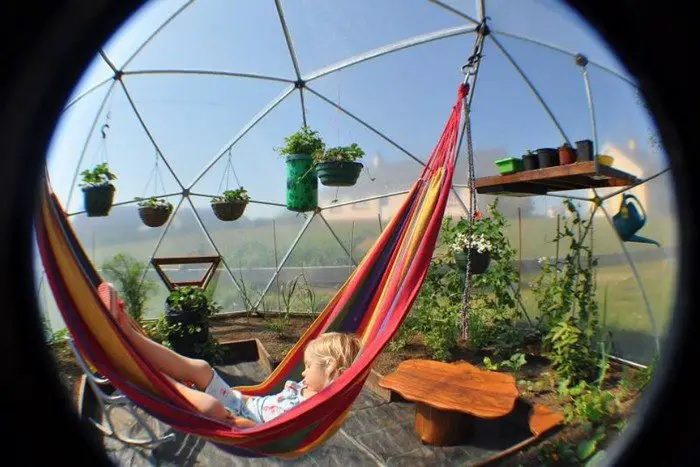
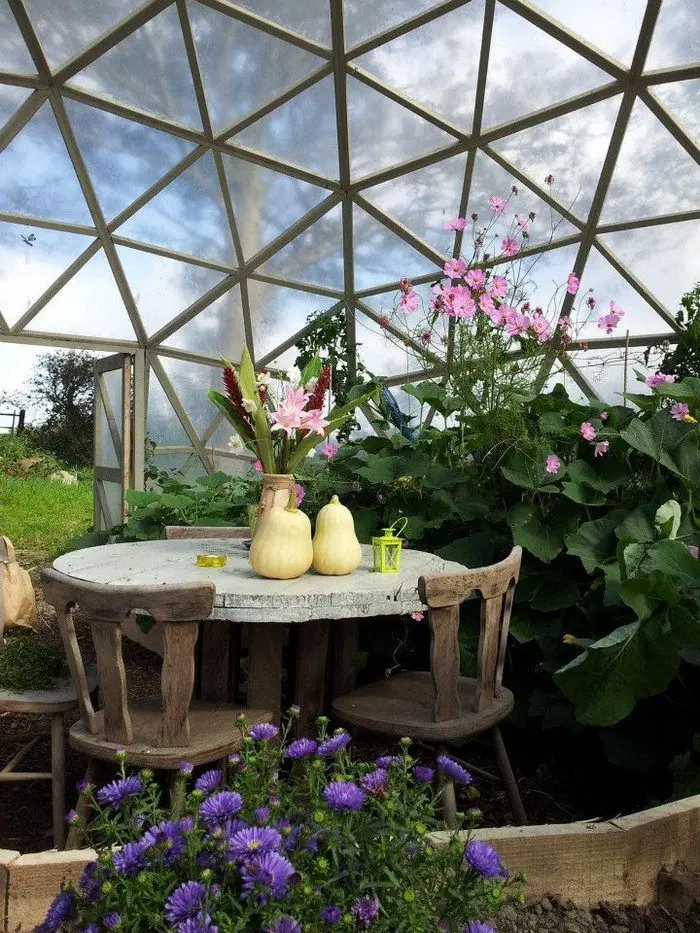
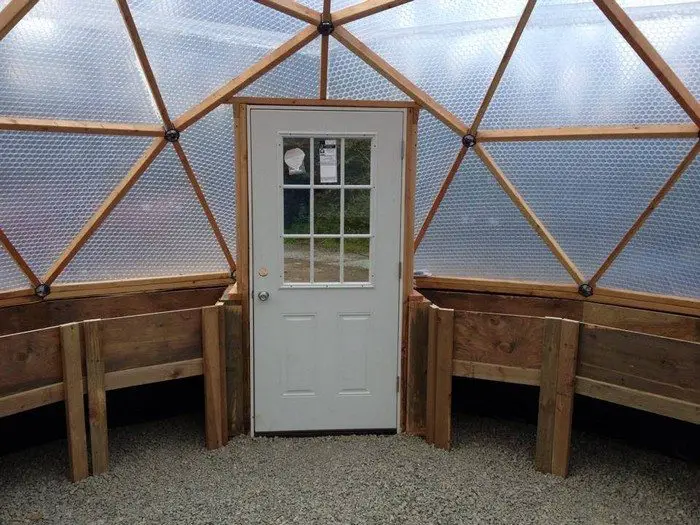
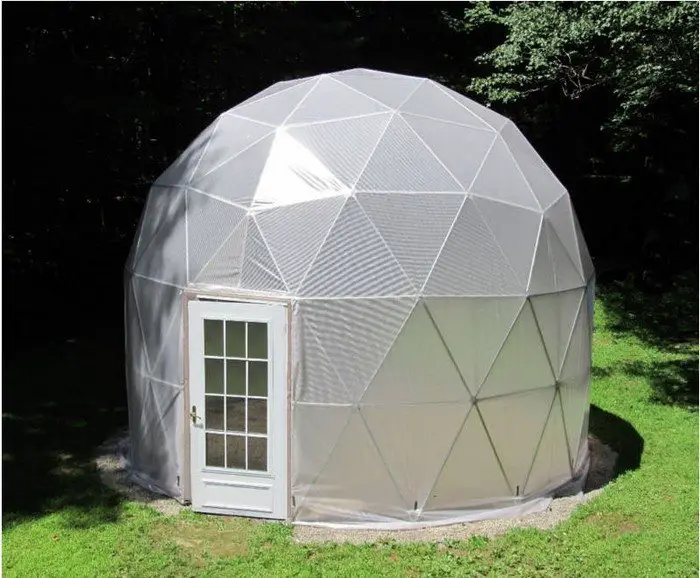
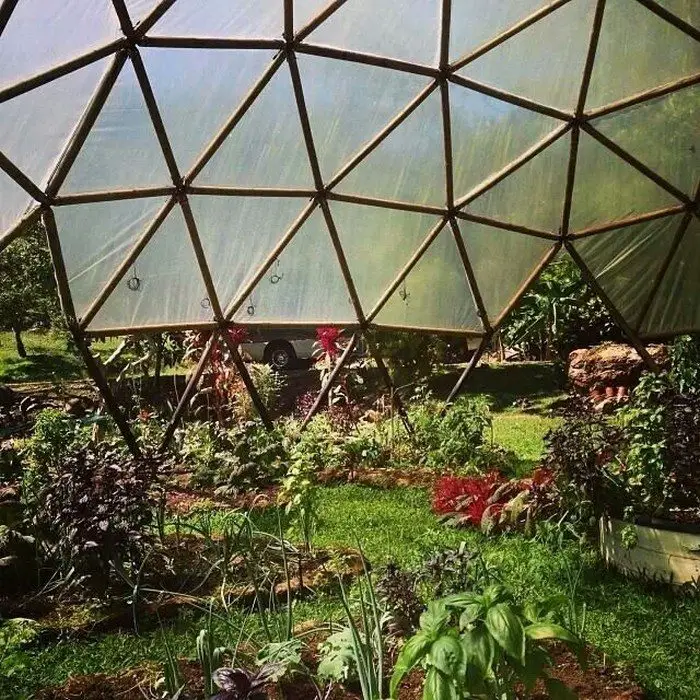
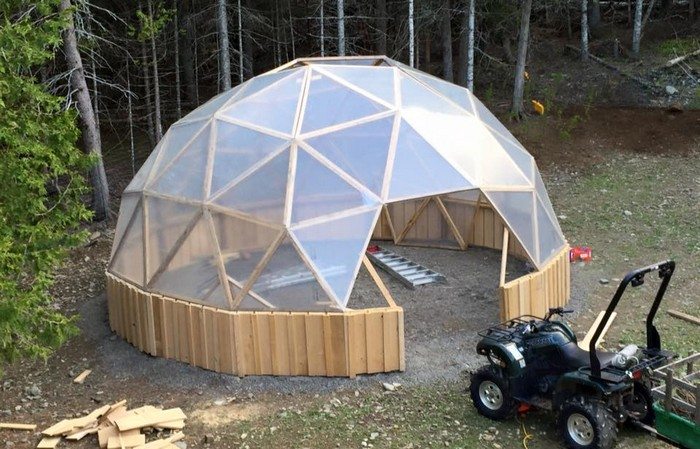
Thanks to Northern Homestead for this great project. You can get step-by-step instructions here…
Maximizing Space and Yield in a Geodesic Greenhouse
A geodesic greenhouse offers unique opportunities for maximizing space and increasing yield due to its efficient structure. Whether you’re a home gardener or an urban farmer, optimizing the available space within your geodesic greenhouse can lead to more abundant and diverse harvests.
Here are some effective strategies to make the most of your geodesic greenhouse.
Utilize Vertical Gardening
One of the standout features of a geodesic greenhouse is its height and ample vertical space. This makes it ideal for vertical gardening, which can significantly increase your growing capacity.
- Trellises and Climbing Plants: Install trellises along the walls of your geodesic greenhouse. Use these to support climbing plants like tomatoes, cucumbers, and beans. These plants will grow upwards, freeing up ground space for other crops.
- Hanging Baskets and Pots: Suspend baskets or pots from the structure’s internal frame. This method is perfect for growing herbs, strawberries, or small ornamental plants. The spherical shape of the geodesic greenhouse allows light to reach these hanging plants from all angles.
- Stacked Planters: Use tiered or stacked planters to grow more plants in the same floor space. This approach is great for leafy greens, herbs, and compact vegetables. By growing vertically, you can effectively multiply your growing area within the greenhouse.
Integrate Hydroponic and Aquaponic Systems
Hydroponic and aquaponic systems can be seamlessly integrated into a geodesic greenhouse to maximize yield. These systems allow you to grow plants without soil, using nutrient-rich water solutions instead.
- Hydroponics: Set up hydroponic systems that use trays or tubes to deliver nutrients directly to the plant roots. This method conserves space and can produce faster-growing and higher-yielding crops compared to traditional soil-based gardening.
- Aquaponics: Combine hydroponics with aquaculture by establishing an aquaponic system. Fish waste provides nutrients for the plants, while the plants help to filter and clean the water for the fish. This symbiotic system is both space-efficient and sustainable, making it a perfect match for the innovative design of a geodesic greenhouse.
Implement Crop Rotation and Succession Planting
To ensure a continuous supply of fresh produce and maintain soil health, consider using crop rotation and succession planting techniques in your geodesic greenhouse.
- Crop Rotation: Rotate different types of crops in your greenhouse over time. This practice helps to prevent soil depletion and reduces the risk of pest and disease buildup. For example, alternate between root vegetables, leafy greens, and fruiting plants each growing season.
- Succession Planting: Plan your planting schedule so that new crops are sown as soon as the previous ones are harvested. This method ensures that your geodesic greenhouse is always producing something. For instance, after harvesting early spring lettuce, you might plant summer squash in the same spot.
Optimize Light Distribution and Reflection
The unique dome shape of a geodesic greenhouse allows for excellent light distribution, but you can further enhance this to maximize plant growth.
- Reflective Surfaces: Use reflective materials like Mylar or white paint on the interior surfaces to bounce light around the greenhouse. This helps to ensure that all plants, regardless of their position, receive adequate sunlight.
- Supplemental Lighting: In areas with limited natural sunlight, especially during winter months, consider installing supplemental grow lights. These can be positioned to provide additional light directly to plants that need it the most.
Efficient Use of Ground Space
While vertical and hydroponic methods are excellent, don’t forget to optimize the use of ground space in your geodesic greenhouse.
- Square Foot Gardening: Adopt square foot gardening techniques to maximize planting density in the ground space. Create a grid and plant crops in close proximity, taking advantage of every inch of soil.
- Companion Planting: Utilize companion planting to grow plants that benefit each other. For example, plant basil near tomatoes to repel pests and enhance flavor. This method increases yield while maintaining a healthy plant ecosystem.
Employing these strategies will allow you to fully capitalize on your geodesic greenhouse’s unique design and capabilities. Whether you’re vertical gardening, integrating advanced growing systems, or optimizing light and space, these techniques will help you achieve a thriving, productive greenhouse. The geodesic greenhouse isn’t just a beautiful structure but a powerhouse for efficient and sustainable growth.
Conclusion
An inventive and practical approach to cultivate plants all year round is to construct a geodesic greenhouse. Both novice and seasoned gardeners will find ideal conditions in its robust construction and compact design. With so many harvests and limitless opportunities, this greenhouse is not only a useful but also a beautiful addition to any garden.

