If you love camping and need convenient campfire equipment that you can easily cook with and take with you, then a campfire tripod is a must-have for you!
Campfire tripods are sold in stores but sometimes they just don’t have the exact features that you’re looking for. The cheapest ones are usually short, while the longer ones are too heavy to bring around and more expensive too.
The good news is you can DIY one and customize it to meet your requirements for the perfect campfire tripod for you! This DIY campfire tripod will only cost you anywhere between $20 to $25 even if you buy brand new materials for it. You can cut it to whatever height you need it to be, which is great if you’re looking at using it for a big campfire or fitting it inside your vehicle. It’s also more lightweight compared to the wrought-iron version of it, which makes it more delightful to take with you on your camping trips.
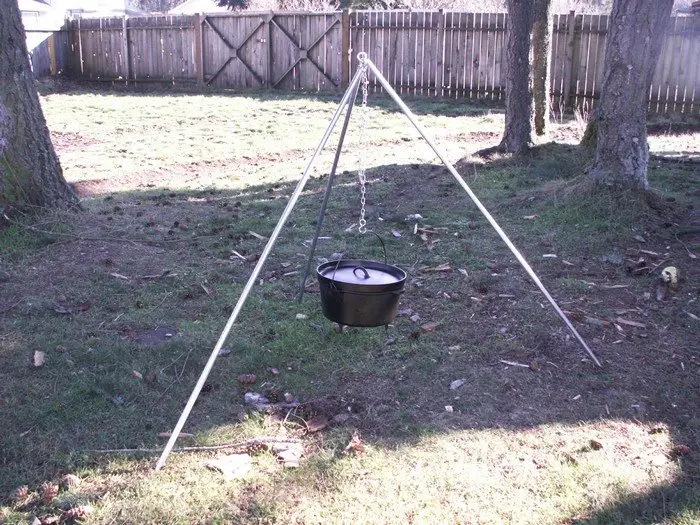
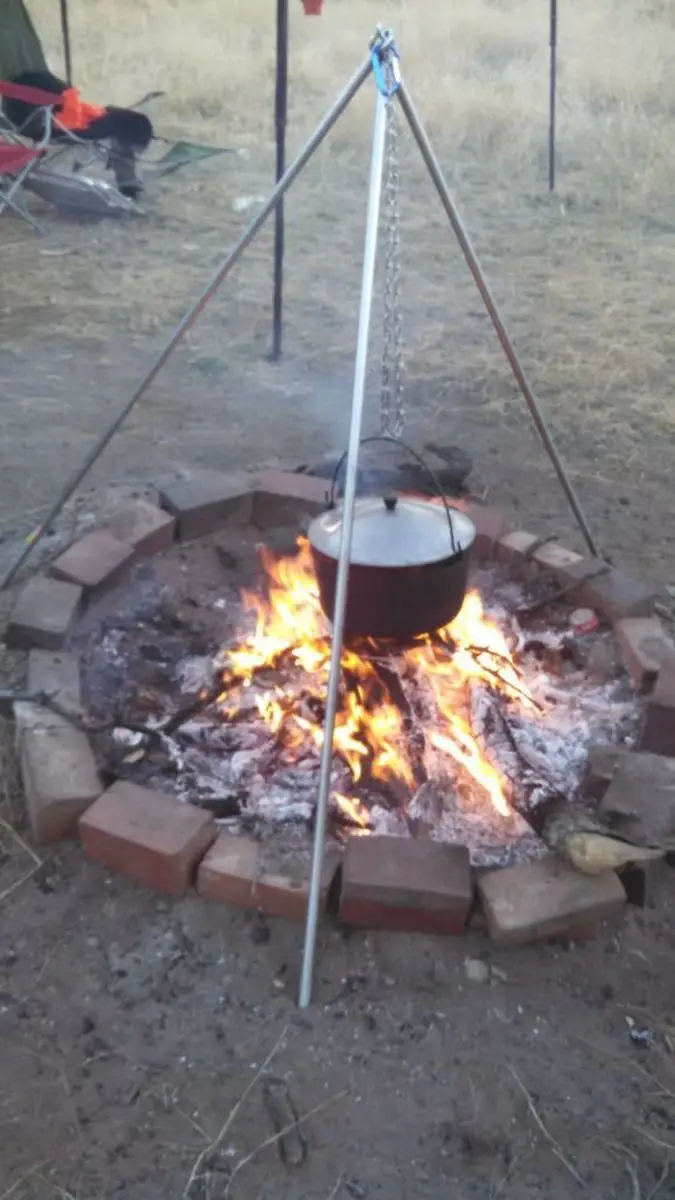
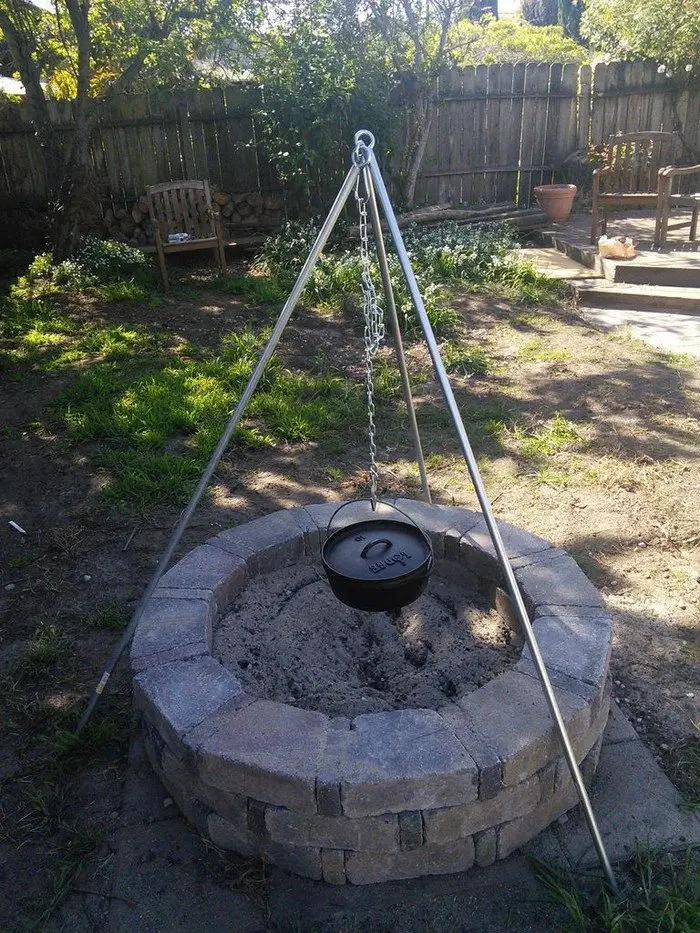
It’s as good as the commercial campfire tripods, maybe even better if you build it right and well. You can hang your dutch oven or pots weighing 30 to a maximum of around 90 lbs on it. You can enjoy the convenience of it even when you’re roughing it outdoors!
Learn how to build your own campfire tripod and get ideas on how you can customize it to fit your cooking needs by following the step-by-step tutorial below!
Would you want this for your next camping trip?
Click on any image to start the lightbox display. Use your Esc key to close the lightbox.![]()
Materials:
- 1/2″ Conduit (4′ long or longer; 3 sections)
- 3 Heavy-duty Eye Bolts
- 2 S-Hooks
- 4′ Chain (the kind with the wire links is great)
Tools:
- Hammer
- Tubing Cutter or Hacksaw
- Pliers
- Wire Cutter
Steps:
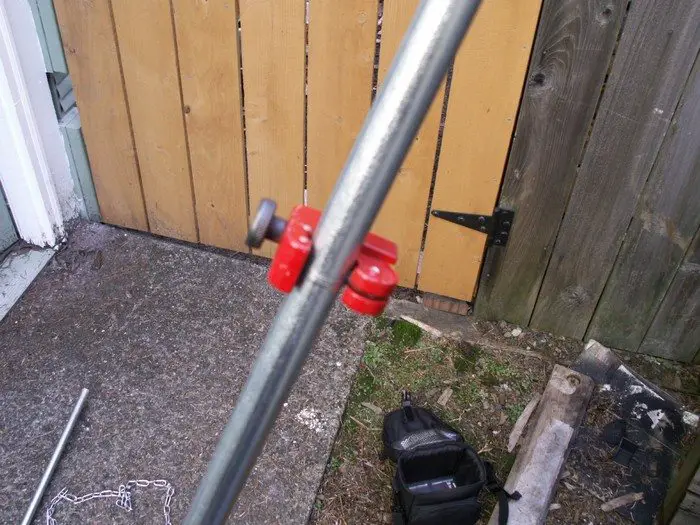
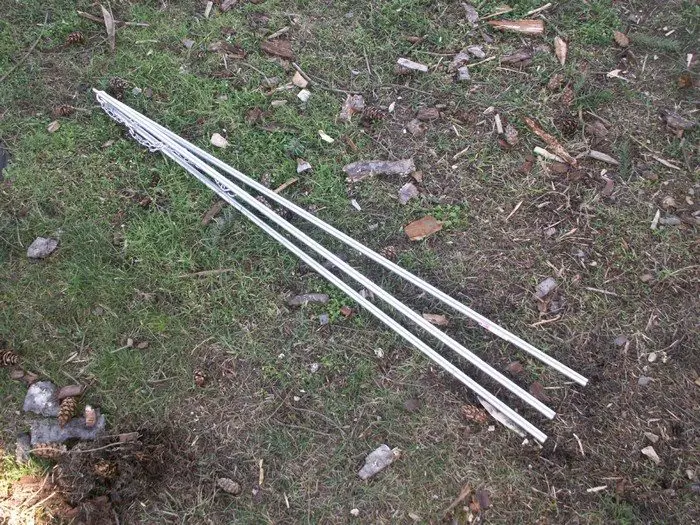
Cut the legs: First, cut the conduit to the desired length. I made mine 4’8″, but you can make them any length you like.
The tubing cutter has little rollers and a cutting wheel on a clamp. Tighten the clamp onto the conduit where you want the cut then tighten it down, turn, and repeat until the conduit is cut all the way through.
A hacksaw may also be used to do the job.
If you don’t have a way to cut the conduit, the hardware store may cut it for you when you buy it.

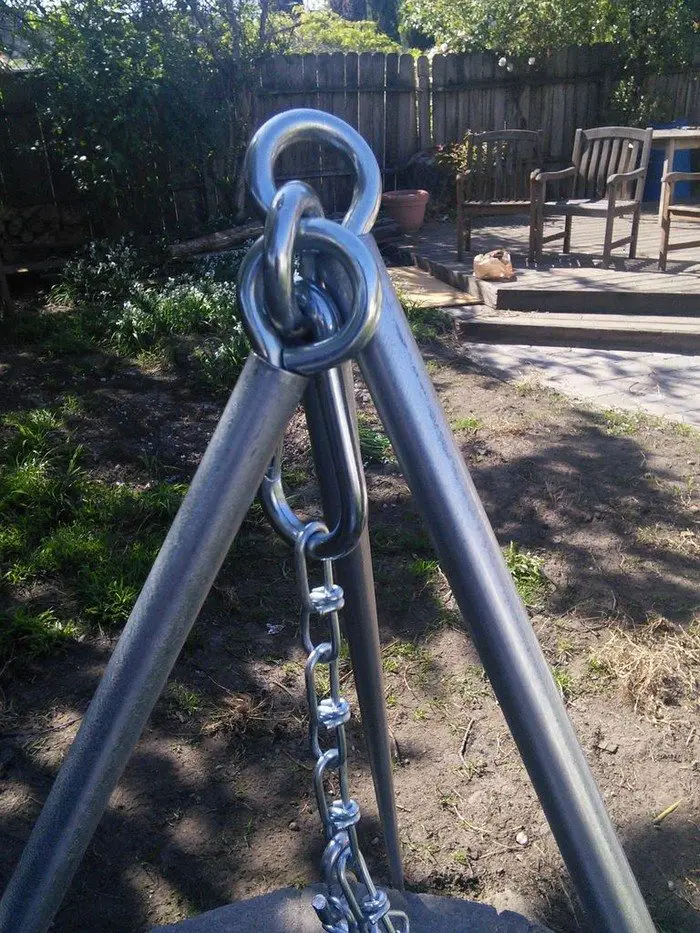
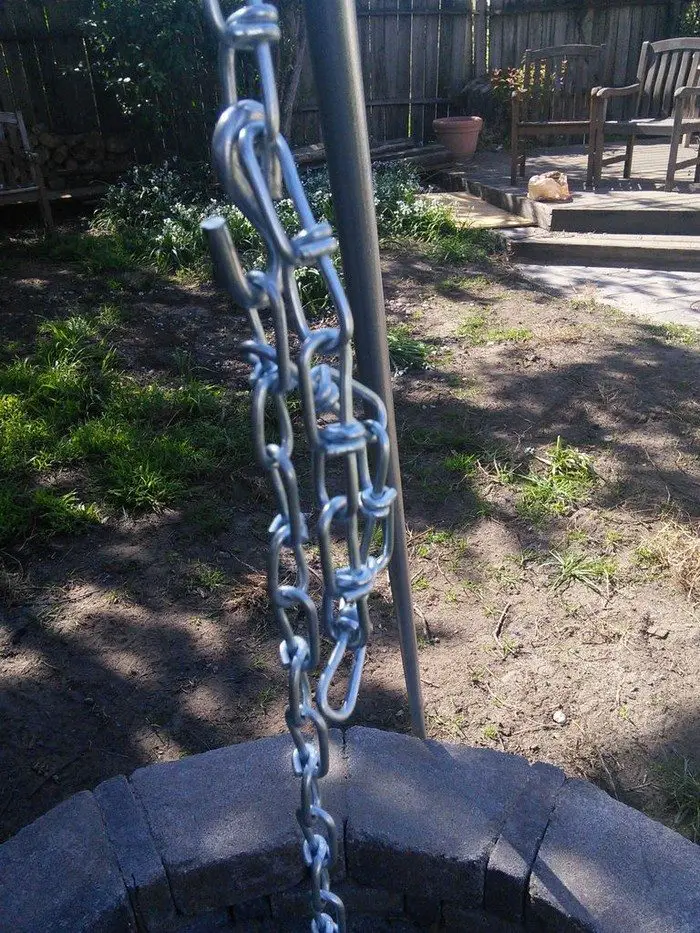
Open one eye bolt: Open one eye of one eye bolt using pliers, or lever it open with pliers and a scrap of tubing. This is the hardest part if you bought beefy eye bolts like these. It was probably overkill.
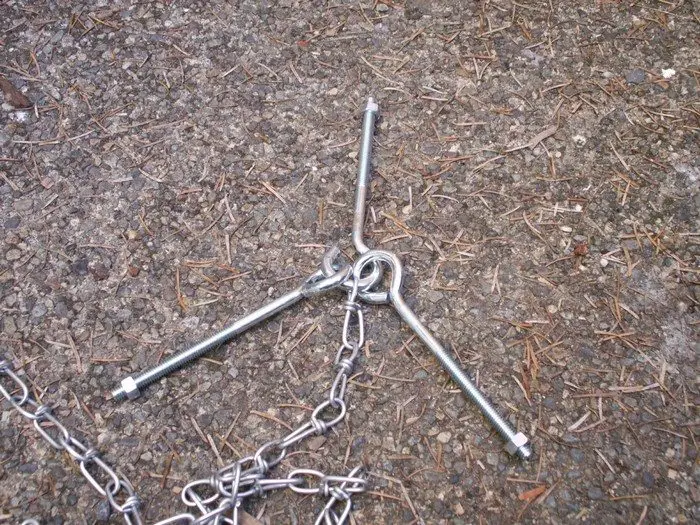
Assemble the eye bolts and chain: Now put the other two eyes and one end of the chain onto the open eye bolt. Use a hammer to reclose the open eye securely so it all stays together.
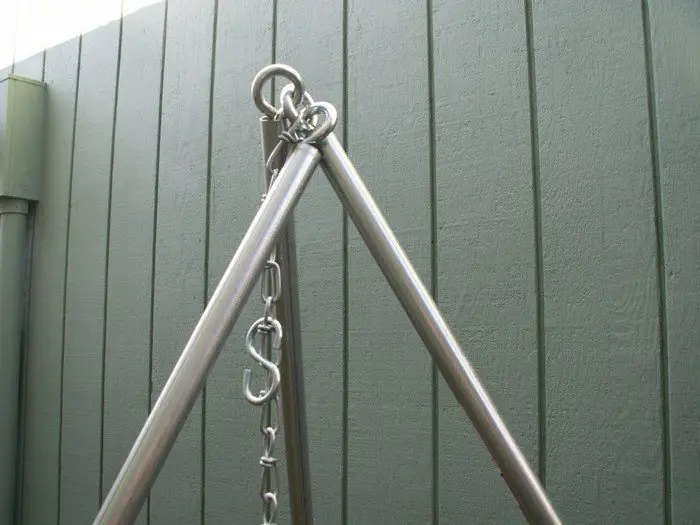
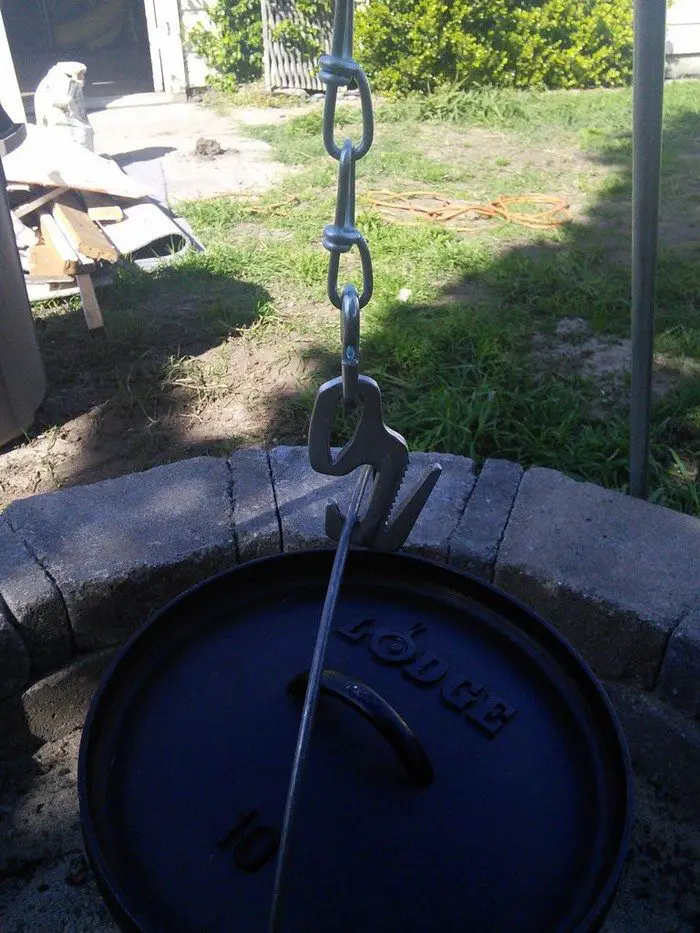
Connect the legs: Put the shafts of the eye bolts into the ends of the legs and stand it up with the legs equidistant, like it will look over a campfire. Put one of the S-hooks on the chain near the top and use the pliers to close it tight. This will be the adjuster for the cookpot height.
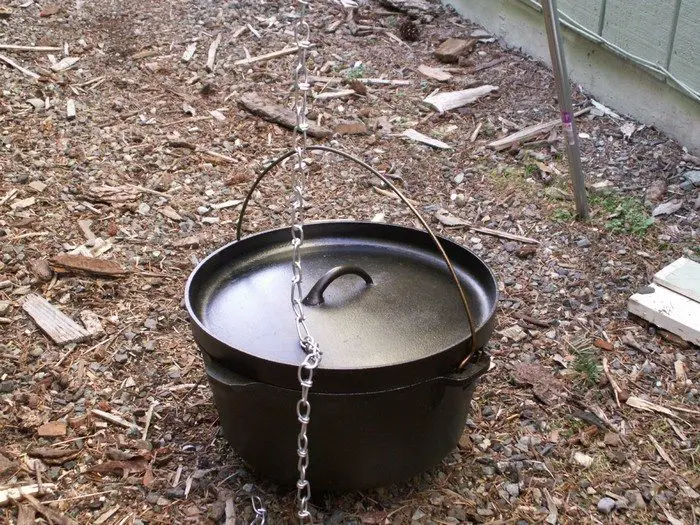
Cut the chain to length: Cut the chain to the desired length, using your cookware to measure the longest possible chain length desired.
It is long enough if the pot can sit on the ground and remain on the chain.
Put another S-hook onto the end of the chain and close with pliers.
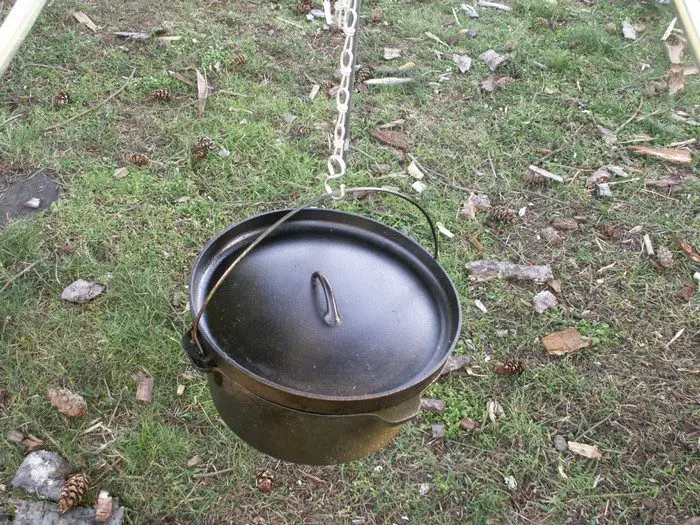
Hang cookware: Hang your dutch oven, coffee pot, or whatever on the chain and make sure it will support its weight. Ensure the adjuster hook will get the cookware to the level you want.
Fold it up: The beauty of this design is that it can collapse easily for storage and transport.
Customize and enjoy: You can add lots of different useful features to this basic design. Add an extra hook to hang utensils, paint it with stove paint, make a mechanism to permanently connect the legs to the head, whatever you want.
Later on I am going to drill holes in two legs and add eye bolts to hold an additional piece of conduit from which I can hang more chains and hooks for more pots, or to hang boots for drying. (My brother-in-law has burned up two pairs of boots in as many hunting seasons because he puts them too close to the fire.)
The lower ends of the tripod should remain cool enough that you can pick up one leg at a time bare-handed to move it around a little bit. If you want to raise or lower the chain while it is hot, you might need oven mitts or a dutch oven lid lifter.


