Camping is a great way to take a break and escape from the usual business of life. Whether it’s for a weekend or a week, the respite allows you to recharge despite roughing it out with mother nature. It also provides lots of fun activities that will keep you entertained throughout your getaway…
But as much as we love camping, there are also some things about it that we don’t quite enjoy – like a cold night. The unbearable cold or the need to keep the campfire going can keep you up all night!
The good news is this self-feeding campfire idea is available to help solve that problem! It provides around 14 hours of steady fire, perfect for letting you sleep cozily and undisturbed during the night!
It takes a little longer to build than other campfires, but it’s still easy to do!
It’s a nice technique to know and one that could come in handy especially when you’re going to be in the woods for a longer time!
Now there are certain aspects that you need to consider in building a successful self-feeding campfire. You would need to learn about the right frame angle and airflow among others.
To learn all these things about building a self-feeding fire, watch the video tutorial below. :)
Do you know anyone who would love this clever idea?
Contents
Creating a Self-Feeding Fire
Materials:
- Logs
- Tree Branches
- Kindling
- Match or a Lighter
Tools:
- Trowel (or something similar to dig the ground)
- Ax
Steps:
Step 1: Pick a Safe and Clear Spot
Find a flat area free of overhanging branches and dry leaves. Use your trowel to clear a space at least 3 feet wide. Dig a shallow pit to contain the fire and reduce the risk of spreading.
Step 2: Prepare the Logs
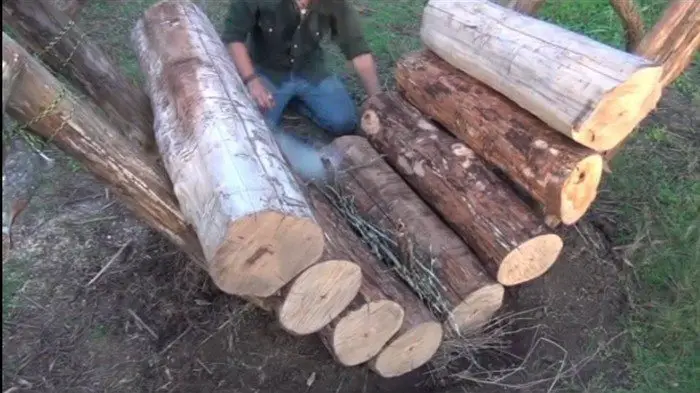
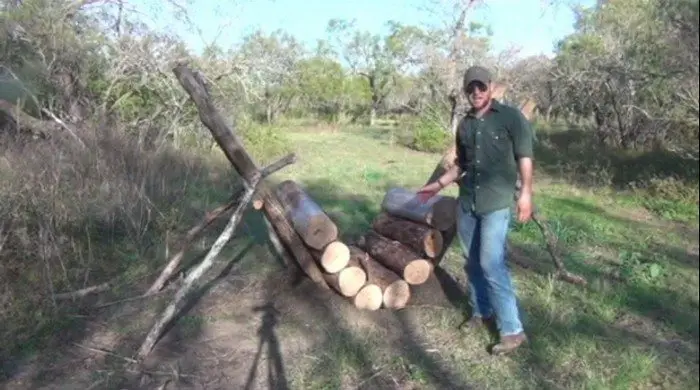
Using your ax, cut logs to similar lengths—around 2 to 3 feet long. You’ll need at least 6 logs for a basic setup. The thicker and drier the logs, the longer the fire will burn. Strip off any loose bark if it’s damp.
Step 3: Create the Support Trenches
Dig two shallow parallel trenches inside your fire pit, about 6 to 8 inches deep and 1 foot apart. These will hold the base of your logs at the right angle and allow airflow beneath.
Step 4: Build the Feed Ramp
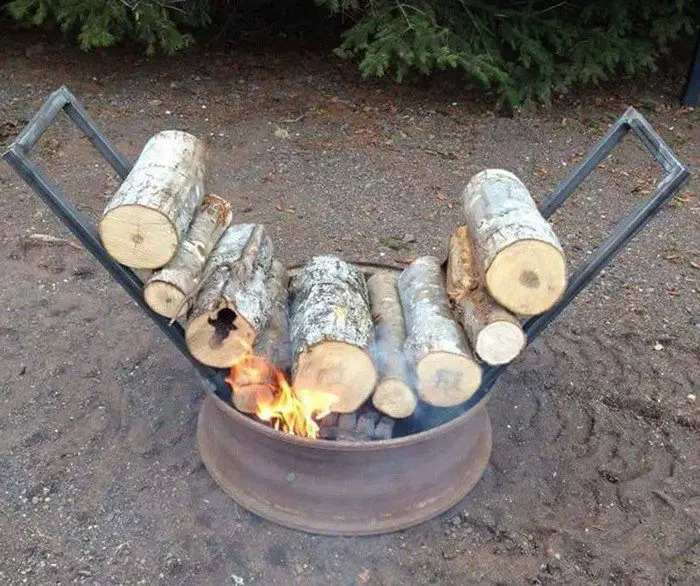
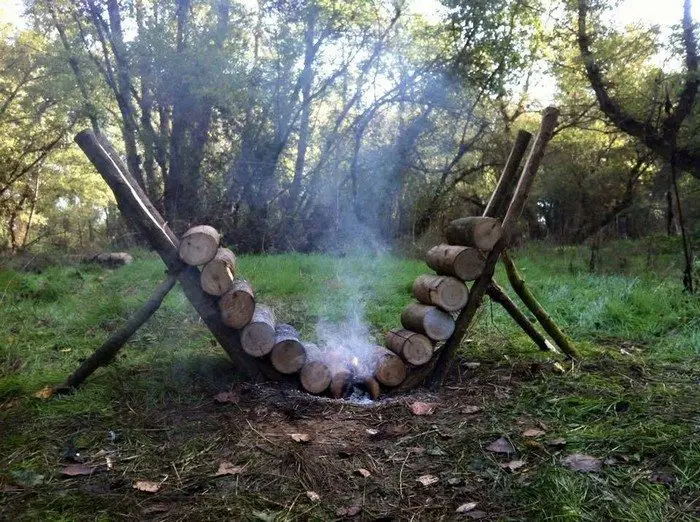
Lean three logs on each side at an angle, so they rest against each other like an inverted V or triangle. The bottom of each log should sit in one of the trenches. This angle helps gravity pull the logs into the fire as they burn down. Adjust spacing to allow oxygen to pass through.
Step 5: Add Kindling and Tree Branches
Place dry kindling and small branches at the center, right where the logs meet. Build a small teepee or pile to start the fire effectively. This ignition point will ignite the logs gradually as they’re drawn in.
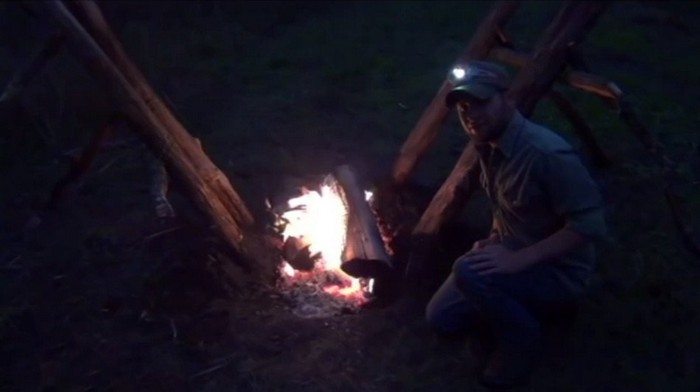
Step 6: Light the Fire
Use a match or lighter to ignite the kindling. Stay close at first to make sure the flames catch and begin to transfer to the logs. Once the fire is stable, it should feed itself for hours with minimal tending.
Step 7: Monitor and Adjust as Needed
Although it’s low maintenance, glance at the fire now and then. Adjust any logs that shift out of place. Keep extra kindling nearby in case the initial flame needs support.
How a Self-Feeding Fire Works
A self-feeding fire is one of the most practical techniques for campers who want steady warmth without constantly tending the flames. Unlike traditional campfires that need frequent adjustments and fuel, this setup uses gravity, smart positioning, and airflow to do the work for you. It’s simple in design but effective in execution, making it an ideal choice for overnight camping or survival situations. Once you understand the science behind it, you’ll see why the self-feeding fire is such a reliable method in the outdoors.
The Role of Gravity in Feeding the Fire
The core principle behind a self-feeding fire is gravity. Logs are stacked at an angle, leaning toward each other so they gradually slide down as they burn. The setup usually involves two ramps of logs angled inward, meeting in the middle where the flame begins. As the ends of the logs burn, more wood naturally shifts into the center, keeping the fire going. There’s no need to keep adding logs manually. The structure keeps delivering fuel to the flame on its own.
Airflow and Fire Efficiency
Airflow is just as important as gravity. Without enough oxygen, even the best-angled logs won’t burn properly. That’s why the base area is often dug out or cleared to allow space beneath the logs. This space creates a draft that feeds oxygen to the flames, encouraging cleaner and more efficient burning. The elevated design also helps minimize smoke, which is a bonus when you’re trying to rest or cook nearby. Good airflow keeps the fire hot and steady through the night.
Burn Time and Wood Selection
One of the main reasons campers love the self-feeding fire is its extended burn time. With the right wood—preferably dry, dense hardwoods like oak or hickory—it can last up to 14 hours. That’s a full night’s rest without getting up to stoke the flames. The fire consumes the wood slowly, thanks to the consistent fuel delivery and the lower combustion rate at the log ends. Choosing uniform logs also helps with balance and feeding.
Why This Setup Works in the Wild
This type of fire is especially useful for longer camping trips or emergency situations where conserving energy matters. You can set it up, get it going, and then focus on other tasks—or get some sleep. The self-feeding fire doesn’t just offer warmth. It gives you peace of mind knowing the flames will take care of themselves.
Benefits of Using a Self-Feeding Fire
A self-feeding fire isn’t just a clever camping trick—it’s a dependable setup that makes life in the outdoors easier. Whether you’re spending a night under the stars or setting up a semi-permanent camp, this type of fire gives you several practical advantages. It’s especially helpful when you need consistent heat without hovering over the flames all night.
Long-Lasting Heat Without Constant Attention
One of the biggest benefits of using a self-feeding fire is the extended burn time. Once it’s properly built and lit, it can burn steadily for 10 to 14 hours. That means you can get a full night’s sleep without having to wake up to add more wood. It’s a low-maintenance system that keeps working even when you’re not around.
More Efficient Use of Fuel
A self-feeding fire makes better use of your wood. The angled design allows logs to burn from one end while gravity slowly feeds new material into the flames. This controlled burn reduces waste and helps stretch your fuel supply, which is especially important if you’re in a remote area with limited resources.
Ideal for Cold Nights
If temperatures drop after sundown, having a reliable fire is a must. A self-feeding fire keeps a consistent level of warmth, especially when built with dense hardwoods. It’s an excellent setup for keeping your campsite warm through the coldest hours of the night.
Reduces Campfire Maintenance
Traditional fires require regular tending. You need to reposition logs, stoke the flames, and stay alert to prevent it from dying out. With a self-feeding fire, much of that work is eliminated. Once the fire is going, it stays active with minimal input. That gives you more time to rest, cook, or focus on other camp tasks.
Safer for Overnight Use
Because of its structure and steady burn, a self-feeding fire is often safer for overnight use. It burns lower and more controlled than a roaring campfire. When built in a cleared, sheltered area, it’s less likely to spread or flare unexpectedly. It still needs responsible setup and monitoring, but it’s generally more stable than other styles.
Reliable in Survival or Emergency Situations
If you ever find yourself in a survival scenario, the self-feeding fire becomes more than a convenience—it becomes a lifeline. It saves energy, offers dependable heat, and frees up your focus for gathering food, staying alert, or taking shelter. This makes it one of the most valuable fire methods in the wild.
Self-Feeding Fire Gallery
Click on any image to start the lightbox display. Use your Esc key to close the lightbox.![]()

Common Mistakes When Building a Self-Feeding Fire
Building a self-feeding fire might seem simple, but a few overlooked details can ruin the setup. If it’s not done right, the fire won’t last, and you’ll do more work than if you just built a regular campfire. Understanding the common mistakes can help you avoid frustration and keep the fire going strong through the night.
Wrong Angle of the Logs
The angle of the logs is what makes a self-feeding fire work. Too steep, and the logs can collapse into the fire all at once. Too shallow, and they won’t feed in properly. You need a balanced angle—about 30 to 45 degrees—so gravity can do its job without overwhelming the flame or leaving the logs stuck.
Using the Wrong Type of Wood
Not all wood burns the same. Green wood, damp logs, or softwoods like pine can lead to excessive smoke or quick burnout. For a self-feeding fire to work well, you need dry hardwoods like oak, hickory, or maple. These burn hotter, longer, and more consistently. Softwoods may catch quickly, but they don’t offer the long burn time this setup relies on.
Poor Airflow at the Base
A self-feeding fire needs good airflow to burn efficiently. If the base of your fire doesn’t allow air to circulate, you’ll get smoke instead of flames. A common mistake is placing the logs directly on the ground without digging shallow trenches or spacing them properly. Without airflow, even the best wood won’t burn well.
Logs That Are Too Short or Uneven
Consistency matters. Logs that are too short or shaped unevenly can slide out of place or feed unevenly into the fire. That creates gaps in the burn area and leads to uneven heating or early flameouts. Try to cut all your logs to the same length and keep the ends squared so they stack cleanly.
Starting the Fire with Too Much or Too Little Kindling
Another mistake is getting the fire going with an unbalanced amount of kindling. If there’s too little, the main logs won’t catch. If there’s too much, you’ll choke the airflow and smother the fire. Use just enough dry twigs and small branches to create a hot, steady flame at the center of the structure.
Not Testing the Setup Before Nightfall
The last thing you want is to realize the fire isn’t feeding properly after dark. Take the time to test the setup while there’s still daylight. That gives you time to fix angles, reposition logs, or add airflow before it’s too late. A few extra minutes of prep can make the difference between a successful self-feeding fire and a sleepless night.
Conclusion
A self-feeding fire is a smart and efficient way to stay warm during overnight camping trips. With the right setup, it burns steadily with minimal effort. It’s a reliable fire-building method that every camper should learn.
We have more useful guide for your camping trip. Check out our campfire tripod project!


