With increasing strains on water supplies and access to water in many places, it’s easy to feel guilty about wasting too much in our backyards. Today, 785 million people – 1 in 9 – lack access to safe water. Another 2 billion people – 1 in 3 – lack access to a functioning toilet. That’s why many of us are looking for ways to conserve water in our households.
If you feel you’re wasting or consuming way too much water in your backyard, then an outdoor garden is a great solution for you!
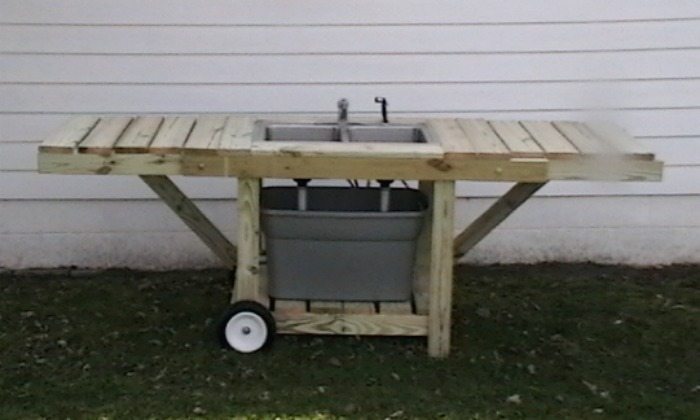
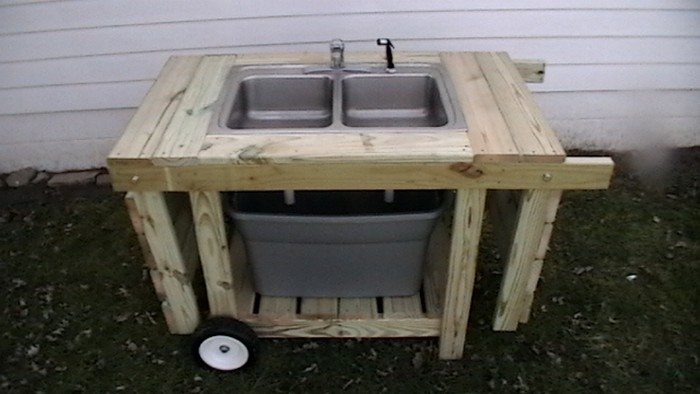
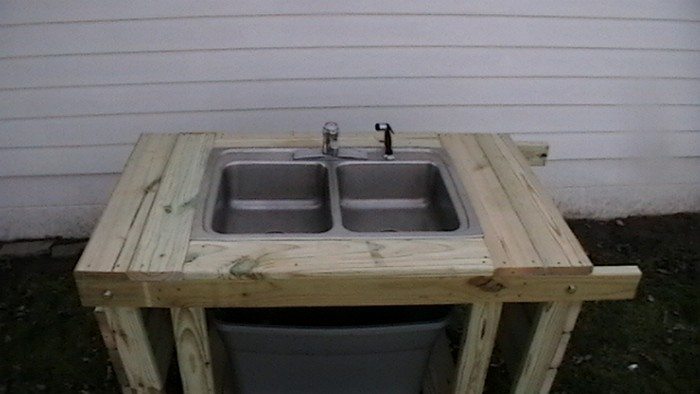
This DIY outdoor garden sink allows you to save and maximize the use of water by reusing the one in the tote below it until it gets too dirty to use again.
It simply works like this: You fill the tote with clean water. The pump installed will draw water from that tote to the faucet when you’re using it. Then, the used water will drain back to the tote.
When you see that your water ‘reservoir’ is already too dirty for another cycle, simply empty and refill it with clean water. You can use the dirty batch to water your plants if you want to!
This project is not necessarily a cheap one since you will have to get plumbing materials and the appropriate kind of timber if you want your outdoor sink to last long. But for the long-term benefit that it offers, we say it’s definitely worth the money and effort!
It’s great for all your backyard activities such as grilling, campfires, and gardening.
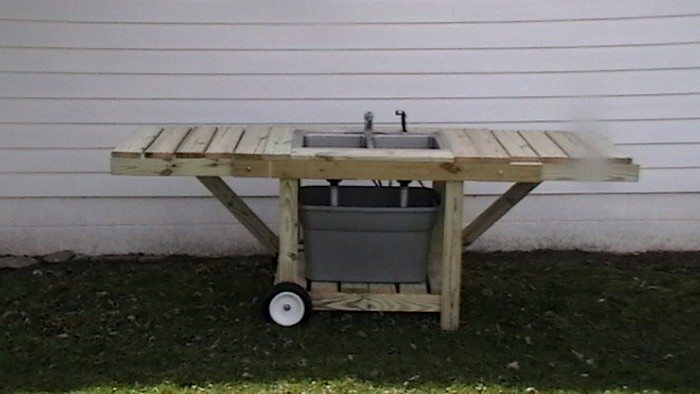
It comes in handy for those who maintain quite a large backyard garden. It’s mobile so you can easily move it around.
Do you need this outdoor sink in your garden?
Click on any image to start the lightbox display. Use your Esc key to close the lightbox.![]()


Materials:
- Old Kitchen Sink
- 30-gallon tote
- 2x4x8 Treated Lumber
- 8′ long Deck Boards
- Electric Pump
- Stainless Deck Screws
- Rubber Wheel Casters
- Brass Hinges
- 2-1/2 Bolts
- Lock Nut
- Shop-Vac Wet Filter
- Zip Ties
Tools:
- Router
- Cordless Drill
- Table Saw
- Plumbing Tools
Steps:
How the wings work: The wings hang from 2 1/2-13 bolts. There is a washer between the sink frame and the wing frame to make them swivel more easily. I used a lock nut so I could tighten the nut without pressing the 2 frames together and make them hard to move. I left the nut just loose enough that the wing moves easily and at the same time it’s not loose. The ends of the two wings are rounded so they don’t catch on the sink frame as they’re rotated.
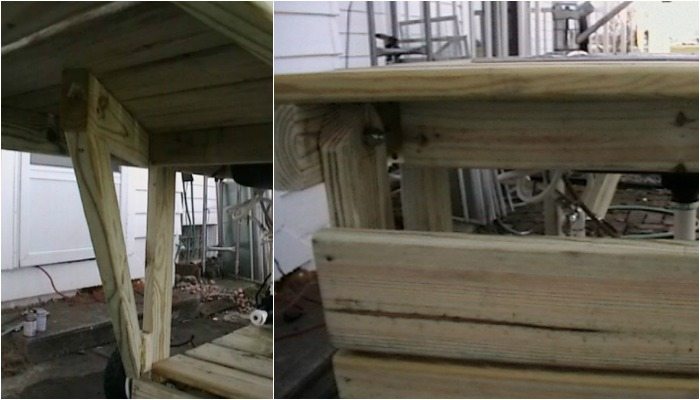
The leg that holds the wings up has 2 hinges allowing the leg to swing out from under the wing, or back against the sink frame for storage. Both sides are this way. The leg sits just a little lower than the sink top so it does not catch. To put the wing up you have to lift the wing all the way up, rotate the leg out, and then lower the wing onto the leg. To put the wing down you lift the wing, rotate the leg in, lower the wing.
On the right side, you can see that the sink frame is longer. These are handles to move the sink around with.
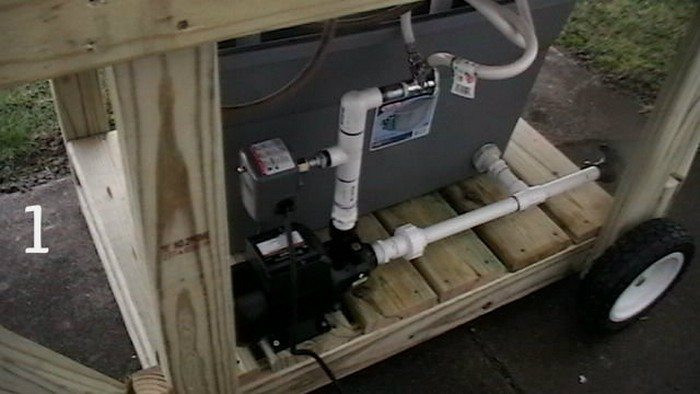
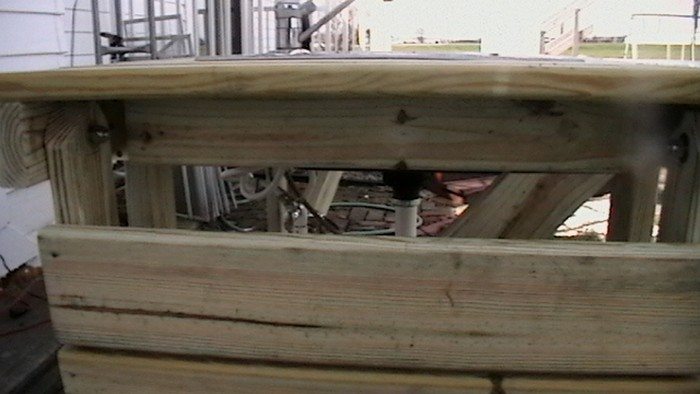
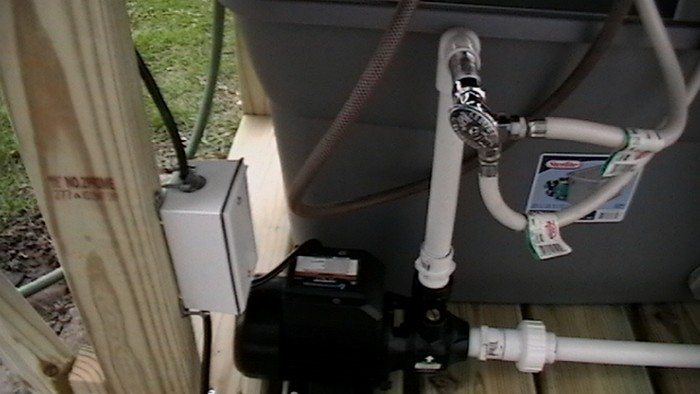
Plumbing and electrical: This photo shows all the plumbing. The water comes from the tote to the pump inlet. From the pump, the outlet passes through a check valve, then past a pressure switch then up the split valve. The check valve keeps the water from running back down and losing pressure when the pump is off. The pressure switch turns the pump on and off. I used a split valve because both water lines for the faucet are fed from this same water supply. I don’t need the valve, but it was the cheapest way to feed the 2 lines to the faucet with the parts I had at the store. I got the pump from harbor freight. The rest of the parts came from Ace Hardware or Menards.
I cut the cord that came on the pump and connected it to the pressure switch.
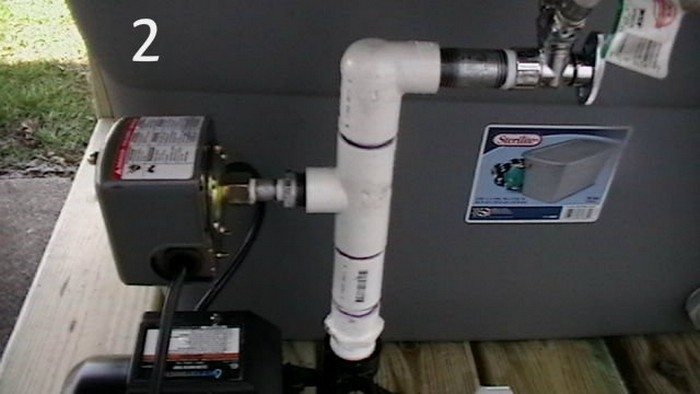
Here is a closer look at the pump outlet. What I am using for a check valve is not a check valve, it is a home-made valve. I did not have room to use an off-the-shelf valve so I made one. (Photo 6 for more details.)
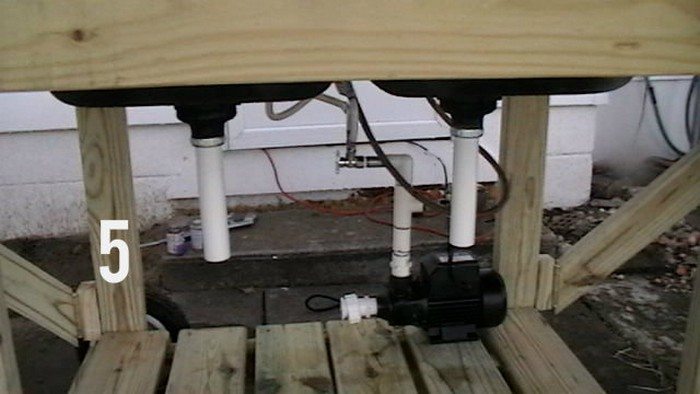
This shows the inlet side of the pump. There is a union closest to the pump, this is for wintertime. When it’s time to put it away I take the union apart, take the 2 lines off the split valve, unbolt the pump and take it inside for the winter. There is a bulkhead fitting going through the tote. I used this because that’s what they’re made for. You could just silicone the pipe into place, but if there are problems in the future, then you have to cut it apart. This way I can just unscrew and fix it. There is a valve at the far right. This valve is for draining the tote. It won’t get all the water out, but enough so you can take the tote out and dump what is left.
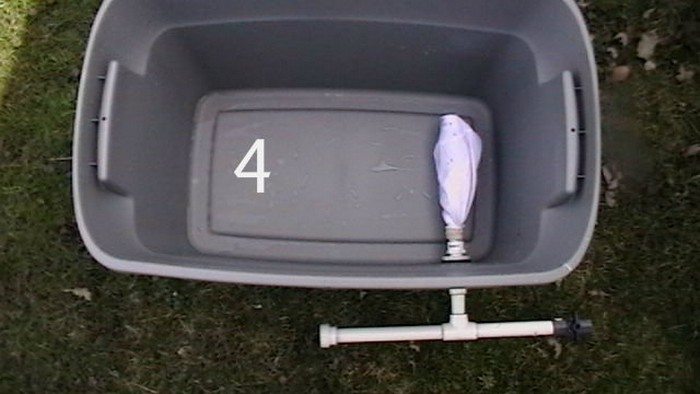
This is the inside of the tote. I capped a piece of 3/4 pipe and then drilled a bunch of holes into the pipe to allow the water in. The other end has a threaded fitting for the bulkhead. I used a shop vac wet filter over the pipe and zip tied the end to keep it in place.
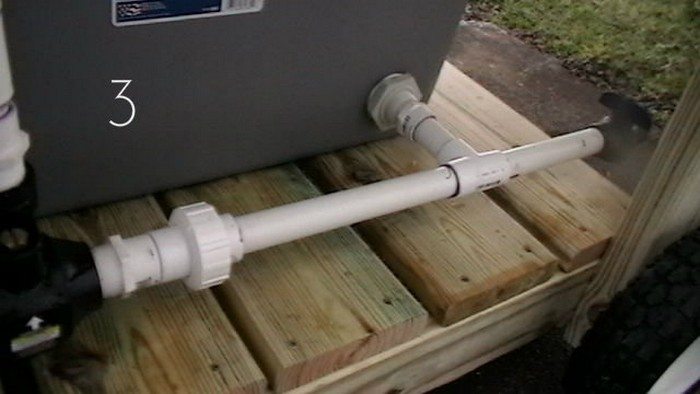
Here are the drains. These are just straight drain extensions that I cut to the length I needed to be just around the water level. I don’t tighten these very much because to take the tote out I need to take off the drains.
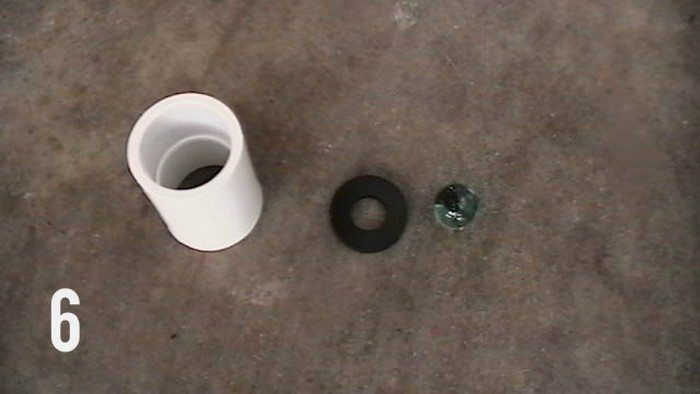
This shows the three parts, a coupling, a flat rubber seal, and a marble. The coupling is a 3/4″. I found a seal that fits perfectly inside it and rested it on the small lip in the coupling. I glued the seal in place. Then I glued the pipe into the coupling. Put the marble in the pipe and continued assembling my way up.
Changes: In the previous step, I had a check valve and a pressure switch. That set up does not work. I believe that is because there is no place for pressure to be regulated with such a small amount of water in the piping. I spent an hour trying to adjust the pressure switch to a point that it would cycle correctly. I finally had to give up. All it would do is make the pump cycle on and off really fast when the valve was closed. So I removed the piping from the top of the pump to the split valve. Then I got new fittings and piped it the way it’s shown in the photo.
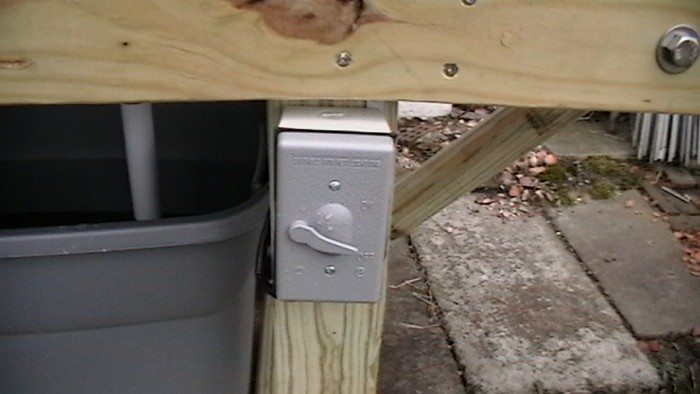
Then I mounted the junction box next to the motor for my connections and ran a cable up to the switch that is in this photo. I have better flow and pressure to the faucet, but now I have to turn the pump on and off manually. I then took the handle off the faucet so it can’t be closed and deadhead the pump. Now in the winter, I will have 3 water connections and 1 electrical connection to undo to bring the pump in, but it works now.
Thanks to kalefranklin for this great project!


