Is gardening in the city proving to be difficult because of rodents? Then city-proof garden project is for you!
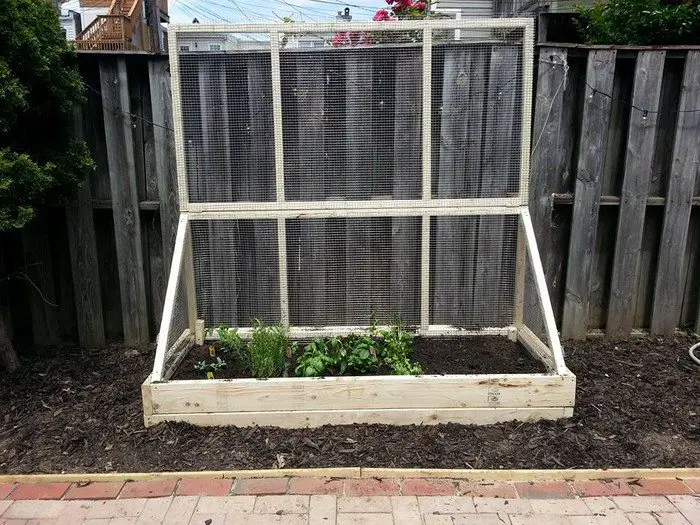
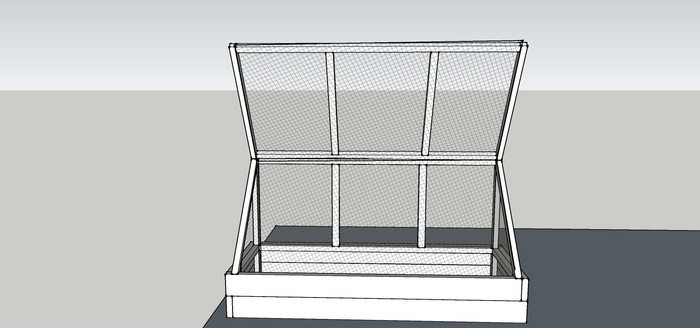
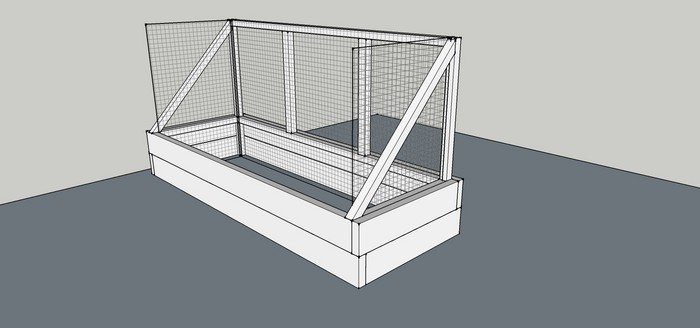
This city-proof garden is a very simple structure that you can build within a day given the right tools and complete materials.
With this garden, your produce safe should be safe from critters while still getting all the air and sunlight that they need.
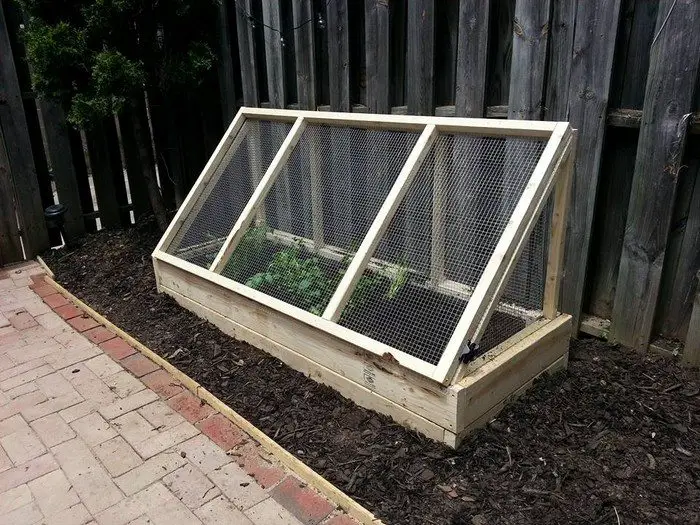
It’s definitely a handy kind of garden perfect for a city backyard. You can even replace the hardware cloth with glass or plastic to use it as a cold frame in the winter!
Do you need a city garden?
Click on any image to start the lightbox display. Use your Esc key to close the lightbox.![]()
Materials:
- 8 pcs of 2 x 2 x 8 (not pressure treated)
- 4 pcs of 2 x 6 x 8 (not pressure treated)
- Chicken Wire/Hardware Cloth (1/2 in. x 3 ft. x 25 ft.)
- 2 packs of 2-1/2 in. Galvanized Non-Removable Pin Narrow Utility Hinge
- 2 pcs of Sash Lock
- 2-1/2″ Drywall Screws
- 1/2″ T-50 Staples
Tools:
- Power Drill
- Miter Saw
- T-50 Staple Gun
- Shovel and Rake
- Metal Snips
Steps:
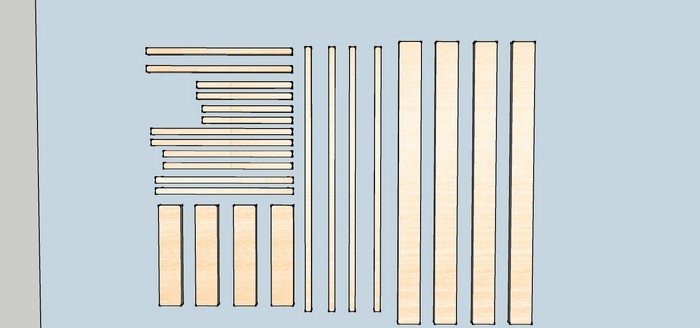
Make cuts: Using your Miter saw or Circular Saw, measure and make cuts to each of the dimensional lumber. You can also use a handsaw, but it will be less efficient.
Cut List: 2 x 2
- (2) – 40″
- (4) – 66″
- (2) – 24″
- (2) – 22.25″
- (2) – 35″
- (2) – 32″
- (2) – 34.5″ (after straight cut, cut from end at 45* angle. You will have a 34.5″ piece outside, 31.5″ inside)
Cut List: 2 x 6
- (4) – 25.5″
- (4) – 70.5
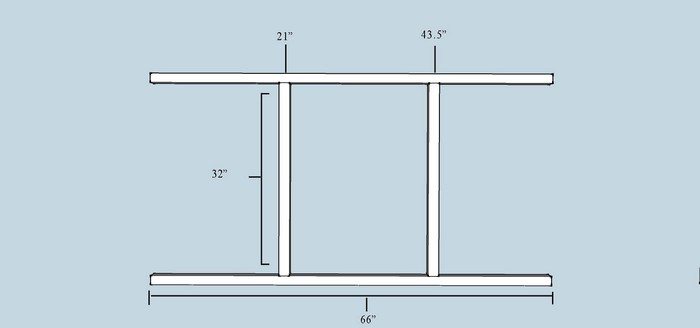
Assemble wooden gate: Align the wooden components as shown, and screw together the first H pattern using your cordless drill. I found this step easiest with a 36″ clamp to hold the pieces in place while I screwed the components together.
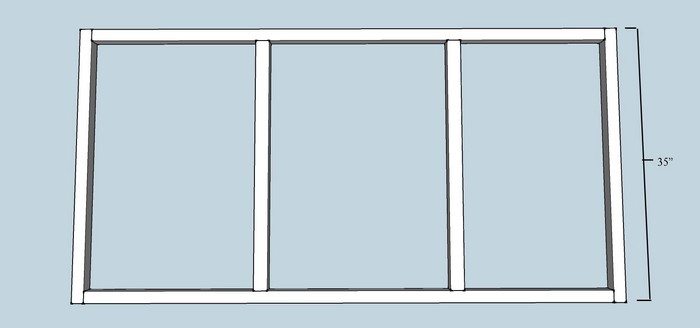
Attach the 35″ side pieces, with one screw connecting each end to the h pattern made in step one. Again I used a clamp to secure the boards easier.
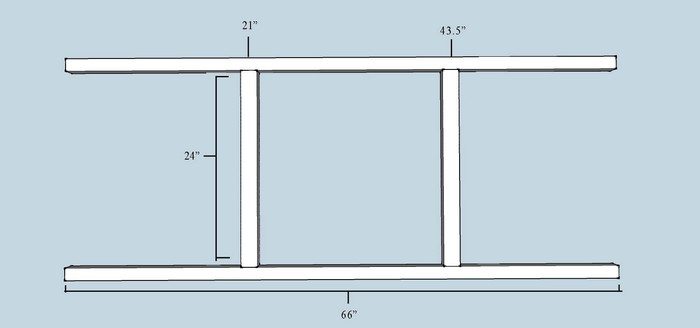
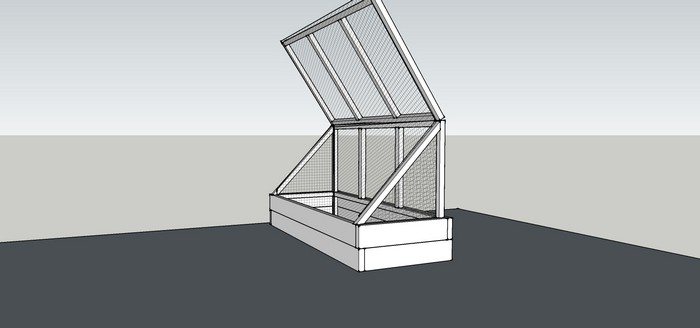
Assemble the structure: Align the wooden components as shown, and screw together the first h pattern using your cordless drill. I found this step easiest with a 36″ clamp to hold the pieces in place while I screwed the components together.

Attach the 40″ side pieces, with one screw connecting each end to the h pattern made in step one. Again I used a clamp to secure the boards easier.
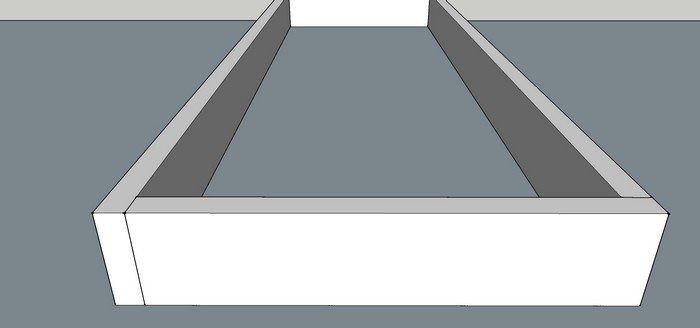
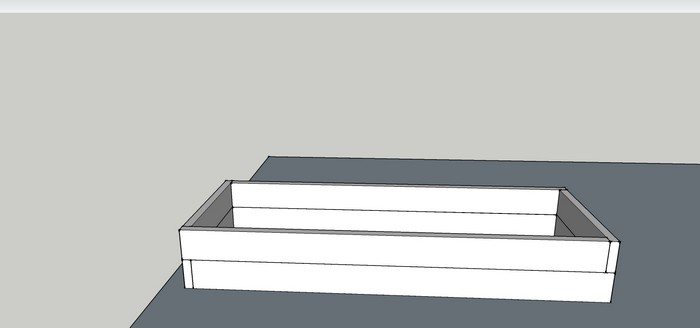
Assembling the base: Find the area where you will place the garden and prep the soil. I dug out around 2-3 inches deeper than the rest of the surrounding area with the 72″ x 27″ footprint. Make sure the area is flat and somewhat level.
Assemble the base as shown and place two screws in each flat surface/butt end joint.
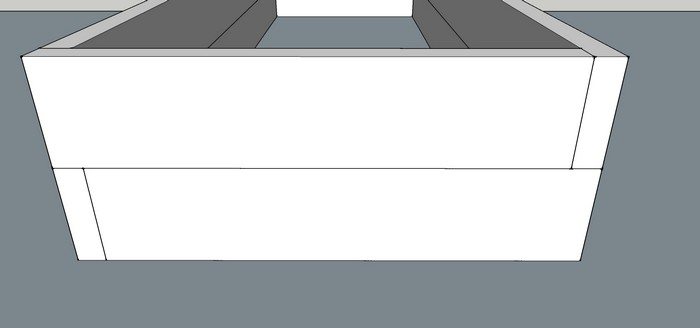
Repeat for the second layer, staggering the boards as shown.
Screw the top into the bottom layer. I start the screws straight in near where the two boards meet, then rotate the screw at a 45* angle to connect the two boards. I placed 6 screws in, 2 on each long section and one on each side section.
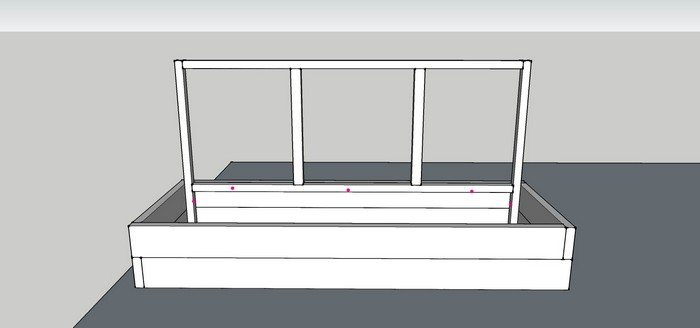
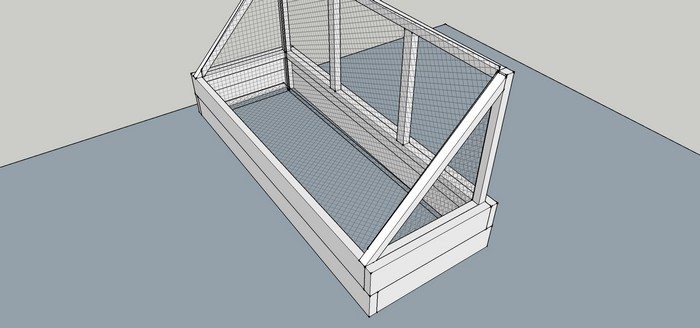
Attaching the frame to the base: Dig a hole by each back corner of the base about 4 inches deep. Place the structure inside the hole and make sure that the bottom structure board is aligned with the top of the base. Place screws connecting the structure to the base in the location of the pink dots.
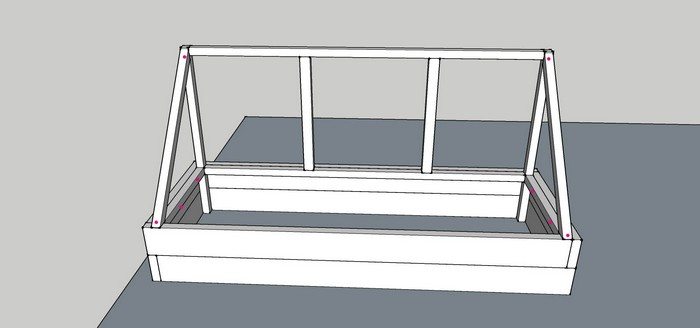
Attach the 22.25″ on each side, connecting to the base. Screw where the pink dots are located.
Attach the 34.5″ horizontal support. Screw where the pink dots are located.
Attaching chicken wire: Be very careful, wire is sharp! I recommend wearing gloves for this step.
Unravel part of the wire, and start to staple it around the inside back of the structure as shown. Proceed slowly and make sure that the wire is tight and fitted to the structure. Cut with the shears when you are close to the end of the opposite side.

Cut the wire so it is flush with the horizontal support.
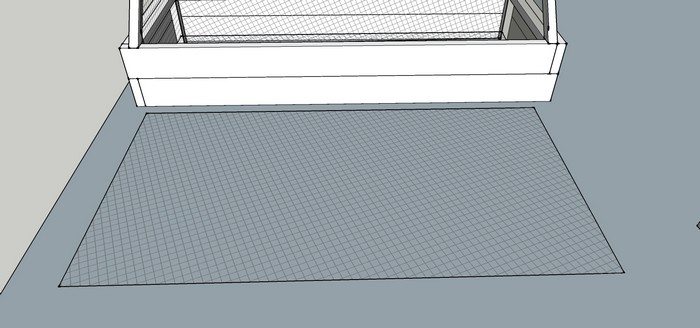
Cut a section of wire slightly wider than the garden, and work it into the base of the unit.
Please wear gloves, metal is sharp. Staple the bottom enclosure to where ever it will attach to the wood.
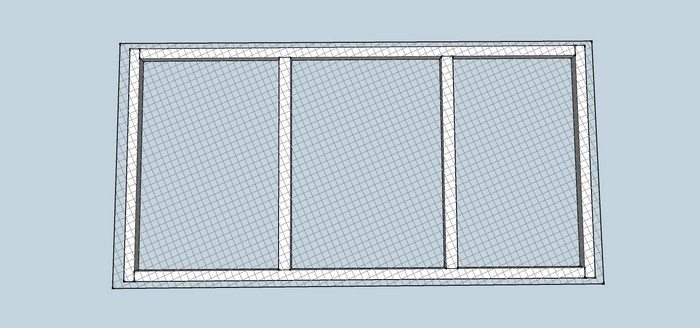
Fit the wire to the gate, and cut it to size. Staple the wire to the gate
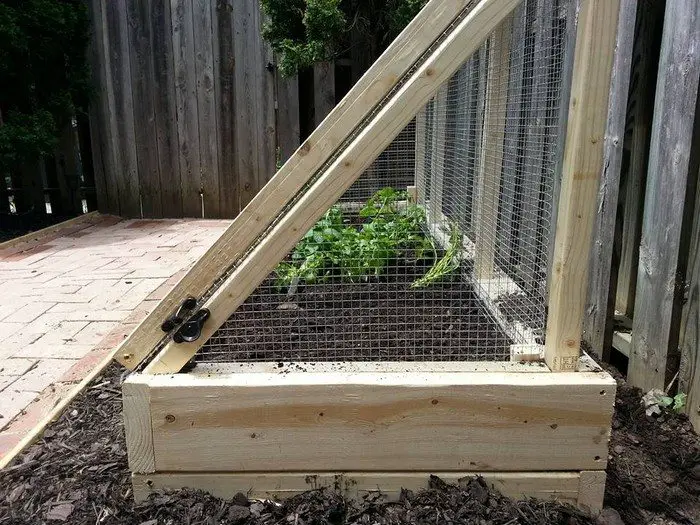
Attach hinges and locks: Attach hinges first to the gate, I aligned mine 6″ from each end. Attach with screws provided.
Attach sash locks to each side to keep those pesky critters out of your garden. I attach each side in full locked position to ensure proper alignment.
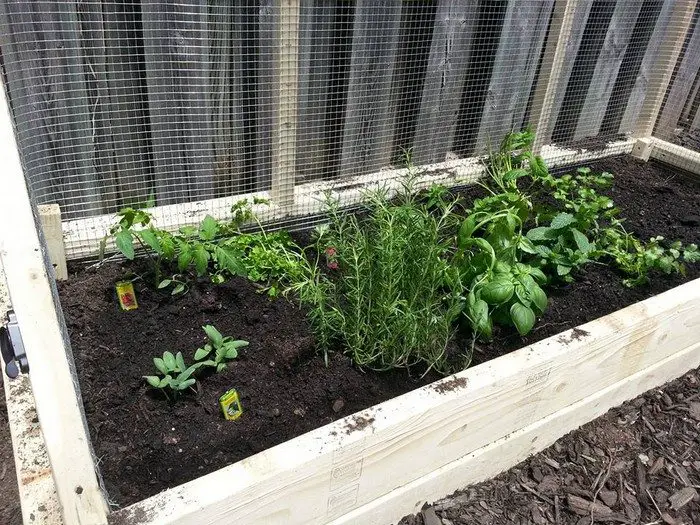
Plant your garden: Fill top soil. I used 5 cubic feet of Miracle-gro. Should run around $4 a cubic foot.
Plant your plants! I used herbs since that’s what always goes bad before I use it all up when I cook. Enjoy the fruits of your labor! (Tomatoes are fruits right?)
Thanks to Herbsco for this great project!


