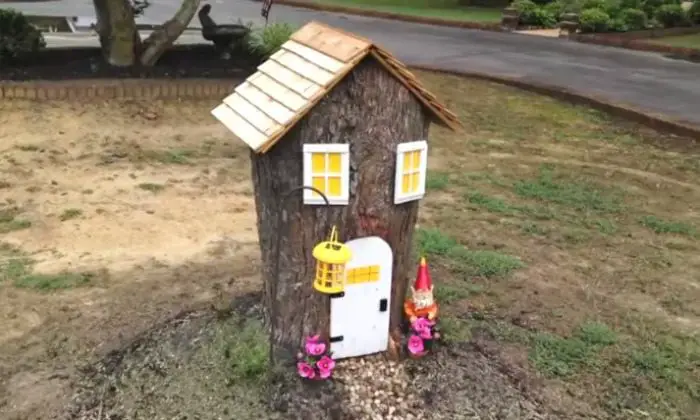
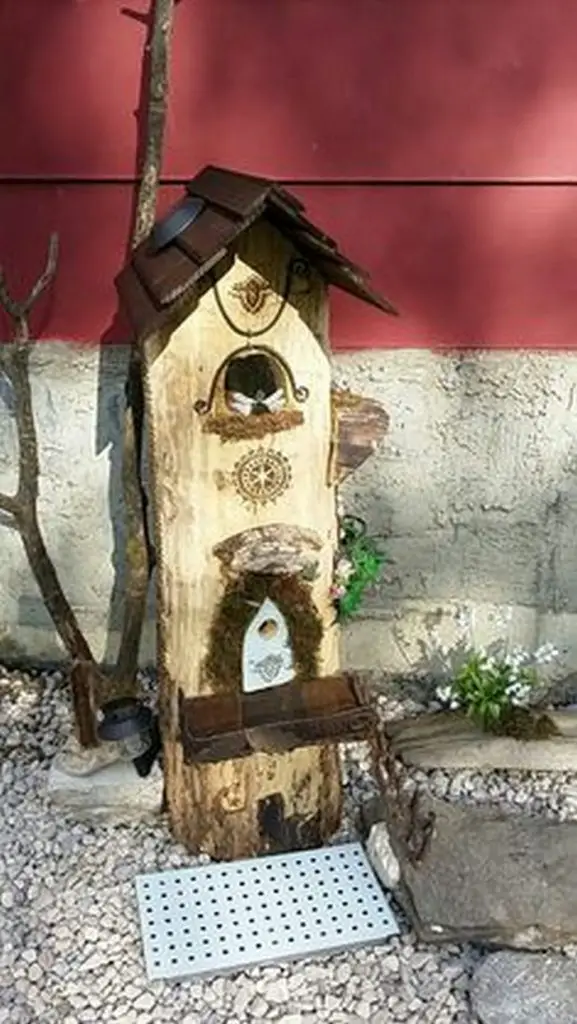
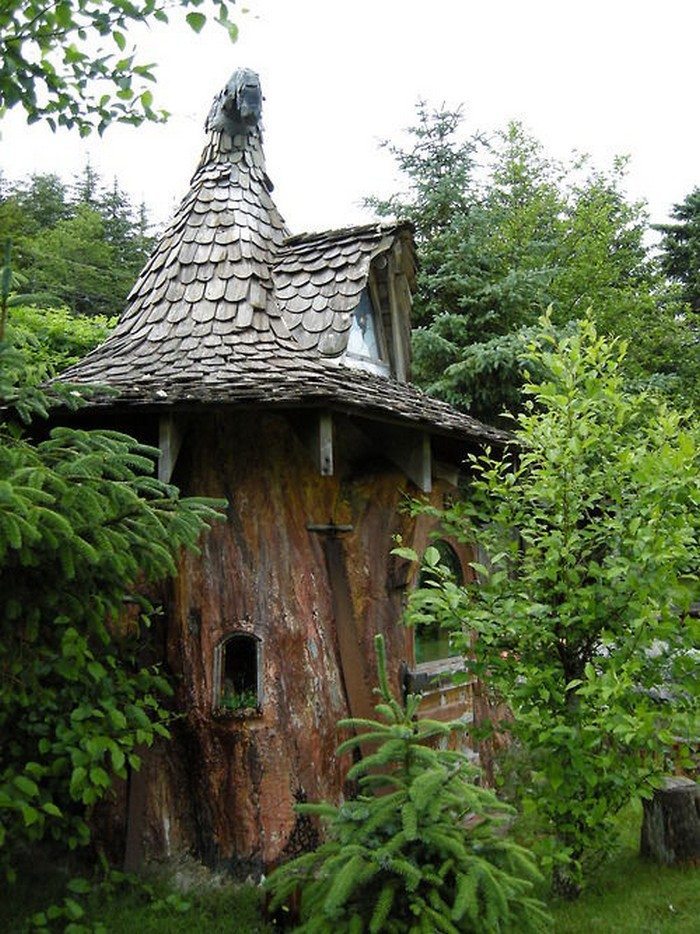
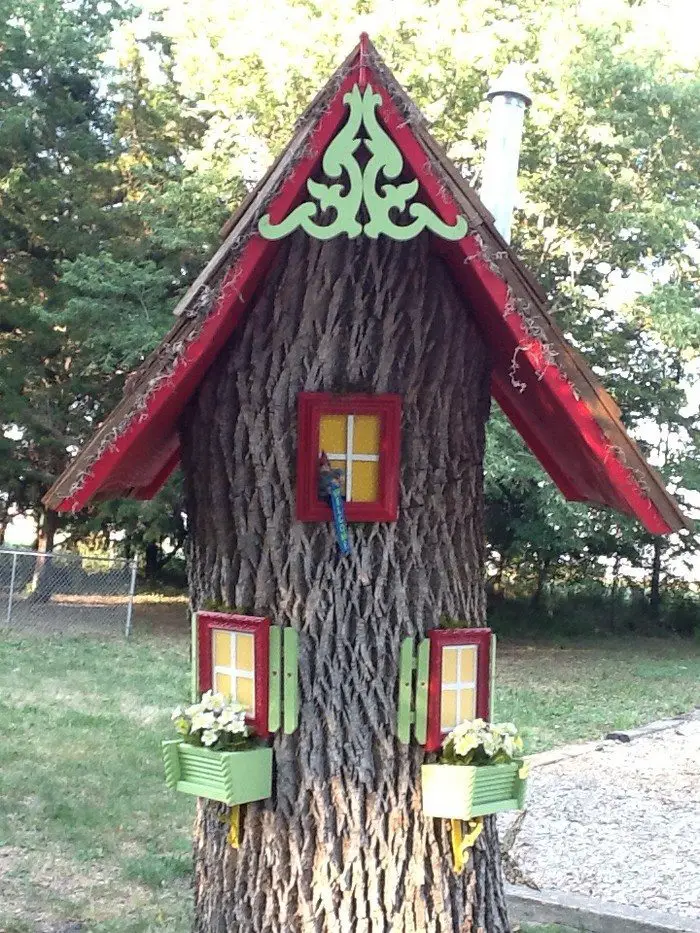
Tree stumps tend to be an eye sore for everyone. With the right effort, you can turn a dead tree into a fantastic tree stump fairy house.
It is indeed a great idea for any home DIYer. Instead of letting the tree stump become an unpleasant sight on their property, they turned it into a cute fairy house that even the passers-by liked!
Contents
How to Build a Magical Tree Stump Fairy House
Materials
- Scrap Wood
- Wood glue
- Wood saw
- Sandpaper
- Exterior paint and brushes
- Miniature windows and doors
- Decorative elements such as pebbles, seashells, or moss
- Solar-powered lights (optional but highly recommended for a magical glow at night)
Tools
- Hammer
- Ruler
- Drill
- Nails
- Hacksaw
Instructions
- Preparing the Tree Stump
Start by cleaning the tree stump. Remove any loose bark and debris for a neat surface.
Use sandpaper to smooth the stump’s surface. This prepares it for painting and decoration.
- Carving and Installing Windows and Doors
Carefully mark the positions for windows and doors on the stump.
Use a wood saw to cut out these marked areas. Ensure the cuts are clean and even.
Fit miniature windows and doors into the carved spaces. Use wood glue to secure them firmly. This step brings the fairy house to life, adding charm and character.
- Painting and Decorating
Choose exterior paint in your desired colors. Paint the stump to reflect your fairy house vision.
Once the paint dries, start decorating. Use pebbles, seashells, or moss to add natural elements. These details create an enchanting, fairy-tale look.
Consider the house’s surroundings. Match the decorations to the garden’s theme for a cohesive look.
- Adding Lighting
For an extra magical touch, install solar-powered lights. These lights can illuminate the fairy house at night, creating a captivating glow.
Place lights strategically to highlight the house’s features. This can enhance the overall aesthetic and make the fairy house a focal point after dark.
- Finishing Touches
Review your fairy house. Make any necessary adjustments or additions.
Add personalized touches. This could be a tiny mailbox, a miniature path leading to the door, or a small fairy figurine.
Stand back and enjoy your creation. Your tree stump fairy house is now a unique and magical addition to your garden.
Choosing the Ideal Tree Stump for a Fairy House
Creating a tree stump fairy house begins with selecting the perfect tree stump. This step is crucial as the stump serves as the foundation of your magical creation.
Stump Location and Accessibility
When planning a tree stump fairy house, the location and accessibility of the stump play a vital role. Ideally, the stump should be situated in a spot where it is easily accessible for building and maintenance. This accessibility is key for adding intricate details and carrying out regular upkeep.
Additionally, the location of the stump should allow for easy viewing of the fairy house, enhancing the overall aesthetic appeal of your garden. A tree stump fairy house positioned in a visible and accessible location not only adds charm to your garden but also becomes a point of interest and conversation among visitors.
Size and Shape
The size and shape of the tree stump are crucial factors in creating your fairy house. A stump that is approximately 2 to 3 feet tall is ideal, as it provides ample space for creativity while still integrating seamlessly into the garden landscape. The diameter of the stump should be at least one foot to allow for the construction of doors, windows, and other design elements.
Also, the unique shape of the stump can serve as an inspiration for the fairy house design. A stump with an interesting form can lead to a more imaginative and distinctive fairy house, making your project truly one-of-a-kind. The size and shape of the stump lay the groundwork for the style and possibilities of your tree stump fairy house.
Condition of the Tree Stump
The condition of the tree stump is a critical aspect to consider for your fairy house project. A sturdy, healthy stump is essential for creating a durable and long-lasting fairy house. It’s important to inspect the stump for any signs of rot or decay, as these can weaken the structure and shorten the lifespan of your fairy house.
A tree stump in good condition ensures a safer crafting process, as rotting wood can be unstable and difficult to work with. Ensuring the stump is free from pests like termites is also vital, as they can cause further damage. The ideal tree stump should be solid, with a firm bark that can support the modifications and decorations you plan to add. The overall integrity of the stump not only affects the safety and feasibility of your project but also impacts the final appearance and durability of the tree stump fairy house.
Surrounding Environment
The surrounding environment plays a significant role in integrating your tree stump fairy house into the garden. Consider the overall aesthetics of your garden and how the stump will fit into this environment. For instance, a stump in a flower garden might inspire a fairy house with vibrant colors and floral motifs, while a stump in a wooded area might lend itself to a more rustic, nature-inspired design.
The plants and flowers around the stump can be used to enhance the fairy tale ambiance, creating a cohesive and enchanting setting. Think about how the seasons will affect the appearance and accessibility of the fairy house.
For instance, deciduous trees nearby will change the setting dramatically through the seasons, offering different backdrops for your fairy house. The surrounding environment not only influences the design and theme of your tree stump fairy house but also contributes to how it harmonizes with the natural beauty of your garden.
Design Inspirations for Tree Stump Fairy Houses
Creating a tree stump fairy house offers endless possibilities for creativity and imagination. Drawing inspiration for your design is a key part of the process, making your tree stump fairy house truly unique and personal.
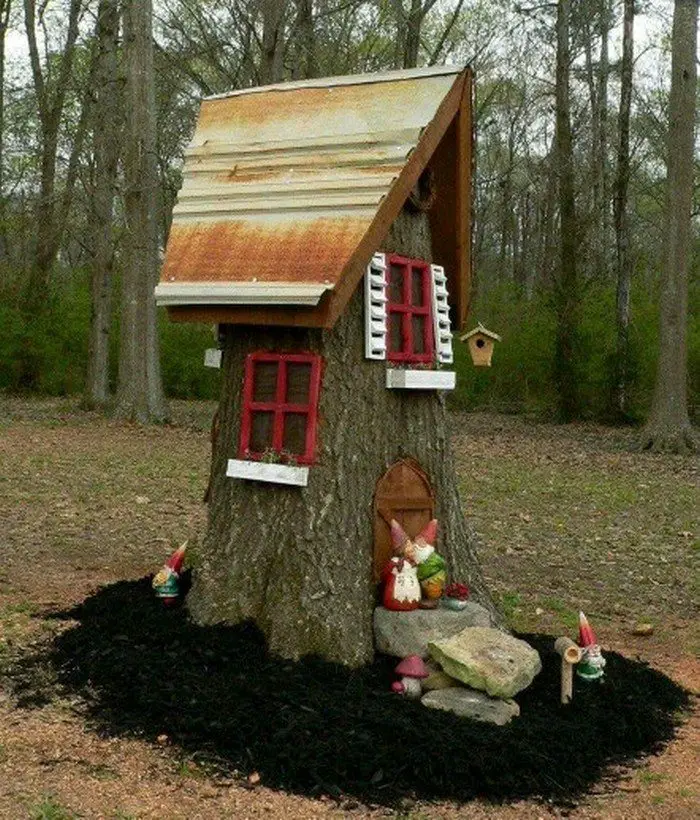
Rustic Charm
For a classic look, consider a rustic theme for your tree stump fairy house. This style embraces the natural textures and colors of the stump, complementing them with simple, earthy decorations. You might use bark, twigs, and leaves to add to the rustic feel. This theme is perfect for a tree stump fairy house nestled in a wooded or garden setting, where the natural elements blend seamlessly with the surroundings.
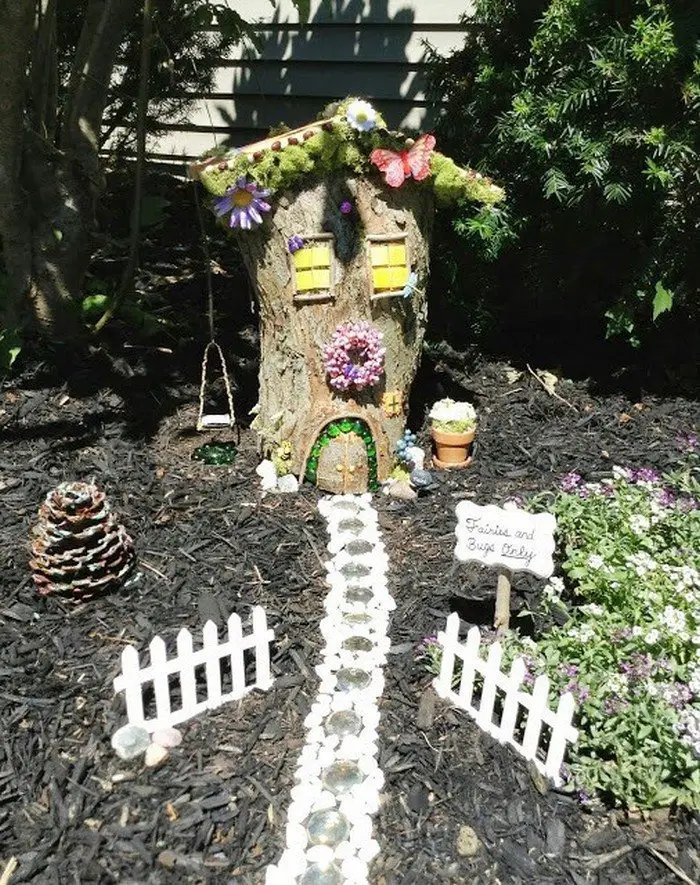
Enchanted Garden
An enchanted garden theme transforms your tree stump fairy house into a magical retreat. This design can include miniature flower beds, moss-covered roofs, and tiny winding paths leading to the door. Incorporate bright colors and whimsical elements like small fairies or butterflies to bring this theme to life. The enchanted garden theme turns your tree stump fairy house into a fantastical focal point in your garden.
Fairytale Castle
For a more dramatic effect, turn your tree stump fairy house into a miniature fairytale castle. Add turrets, flags, and arched doorways to create a regal look. You can paint the stump in stone-like colors and add details to mimic a castle’s texture. This theme is perfect for a tree stump fairy house that is meant to be a standout feature in your garden, sparking imagination and wonder.
Beachfront Retreat
If you’re near the coast or just love the beach, consider a beachfront theme for your tree stump fairy house. Decorate with seashells, sand, and small pieces of driftwood to create a seaside feel. You can even create a tiny beach or a small dock extending from the stump. This theme gives your tree stump fairy house a relaxed, summery vibe, perfect for a garden that enjoys plenty of sun.
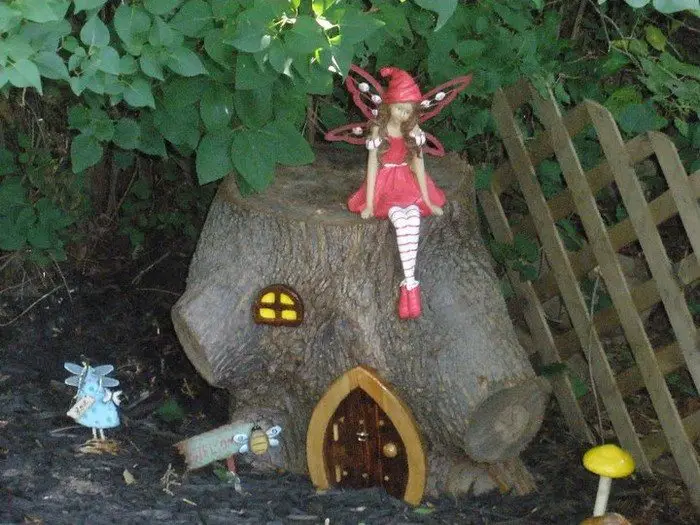

Whimsical Wonderland
A whimsical wonderland theme allows you to let your imagination run wild. Mix and match colors, patterns, and textures for a playful and eclectic look. Add unexpected elements like a small teacup garden or a tiny winding staircase. This theme is ideal for those who want their tree stump fairy house to be a vibrant and imaginative escape.
Incorporating these design inspirations into your tree stump fairy house project can turn an ordinary stump into an extraordinary work of art. Each theme offers a unique way to celebrate the magic of nature and the charm of fairy tales, making your garden a more enchanting place.
Incorporating Natural Elements into Your Fairy House Design
Integrating natural elements into your tree stump fairy house design not only enhances its aesthetic appeal but also helps it blend seamlessly with the garden environment. Utilizing materials from nature adds authenticity and charm to your tree stump fairy house, making it a true part of its natural surroundings.
Moss and Lichen
Moss and lichen are perfect for creating a lush, green roof or for covering parts of the stump. They provide a vibrant texture and color, giving your tree stump fairy house a look that’s both enchanting and natural. These elements are especially effective in creating a sense of age and timelessness, as if the fairy house has always been a part of the landscape.
Twigs and Branches
Collect twigs and branches to use as structural elements. They can be fashioned into fences, ladders, or even furniture for your tree stump fairy house. This approach not only recycles natural materials but also gives your fairy house a rustic, woodland feel. Twigs and branches maintain the organic look and feel, keeping the design grounded in nature.
Pebbles and Stones
Using pebbles and stones can add a different texture to your tree stump fairy house. They are ideal for creating pathways leading to the door, or for building tiny walls and boundaries. Stones can also be used to craft a miniature fireplace or chimney, adding a cozy touch to the fairy house.
Leaves and Flowers
Incorporate leaves and flowers for color and variety. They can be used to create a garden around the stump or as decorative details on the fairy house itself. Choose flowers that complement the color scheme of your tree stump fairy house or those that bloom seasonally for a changing look.
Seashells and Driftwood
For a fairy house with a coastal theme, seashells and pieces of driftwood are ideal. They can be used to adorn the exterior walls or to create unique decorative elements. Seashells and driftwood add a touch of the seaside, perfect for tree stump fairy houses in beach-themed gardens.
Incorporating these natural elements into your tree stump fairy house design not only adds beauty and character but also promotes an eco-friendly approach. By using materials sourced from nature, you create a fairy house that is both enchanting and harmonious with its environment.
Safe and Creative Carving Techniques for Tree Stumps
Carving a tree stump to create a fairy house requires both creativity and safety. These techniques can help you transform a simple stump into a stunning tree stump fairy house, ensuring the process is safe and enjoyable.
Safety First
Ensuring safety is paramount when carving a tree stump fairy house. The first step is to wear the right protective gear. Safety glasses protect your eyes from wood chips and dust, while gloves shield your hands from splinters and cuts. It’s essential to equip yourself properly to prevent injuries.
Using sharp and well-maintained tools is crucial. Dull tools require more force and can slip, increasing the risk of accidents. Regularly check and sharpen your tools to ensure they are in optimal condition for precise and safe carving.
Working in a well-lit area is important for visibility. Good lighting helps you see fine details and avoid mistakes. Ensure your workspace is stable and free from clutter. A stable working surface provides control over your carving process, further reducing the risk of accidents.
Selecting the Right Tools
Choosing the appropriate tools for carving your tree stump fairy house is key to achieving your desired outcome. The size and hardness of the stump will dictate the types of tools needed. A wood saw is essential for making large cuts, such as shaping doors or windows. Chisels are invaluable for adding details and textures, while a hammer aids in chiseling and shaping.
For more intricate details, smaller tools like carving knives or a Dremel tool can be incredibly useful. Carving knives allow for precision in creating small and delicate features. A Dremel tool, with its various attachments, can be used for intricate carving, sanding, and even drilling. These smaller tools enable you to add fine details that bring your tree stump fairy house to life.
Planning Your Design
Effective planning is a critical step in creating your tree stump fairy house. Begin by sketching your design directly onto the stump. This visual guide is essential for envisioning how your fairy house will take shape. It helps in mapping out the placement of windows, doors, and other key features, reducing the likelihood of errors during the carving process.
When planning your design, pay close attention to the stump’s natural shape and features. Each tree stump has unique characteristics that can inspire and enhance your fairy house design. For instance, a knot in the wood could become a quirky window or an interesting architectural feature. A protruding section might be transformed into a whimsical chimney or a small balcony. Leveraging these natural elements not only adds character to your fairy house but also makes the design feel like a natural extension of the tree stump itself.
Carving Techniques
The carving process begins with making larger cuts to define the basic structure of your fairy house. Use a wood saw to shape the main elements like windows, doors, and the overall outline of the house. These initial cuts lay the foundation for your design and should be done with care and precision.
For more detailed work, switch to chisels and hammers. These tools are perfect for adding textures and fine details that bring your fairy house to life. Use chisels to sculpt intricate designs, create roof shingles, or fashion realistic-looking door frames. A hammer can be used in tandem with chisels to carefully chip away wood and achieve the desired shape and depth.
Remember, carving a tree stump fairy house should be a fun and creative process. Take your time, enjoy the journey, and watch as your fairy house takes shape. With these safe and creative carving techniques, you’ll be able to craft a unique and enchanting space that brings a touch of magic to your garden.
Conclusion
In conclusion, creating a stunning fairy house from a tree stump is a magical and fulfilling endeavor. With a bit of planning, creativity, and the right materials, you can transform an ordinary tree stump into a whimsical dwelling that will captivate the hearts and imaginations of all who encounter it. If you love this project, you will love our fairy house lamp project.
So, let your imagination soar, embrace the wonders of nature, and embark on this enchanting journey of bringing magic into your garden. With a little touch of fairy dust and a whole lot of love, your fairy house will become a cherished centerpiece, evoking a sense of joy and wonder for years to come.


