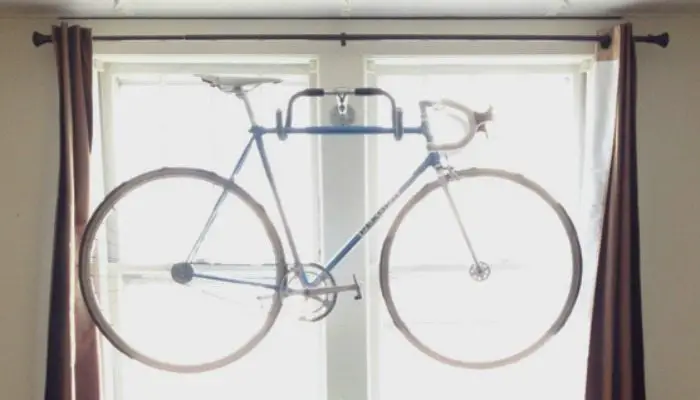
Storing a bicycle can be a challenge in a small space. No cyclist would leave his bike outside in the rain. So if space is a problem indoors, you need to be a little creative. With pedals and handlebars sticking out, just standing them in the hallways is a bad idea. They’ll snag, get knocked over, and generally be annoying. Often enough, a wall-mounted rack provides the perfect solution.
Do you need a wall-mounted rack for your bicycle but don’t like the price tags of the ones sold in stores? Save your money with this awesome bicycle wall hanger idea!
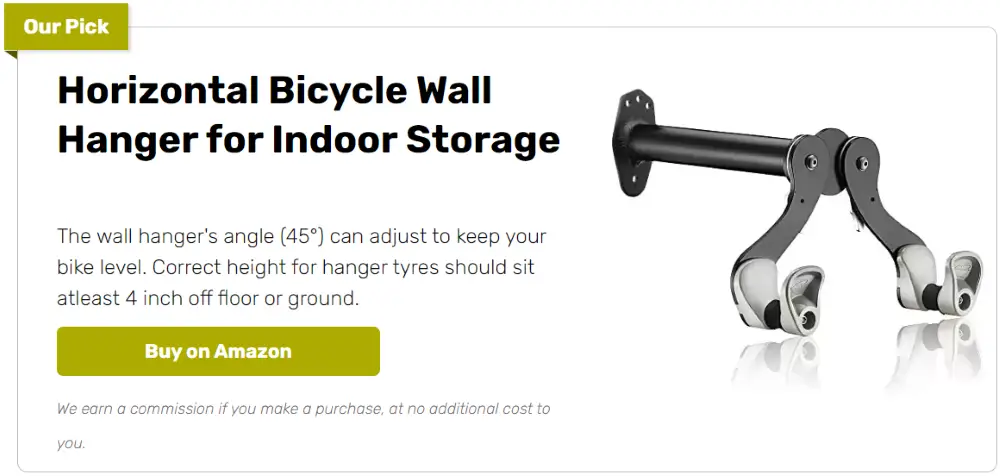
Good wall-mounted bike storage racks usually cost around $30 to $50, but you can definitely spend less by making your own.
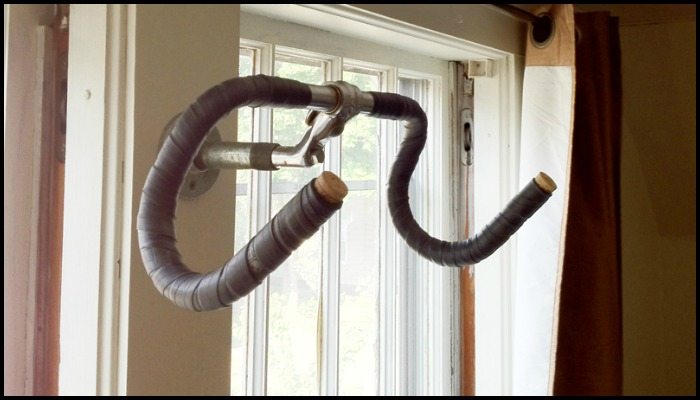
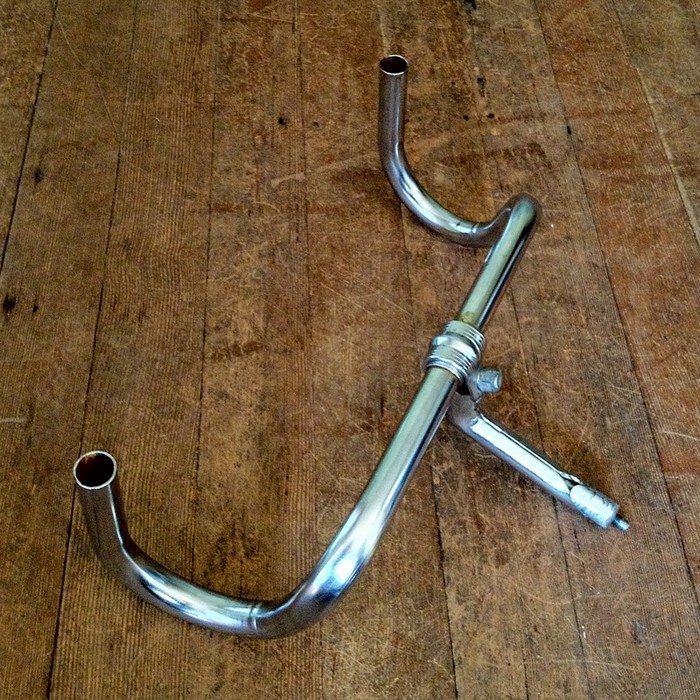
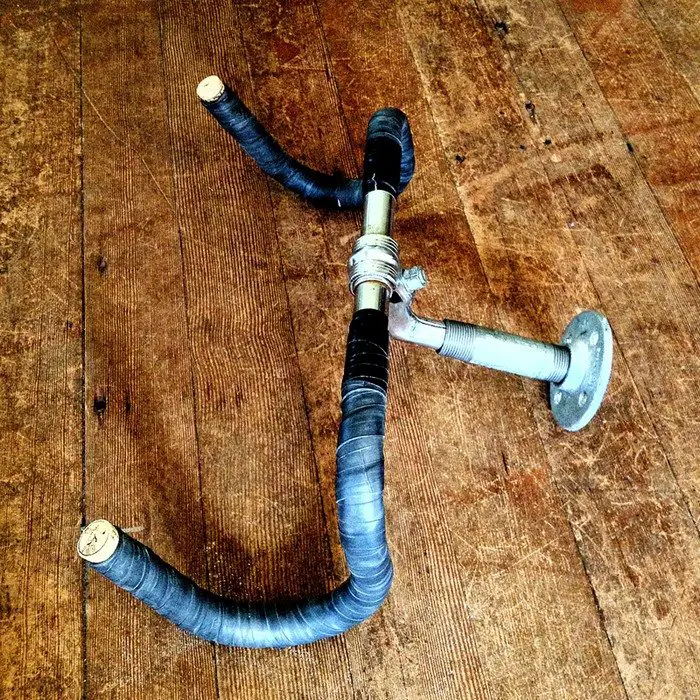
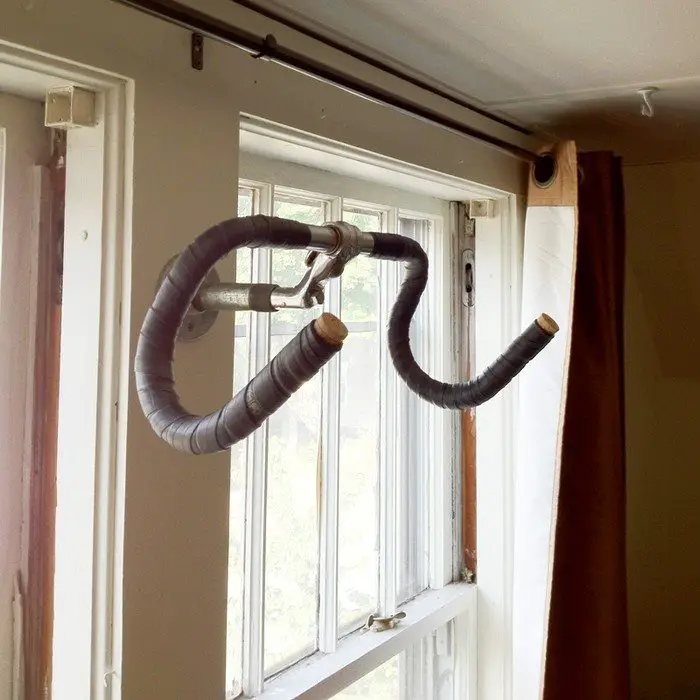
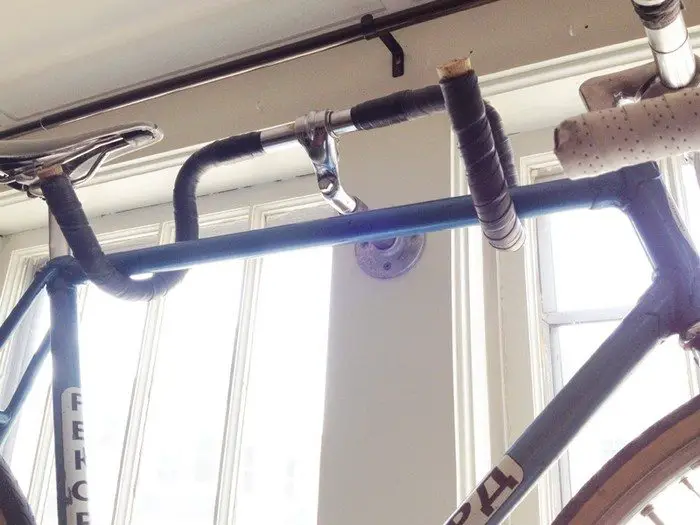
The trick as you may already have figured out with the image above is to use an old (but still in good condition) handlebar. Together with its quill stem, a threaded pipe, and a flange you can have yourself a really cheap and unique bike rack!
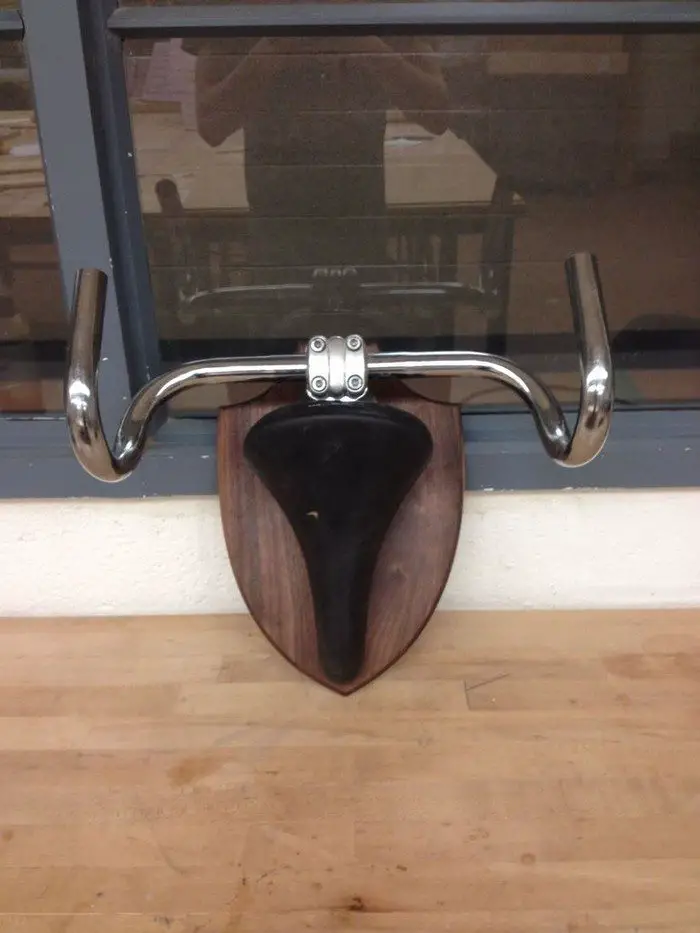
This DIY project is very easy to do but keep these factors in mind. Make sure the parts you get are still good and can still fit snugly with each other. Take the weight of your bike into consideration. Depending on their weight, some bikes are better parked than mounted on walls. If yours is extremely lightweight, then a flange and two screws should keep your DIY bike rack strong enough to hold it. But if it’s a bit heavier than others, you will need to use bolts and other reinforcements.
Nevertheless, this recycling idea is one clever option you can consider for storing your bikes. It’s inexpensive, unique, and a space-saver!
Do you need a wall-mounted bike storage rack at home? Then start looking for an old handlebar now! :)
Contents
Building a Bicycle Wall Hanger
Materials
- 1 set of Drop Styled Handle Bars
- 1 Quill Stem (should fit Handle Bars)
- 1 Old Tire
- 1 Threaded Galvanized Steel Pipe (should fit snuggly with Stem)
- 1 Wall Flange
- Screws
Tools
- Measuring Tape
- Drill
- Level
Instructions
Step 1: Gather Your Materials and Tools
Ensure you have all the materials and tools listed before you begin. This will make the process smoother and faster.
Step 2: Prepare the Handle Bars and Stem
- Attach the quill stem to the drop-style handlebars. Make sure it fits securely.
- If the stem and handlebars haven’t been used in a while, check them for rust or damage, and clean them if necessary.
Step 3: Attach the Steel Pipe
- Screw the threaded galvanized steel pipe into the quill stem. It should fit snugly without any wobble. This pipe will act as the main support, holding the weight of the bicycle, so ensure it is tightly fixed.
Step 4: Prepare the Wall Flange
- Attach the wall flange to the other end of the steel pipe. This flange will be mounted on the wall, so ensure it is securely attached to the pipe.
Step 5: Mark the Wall
- Use the measuring tape to find the right height on the wall for your bicycle hanger. A good standard height is about five feet from the ground, but adjust according to your space and bike size.
- Use the level to ensure your markings are straight. This is crucial for the bike’s balance once mounted.
Step 6: Drill Holes
- At the marks you’ve made, drill holes for the screws. Make sure the holes match the arrangement of the holes in the wall flange.
Step 7: Mount the Flange to the Wall
- Align the wall flange with the drilled holes.
- Use the drill to drive screws through the flange into the wall. If you’re mounting to drywall, you may need wall anchors to ensure a secure fit.
Step 8: Secure the Old Tire (Optional)
- For added stability and to protect the wall, you can cut the old tire to fit around the steel pipe or behind the flange as a buffer.
- Attach the tire segment by sliding it over the pipe or affixing it to the wall around the flange, using additional screws if necessary.
Step 9: Test the Hanger
- Gently place your bicycle onto the handlebars to test the hanger’s stability. Ensure the bike hangs correctly and the hanger holds the weight without any signs of pulling from the wall.
Step 10: Final Adjustments
- Check all connections once more to ensure everything is tight and secure.
- Make any necessary adjustments to ensure the bike is level and stable.
Click on any image to start the lightbox display. Use your Esc key to close the lightbox. ?
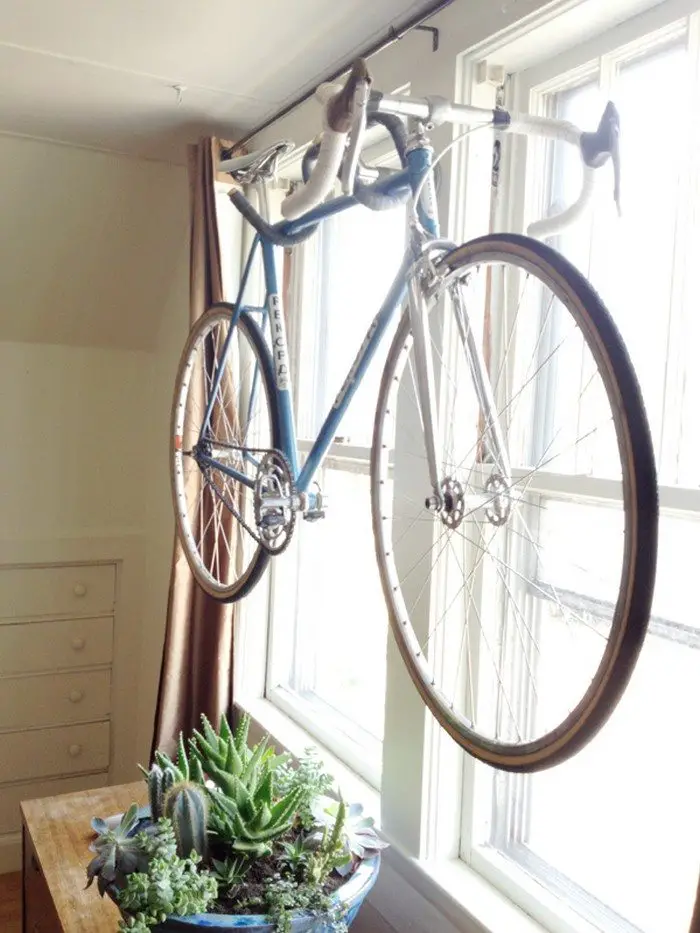
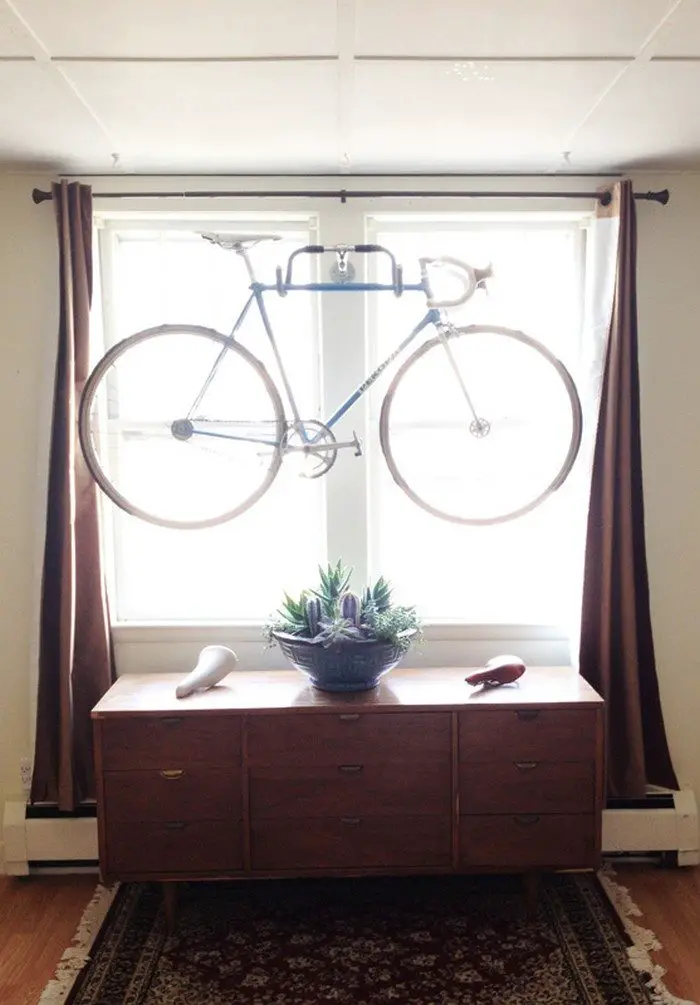

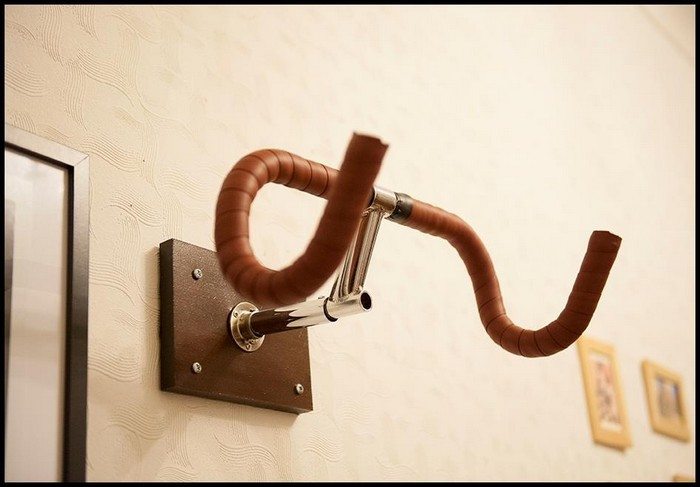
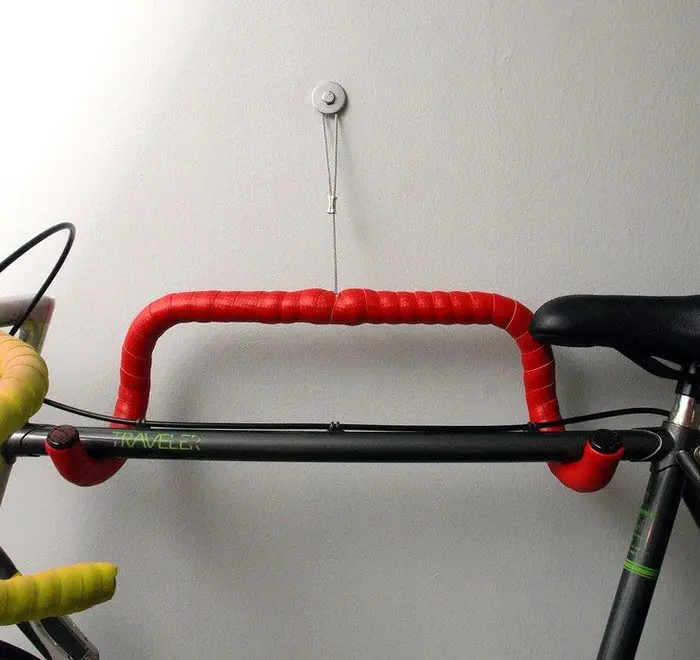
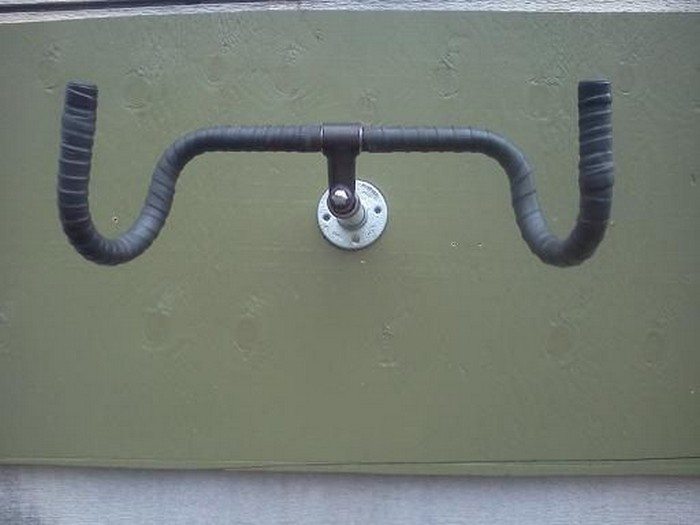
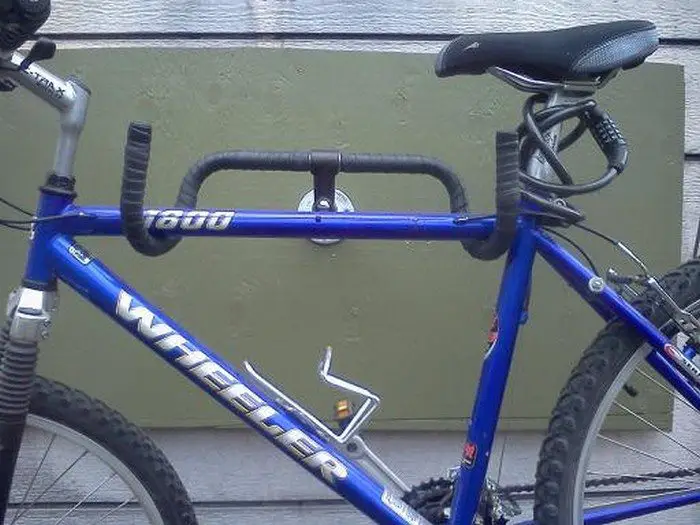
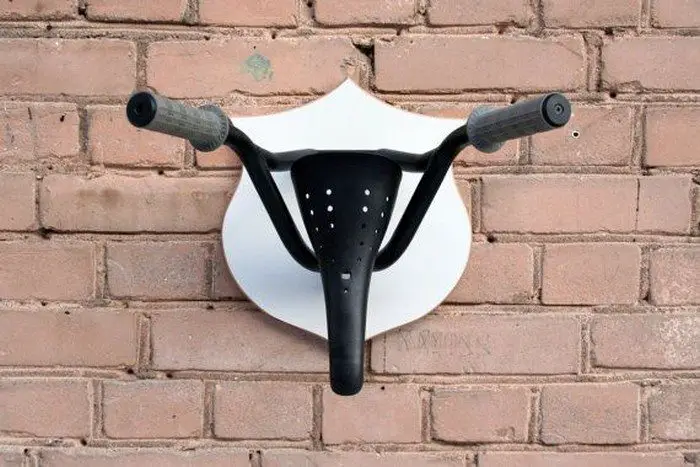
Thanks to Kyle Wilson for this great project. You can get step-by-step instructions here…
Installation Guide for Different Wall Types
Installing a bicycle wall hanger can vary slightly depending on the type of wall you have. Proper installation is crucial to ensure the safety and stability of the hanger. Below, you’ll find tailored instructions for mounting your bicycle wall hanger on different wall types, ensuring that whether you have drywall, brick, or concrete, your bike will be securely supported.
Installation on Drywall
For installing a bicycle wall hanger on drywall, it’s essential to locate the studs. Use a stud finder to identify the most secure part of your wall. Once you find the studs:
- Mark the drilling points using a level to ensure your bicycle wall hanger will be perfectly horizontal.
- Pre-drill holes into the studs at the marked spots.
- Secure the wall flange of your bicycle wall hanger to the studs using screws that are long enough to penetrate deep into the studs for a strong hold.
Installation on Brick
Brick walls require a different approach for installing a bicycle wall hanger due to their hardness and texture.
- Use a masonry drill bit to drill holes at your marked spots.
- Insert wall plugs that are appropriate for masonry use into the holes.
- Screw the wall flange of the bicycle wall hanger into the wall plugs. Ensure that each screw is tight and the flange is flush against the brick wall.
Installation on Concrete
Installing a bicycle wall hanger on concrete walls is similar to installation on brick but often requires more robust fixtures.
- Mark your drill points ensuring the bicycle wall hanger will be level.
- Use a masonry drill bit suited for concrete to drill into the marked spots.
- Place appropriate concrete anchors into the holes.
- Attach the wall flange of the bicycle wall hanger to these anchors, securing tightly to ensure the hanger can support the weight of the bicycle without risk of detachment.
Final Checks and Tips
Regardless of the wall type, after installing your bicycle wall hanger, perform a weight test by gently placing your bike on the hanger. Check for any signs of movement or instability and tighten any fixtures if necessary. Always use hardware that’s designed for the weight of your bike and the material of your wall. Properly installing your bicycle wall hanger not only maximizes space but also protects your bike and wall from damage.
Space Planning and Layout
Choosing the optimal placement for a bicycle wall hanger can transform a cluttered space into an organized and functional area. Whether you’re working with a compact urban apartment or a spacious garage, strategic planning and layout are essential to maximize both the aesthetic and practical benefits of your bicycle storage solution.
Assessing Your Space
Start by assessing the space available in your home or garage. Consider the primary areas where the bicycle wall hanger could be installed, such as near the entrance, in a hallway, or in a designated storage area. It’s important to choose a location that allows easy access to your bike without interfering with the flow of the room. Measure the dimensions of the space, and consider the clearance needed for not just hanging the bike but also for removing it easily.
Choosing the Right Spot
For an effective layout:
- Visibility: Choose a spot where the bicycle wall hanger will be visually accessible, making it easy to hang and retrieve your bike. This is particularly important in smaller spaces to avoid maneuvering difficulties.
- Accessibility: Ensure there’s enough room around the hanger for easy access. This includes sufficient space to lift and hang the bike without straining and enough clearance to prevent bumping into other items or walls.
- Protection: Position the bicycle wall hanger in a spot away from heavy foot traffic to avoid accidental bumps. Also, ensure it’s not placed near moisture-prone areas, especially if the wall material is susceptible to water damage.
Utilizing Vertical Space
Vertical space is often underutilized in home storage solutions. A bicycle wall hanger makes excellent use of vertical areas, freeing up floor space for other uses. In smaller apartments, installing the hanger on a free wall can transform an unused area into a practical storage spot. In larger spaces, such as garages, you can line up multiple hangers to create an efficient storage system that keeps all bicycles organized and easily accessible.
Integrating into Your Decor
The bicycle wall hanger doesn’t just have to be functional; it can also complement your interior decor. Consider the style and color of the hanger in relation to your room’s aesthetic. A well-chosen hanger can act as a display piece, showcasing your bicycle as part of your home’s design. This is particularly appealing for those with high-end or custom bikes that are visually striking.
By carefully planning the installation and layout of your bicycle wall hanger, you can enhance the functionality of your living space while keeping your bike safe and accessible. This strategic approach ensures that your bike storage solution offers both convenience and style.
Conclusion
In addition to saving valuable floor space, a bicycle wall hanger keeps your bike safely stowed and readily available. It can easily fit your house décor and transform a useful object into a chic display. For cyclists trying to combine utility with beauty in their homes, this storage solution is a great fit overall.
We have more ways to save space and organize your belongings. Check out our guitar hanger project next!

