We all dream of a spacious kitchen with sky-high ceilings and spacious counters. The fact is, most of us have to make do with a cramped kitchen with little counter space. But it doesn’t have to be so bad!
Kitchen island carts are a great solution for homeowners who need extra counter space but don’t have enough room or the budget to build an additional standard kitchen counter.
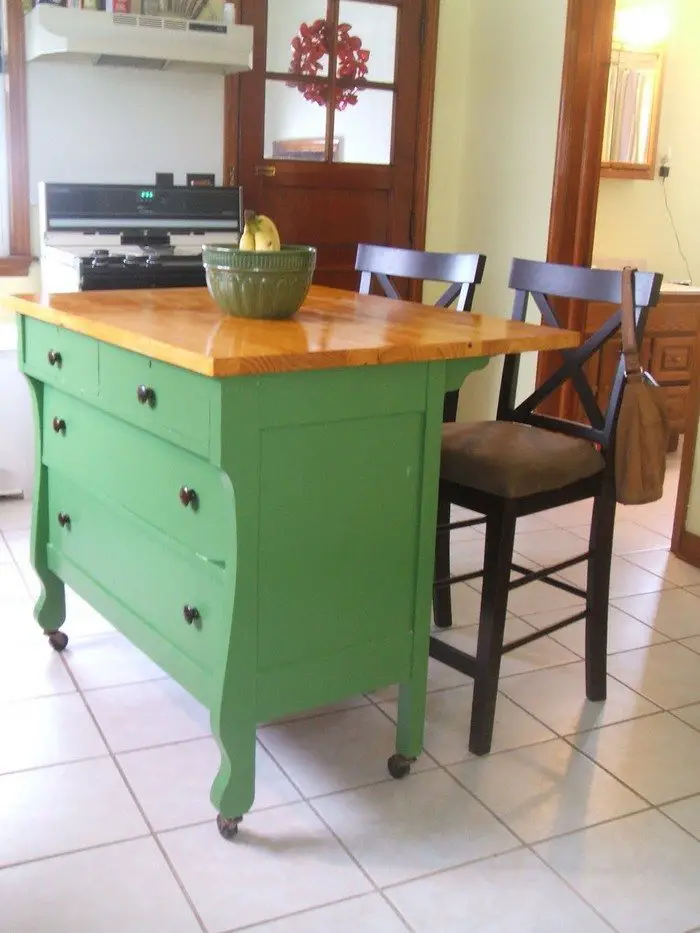
Here’s a great idea that will turn an old dresser into a kitchen island cart that will cost you next to nothing!

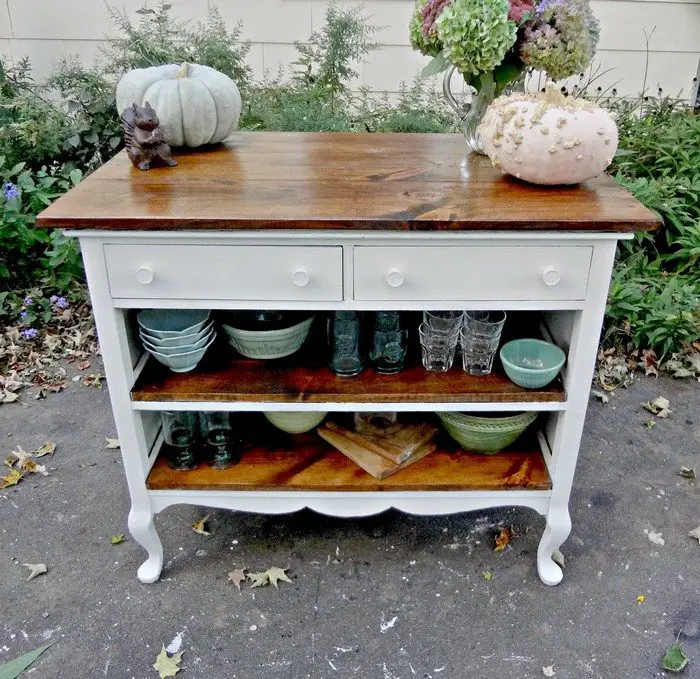
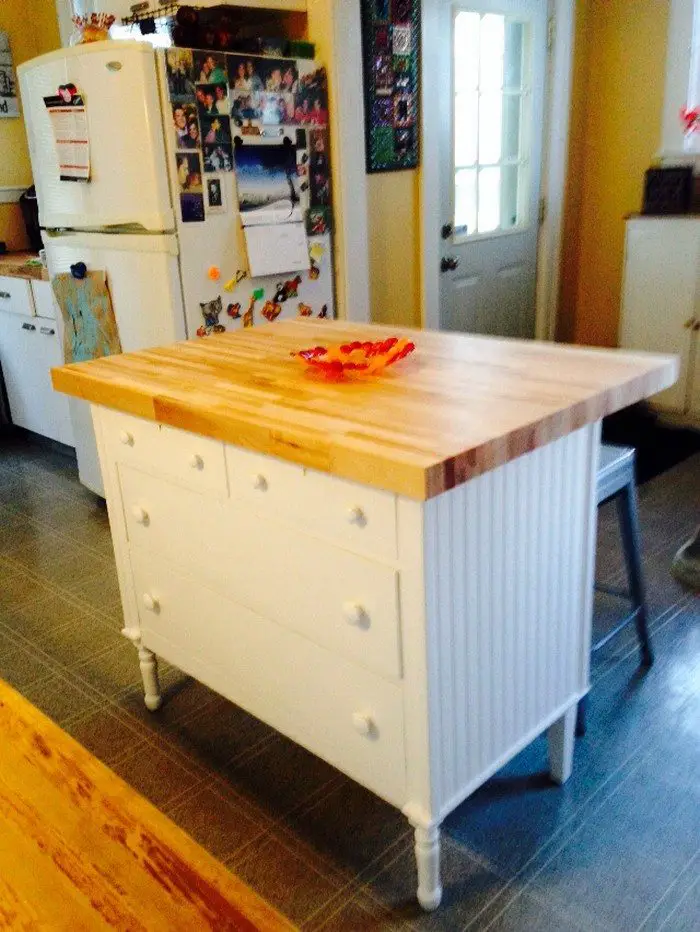
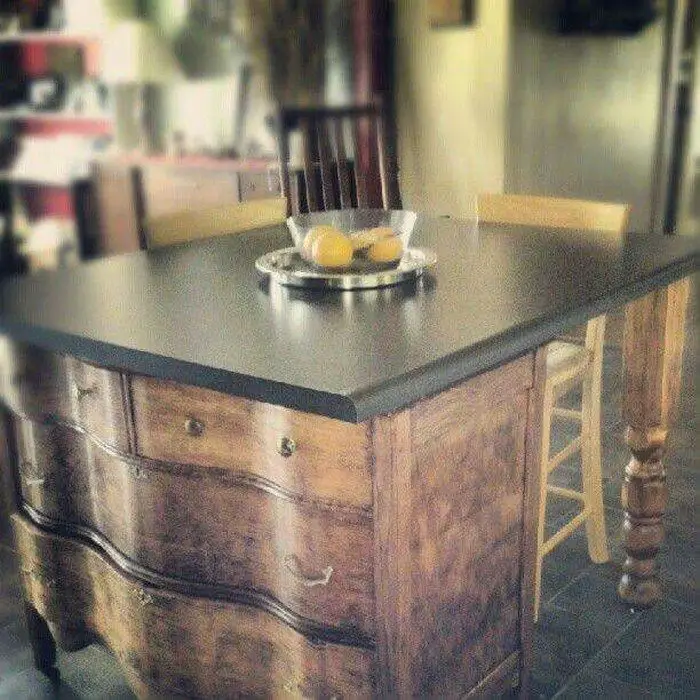
Instead of buying a hundred-dollar kitchen island cart, find an old and ugly dresser and turn it into a rustic kitchen island cart yourself! You can also look for a solid wood top dresser at thrift stores to keep expenses low.
It’s easy to do since it only needs a few modifications – provide open shelves if you want, attach the solid wood top, and casters and give it a new finish. And that’s it – you have a new but inexpensive and unique kitchen island cart!
If you’re unsure how to modify drawers to have open shelving, this project from cfreeman8 is a good guide to follow.
Could you use an additional counter space in the kitchen?
Click on any image to start the lightbox display. Use your Esc key to close the lightbox. ?


Contents
Building a Kitchen Island Cart
Materials
- Old Dresser
- Solid Wood Counter Top
- Extra/Leftover Timber and Boards
- Paint Stripper (optional)
- Wheel Casters
- Drawer Handles
- Wood Screws and Nails
- Clear Coating
Tools
- Jigsaw
- Belt Sander
- Nail Gun
- Drill
Steps
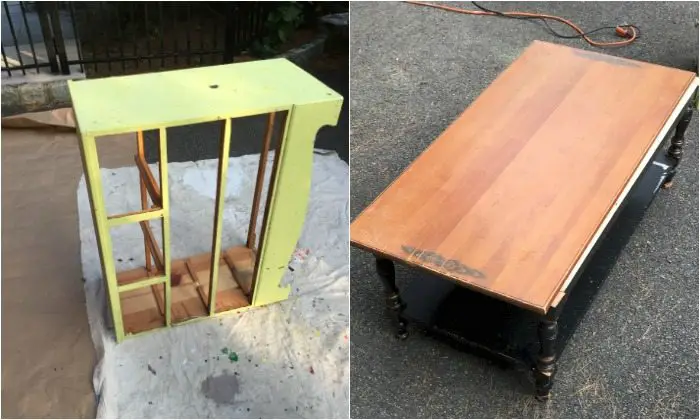
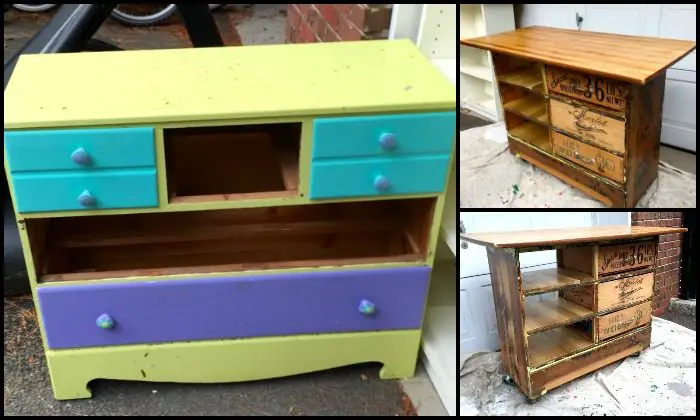
Finding the materials: Our neighborhood had bulk trash pickup and people were throwing out furniture left and right. We found this ugly children’s dresser that we thought had potential as a base. Once we had secured the base we went looking for a top.
We liked the look of a butcher block counter but didn’t really want to spend the money. We found this coffee table with a solid wood top that we thought would do the trick.
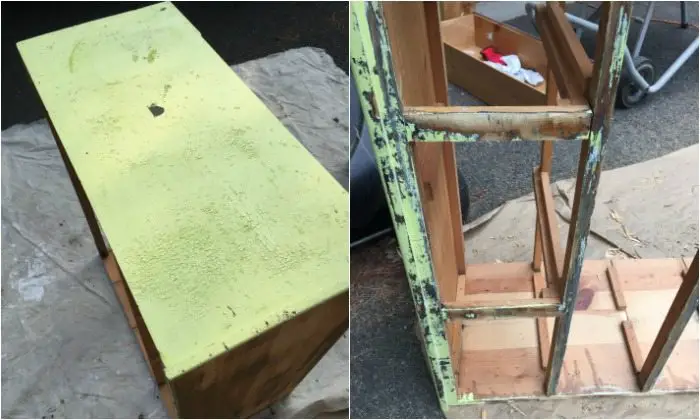
Stripping down the finishes: The first thing we had to do was strip the finishes off the existing pieces. The yellow dresser was hideous. I sanded off the top and one side but thought it was taking to long so we went out and got paint stripper. After two strips I decided I kind of liked the distressed look that had remnants of the paint. I also liked the way the yellow played off of the blue on the crate drawers.
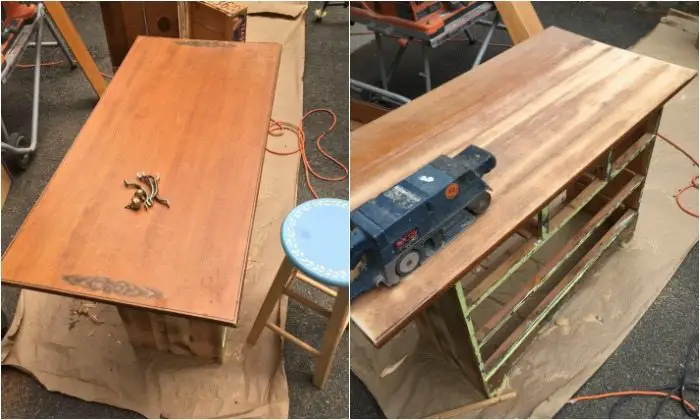
For the top I just sanded it down to take the flower detail and varnish off.
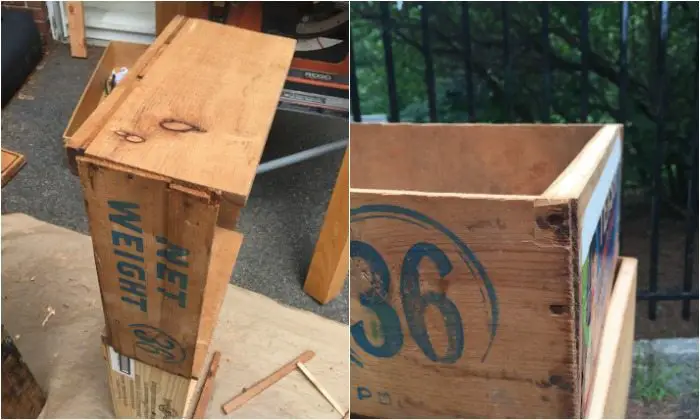
Resizing the crates: The crates were not the size I needed to replace the drawers. The two “Net Weight” crates were too tall and the wine crate was too wide and to tall. I used a jig saw to trim about an inch off the top.
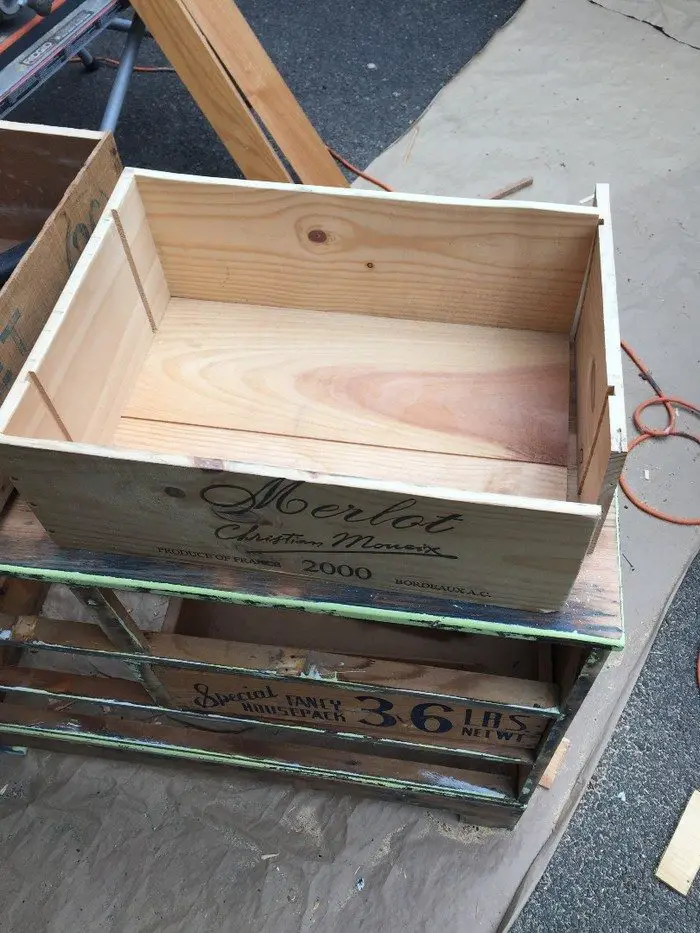
For the wine crate I popped off one side, cut it down and then used a nail gun to reattach it. I really liked these crates that we had lying around the house and am glad I got to use them for this rustic kitchen island, I think they really elevate the piece.
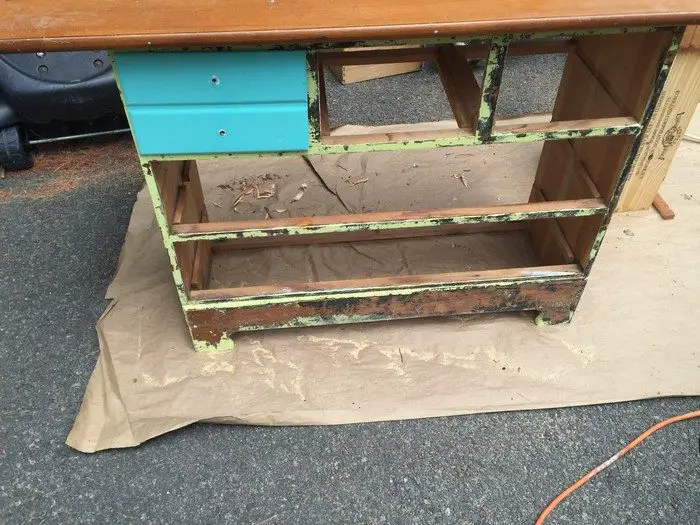
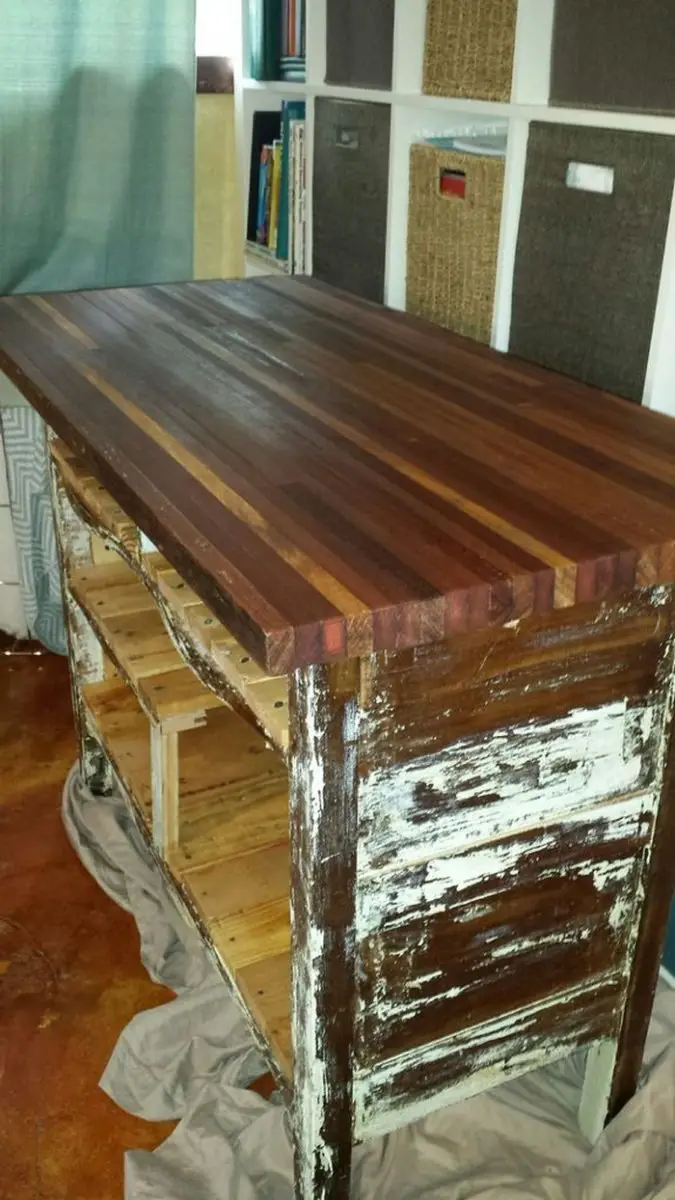
Re-configuring the insides and adding shelves: I disassembled the inside of the dresser in order to reconfigure it for my needs. I reused the two pieces from the top drawers and created a third from scrap wood around the garage.
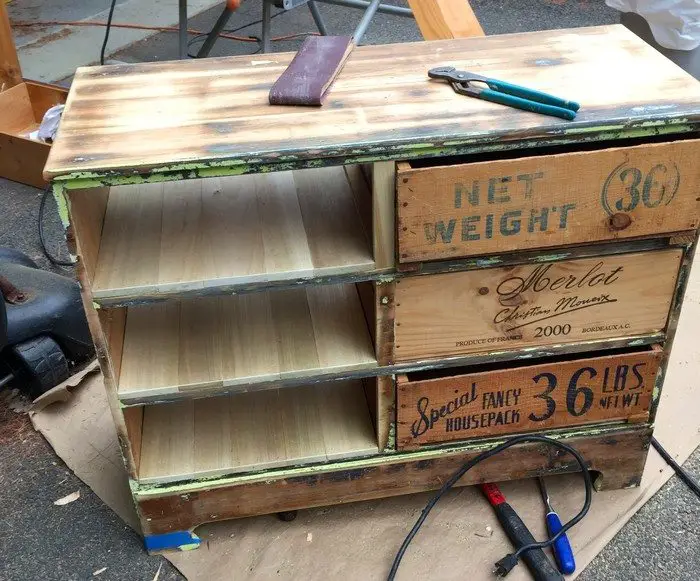
Using leftover boards from another project we made planking for open shelving.
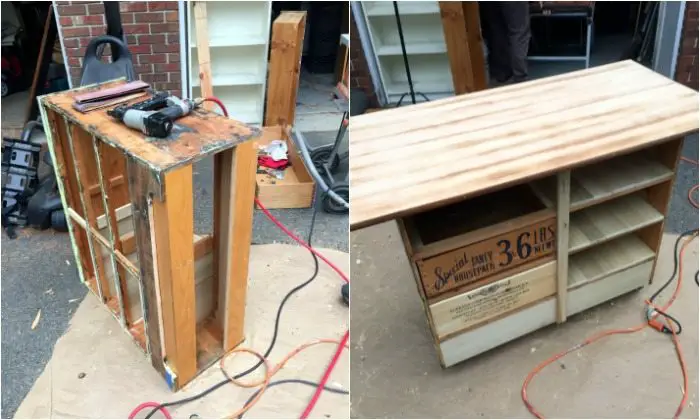
Adding strength and a place to put casters: We added these two corner pieces to the bottom in order to strengthen the piece as a whole and to have a place to put our casters. We were going to use two by fours but had this piece left over from another project and figured it would work better. We capped it on the back with a piece of poplar and also added a small strip to act as a stopping mechanism for the drawers.
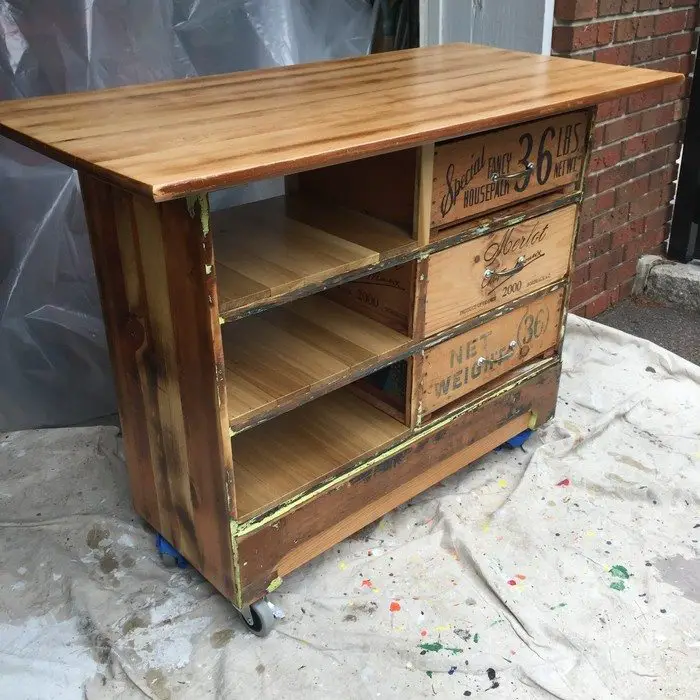
Finishing: We added the casters, bought them at home depot for about eight dollars a piece. We found some salvaged brass hardware in the garage to put on the drawers. We then screwed the top on and added two coats of clear coat.
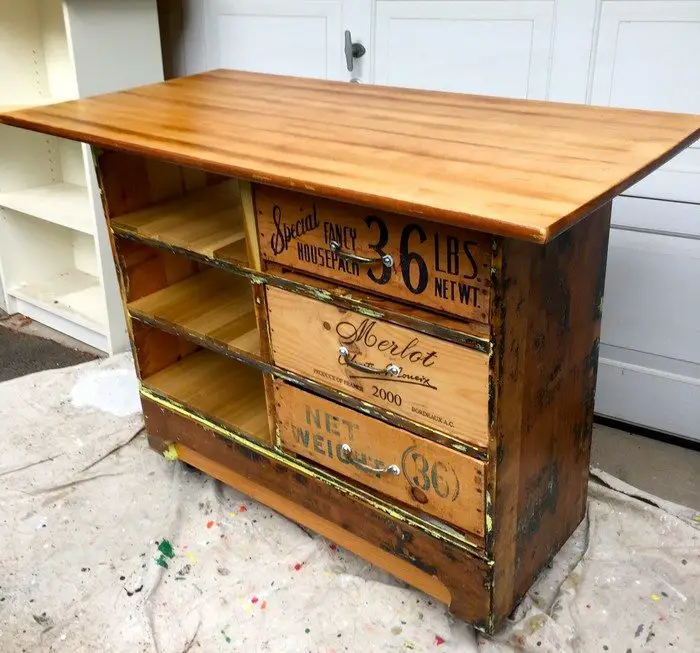
I sanded in between with a fine piece of sand paper. We decided not to add polyurethane to the crates because they had some decals on the side that we didn’t want to mess up. Hope you all liked the project and are inspired to keep making!
Thanks to cfreeman8 for this great project!
Functionality Enhancements
Enhancing the functionality of a kitchen island cart can make it not just a statement piece but a highly useful addition to any kitchen, especially where space is at a premium. Whether you’re looking to add more storage options or expand your workspace, these improvements can tailor your kitchen island cart to meet your specific needs more effectively.
Here’s how you can upgrade its utility and make the most out of this versatile piece of furniture.
Incorporating Additional Storage Solutions
A kitchen island cart is inherently versatile, but with a few tweaks, you can significantly increase its storage capacity. Consider installing hooks on the sides or underneath the cart to hang towels, pots, and pans. A magnetic knife rack can also be attached to one side, providing easy access to kitchen knives while saving drawer space.
For those who love to cook with spices, a small spice rack mounted on the side or incorporated into a pull-out drawer can keep essential seasonings within arm’s reach. These additions not only enhance the functionality of the kitchen island cart but also help keep your countertop clutter-free.
Adding More Counter Space
For many, the primary value of a kitchen island cart lies in the additional counter space it provides. To maximize this space, consider adding a drop leaf extension that can be lifted when more surface area is needed and folded down to save space when not in use. Another option is to add a pull-out cutting board just below the countertop.
This hidden board can slide out easily, offering additional space for food preparation without permanently occupying valuable room on the cart. Such expandable solutions make the kitchen island cart even more practical for daily use, especially in smaller kitchens.
Top Surface Alternatives
While many kitchen island carts come with a basic wood or laminate top, upgrading this surface can significantly enhance the cart’s functionality and aesthetic. For those seeking a more durable and heat-resistant surface, granite or stainless steel are excellent choices. These materials withstand heat better, making them ideal for placing hot pots and pans.
Alternatively, a butcher block top adds a warm, rustic touch and serves as a built-in cutting surface. Selecting the right material for your kitchen island cart’s top depends on your cooking style and design preferences, ensuring it not only looks good but also meets your functional needs.
Mobility and Stability
The mobility of a kitchen island cart is one of its greatest assets, allowing you to move it as needed. To enhance this feature, invest in high-quality casters that can lock into place to ensure stability when the cart is being used for chopping or mixing. Rubberized wheels are preferable as they roll smoothly and won’t scratch hardwood floors.
When choosing casters, consider the weight they need to support, especially if you plan on storing heavy items in or on the cart. Properly chosen casters increase the cart’s usability and ensure it can be moved easily without jeopardizing its stability or damaging your floors.
By considering these enhancements, you can transform your kitchen island cart into an even more essential part of your kitchen setup. Each modification not only boosts its functionality but also helps tailor it to fit your unique kitchen activities, making every cooking experience more efficient and enjoyable.
Maintenance Tips
Maintaining your kitchen island cart is essential to keep it looking as good as new and functioning optimally for years to come. Regular care and maintenance ensure that it remains a centerpiece in your kitchen that is both beautiful and practical. Here are some essential maintenance tips to help you preserve the condition and enhance the longevity of your kitchen island cart.
Routine Cleaning
Keeping your cart clean is the first step in maintaining its appearance and functionality. Wipe down the countertop after every use with a mild soap and warm water solution to prevent stains and buildup. For wooden tops, avoid using harsh chemicals that can strip the wood of its natural oils. Instead, opt for natural cleaners or a diluted vinegar solution. Make sure to dry the surface thoroughly to prevent water damage.
Protecting the Surface
To protect the surface of your cart, especially if it’s made of wood, regular application of a sealant or butcher block oil is advisable. This will help to keep the wood hydrated, preventing cracks and warps. For surfaces like granite or stainless steel, applying a protective coating can help resist fingerprints and smudges, keeping the surface shiny and new. Always use coasters or placemats to prevent direct contact with hot dishes, which can mar the finish.
Checking and Tightening Hardware
Regular movement and use causes the hardware on your kitchen island cart, scues, bolts, hinges, to loosen over time. Check these parts often and tighten them as needed. This guarantees the cart stays strong and free of squeaks. Replace any hardware you find rusting or damaged right away to stop additional deterioration.
Caster Care
Your cart gains mobility from the casters, which also call for attention. Check the wheels often for accumulated hair, trash or dust to impede movement. Using a brush and soapy water will help the wheels to remain rolling without problems. Should the wheels begin to squeak, a suitable lubricant can be sprayed on the bearings to guarantee silence of operation.
Following these maintenance guidelines will help you to guarantee that your cart stays a useful and appealing feature of your kitchen. Regular maintenance not only improves its look but also prolongs its life, so making it a good investment in your house.
Conclusion
Kitchen island carts offer a versatile solution for adding extra counter and storage space to kitchens, especially those limited by size. Their mobility allows for easy rearrangement, adapting to various kitchen layouts and needs. As a result, these carts enhance both the functionality and aesthetic appeal of any kitchen environment.


