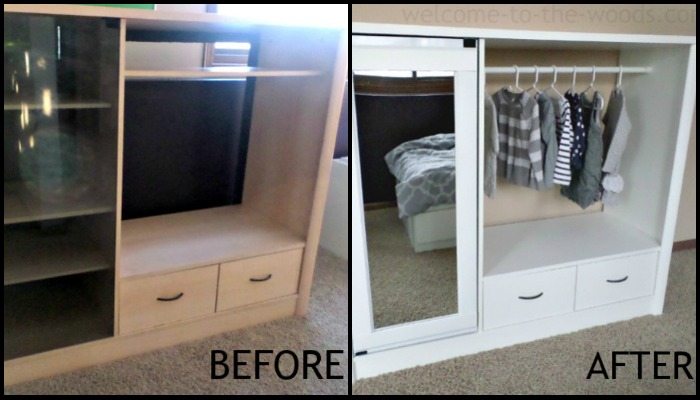
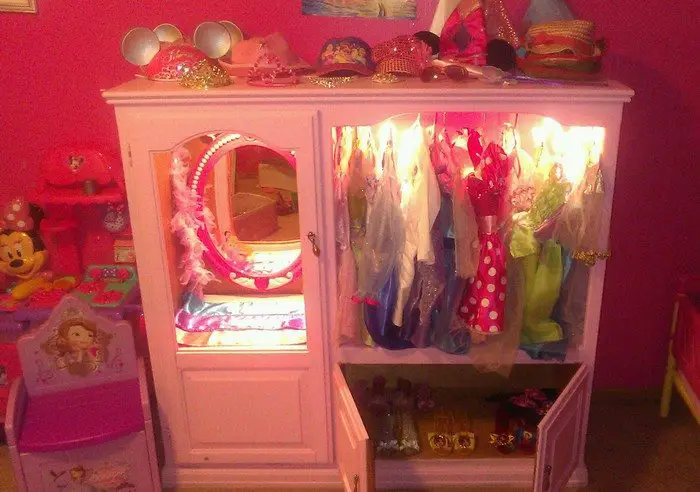
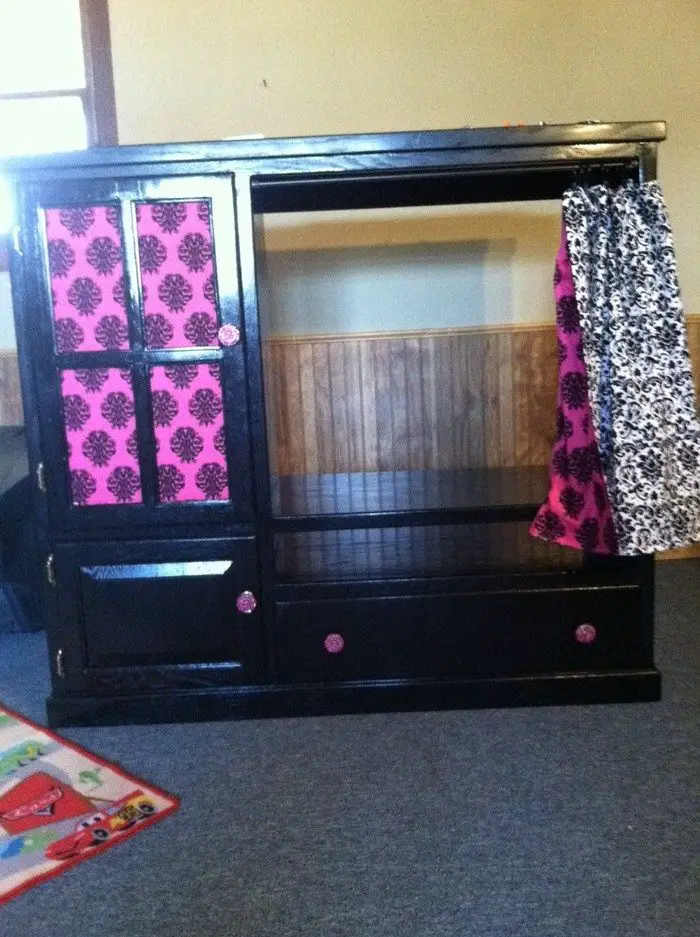
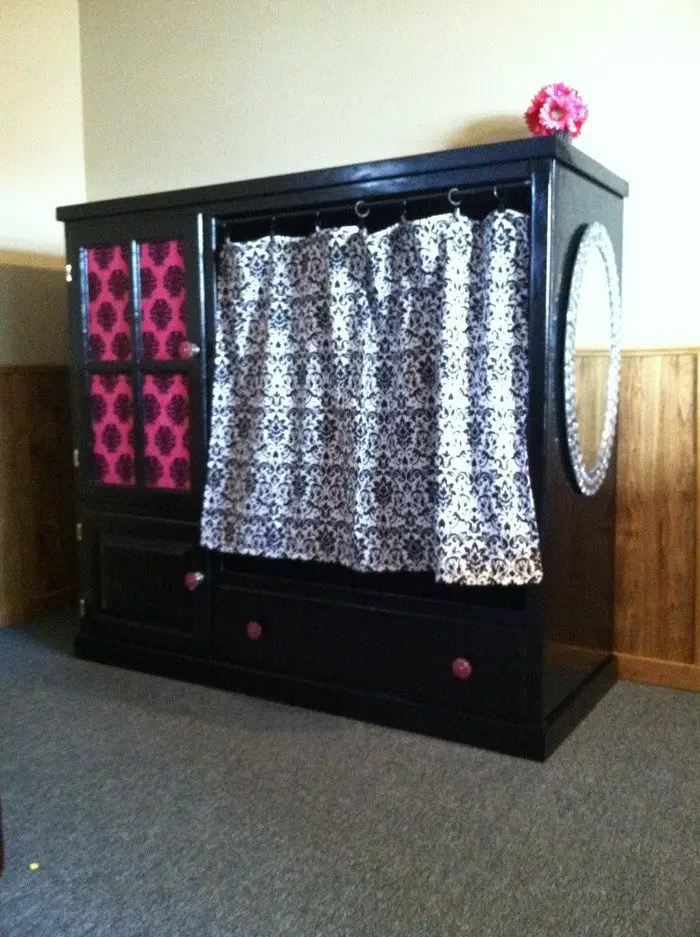
Here’s a nice idea for the kids, especially the girls – an old entertainment center turned into a dress up closet!
We’ve already featured a DIY play kitchen out of an old entertainment center, but this is a repurposing project you can do if your youngsters enjoy dressing up more than cooking!
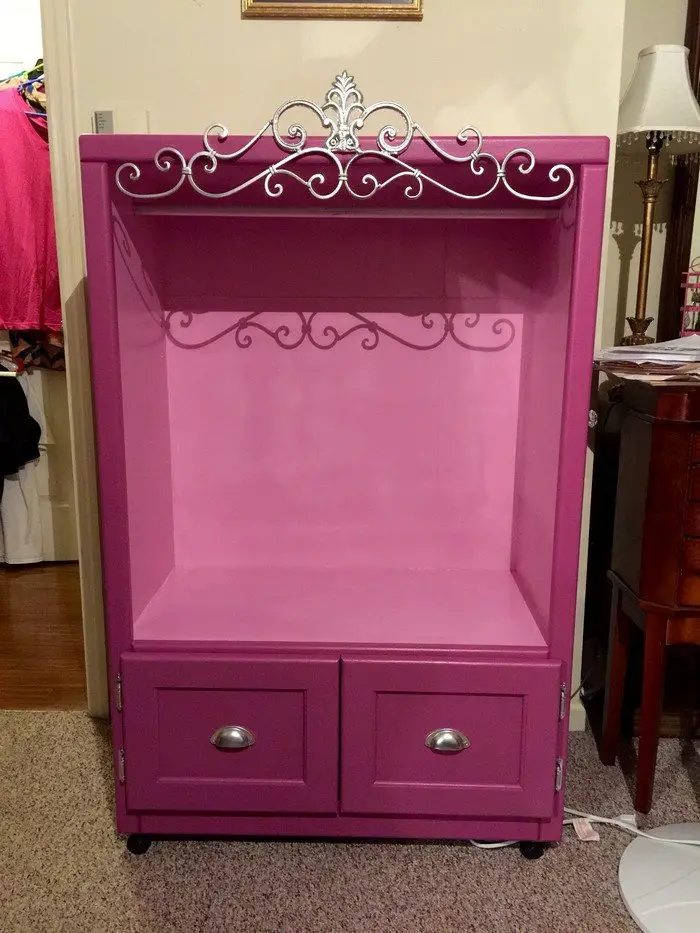
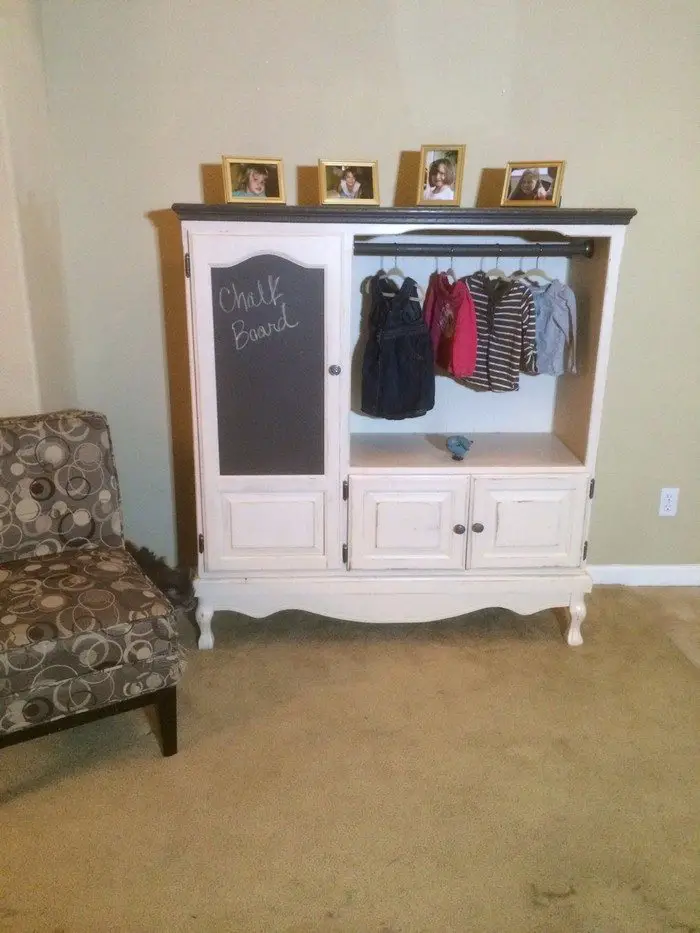
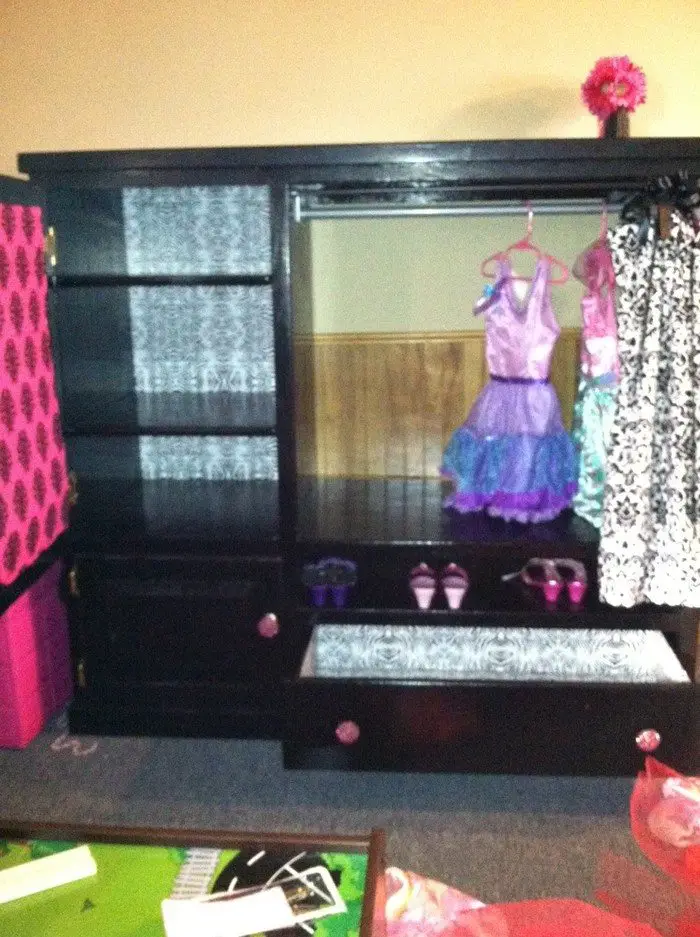
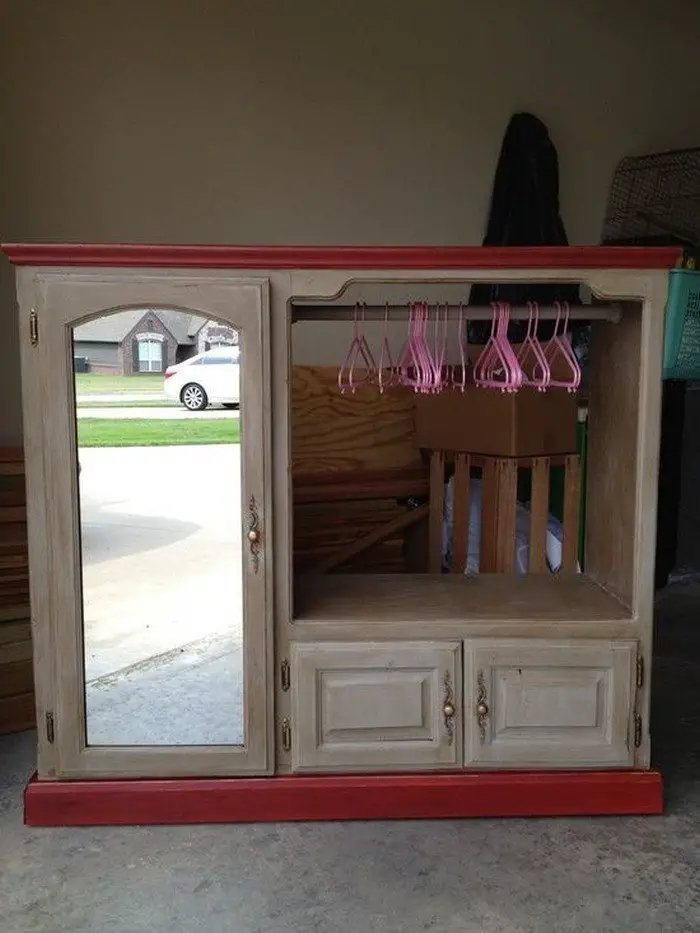
All you have to do with your old entertainment center is to repaint it, add a mirror and then a rod for hanging clothes. You might also need to add or adjust shelving for more clothes/shoe storage. And that’s it! Depending on the condition of your old furniture, your makeover might require a little more work. But basically, it’s a very easy DIY project you will definitely enjoy!
If you’ve got a very large entertainment center, you can even use it as your kid’s ‘real’ closet. :)
A little closet for the little one. Is there any child who wouldn’t love this old entertainment center armoire?
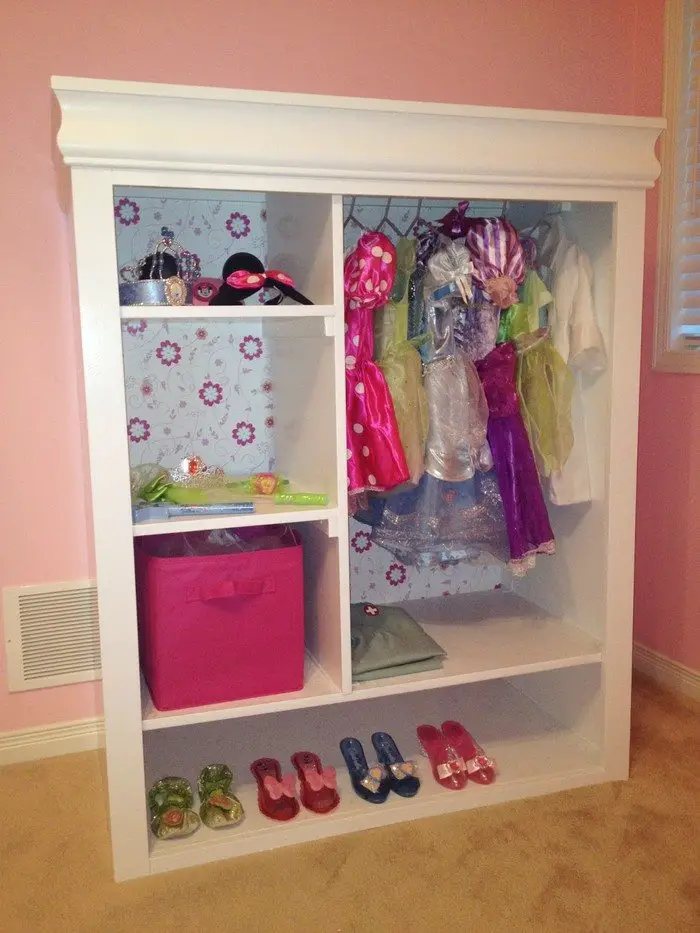
See more cute examples from our album and learn how our featured kids’ armoire was made by heading over to the article linked below!
Contents
Turning an Entertainment Center into a Kids’ Armoire
Materials
- Old Entertainment Center
- Wood Casing
- Primer and Paint
- White Spray Paint
- Wrapping Paper
- Mirror
- Heavy-duty Liquid Adhesive for glass
- Metal Closet Rod
- Bins
Tools
- Screwdriver
- Scoring Tool
- Metal Square
- Clamps
Instructions
Step 1: Prepare the Entertainment Center
- Clean the unit: Begin by cleaning your old entertainment center thoroughly to remove dust and grime.
- Remove unnecessary components: Use a screwdriver to remove any hardware or components that won’t be needed (like old shelves or drawer slides).
Step 2: Sand and Prime
- Sand the surface: Smooth out the entire surface with sandpaper to ensure the paint adheres well.
- Apply primer: Coat the sanded furniture with a layer of primer. Let it dry according to the product instructions.
Step 3: Paint
- Paint the exterior: Apply your chosen color of paint to the outside of the entertainment center. You might need several coats to achieve an even finish.
- Spray paint details: Use white spray paint for intricate areas or for a different textured look on smaller details.
Step 4: Add Wood Casing
- Measure and cut: Using a metal square and scoring tool, measure and cut the wood casing to fit around the edges of the entertainment center for a polished look.
- Install the casing: Attach the casing using clamps and screws, ensuring it is securely fastened.
Step 5: Install the Mirror
- Position the mirror: Decide where the mirror will be most functional and aesthetically pleasing, typically on the inside of a door.
- Attach with adhesive: Apply a heavy-duty liquid adhesive to the back of the mirror and press it firmly into place. Allow it to cure as recommended by the adhesive instructions.
Step 6: Install the Closet Rod
- Measure and mark: Determine the height of the rod, considering the length of the clothes to be hung. Mark the placement on both sides of the armoire.
- Install the rod: Secure the metal closet rod in place using the hardware it comes with, ensuring it is sturdy enough to hold the weight of the clothing.
Step 7: Add Shelves and Bins
- Fit additional shelves: If needed, add or adjust shelves within the armoire for additional storage. You might need to cut them to size using the metal square and scoring tool.
- Organize bins: Place bins on the shelves or at the bottom of the armoire for toys, shoes, or accessories.
Step 8: Customize with Wrapping Paper
- Cut wrapping paper: Measure and cut pieces of decorative wrapping paper to fit the back wall or shelves of the armoire.
- Attach the paper: Secure the wrapping paper with adhesive or double-sided tape for a personalized touch.
Step 9: Final Touches
- Check all components: Ensure that everything is securely attached and the paint is dry.
- Add decorations: Optionally, add knobs, decals, or other decorative elements to personalize the armoire.
Click on any image to start lightbox display. Use your Esc key to close the lightbox.![]()
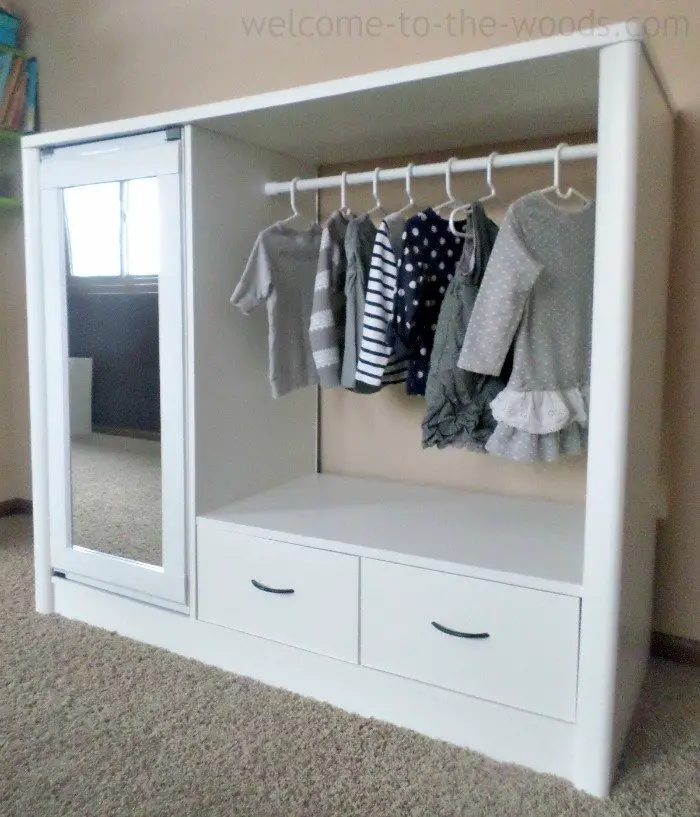


You can get more step-by-step instructions here…
Themed Designs for Kids’ Armoires
Creating a themed kids’ armoire can be a fun and exciting project that adds a personalized touch to your child’s room. By choosing a theme that resonates with your child’s interests, you transform a simple storage solution into an imaginative space that encourages creativity and organization.
Here are some themed design ideas to consider for your kids’ armoire.
Princess Castle Armoire
Transform the kids’ armoire into a magical princess castle with pastel colors and decorative towers. Use stencils to paint castle windows and doors, and add glitter or metallic accents for a touch of magic. Installing a small curtain rod inside the doors with lightweight curtains can mimic grand castle drapes, providing a royal flair.
Superhero Headquarters Armoire
For the young superhero fan, a superhero headquarters-themed kids’ armoire can be the perfect addition to their room. Paint the armoire in bold primary colors like blue, red, and yellow. Use vinyl decals or hand-painted emblems of their favorite superheroes. Inside, install hooks and baskets to store superhero costumes and accessories neatly.
Underwater Adventure Armoire
An underwater-themed kids’ armoire can bring the calming vibes of the ocean into your child’s bedroom. Paint the armoire in shades of blue and green, and use sea creature decals such as fish, sharks, and octopuses. For a textured effect, add some real or faux seashells and starfish to the doors and sides of the armoire.
Jungle Safari Armoire
A jungle safari-themed kids’ armoire can inspire a love for animals and adventure. Paint the armoire in earthy tones like greens and browns and decorate it with stencils or stickers of jungle animals such as lions, elephants, and monkeys. Adding a few hanging vines or leaf garlands around the armoire can enhance the jungle feel, making the armoire a centerpiece of a safari-themed room.
Each of these themes can turn an ordinary kids’ armoire into an exciting element of your child’s daily adventures, while still serving its functional purpose of organizing clothes and toys. By tailoring the design to your child’s tastes, the kids’ armoire becomes much more than just furniture—it becomes a portal to their imagination.
Incorporating Educational Elements
Incorporating educational elements into a kids’ armoire can turn everyday furniture into a fun and interactive learning tool. By embedding educational features, the kids’ armoire not only serves its primary function of organization but also becomes a resource for ongoing learning and development.
Here’s how you can make the kids’ armoire both functional and educational.
Alphabet and Numbers
Transform the doors or inner panels of the kids’ armoire into an educational canvas by painting or adhering letters and numbers. This is a simple way to familiarize young children with the basics of language and mathematics. For an interactive twist, use magnetic paint and create magnetic letters and numbers that children can move around to form words or solve math problems.
Color Coordination
Use the kids’ armoire to teach colors and sorting by organizing its contents by color. Paint the edges of shelves or use colored bins inside the armoire corresponding to the color of the items stored, like red for red clothes and blue for blue toys. This not only helps in teaching colors but also in developing organizational skills.
World Map Armoire
Cover the exterior sides of the kids’ armoire with a large world map. This can spark curiosity about different countries, cultures, and geography. You can further enhance this by using marker board paint, allowing your child to mark places they learn about in school or dream of visiting. It’s a great way for children to visually connect with the world around them.
Educational Themes and Stories
Choose a theme for the kids’ armoire that ties into educational stories or subjects, like space, the ocean, or history. Decorate the armoire with relevant images and facts. For instance, a space-themed armoire could have planets, stars, and notable spacecraft. You can rotate themes periodically to maintain interest and correspond with what they’re currently learning.
Integrating these educational elements into a kids’ armoire not only enhances its visual appeal but also contributes significantly to a child’s learning environment, making everyday activities like choosing clothes or putting away toys more stimulating and informative.
Maintenance and Care Tips
Maintaining and caring for a kids’ armoire is essential to ensure it remains both functional and attractive over time. Proper maintenance not only prolongs the life of the furniture but also keeps it safe for use by children. Here are some straightforward tips for keeping the kids’ armoire in top condition.
Regular Cleaning
- Dust Regularly: Dust the armoire weekly with a soft, dry cloth to prevent buildup, which can scratch the surface over time. For carved details or harder-to-reach areas, use a small brush to remove dust.
- Wipe Spills Immediately: Clean any spills or marks immediately with a damp cloth followed by a dry cloth. This prevents stains and moisture damage, particularly important for painted or decorated armoires.
Check and Tighten Hardware
- Inspect Hardware: Monthly, check all handles, hinges, and decorative elements to ensure they are secure. Kids often pull and tug on these parts, and loose hardware can be a safety hazard.
- Tighten Fittings: Use a screwdriver to tighten any loose screws or bolts. This simple step helps prevent parts from falling off or causing misalignment of the armoire doors.
Protect from Damage
- Avoid Harsh Chemicals: When cleaning, avoid using harsh chemicals or abrasive cleaners, as these can damage the paint and finish. Stick to mild soap and water for a deeper clean.
- Use Mats or Coasters: Place mats or coasters under any items that might scratch the surface of the armoire, like lamps or storage bins.
Periodic Refreshes
- Touch-Up Paint: If the armoire has painted surfaces, keep some touch-up paint on hand to quickly correct any chips or scratches. This keeps the armoire looking fresh and new.
- Update Protective Coatings: Every few years, consider applying a new coat of clear protective lacquer or sealant to wood surfaces. This helps protect against scratches and wear, especially in a child’s room.
By following these maintenance and care tips, your kids’ armoire will not only look great but also provide a safe and durable storage solution for many years. Regular upkeep helps avoid the need for major repairs and ensures that the armoire remains a cherished piece of your child’s room.
Conclusion
Turning an old entertainment center into a kids’ armoire is a creative and sustainable way to repurpose furniture. This DIY project not only adds a unique and functional element to your child’s room but also allows for personalization that can grow with them over the years. Engaging in such transformations can also inspire both practical skills and imaginative thinking, making it a rewarding endeavor for the whole family.


