
Drill (2) 1″ holes on the center of the two sides of the box. These will end up holding up the box in its final location
Pre-drill and install (2) screw eyes (one on each side) about 2″ off-center. These will be used to hold up the box to wire.
I installed 2 electrical junction boxes inside so all wires could be pulled to this location in the next step.
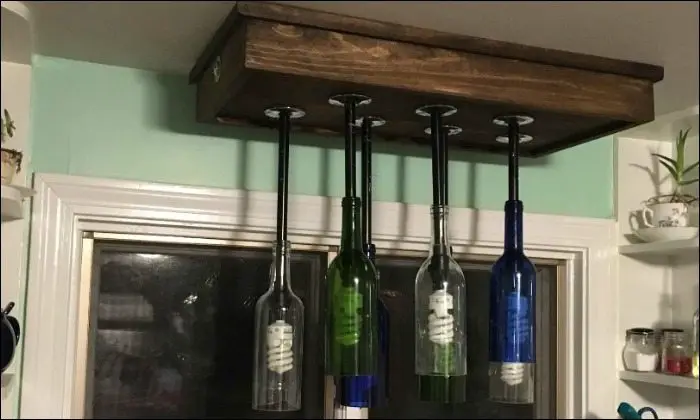
Hanging and electrical wiring: To wire the fixture in place, I wanted to first hang the fixture so one did not have to hold in place (since it is fairly heavy). This would also make it easier to replace a bottle if needed etc.
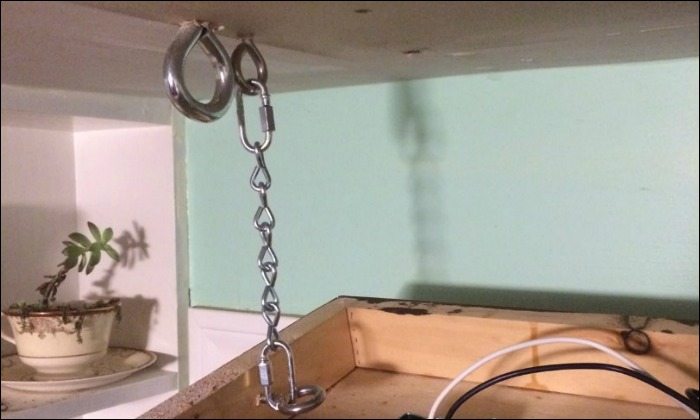
Pre-drill and screw 2 hooks into the ceiling directly inside the footprint of the box’s final location. Doesn’t necessarily matter where, but I recommend about 2″ off-center of each side. I was fortunate to have the whole ceiling covered with in-wall blocking, but you will want to check and ensure you hit something solid when you install these hooks as they will be holding the fixture’s weight
Using the quick links and chain, attach the hooks in the box, to the hooks in the ceiling.

Let go and test that the chain/fixture strength to make sure it holds.
Once it is secure, turn off the power to the circuit and check out the wiring. My fixture was power fed from the ceiling, with wires going to the light switch from there. This is not a normal situation (and one I had to discover through trial and error).
Thread the light sockets through the bottle/conduit so all the wires extend into the box. Pull all the wires into the junction box closest to the wires in the ceiling. Using electrical tape, tape together all of the white wires, and all of the black wires and make sure the wires are all connected.
If some of the bulbs hang down further than desired when pulled to the junction box, pull to the desired height, then overlap the wires and wrap electrical tape around the top to hold it in place.
In my scenario, the black wire was the power, that fed to the switch, and the red wire came from the switch. So for the light switch to operate, all the black wires from the light bulbs had to be attached to the red wire, not the black. I capped the black wires from the ceiling and attached the white bundle, to the white in the ceiling, and as mentioned before, the black bundle to red using wire nuts. Once the nuts were on securely, wrap electrical tape around them to ensure there are no exposed threads. If your fixture is not powered from the ceiling, you should just be able to attach black to black and white to white.
For the ground, I wrapped it around a screw I placed inside the box, making sure it could not touch any other metal.
Turn the circuit and switch on to make sure the fixture works properly.
Installing in a final location: This was another tricky part, that took some serious thought on how I wanted to attach it directly to the ceiling. Many factors came into play.
- Due to the tight nature of my cabinets to the fixture, a dowel that went through the whole length of the fixture was not possible since I would not have been able to get it in/out without jamming into the cabinets
- I live right near a train station, and the house shakes on occasion, so I didn’t want to just use a pin since it could ‘wiggle’ out
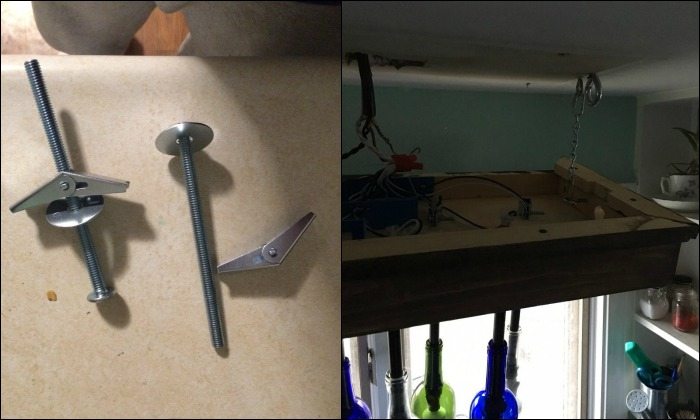
In discussing the dilemma with a friend, and gentlemen at HomeDepot, I came up with the following idea that uses drywall toggle bolts. These can be threaded through the holes in the box, then through hooks on the ceiling, and tightened. The bolt then could not ‘wiggle’ out, but by unscrewing it, can come off to access the inside of the box.
Pre-drill and install the (2) screw eyes on the ceiling in the center of the final location of the sides of the box (should match up perfectly with the existing holes in the side of the box from the previous step).
Measure the distance from the ceiling to the bottom of the eye-opening and from the top of the box, to the bottom of the drilled hole. These dimensions should match up. (I had to add some trim to the top of the box for them to line up).
Lift the box into location, and thread the toggle bolt (adding a washer so the head of the bolt wouldn’t go through the hole as well) through the side of the box, then through the eye. Do the same to the other side, then tighten them down. To remove, simply unscrew the toggle bolts and the box will drop down to the chains again.
Editorial Note:
Please be mindful that electricity is very unforgiving. In some countries, it is illegal to make a mains power electrical connection without an appropriate license.
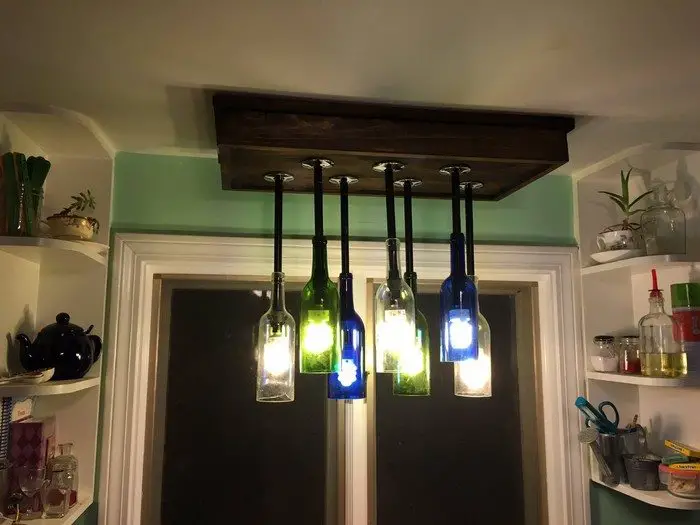
And you’re done! Enjoy!
Thanks to campbesj7 for this great project!
Contents
Choosing the Right Wine Bottles for Your Chandelier
Selecting the right wine bottles is a crucial step in building a wine bottle chandelier that looks great and functions well. The shape, size, and glass type all impact how light disperses and how sturdy your fixture will be. Knowing what to look for will help you create a chandelier that is both stylish and practical.
Bottle Shape and Size Matter
Different wine bottles create different lighting effects. Tall and slender bottles focus light downward, making them ideal for task lighting, while wider bottles spread light more evenly for a softer glow. Standard 750ml bottles are the most commonly used, but mixing bottle sizes can create a more dynamic look.
Clear vs. Colored Glass
The color of the bottles affects the ambiance of your chandelier. Clear glass allows for the brightest light output, making it ideal for well-lit spaces. Green, blue, or amber bottles add warmth and depth, softening the light for a more intimate setting. If you prefer a diffused glow, frosted or lightly sanded glass bottles work well.
Label Removal and Cleaning
Clean bottles enhance the look of your chandelier and allow light to shine through properly. Soaking bottles in warm, soapy water helps remove labels easily. Any adhesive residue can be scrubbed off with baking soda and oil or a commercial adhesive remover.
Matching Bottles to Your Chandelier Style
The style of your chandelier should guide your bottle choice. For a rustic look, opt for bottles with natural imperfections or embossed details. A modern design benefits from sleek, uniform bottles, while a vintage aesthetic works well with antique wine bottles or those with decorative etching.
Choosing the right bottles ensures your wine bottle chandelier is both visually appealing and functional. By considering shape, color, and style, you can create a unique fixture that complements your space perfectly.
Different Wine Bottle Chandelier Designs
A wine bottle chandelier can take on many styles, from rustic and industrial to sleek and modern. The design you choose will depend on your space, personal taste, and the type of ambiance you want to create. Here are some popular styles to consider when crafting your chandelier.
Rustic Farmhouse Style
A rustic wine bottle chandelier brings warmth and character to any space. Using reclaimed wood, metal chains, and vintage Edison bulbs enhances the old-world charm. This style works well in kitchens, dining rooms, or outdoor patios where a cozy, inviting atmosphere is key.
Industrial-Inspired Designs
For a bold and edgy look, industrial-style chandeliers combine wine bottles with raw metal, exposed bulbs, and black iron piping. The contrast between rugged materials and elegant glass bottles creates a striking visual effect. This style is ideal for loft apartments, modern homes, and industrial-themed bars or restaurants.
Minimalist and Modern Chandeliers
A minimalist wine bottle chandelier focuses on clean lines and simplicity. Clear glass bottles, geometric arrangements, and subtle metal accents define this look. Using LED bulbs with warm or cool tones allows for sleek, energy-efficient lighting that complements contemporary spaces.
Vintage and Antique-Inspired Chandeliers
Vintage designs often feature ornate details, repurposed metal fixtures, and colored glass bottles. Adding elements like wrought iron scrollwork or candle-style bulbs enhances the nostalgic feel. This style pairs beautifully with classic decor, making it a great fit for cozy libraries, home bars, or traditional dining areas.
Outdoor and Patio Chandeliers
A wine bottle chandelier can also be a stunning addition to an outdoor space. Weather-resistant materials like treated wood, galvanized metal, and solar-powered LED bulbs make it durable for patios or garden settings. This style creates a soft, inviting glow for evening gatherings and outdoor dining.
No matter which design you choose, a wine bottle chandelier adds personality and creativity to any space. With the right materials and thoughtful planning, you can craft a one-of-a-kind lighting fixture that complements your home’s aesthetic.
Customizing Your Wine Bottle Chandelier
A wine bottle chandelier is more than just a lighting fixture—it’s an opportunity to showcase your creativity and style. Customizing your chandelier allows you to match it to your home’s decor, enhance its functionality, and make it a true statement piece. Here are some ways to personalize your wine bottle chandelier for a unique and polished look.
Painting and Etching for a Decorative Touch
Adding color or patterns to your bottles can transform the overall appearance of your chandelier. Spray-painting bottles in metallic or matte finishes gives them a sleek, modern look, while hand-painting designs creates a more artistic effect. Glass etching offers a subtle, frosted look that diffuses light beautifully and adds an elegant touch.
Using Colored Glass for Ambiance
The color of your wine bottles can influence the mood of the room. Clear bottles provide the most brightness, while green, amber, and blue glass create a warm and inviting glow. If you want a soft, diffused effect, lightly sanding or frosting the glass can help achieve the desired lighting.
Dimmable Bulbs and Smart Lighting Integration
Customizing your chandelier with dimmable bulbs lets you control the brightness for different occasions. For added convenience, smart bulbs allow you to adjust color temperature and intensity using a mobile app or voice control. This feature is perfect for spaces where you want flexibility, such as dining rooms or patios.
Adding Unique Fixtures and Hardware
The way your chandelier is mounted can make a big difference in its overall look. Consider using vintage chains, rustic wooden beams, or industrial metal piping for a unique design. Mixing materials like reclaimed wood and wrought iron can enhance the chandelier’s character and make it a focal point.
Personalized Arrangements and Layouts
The number of bottles, their arrangement, and their positioning all impact the final design. Hanging bottles at different heights creates a dynamic, cascading effect, while a uniform layout offers a sleek and balanced look. Experimenting with different layouts can help you find the perfect aesthetic for your space.
Themed Chandeliers for Special Settings
For a unique twist, tailor your chandelier to a specific theme. A coastal-themed fixture could use blue and seafoam green bottles, while a rustic farmhouse chandelier might incorporate distressed wood and vintage-style bulbs. Themed designs make great conversation pieces and add personality to your home.
With a little creativity, you can turn a basic wine bottle chandelier into a custom lighting fixture that reflects your style. Whether through paint, lighting, or unique materials, the right customization will make your chandelier a stunning addition to any space.
Conclusion
Building a wine bottle chandelier is a rewarding DIY project combining sustainability and creativity. Your custom lighting fixture can become a long-lasting statement piece with proper installation and maintenance. Whether hung over a dining table or in an outdoor space, it’s a conversation-worthy way to repurpose wine bottles into something beautiful and functional.
We have more ways of lighting up your interior space. Check out our LED strip light guide!


