Enjoy cooking even more by turning your kitchen into a lab with this DIY test tube spice rack!
The kitchen is one of the most important spaces in your home. It’s where the family loves to congregate, cook, laugh, and receive nourishment. While you may already have the latest kitchen appliances, you might want to install this cunning spice rack to add a little more fun to your cooking and dining space.
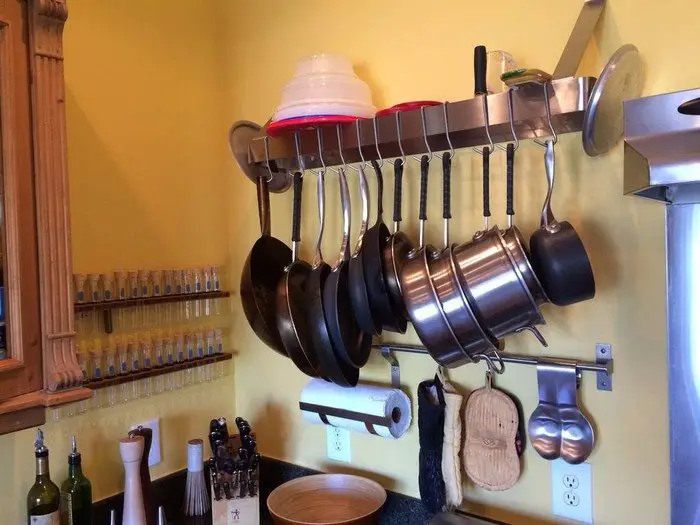
This clever test tube spice rack project is quick and easy that you only need a few hours to make it. You can use any excess timber you might have from previous projects as long as it can hold all the test tubes that you need to put.
Thinking this storage idea is too small for your spices? You can get large test tubes that will fit most of the contents of a 35 spice bottle usually found in grocery stores.
Indeed, this is a beautiful, convenient and space-saving idea perfect for storing your spices!
Is this going to be your next weekend project?
Contents
Making a Test Tube Spice Rack
Materials
- Test Tubes with Cork Stoppers
- Rubber Bands or O-rings
- Piece of wood
- Sandpaper
- Wood stain
- Bonding Tape (for mounting)
Tools
- Drill (with spade drill bit)
- Hammer
- Lighter
- Paintbrush
- Ruler and Pencil Marker
Instructions
Step 1: Prepare the Wood Base
- Measure and Mark: Use the ruler and pencil to measure and mark the locations for the holes where the test tubes will sit. Space the marks evenly to ensure the test tubes have enough room and are visually appealing.
- Sand the Wood: Sand the piece of wood to remove any rough edges and prepare it for staining. This will give it a smooth finish.
Step 2: Drill Holes for the Test Tubes
- Drill the Holes: Attach the spade drill bit to your drill. Align the drill bit with the marks you made on the wood. Drill holes that are slightly larger than the diameter of the test tubes, ensuring they will fit snugly. Drill straight down to maintain consistency in hole depth.
- Smooth the Edges: Use sandpaper to smooth the edges of the drilled holes, removing any splinters or rough areas.
Step 3: Stain the Wood
- Apply Wood Stain: Use a paintbrush to apply wood stain to the entire piece of wood. Follow the grain of the wood for an even application.
- Let it Dry: Allow the stain to dry completely as per the manufacturer’s instructions. This usually takes several hours.
Step 4: Assemble the Spice Rack
- Insert Rubber Bands or O-rings: Place rubber bands or O-rings around each test tube near the top. These will help keep the test tubes from slipping through the holes.
- Position the Test Tubes: Insert the test tubes into the holes, ensuring they rest securely on the rubber bands or O-rings.
Step 5: Mount the Spice Rack
- Apply Bonding Tape: Attach bonding tape to the back of the wood base. Ensure the tape covers enough surface area to support the weight of the spice rack and the filled test tubes.
- Mount the Rack: Choose a suitable location in your kitchen and press the spice rack firmly against the wall or another mounting surface. Hold it in place for the recommended time to ensure a strong bond.
Step 6: Final Touches
- Fill the Test Tubes: Fill each test tube with your chosen spices. Ensure the spices are dry to prevent clumping and spoilage.
- Seal with Cork Stoppers: Insert the cork stoppers into the test tubes to keep the spices fresh and secure.
- Label the Test Tubes: Optionally, label each test tube for easy identification. You can use printed labels, hand-written tags, or chalkboard labels.
Step 7: Enjoy Your New Spice Rack
- Arrange Your Spices: Organize the test tubes by spice type or alphabetically for easy access.
- Use and Maintain: Regularly check the spices for freshness and clean the test tubes as needed. Replace spices every six months to a year to ensure optimal flavor.
Click on any image to start lightbox display. Use your Esc key to close the lightbox. ![]()
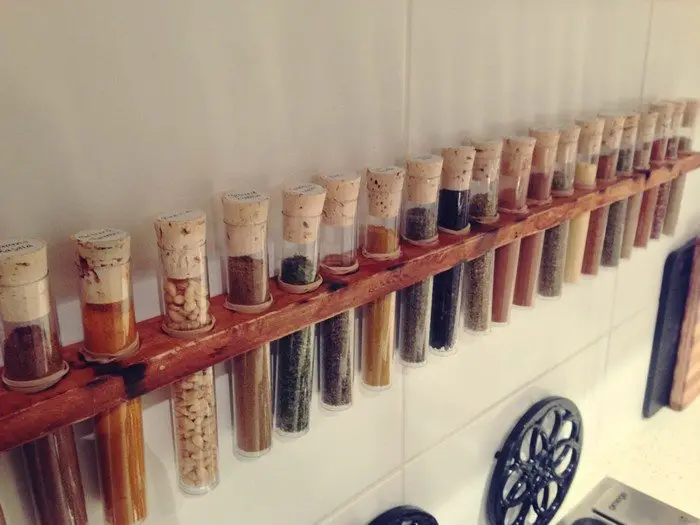
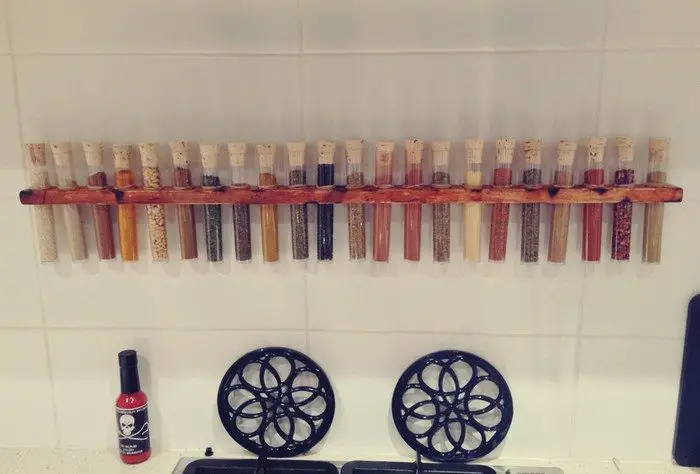
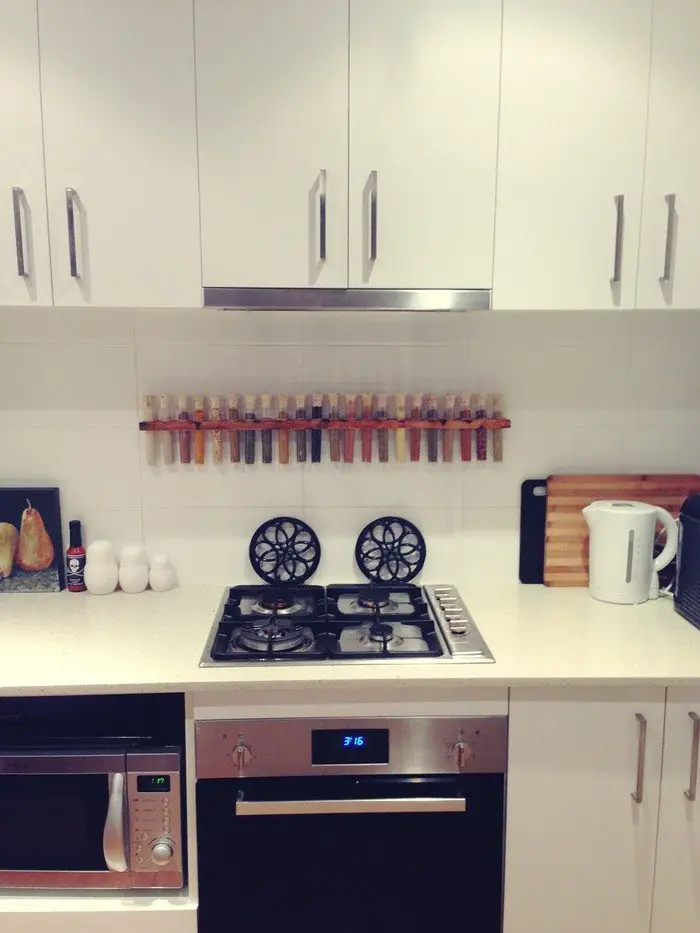
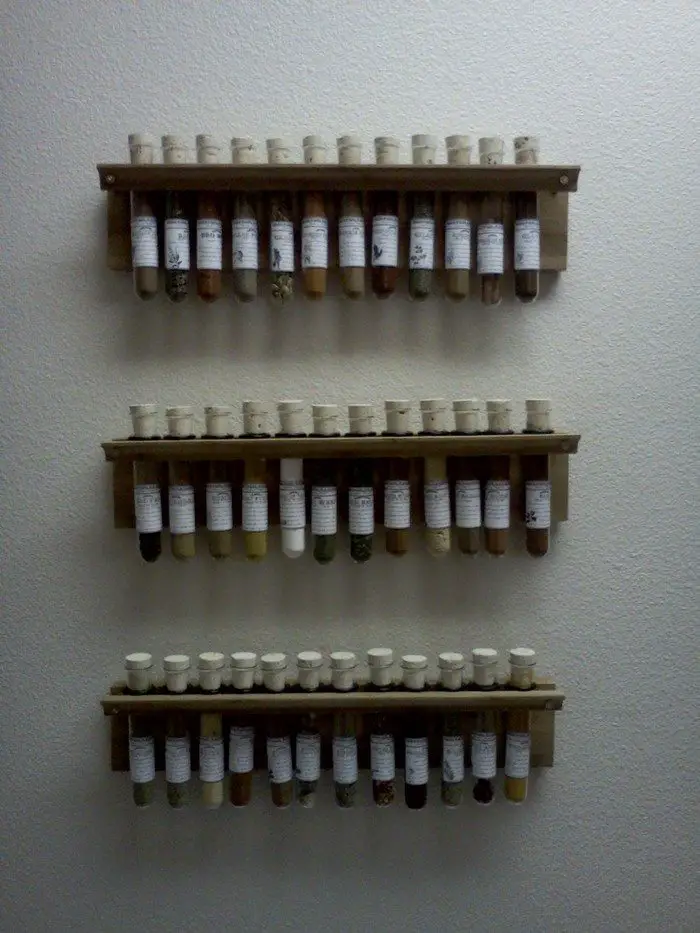


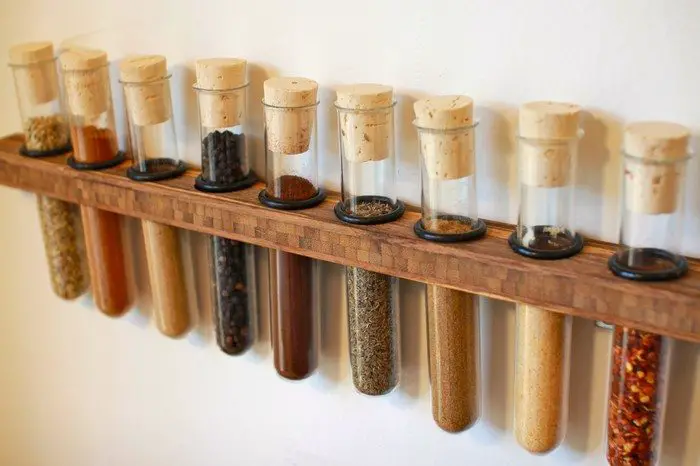
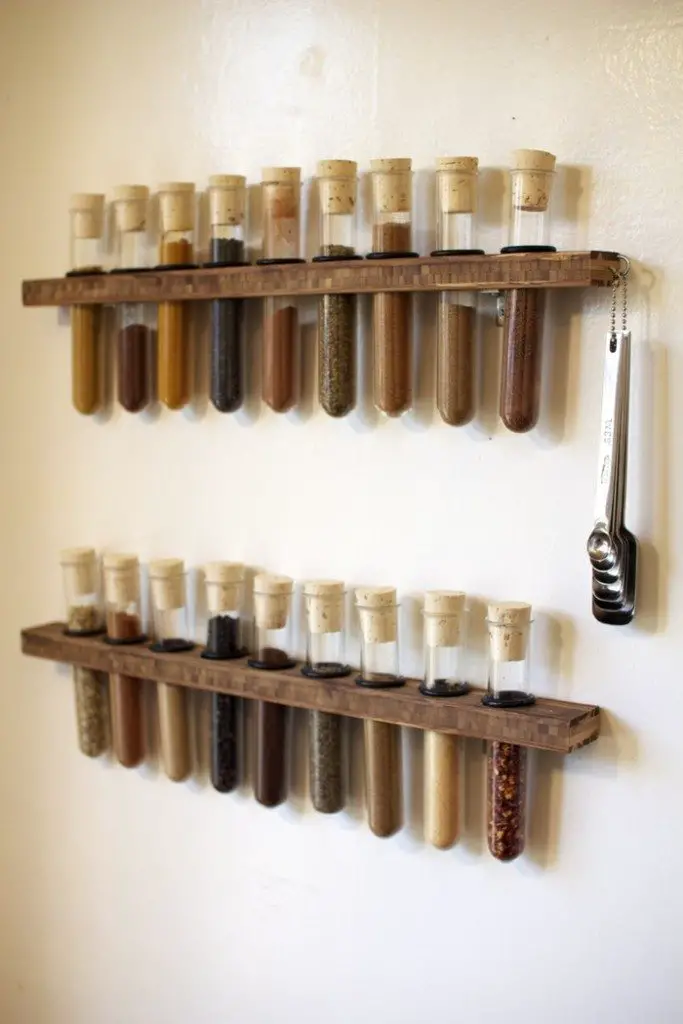
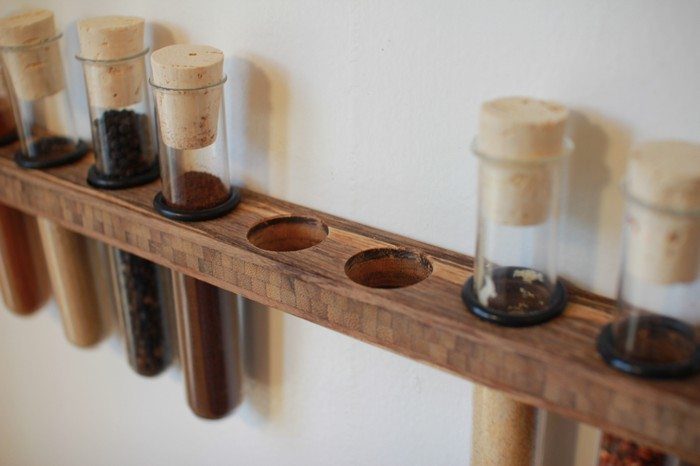
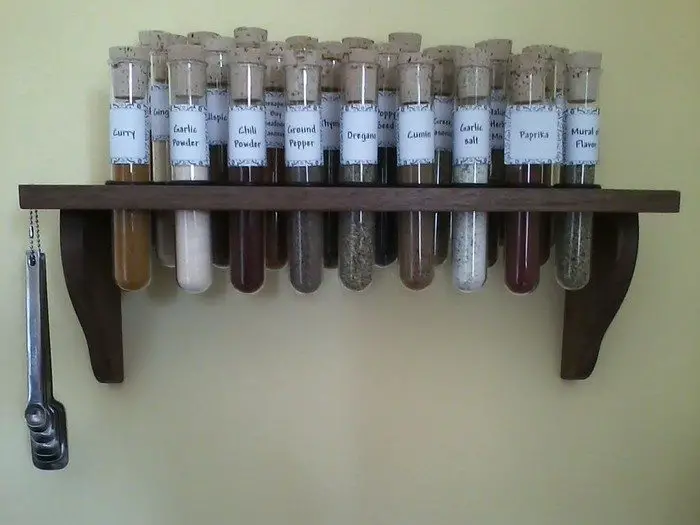
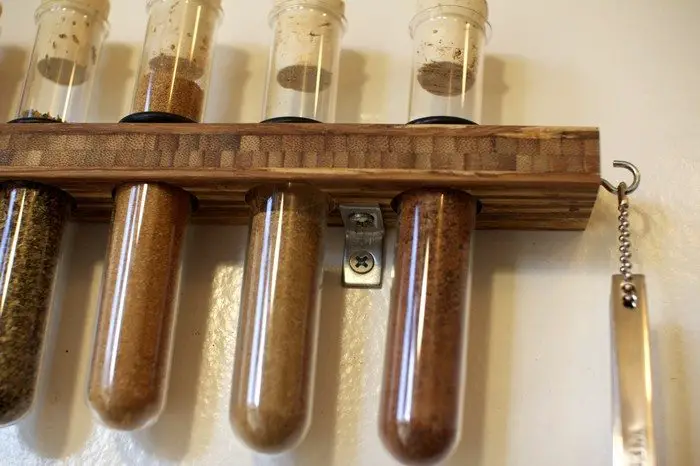
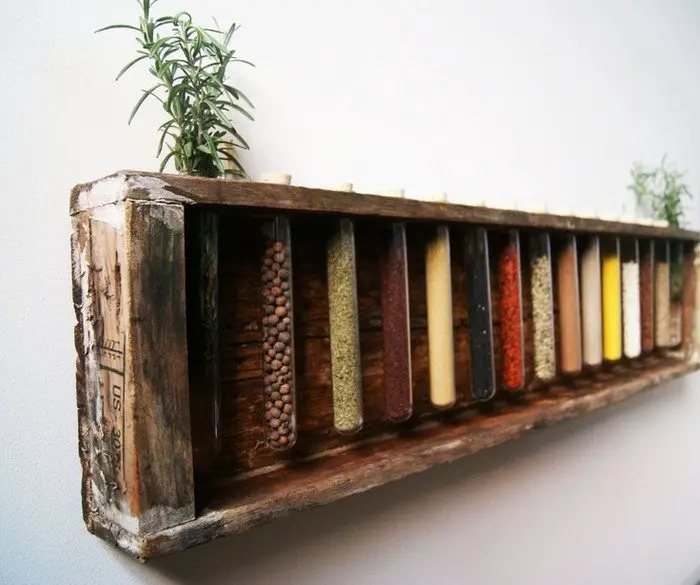
You can get more step-by-step instructions here…
Benefits of a Test Tube Spice Rack
A test tube spice rack is a creative and functional addition to any kitchen. This unique storage solution not only keeps your spices organized but also adds a touch of scientific flair to your cooking space. Here are the key benefits of incorporating a test tube spice rack into your kitchen setup.
Maximizes Kitchen Space
One of the primary benefits of a test tube spice rack is its ability to save space. Traditional spice containers can take up a lot of room in your cabinets or on your countertops. In contrast, test tubes have a slim profile, allowing you to store more spices in a smaller area. This maximizes your kitchen space, making it more organized and efficient.
Enhances Aesthetic Appeal
A test tube spice rack adds a modern and stylish look to your kitchen. The clear glass test tubes showcase the vibrant colors and textures of your spices, creating an eye-catching display. This not only enhances the decor of your kitchen but also makes it easier to identify spices at a glance. The visual appeal of the spice rack can inspire you to experiment with new recipes and cooking techniques.
Easy Customization
Another significant benefit of a test tube spice rack is its versatility and ease of customization. You can choose different sizes of test tubes to accommodate various quantities of spices. Personalizing the rack with labels or decorative elements adds a unique touch. Whether you prefer a rustic wooden base or a sleek modern design, a test tube spice rack can be tailored to fit your kitchen’s aesthetic.
Convenient Access and Organization
With a test tube spice rack, your spices are always within easy reach. The clear tubes allow you to quickly see and select the spice you need without rummaging through a cluttered drawer or cabinet. This convenient access makes cooking more efficient and enjoyable. Additionally, the organized arrangement of spices helps you keep track of what you have, preventing unnecessary duplicates.
Promotes Freshness and Longevity
Test tubes with cork stoppers provide an airtight seal, which helps to maintain the freshness and potency of your spices. Properly sealed test tubes protect your spices from moisture and air exposure, which can cause them to lose flavor over time. This benefit ensures that your spices remain fresh and flavorful for a longer period.
Multi-Purpose Use
While primarily designed for spices, a test tube spice rack can also be used for other small kitchen items. It can store herbs, baking ingredients, or even small candies. This multi-purpose use makes it a versatile addition to your kitchen, providing storage solutions for various small items.
A test tube spice rack offers numerous benefits, from maximizing kitchen space to enhancing aesthetic appeal. Its ease of customization and convenient access to spices make it a practical and stylish choice for any home cook. By promoting freshness and providing multi-purpose use, a test tube spice rack is an excellent addition to your kitchen, making cooking a more enjoyable and efficient experience.
How to Customize Your Test Tube Spice Rack
Customizing your test tube spice rack allows you to create a storage solution that fits your kitchen’s style and meets your specific needs. With a few creative touches, you can transform a simple spice rack into a unique and functional piece of kitchen decor. Here’s how you can customize your test tube spice rack.
Choosing the Right Wood
Selecting the right type of wood for the base of your test tube spice rack can greatly impact its overall appearance.
- Reclaimed Wood: For a rustic, vintage look, use reclaimed wood. Its weathered texture and unique character add a charming touch to your kitchen.
- Hardwood: For a modern and sleek design, choose a smooth piece of hardwood like maple or walnut. Hardwood can be stained or painted to match your kitchen decor.
- Staining or Painting: Apply a wood stain to enhance the natural grain, or paint the wood in a color that complements your kitchen. Use a paintbrush to ensure even coverage and allow the finish to dry completely.
Personalizing with Labels
Adding labels to your test tubes makes it easy to identify spices and adds a personal touch to your spice rack.
- Printed Labels: Use a label maker or print labels from your computer. Choose a font and style that fits your kitchen’s aesthetic.
- Hand-Written Tags: For a more personal feel, write the spice names on small tags using a permanent marker or pen. Attach the tags to the test tubes with string or adhesive.
- Chalkboard Labels: Apply chalkboard paint to small labels and use chalk or a chalk marker to write the spice names. This option allows you to easily change the labels if needed.
Adding Decorative Elements
Incorporate decorative elements to make your test tube spice rack truly unique.
- Decorative Knobs: Attach decorative knobs or handles to the base for an added touch of elegance.
- Engraving: If you have access to engraving tools, consider engraving a design or your initials onto the wood base.
- Additional Supports: Add small hooks or pegs to the base for hanging measuring spoons or small kitchen tools.
Creating a Themed Spice Rack
Theme your spice rack to match your kitchen or a specific culinary style.
- Cuisine-Specific Themes: Group spices by cuisine, such as Italian, Indian, or Mexican. Label each group with a corresponding theme.
- Color Coordination: Organize spices by color to create a visually appealing gradient effect. This can make your spice rack a standout feature in your kitchen.
- Seasonal Themes: Decorate your spice rack with seasonal elements, such as leaves and pumpkins for fall or flowers and herbs for spring.
Customizing your test tube spice rack allows you to tailor it to your kitchen’s design and your personal preferences. From choosing the right wood to adding decorative elements and creating themed arrangements, there are numerous ways to make your spice rack unique. A personalized test tube spice rack not only enhances your kitchen’s aesthetic but also adds a functional and creative touch to your cooking space.
Conclusion
Making a test tube spice rack is a creative and useful endeavor that will give your kitchen flare and utility. Customization made possible by this simple do-it-yourself technique lets you match your kitchen décor. Your new spice rack will let you arrange and aesthetically pleasingly store your herbs.


