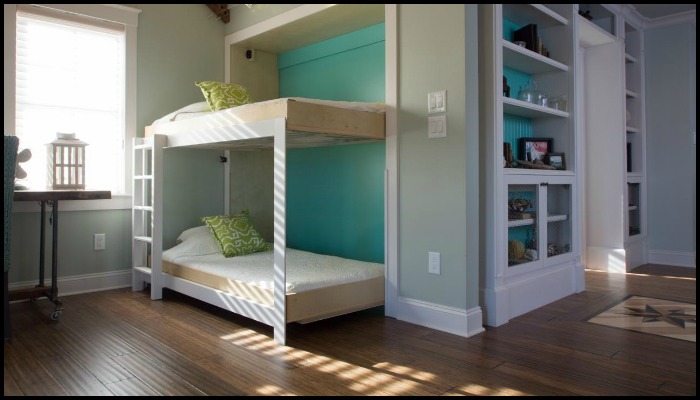
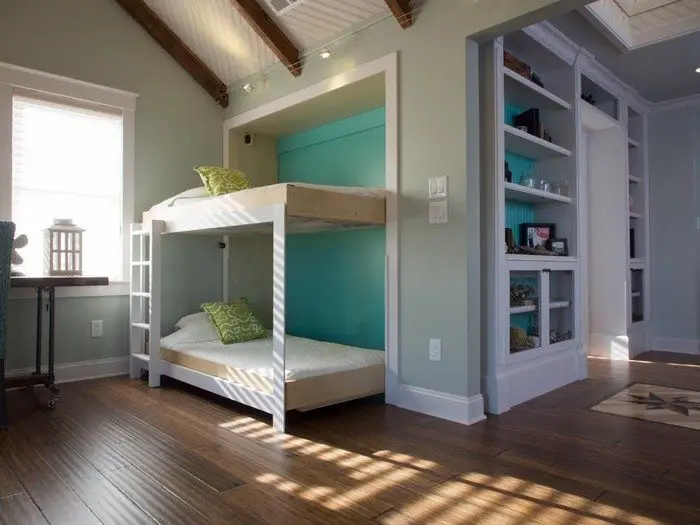
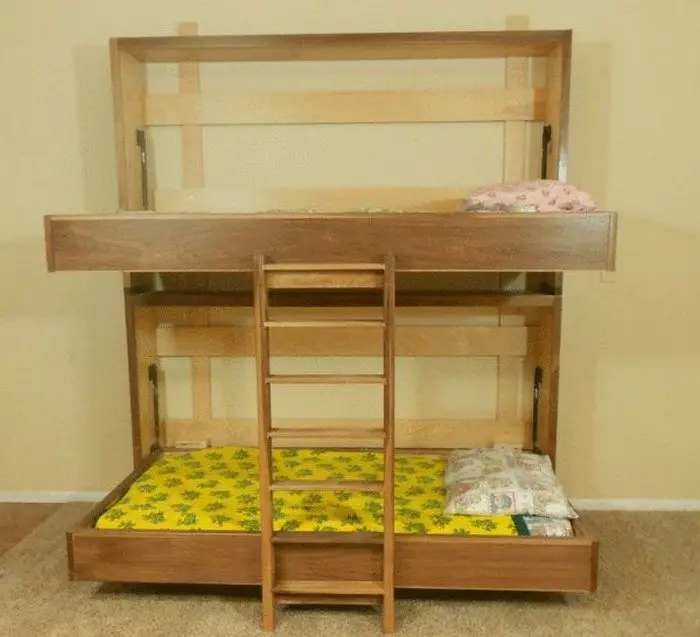
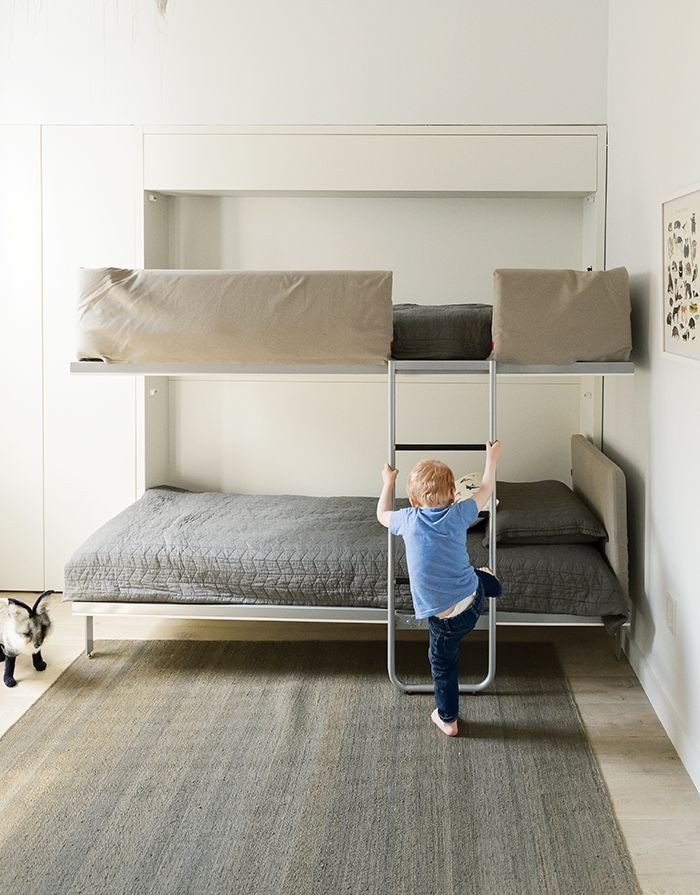
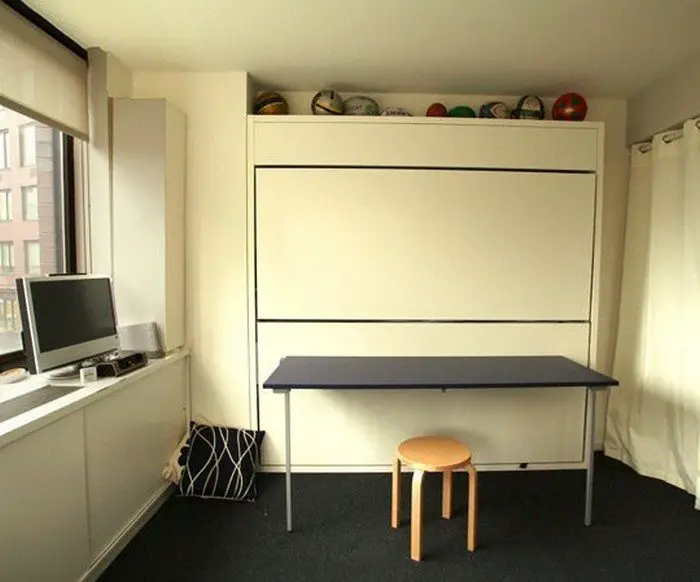
Have you got a spare bedroom at home that you want to keep for guests (or visiting grandkids) but that you’d like to be able to dual purpose as an office or crafts room? If so, a Murphy bunk bed is one of the better bed designs you should consider.
A Murphy bunk bed saves space in two ways. It is vertical, making use of the available space above the first bed. And when the beds are not in use, they can be folded to make space for other activities.

Or do you have kids sharing a small bedroom? This is the right home improvement project for you!
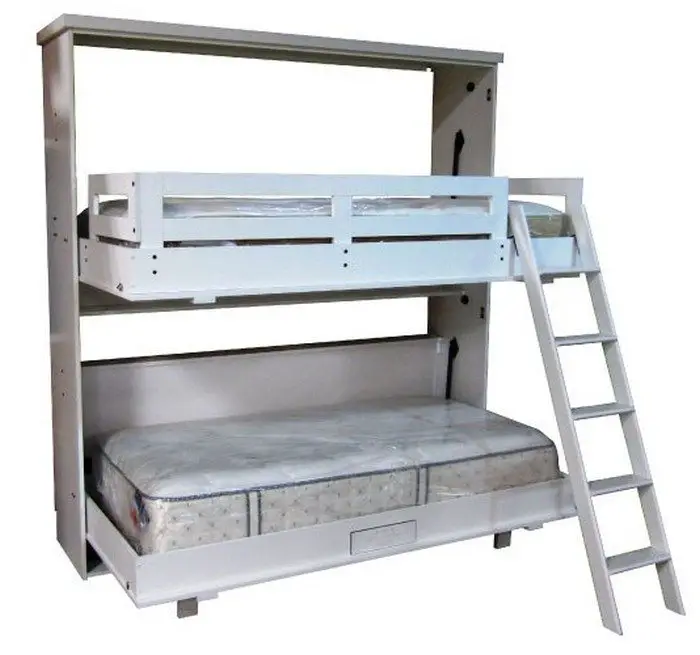
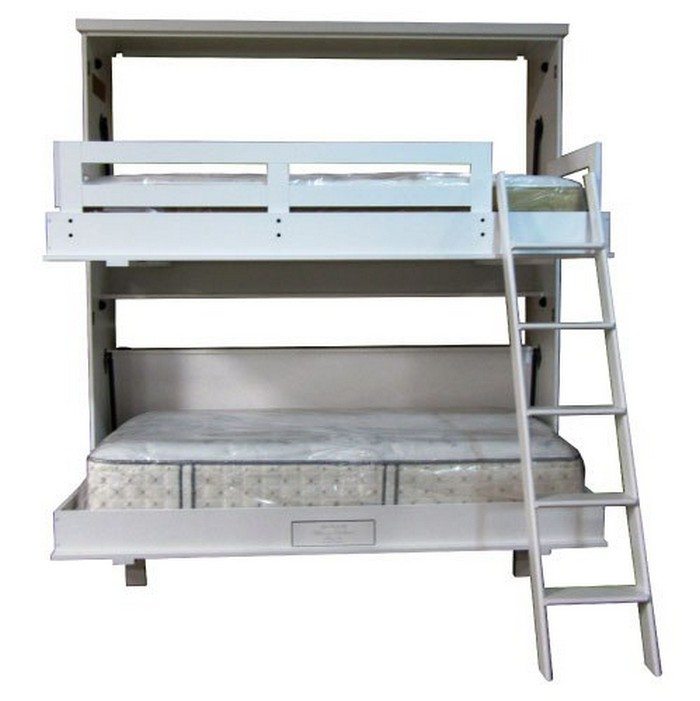
The Murphy bunk bed is designed to maximize space by providing a comfortable bed that can be easily stowed away when not in use. The bunk bed design is perfect for kids, siblings, or even for hosting guests, without sacrificing valuable floor space.
Plus, the sleek and modern design of the Murphy bunk bed will complement any room decor seamlessly. Its aesthetic appeal adds a touch of elegance and sophistication to your living space, making it an eye-catching centrepiece. The bed’s streamlined appearance and clean lines contribute to a visually pleasing environment, creating a harmonious balance between style and functionality.
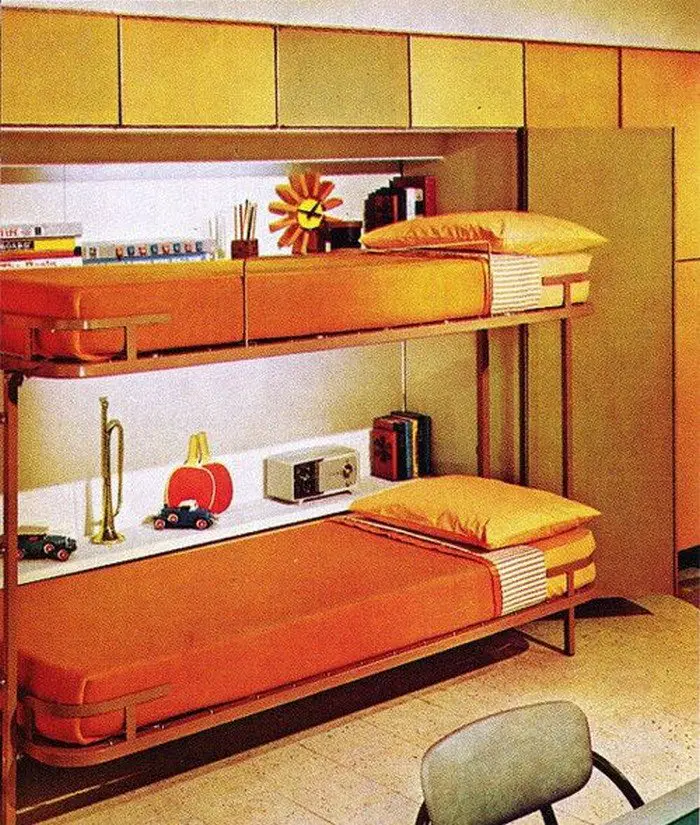
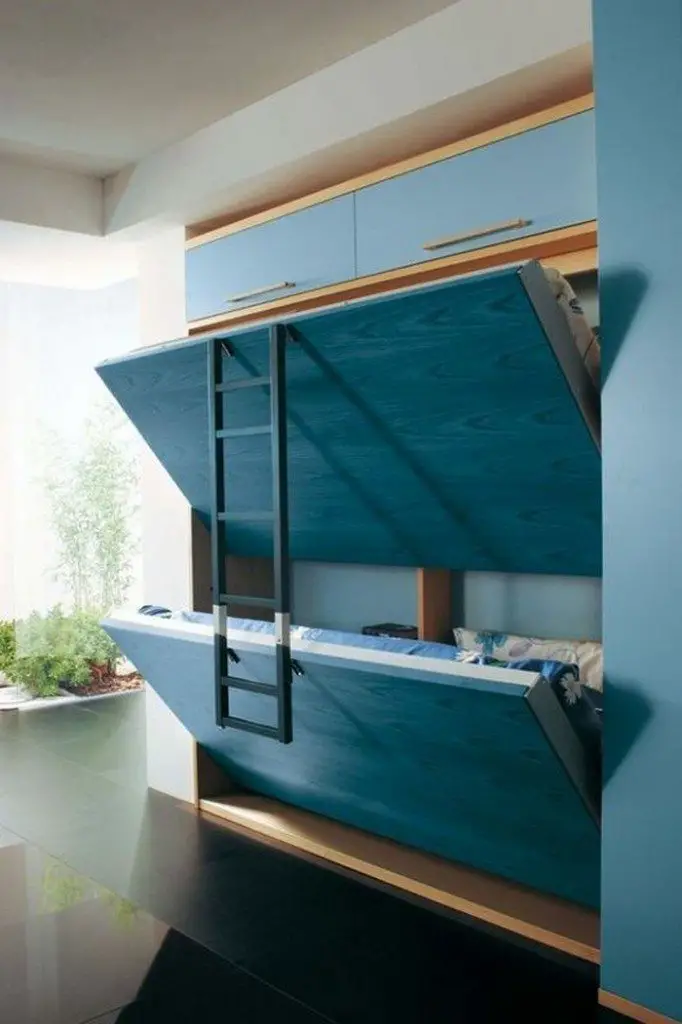
Well, there are a lot of creative possibilities that await as you draw inspiration from the captivating gallery showcasing a wide array of exquisite Murphy bunk beds. Get into the depths of design ingenuity and witness the seamless integration of functionality and style!
To further fuel your imagination and guide you on your DIY journey, click on the tutorial link provided by DIY Network. Walk through each step of the process and find some useful tips and strategies that will make the whole thing a piece of cake.
Is this going to be your next big project?
Contents
- 1 How to Make Your Own Murphy Bunk Bed
- 2 Space Management and Layout Tips
- 3 Murphy Bunk Bed Safety Features
- 4 FAQ for Murphy Bunk Beds
- 4.1 What is a Murphy bunk bed?
- 4.2 How much space do I need for a Murphy bunk bed?
- 4.3 Are Murphy bunk beds safe for children?
- 4.4 Can I install a Murphy bunk bed myself?
- 4.5 How much does a Murphy bunk bed cost?
- 4.6 Can Murphy bunk beds be customized?
- 4.7 What kind of mattress works best with a Murphy bunk bed?
- 4.8 How do I maintain a Murphy bunk bed?
- 4.9 Are there weight limits for Murphy bunk beds?
- 4.10 Can a Murphy bunk bed be moved to another room or house?
- 5 Unlocking the Bunk Bed Magic!
How to Make Your Own Murphy Bunk Bed
In this comprehensive guide, unlock the secrets to crafting your very own Murphy bunk bed. Say goodbye to the limitations of conventional beds and embrace the versatility and practicality of this remarkable DIY project.
By the end of this journey, you’ll possess the knowledge and skills to create a transformative piece of furniture that beautifully integrates comfort and utility.
1. Materials & Tools
- 5 sheets of prefinished birch 3/4″ plywood
- wood shims
- wood glue
- 3/4″ birch edge banding
- 8 bronze flanged-sleeve bearings for 5/8″ shaft diameter, 7/8″ OD, 1/2″ length
- 4 alloy steel shoulder bolts, 5/8″ shoulder dia., 1 1/2″ Shoulder, 1/2″-13 thread
- 4 steel coupling nuts, 1/2″-13 thread size, 1 1/4″ length
- 4 fully threaded hex head cap bolts, 1/2″-13 thread, 1/2″ length
- 16 flat washers, 1/2″ hole size, 1 1/4″ OD
- 1 heavy-duty piano hinge with holes, unfinished, .042″ thick, 1 1/16″ Width, 2′ length
- two-part epoxy
- 24′ of 1×4 poplar
- trim paint
- 60 pocket screws
- 100 15-ga. 1 1/4″ finish nails
- 2-1/2″ bunk mattresses
- (2) gate latches
- hand-held drill and bit driver set
- tape measure
- framing square
- 7 1/4″ circular saw or table saw
- pocket screw jig
- level
- band saw or hacksaw with a metal blade
- household clothes iron
- 15-ga. finish gun
- wrench and socket set
- 7/8″ paddle or Forstner bit
- safety glasses
- dust mask
- work gloves
- earplugs
Click on any image to start lightbox display. Use your Esc key to close the lightbox. ![]()


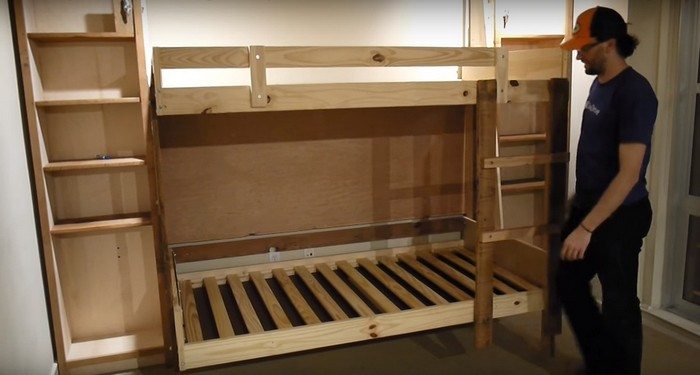

2. Steps
Thanks to DIY Network for this great Murphy bunk bed project. With their detailed guidance, you’ll be equipped with the knowledge and expertise to bring your vision to life. You can get the step-by-step instructions here…
3. Additional Tips
Here are some valuable and additional tips that will guarantee the success of your Murphy bunk bed project and elevate it to new heights of accomplishment:
1. Space Optimization: Prioritize space optimization by selecting the right location for your Murphy bunk bed. Consider factors such as ceiling height, available floor area, and the bed’s orientation to ensure seamless integration into your living space. This thoughtful planning will guarantee maximum functionality and comfort.
2. Safety First: Be sure to use high-quality materials and sturdy hardware to ensure the bed’s stability when in use and secure anchoring to the wall. Sturdy hardware, such as robust hinges and secure latches, will provide the necessary support and reinforcement for safe and dependable construction. Test the bed’s folding mechanism thoroughly to guarantee smooth operation and avoid accidents.
3. Smart Storage Solutions: Enhance the practicality of your Murphy bunk bed by incorporating smart storage solutions. Utilize the space beneath the lower bunk for drawers or shelves to store bedding, toys, or personal belongings. This clever addition will further optimize space and keep your living area neat and organized.
4. Design Improvement: Pay attention to the finer details to elevate the overall aesthetic and functionality of your Murphy bunk bed. Consider incorporating built-in lighting, convenient USB charging ports, or hidden storage compartments to enhance the user experience. These thoughtful additions will set your DIY creation apart and make it truly special.
Unleash the full potential of your room, transforming it into a haven of comfort and style by crafting a secure, practical, and visually stunning Murphy bunk bed. As you venture onto this captivating path of craftsmanship and boundless imagination, brace yourself for the immense satisfaction that accompanies the transformation of your DIY idea into a tangible reality.
Space Management and Layout Tips
Murphy bunk beds are an excellent solution for maximizing space in small areas. They offer the convenience of extra sleeping space without compromising room functionality. Here, we’ll explore how to effectively manage space and layout to integrate a Murphy bunk bed into your home.
Optimal Placement
When selecting the perfect spot for your Murphy bunk bed, prioritize underused areas. Alcoves and corners are ideal as they are often empty and can neatly accommodate a foldable bed. Before finalizing the location, consider the dimensions of the bed when fully extended. Ensure there is ample space for walking and moving around when the bed is down. This not only aids in functionality but also ensures safety, particularly in a child’s bedroom.
Additionally, be mindful of the bed’s proximity to room entrances and high-traffic zones. Placing a Murphy bunk bed near a frequently used doorway can lead to congestion and potential hazards, especially if the bed is down. Instead, aim for a quieter section of the room where the bed can be easily accessed without interrupting the room’s flow. This careful placement helps maintain a clear and safe environment in your home.
Room Layout Considerations
The overall room layout plays a significant role in integrating a Murphy bunk bed seamlessly. The goal is to enhance the room’s functionality without creating a cluttered space. Assess the current furniture arrangement and determine how the bed can best complement it.
For instance, in a bedroom, ensure there’s enough space for essential items like a dresser or a study desk. In shared spaces, like a home office or craft room, the bed should fold away neatly, allowing other activities to continue unhindered.
One practical solution is to use furniture on casters. This flexibility allows you to easily move items like desks, chairs, or storage units, adapting the room for different uses. For example, in a home office, you can roll the desk aside to pull down the bed for guests.
Such adaptable furniture arrangements are particularly beneficial in smaller homes or apartments where every inch of space counts. This approach not only maximizes space usage but also keeps the room functional and aesthetically pleasing, regardless of the Murphy bunk bed’s position.
Maximizing Vertical Space
Murphy bunk beds are a smart choice for capitalizing on vertical space in compact areas. To further enhance this, consider installing shelving or cabinets around the bed’s frame. This not only utilizes the wall space effectively but also provides ample storage for items like books, decor, or bedding. In a child’s room, shelves can hold toys and games, keeping the room organized and tidy.
Cabinetry, in particular, offers a sleek and cohesive look. You can design cabinets that match the bed’s style, creating a unified appearance. These cabinets can be used for storing seasonal clothing, extra linens, or seldom-used items, thus freeing up more space in the room.
By adding these storage solutions, the Murphy bunk bed becomes more than just a sleeping area; it transforms into an integral part of the room’s architecture, contributing to both organization and design.
Balancing Function and Aesthetics
When incorporating a Murphy bunk bed into your space, it’s essential to strike a balance between functionality and aesthetics. The bed should not only serve its purpose in saving space but also enhance the room’s overall look.
Select a design that aligns with the room’s existing decor. For instance, a bed with a wooden finish might complement a room with a rustic or traditional theme, while a sleek, painted bed would suit a modern, minimalist room.
Customization plays a key role here. Options like different finishes, hardware styles, and even the material of the bed can significantly impact how it fits into your room’s aesthetic. For a personalized touch, consider adding unique handles or knobs that match other furniture in the room. You can also choose a bed with decorative elements that reflect your personal style or the room’s theme.
Incorporating a Murphy bunk bed with thoughtful space management and layout planning can transform a cramped space into a versatile and stylish area. This approach ensures comfort, functionality, and a pleasing aesthetic in your home.
Murphy Bunk Bed Safety Features
Murphy bunk beds are a fantastic space-saving solution, but safety is paramount, especially when children are involved. Ensuring the bed is safe for use involves several key considerations. This section covers essential safety features for Murphy bunk beds to provide peace of mind.
Secure Wall Attachments
The most critical aspect of Murphy bunk bed safety is secure wall attachment. Ensure the bed is firmly anchored to wall studs, not just the drywall. This prevents the bed from tipping over when in use or being lowered. It’s advisable to use high-quality mounting hardware and, if possible, professional installation to guarantee the bed is safely attached.
Reliable Lock Mechanisms
A robust lock mechanism is essential to prevent the bed from accidentally unfolding. This is particularly important in households with children. Look for beds with sturdy locks that securely hold the bed in the upright position when not in use. Regularly inspect these locks for signs of wear or damage.
Sturdy Frame Construction
The bed’s frame should be made of durable materials capable of supporting the weight of mattresses and occupants. Check the bed’s maximum weight capacity and adhere to it strictly. Inspect the frame regularly for any signs of weakness, cracks, or wear that could compromise its integrity.
Safe Folding Mechanism
The folding mechanism should operate smoothly and safely. It should be easy enough to handle but not so loose that it moves unexpectedly. If the mechanism is stiff or difficult to operate, it could pose a risk during opening or closing. Regular maintenance, such as lubrication, can ensure smooth operation.
Guard Rails and Ladders
For bunk beds, guard rails are a must to prevent falls. Ensure the rails are of adequate height and securely attached. If the bed is accessed by a ladder, make sure the ladder is stable and securely attached to the bed. Regularly check these components for sturdiness and stability.
Regular Maintenance Checks
Routine maintenance checks are crucial for long-term safety. Regularly inspect all parts of the bed, including hinges, screws, and supports. Tighten any loose fittings and replace any worn or damaged parts immediately. Regular maintenance ensures the bed remains safe and functional over time.
Childproofing Measures
When Murphy bunk beds are in households with children, additional childproofing measures are crucial. Install safety locks that prevent children from opening the bed unsupervised. Cover sharp edges or corners with padding to minimize injury risks. It’s also important to keep the area around the bed free of small objects or toys that children could trip over.
Weight Distribution and Support
Proper weight distribution is key to the safe use of Murphy bunk beds. Ensure that the mattress and bedding used do not exceed the recommended weight limits. Balanced weight distribution prevents undue strain on the bed’s mechanism and structure, thereby enhancing safety.
Emergency Release Mechanism
Incorporate an emergency release mechanism, especially for the upper bunk. This feature is essential in the unlikely event that someone is trapped under the bed. The mechanism should be easily accessible but not so simple that it can be accidentally triggered, especially by children.
Ventilation Considerations
Good ventilation is often overlooked in Murphy bunk bed designs. Ensure that when the bed is in the down position, there is adequate air circulation. This is particularly important for the upper bunk, where airflow can be more restricted.
Fire Safety Compliance
Choose materials that are fire-resistant or treated with fire-retardant chemicals. This includes the bed frame, mattress, and any additional textiles like curtains or bedding. Also, keep the area around the bed clear to ensure easy egress in case of an emergency.
Age and Ability Appropriateness
Consider the age and physical abilities of the bed’s users. For younger children or those with limited mobility, lower bunks are safer. The use of upper bunks should be restricted to older children and adults who can safely navigate ladders.
By prioritizing these safety features, Murphy bunk bed owners can ensure a secure and comfortable sleeping environment. Safety should always be the top consideration, especially in designs that are as innovative as Murphy bunk beds.
FAQ for Murphy Bunk Beds
What is a Murphy bunk bed?
A Murphy bunk bed is a space-saving bed that can be folded up against the wall when not in use. It features two beds stacked one over the other, making it an ideal choice for small spaces or multi-functional rooms.
How much space do I need for a Murphy bunk bed?
You’ll need enough wall space to accommodate the width of the bed, plus additional space in the room to lower the bed comfortably. Check specific model dimensions for precise requirements.
Are Murphy bunk beds safe for children?
Yes, when properly installed and used with safety features like guardrails and sturdy ladders, Murphy bunk beds are safe for children. Regular safety checks and adherence to weight limits are important.
Can I install a Murphy bunk bed myself?
It’s possible to install a Murphy bunk bed yourself if you have good DIY skills. However, due to the complexity of the installation and safety concerns, professional installation is often recommended.
How much does a Murphy bunk bed cost?
Prices vary based on design, materials, and features. Generally, Murphy bunk beds can range from a few hundred to several thousand dollars.
Can Murphy bunk beds be customized?
Yes, many Murphy bunk beds come with options for customization in terms of color, finish, and additional features like storage or lighting.
What kind of mattress works best with a Murphy bunk bed?
A lightweight, medium-firm mattress is typically recommended. Make sure to check the maximum thickness and weight your bed model can accommodate.
How do I maintain a Murphy bunk bed?
Regular maintenance includes checking and tightening hardware, inspecting locking mechanisms and safety features, and ensuring the bed operates smoothly.
Are there weight limits for Murphy bunk beds?
Yes, each Murphy bunk bed model will have specific weight limits. It’s important to adhere to these limits for the safety and longevity of the bed.
Can a Murphy bunk bed be moved to another room or house?
While it’s possible to move a Murphy bunk bed, it requires careful disassembly and reinstallation. Professional assistance is recommended for moving to ensure the bed remains safe and functional.
Unlocking the Bunk Bed Magic!
Discover the key elements to create a space-saving and chic addition to your home. With the three essential secrets, you can now embark on a journey of creativity and craftsmanship, crafting a stylish and functional Murphy bunk bed that complements your living space.
Make sure to use high-quality materials, optimize the bed design with smart considerations, and pay attention to the finer details for an elevated and visually appealing result.
Unlock the full potential of your DIY dream as you build a trendy and practical Murphy bunk bed that combines fashion with functionality, bringing a touch of elegance to your home.
Are you ready for the bunk bed magic?


