Not satisfied with how your current laundry area looks? If you say yes, then this simple idea might be the solution you need which makes any laundry area more organized!
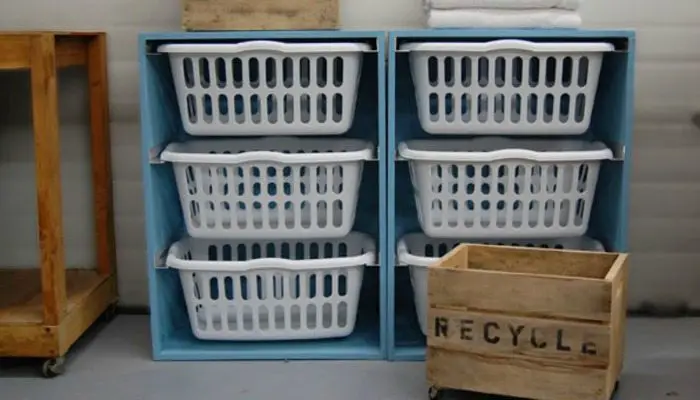
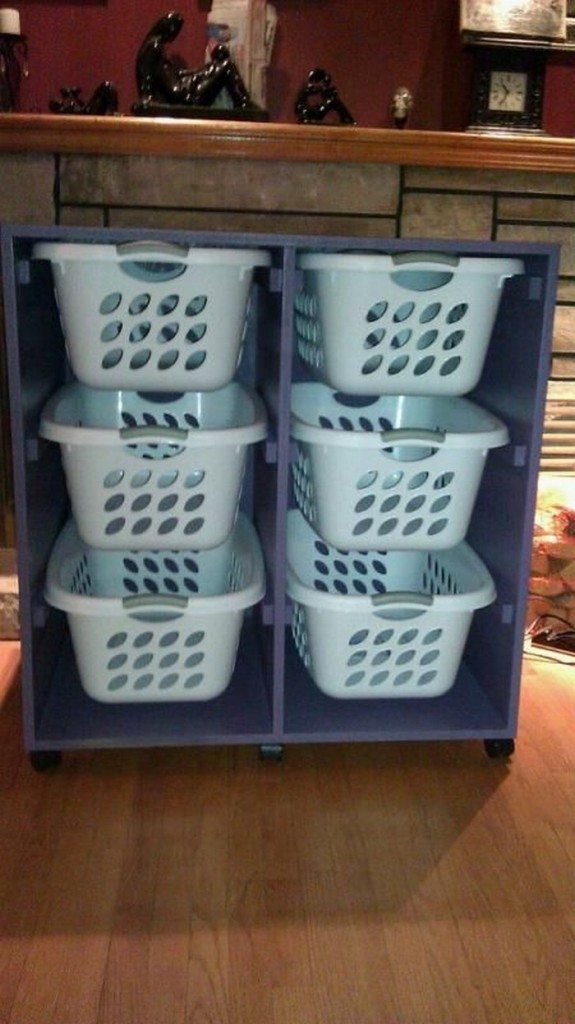
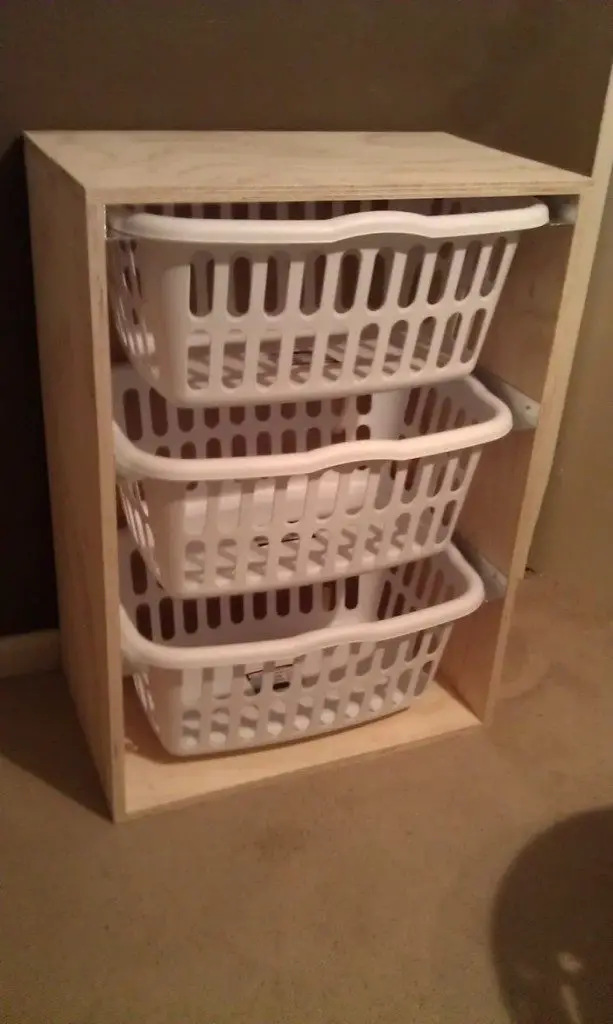
This DIY laundry basket dresser will keep everybody’s dirty clothes hidden, and already grouped so they are easier to deal with on laundry days.
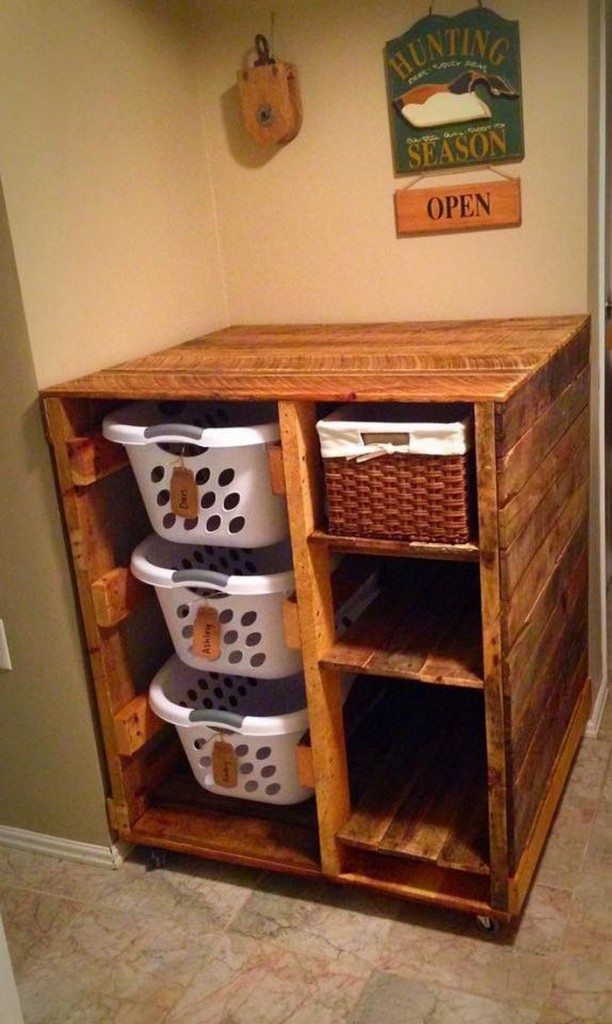
It’s the perfect project to use up that pallet you found or you can make one out of the timber offcuts you might have from previous projects since it’s really just a simple building project.
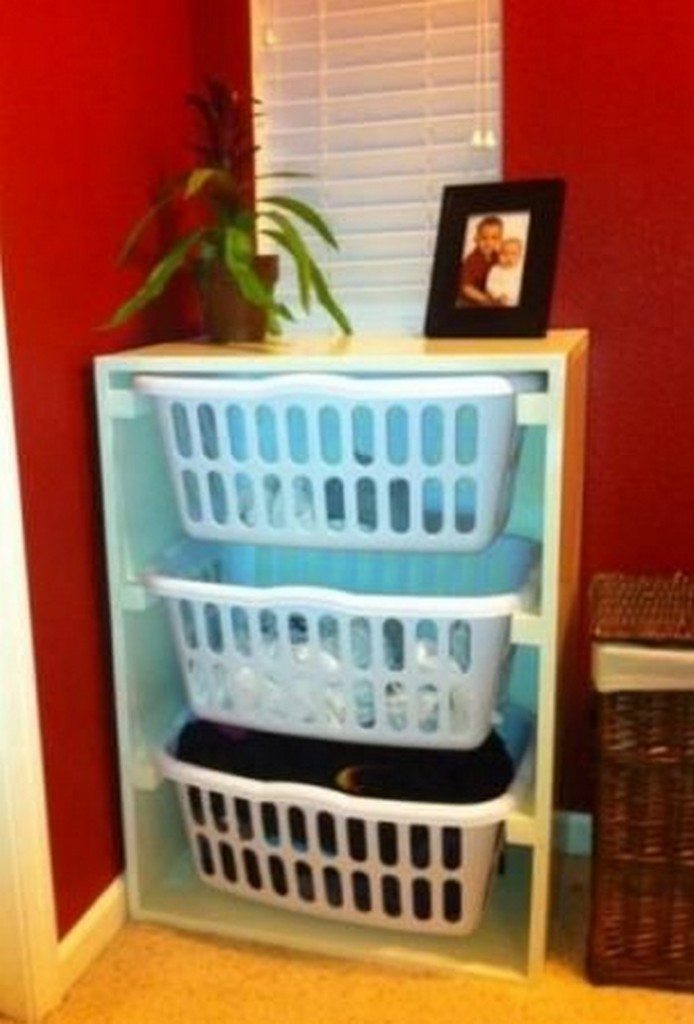
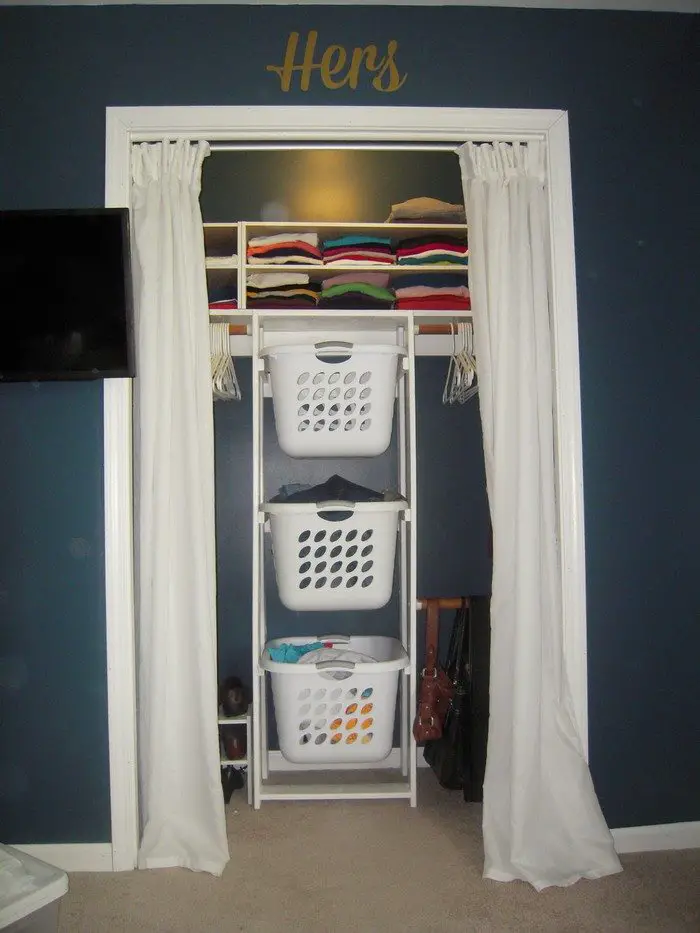
This laundry basket dresser can be placed anywhere, no matter where you are used to placing your dirty (or newly cleaned) clothes. You can put it in the laundry room (obviously), the bathroom, the bedroom, or even have it retrofitted in your closet!
Whichever way you categorize the baskets and wherever you plan to put the dresser, this simple DIY storage idea will definitely keep all your laundry more organized! It will make doing the laundry easier, too!
Do you know anyone who also needs this idea?
Contents
Crafting a Laundry Basket Dresser
Materials
- 3/4″ Plywood
- 1/4″ Plywood
- 1 1/2″ x 1 1/2″ Metal Angle
- 2″ Wood Screws or 1 1/4″ Pocket Hole Screws
- 3/4″ Wood Screws
- 1 1/4″ Wood Screws
- Wood Glue
- Wood Filler
- Finishing Supplies
Tools
- Measuring Tape
- Square
- Pencil
- Safety Glasses
- Hearing Protection
- Drill
- Circular Saw
- Random Orbital Sander
- Level
- Countersink Drill Bit
Instructions
Step 1: Design and Planning
- Measure the space where you will place the dresser to determine the size.
- Sketch the dresser design, including dimensions for each part (sides, top, shelves, and dividers).
Step 2: Cutting the Plywood
- Put on safety glasses and hearing protection.
- Use the circular saw to cut the 3/4″ plywood into pieces for the top, sides, and shelves according to your design measurements.
- Cut the 1/4″ plywood for the back panel of the dresser.
Step 3: Assembling the Frame
- Lay out the side panels and shelves to form the basic frame.
- Apply wood glue on the edges where the shelves meet the side panels.
- Secure the shelves to the side panels using 1 1/4″ wood screws. Ensure everything is square before tightening the screws.
Step 4: Adding the Back Panel
- Attach the 1/4″ plywood back panel using 3/4″ wood screws. This will add stability to the structure.
- Ensure the back is flush with the frame for a neat finish.
Step 5: Installing Metal Angles
- Use metal angles to reinforce the corners and provide additional support. Position them where the shelves meet the side panels.
- Screw the metal angles into place using 1 1/2″ wood screws.
Step 6: Sanding
- Sand all surfaces, edges, and corners using the random orbital sander. Start with a coarse grit and progress to a finer grit for a smooth finish.
Step 7: Applying Finish
- Fill any gaps or screw holes with wood filler. Let it dry according to the manufacturer’s instructions and then sand smooth.
- Apply your chosen finish (paint, stain, or varnish). Allow it to dry completely.
Step 8: Final Assembly
- If desired, add additional decorative handles or labels on the front of each shelf for the laundry baskets.
- Place laundry baskets in the designated slots.
Step 9: Cleanup and Setup
- Clean up your work area and remove any excess materials.
- Place the laundry basket dresser in its designated spot and organize your laundry items.
Click on any image to start lightbox display. Use your Esc key to close the lightbox. ![]()

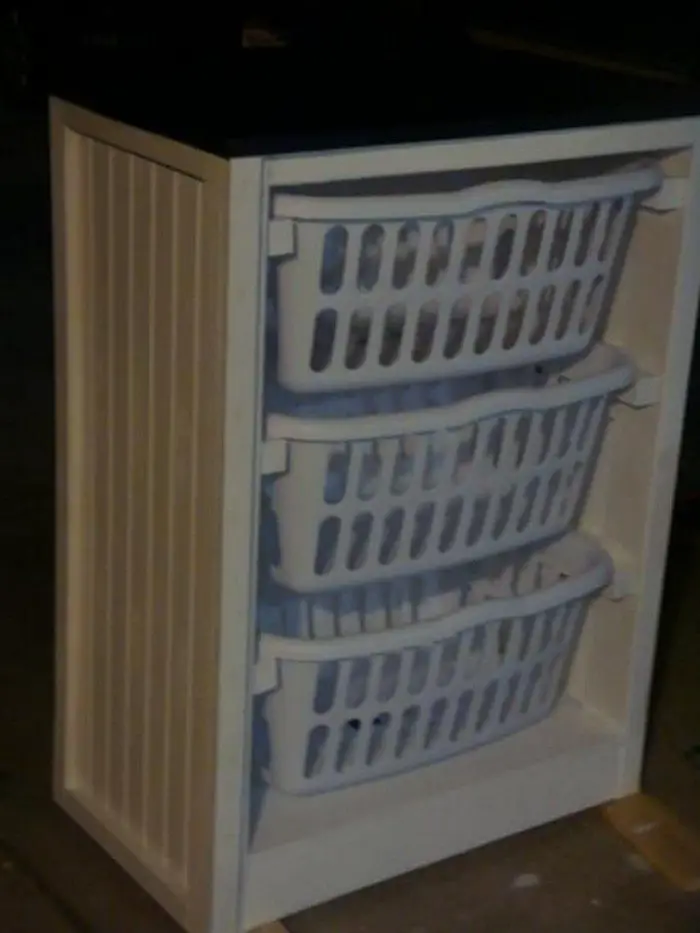


You can get more step-by-step instructions from Ana White over here…
Advanced Organizer Features
Enhance the functionality of your laundry basket dresser with these advanced organizer features. By integrating these additional elements, you can streamline your laundry process, making it more efficient and tailored to your specific needs.
Here’s how you can transform a basic laundry basket dresser into a highly functional storage solution.
Lid Installation for Dust-Free Storage
Adding lids to your laundry basket dresser compartments can keep your laundry dust-free and out of sight. This feature is particularly useful in areas with high dust or if the dresser is in a multipurpose space. Measure the top of each basket compartment, cut a piece of plywood or durable fabric to size, and attach using hinges for easy access.
Divider Systems for Sorting
Introduce dividers within the laundry basket dresser to sort clothes by color, fabric type, or washing instructions right when they’re tossed in. This saves time on laundry day and helps maintain fabric care. Use thin plywood or sturdy plastic sheets as dividers, custom-cut to fit inside each basket space.
Pull-Out Baskets for Easy Access
Convert the standard spaces in your laundry basket dresser into pull-out baskets. This upgrade makes it easier to access the contents, especially if the dresser is deep or low to the ground. Install drawer slides on each side of the basket compartments, and attach basket handles for convenient pulling.
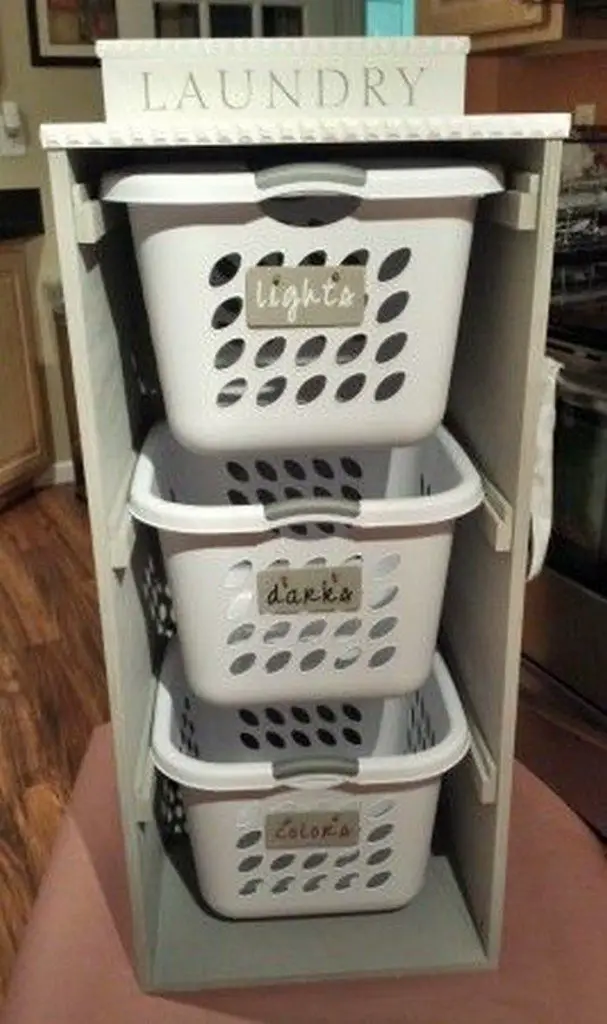
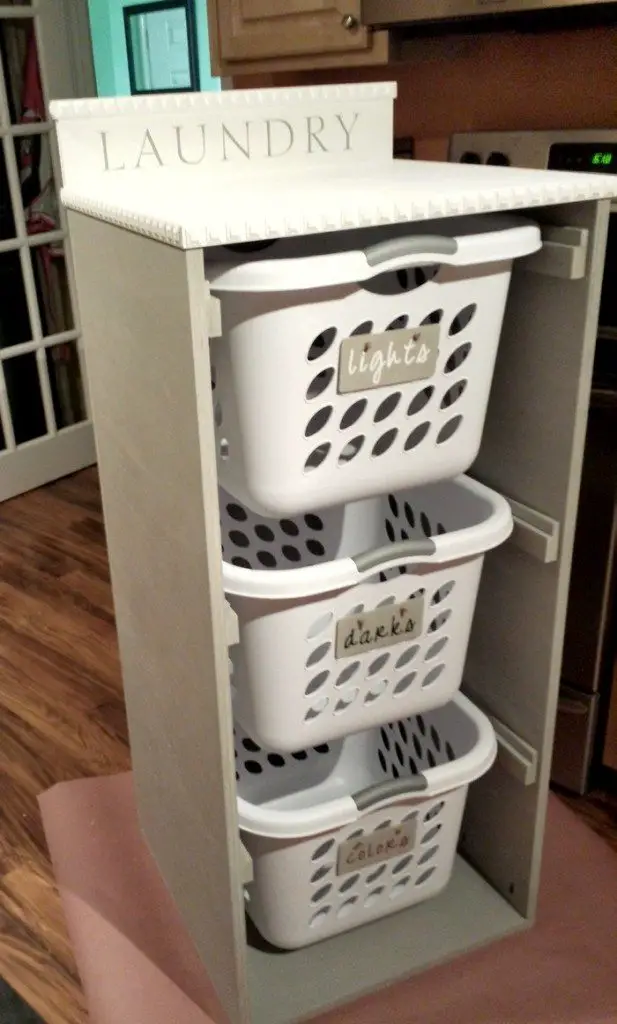
Labeling for Identification
Label each section of your laundry basket dresser to guide family members where to place their laundry, reducing mix-ups and sorting time. Use adhesive labels or paint stencils directly on the dresser or baskets. This small addition can significantly streamline your laundry process.
Moisture-Resistant Coating
Given that the laundry basket dresser might be exposed to damp clothing or a humid environment, applying a moisture-resistant finish is crucial. This will protect the dresser from water damage and mold growth. Opt for a clear polyurethane coating that doesn’t alter the look of your dresser but provides lasting protection.
Adjustable Shelf Heights
Incorporate adjustable shelves within the laundry basket dresser to accommodate varying sizes of laundry baskets or items that may need to be stored. Utilizing a pegboard system or adjustable brackets can allow you to reconfigure the shelf heights as needed, making your storage solution more versatile and adaptable to changing needs.
Built-in Ironing Board
Integrate a pull-out ironing board into the design of your laundry basket dresser. This hidden feature can be neatly tucked away when not in use and easily extended for quick ironing tasks. It saves space and adds convenience, especially in smaller laundry rooms where every inch of space is valuable.
Ventilation Enhancements
Add ventilation to the laundry basket dresser to prevent moisture buildup and keep the contents aired out, particularly important for damp clothes waiting to be washed. This can be achieved by incorporating slatted doors or drill holes into the back panel of the dresser, promoting air circulation and reducing mildew and odor.
Lighting Features
Install lighting inside or under the laundry basket dresser to improve visibility, especially useful in rooms with poor lighting conditions. LED strip lights or small puck lights can be mounted under shelves or inside compartments, making it easier to find items in deep baskets or during evening laundry sessions.
Security Locks
For households with small children or when storing items like cleaning supplies, adding locks to the laundry basket dresser can provide security and safety. Simple cam locks or child-proof locking mechanisms can prevent unwanted access, keeping both the contents and your family safe.
Modular Design
Create a modular laundry basket dresser that can be easily expanded or reconfigured. Design each section to connect with others seamlessly, allowing for additions like extra baskets, shelves, or even a collapsible sorting table as your needs or space changes.
Incorporating these advanced organizer features into your laundry basket dresser will enhance its functionality and make laundry day more efficient and organized. Each feature can be customized to fit your home’s specific needs and style, making your laundry basket dresser a truly tailored solution.
Integration with Laundry Room Design
Integrating a laundry basket dresser into your laundry room design not only optimizes space but also enhances the overall functionality and aesthetics of the area. Here’s how you can seamlessly incorporate this versatile piece of furniture into your laundry room setup, ensuring it complements the existing decor while boosting organization.
Align with the Room’s Color Scheme
Choose colors for your laundry basket dresser that align with the existing color palette of your laundry room. If your room features light, neutral tones, opt for a similarly light-stained wood or painted white dresser. For bolder room colors, consider a laundry basket dresser with a complementary or contrasting color to create a cohesive or accentuated look.
Optimize Space Layout
Position your laundry basket dresser strategically to make the best use of available space. If your laundry room is on the smaller side, place the dresser under a counter or beside the washing machine to save space. For larger rooms, the dresser can serve as a room divider or a central feature, accessible from multiple sides.
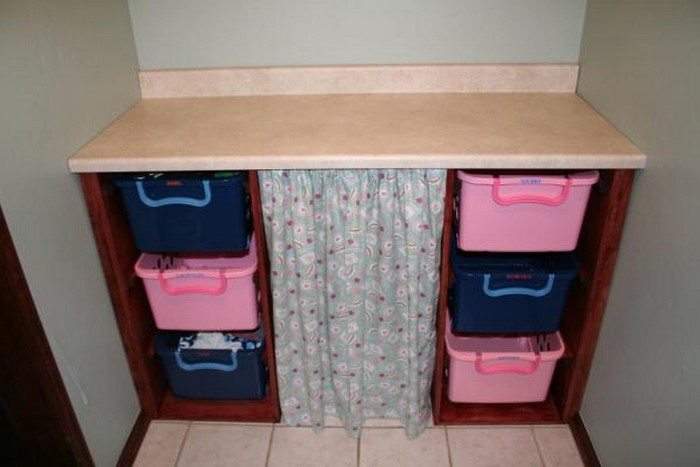
Enhance Functionality with Additional Surfaces
Add a countertop on top of your laundry basket dresser to provide a convenient surface for folding clothes or handling delicate laundry tasks. This can be especially useful in compact spaces where every bit of functional surface counts. Choose a durable material like laminate or sealed wood that can withstand moisture and wear.
Use as a Visual Focal Point
Let the laundry basket dresser be more than just functional—make it a visual focal point of your laundry room. Decorate the top with practical items that are also aesthetically pleasing, such as vintage laundry tins, potted plants, or stylish laundry supplies. This not only beautifies the space but also makes the essentials handy.
Coordinate with Other Storage Solutions
Ensure that the design and function of your laundry basket dresser coordinate with other storage solutions in the room. If you use cabinets, shelves, or bins, select materials and designs for the dresser that complement these elements. Consistency in design creates a harmonious look and can make the space feel larger and more organized.
You can create a functional, stylish, and cohesive space by thoughtfully integrating your laundry basket dresser into the laundry room’s design. This integration not only enhances the usability of your laundry area but also contributes to a more pleasant and efficient household chore experience.
Conclusion
One doable project that improves efficiency and organisation in your house is building a laundry basket dresser. Its sophisticated features and configurable settings allow it to be customised to meet the particular requirements of each washing regimen. This do-it-yourself addition gives your laundry room some flair and streamlines laundry day.


