
Whether you are just learning the basics of simple maintenance or are taking on a big project for the house, good cordless tools are essential.
Cordless tools used to be heavy, cumbersome behemoths with fat nickel-cadmium batteries. But tool companies have slimmed their products down.
These days, cordless tools are compact and powerful. New innovations are allowing some larger cordless tools to become nearly as powerful as their plugged-in counterparts. Some cordless tools now come in kits of several tools with one or two batteries for a relatively low price!
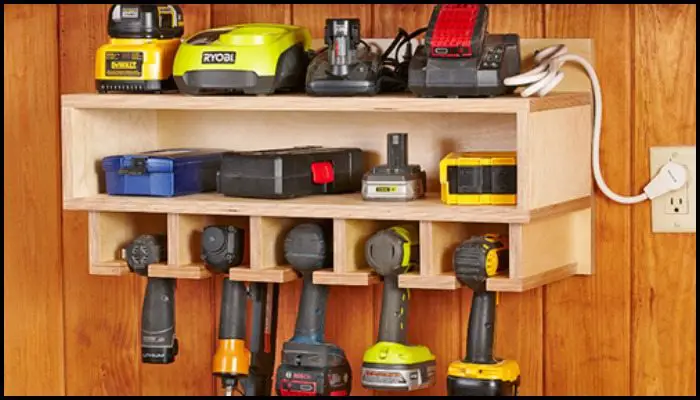
Now, this is a great DIY project for storing your cordless tools together with all their accessories!
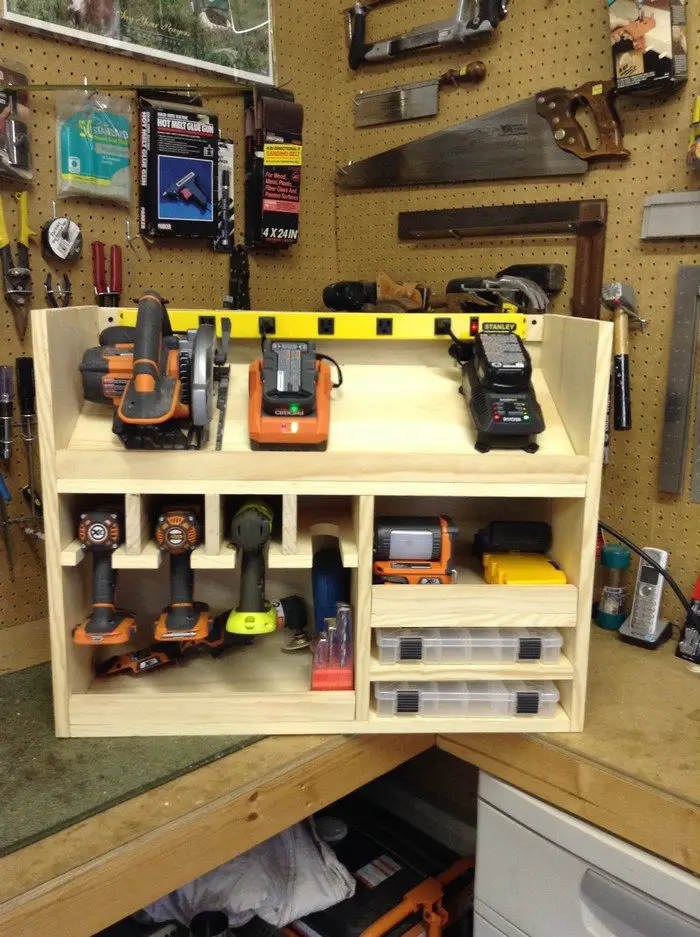
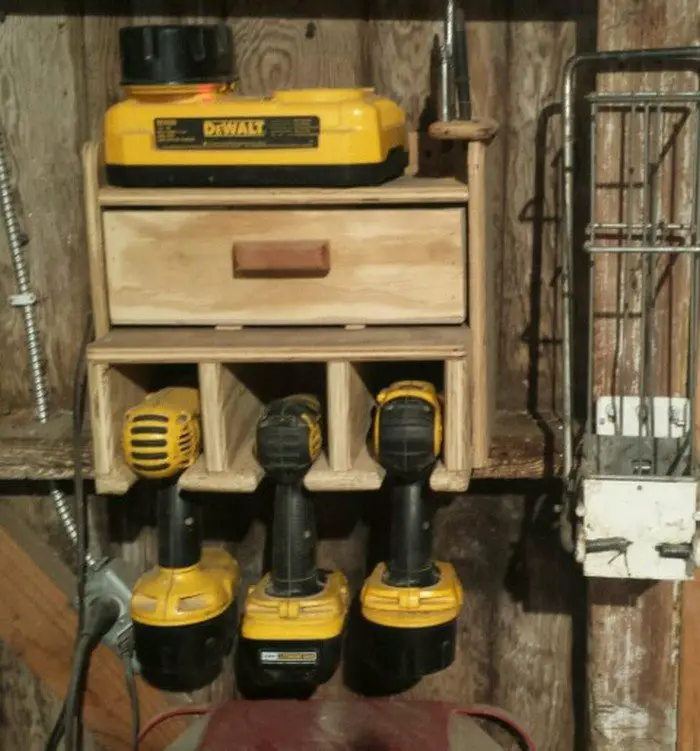
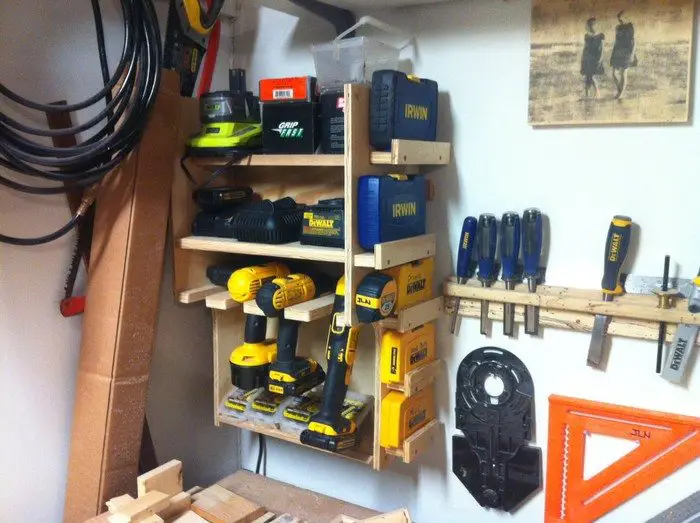
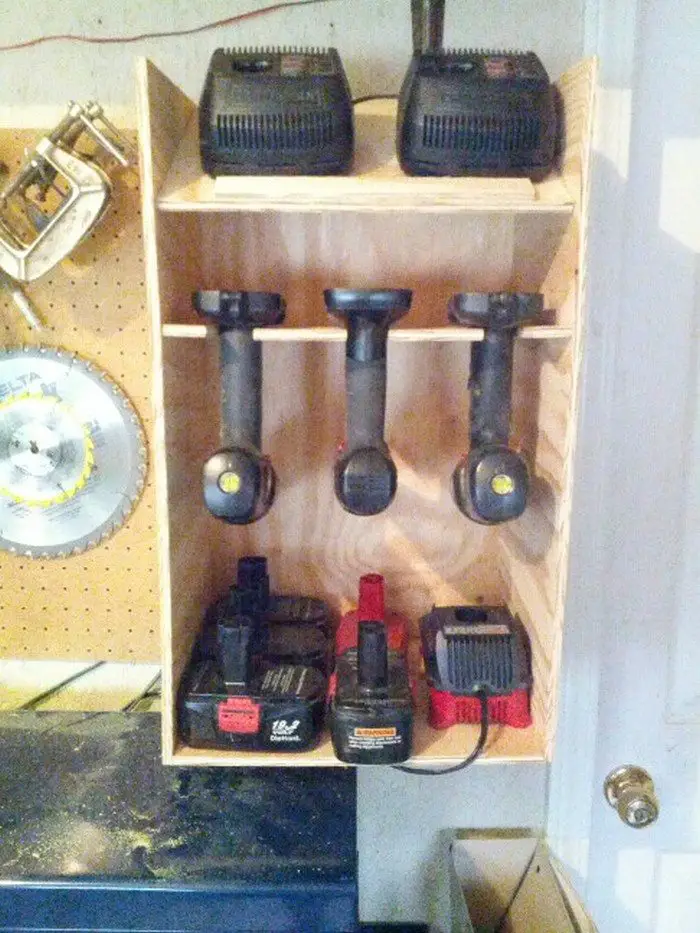
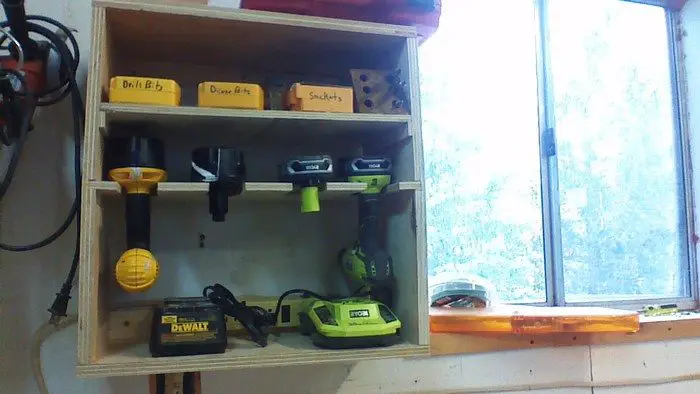
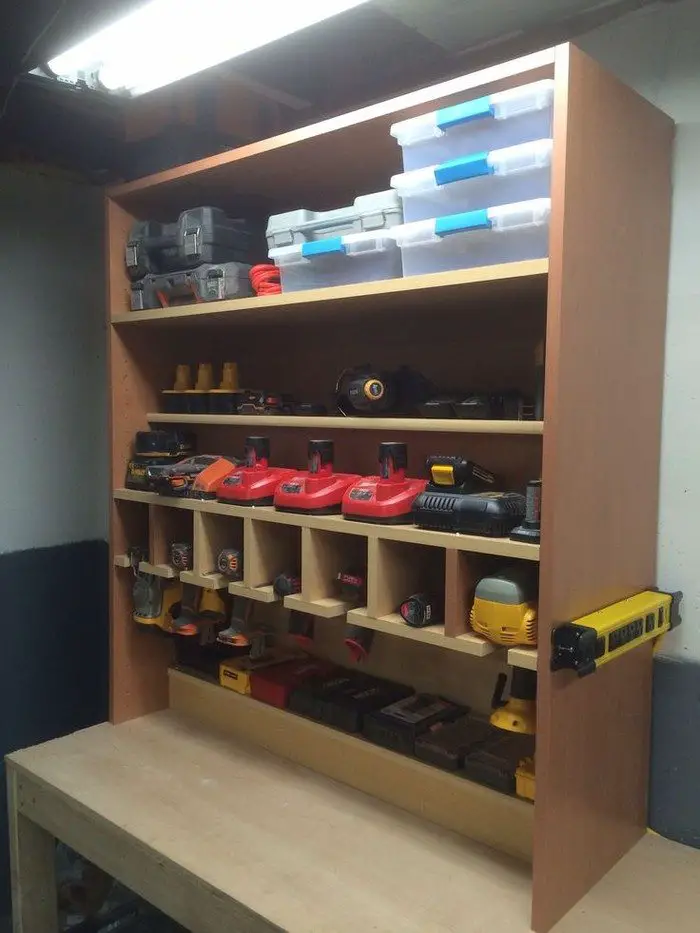
This cordless drill storage will help keep the entire workshop looking clean and organized. It also serves as a charging station so that items related to your cordless tools are always all in one place. Just don’t forget to provide it with a power outlet. ;)

This DIY storage is also space-saving as it is wall-mounted. Thus, you can make better use of every inch of your work area.
If you no longer have any wall space, you can incorporate this idea into existing furniture/storage in your workshop! One good example would be your workbench.
Is this going to be your next project for the workshop?
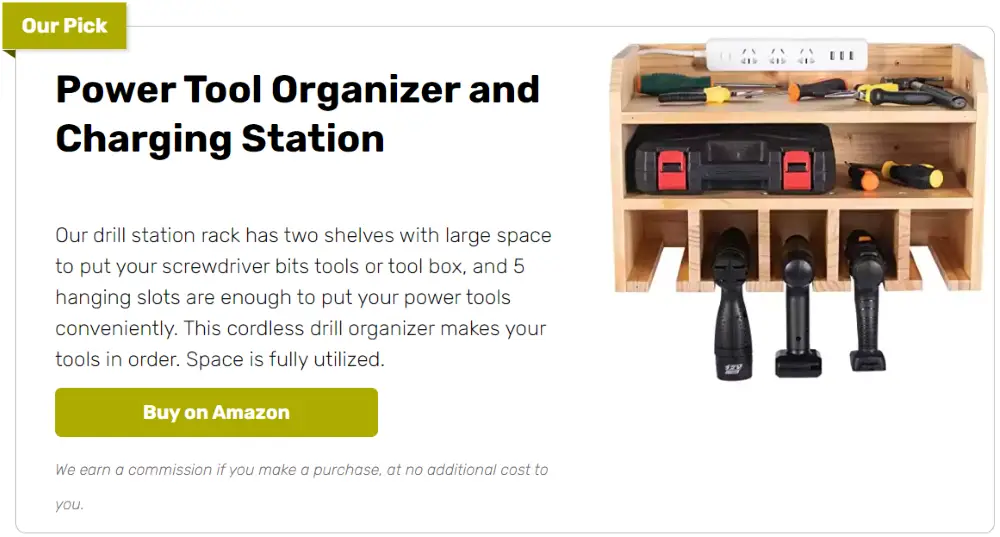
The cordless drill storage and charging station offer a plethora of benefits that revolutionize the way you approach your DIY projects and workspace organization. Here are some more advantages that await you:
Time Efficiency: The designated spaces for dividers, screws, and other accessories ensure that you have everything you need right at hand. This minimizes interruptions during projects, streamlining your process.
Enhanced Productivity: With all your cordless drills neatly arranged and easily accessible, you can effortlessly locate the right tool for the job. This seamless process boosts your productivity, allowing you to dive into tasks without delays.
Optimal Space Utilization: Whether in your garage, workshop or even a small corner, this cordless drill storage and charging station optimizes space utilization. It transforms untamed chaos into a well-organized, efficient workspace.
Battery Bliss: The built-in charging station ensures your cordless drill batteries are always ready for action. No more last-minute searches for charged batteries or downtime due to depleted power – your tools are always at their peak performance.
Tool Protection: Safeguard your valuable cordless drills from potential damage. The designated compartments prevent tools from knocking into each other, increasing the lifespan of your equipment.
Aesthetic Appeal: Beyond functionality, the station’s carefully crafted design adds an aesthetic touch to your workspace. The elegant appearance showcases your commitment to both organization and style.
Customization Potential: Adapt the cordless drill storage and charging station to your needs. You can tailor the number of dividers, shelves, and compartments to suit your tool collection and preferences, creating a truly personalized organization solution.
Incorporating the cordless drill storage and charging station into your workspace isn’t just about tidiness – it’s about elevating your efficiency, enhancing the longevity of your tools, and transforming your workspace into a hub of creativity and productivity. Witness the transformation it brings to your DIY endeavours!
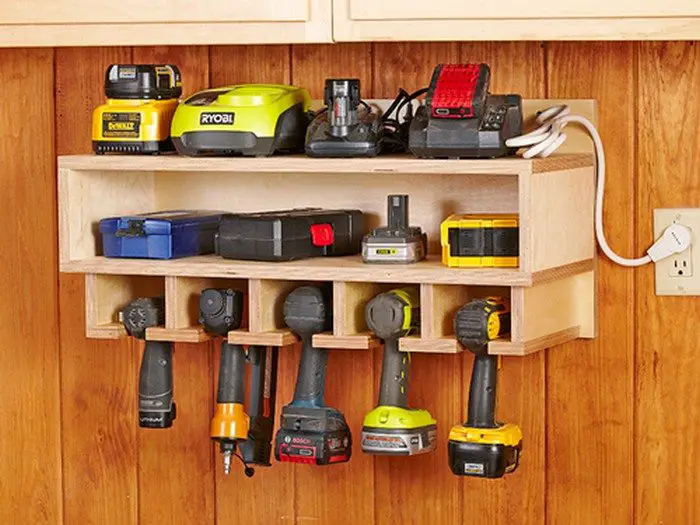
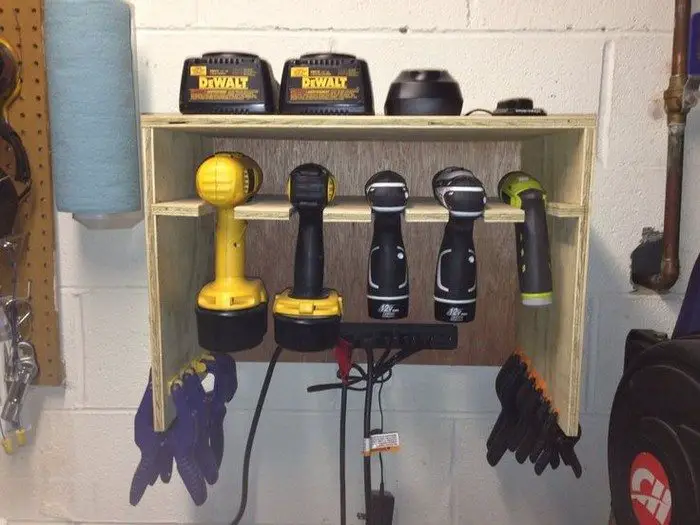
See the different versions of this cordless drill storage and charging station from our album below for your inspiration! You can also get the link to an easy-to-follow tutorial after the album. :)
Contents
How to Make a Cordless Drill Storage and Charging Station
Are your valuable drills always playing hide-and-seek? Tired of searching for charged batteries before tackling a project?
Say goodbye to the chaos and hello to efficiency with this step-by-step guide on creating the perfect cordless drill storage and charging station. Transform clutter into convenience and revitalize your workspace!
Gather the necessary materials and tools to get started.
Materials
- 3/4″ Plywood (1/2 sheet 4’x4′)
- 1/4″ Plywood
- 1 1/4″ Screws
- Wood Glue
- Sand Paper
- 3″ Screws
- Drawer Pull
Tools
- Table Saw with Dado Cutter
- Drill
- Marker
- Measuring Tape
- Stud Finder
- Pair of goggles and gloves
Click on any image to start the lightbox display. Use your Esc key to close the lightbox. ![]()


Steps
Here’s a game-changing solution in just eight simple steps. No more frustration, no more tangled cords – just a seamless blend of innovation and organization with the cordless drill storage and charging station! Craft, create, and conquer the ultimate workspace upgrade! Dive in and make every step count!
Step 1: Safety First. Always prioritize safety. Wear appropriate protective gear such as safety goggles and gloves when using tools and handling materials.
Step 2: Material Magic. Gather your enchanted arsenal: 3/4″ plywood (1/2 sheet of 4’x4′), 1/4″ plywood, 1 1/4″ screws, the mystical wood glue, sandpaper for a smooth touch, 3″ screws for added strength, and the elegant drawer pull that will grace your creation. These treasures will soon transform into a masterpiece!
Step 3: Measure Twice, Cut Once. Unleash your inner artisan with the aid of a table saw and the mighty dado cutter. Slice through the 3/4″ plywood to craft the core of your station, wielding your measuring tape and marker to ensure precision. Watch the pieces dance under the blade’s command, leaving you with perfectly sized components.
Step 4: Joining Forces. With the grace of a craftsman, grab your 1 1/4″ screws and assemble the dividers and bottoms. Mark their meeting points 3/4″ from the edges, and pre-drill with your trusty drill if need be. Coat these pieces with the embrace of wood glue, uniting them into a harmonious whole with the screws as your orchestra.
Step 5: Shaping the Destiny. Claim a shelf as your canvas and bestow it with the gift of dividers. Mark and pre-drill their destiny into the wood, then apply wood glue to them. With 1 1/4″ screws, solidify their bond, ensuring each screw rests gracefully with the surface.
Step 6: The Strength of Titans. Secure your creation to the wall with the majestic 3″ screws, courtesy of your stud finder. Let your cordless drill storage and charging station stand strong and unwavering, a testament to your craftsmanship and vision.
Step 7: A Touch of Elegance. Bestow your creation with a final flourish – the drawer pull. Affix this detail with a delicate touch, infusing your station with a subtle blend of functionality and visual elegance. This pivotal addition serves not only as a practical element but also as a testament to your meticulous attention to detail and your commitment to adorning your creation with purpose and style.
Step 8: The Sands of Perfection. Use sandpaper to caress your masterpiece, smoothing the edges and providing tactile joy for your hands. This procedure, similar to an artist’s finishing stroke, not only adds a polished and welcoming texture but also a feeling of workmanship that enhances the overall appeal of your work.
In this magical journey, armed with your tools and guided by your imagination, you become the architect of an impeccable cordless drill storage and charging station. A symphony of efficiency, organization, and elegance, this creation shall forever enhance your workspace and elevate your endeavours!
Extra Tips
As you embark on the exciting journey of building your cordless drill storage and charging station, here are some extra tips to ensure a smooth and successful crafting experience:
Practice Patience With Glue: When applying wood glue, allow a few minutes for it to set before securing the pieces together. Dedicate a few precious moments for the glue to set before proceeding to join the pieces together. This deliberate interlude is vital in cultivating a bond of enhanced strength between the materials.
Screw Depth: While attaching screws, be mindful of their depth. Check for screws that are flush with or slightly recessed from the surface. This meticulous approach serves as a safeguard against any potential interference that could arise during the use of your cordless drill storage and charging station.
Prevent Splintering: To prevent splintering when cutting plywood, place a strip of painter’s tape along the cutting line before using the saw. This can help create cleaner edges. This ingenious maneuver acts as a barrier, effectively reducing the risk of unsightly splinters and resulting in pristine, smoother edges that reflect the artistry and precision you invest in every facet of your project.
Sand for Smoothness: Make sure to smooth out all rough edges or surfaces, ensuring that your cordless drill storage and charging station not only functions well but feels good to the touch. Envision a finished product that not only performs flawlessly but also invites the touch of your hands with a gratifyingly polished texture, showcasing your dedication to craftsmanship and a delightful user experience.
Personalization Possibilities: Feel free to modify the design to suit your preferences. Add additional shelves, compartments, or even incorporate a power strip for more charging options. This customisation allows you to create a cordless drill storage and charging station that is exactly what you want, catering to your distinct needs and propelling your workspace into a realm of unmatched practicality and adaptability.
Cord Management: Consider adding small hooks or clips to the station for organizing charging cords and preventing tangles. By incorporating these unassuming yet practical elements, you bestow your creation with an extra layer of functionality, ensuring that the station remains a sanctuary of order amidst the bustling currents of your creative projects.
Finishing Touches: Once the cordless drill storage and charging station is complete, apply a protective finish like a clear varnish to enhance its appearance and protect the wood. This meticulous step not only amplifies the station’s visual allure but also fortifies the wood against the tests of time and use, assuring that your creation maintains its splendour while enduring the rigours of your productive endeavours.
Future Expansion: Plan for potential growth in your tool collection. Design the cordless drill storage and charging station with extra space to accommodate future additions, ensuring it remains useful as your needs evolve. This not only underscores your foresight but also guarantees that the station continues to serve as a dynamic and adaptive ally, seamlessly growing alongside your ever-changing demands and ambitions.
Work in a Well-Ventilated Area: If you’re using wood glue or paints, ensure proper ventilation to avoid inhaling fumes and to help the materials dry effectively. By upholding proper ventilation, you safeguard your well-being while concurrently promoting an environment conducive to the optimal performance and curing of the substances at hand.
Test Fit Before Final Assembly: Before permanently securing pieces together, do a test fit to ensure everything aligns properly. Adjustments can be made more easily at this stage. By conducting this meticulous test fit, you pave the way for a final construction that mirrors your intent.
By incorporating these extra tips into your crafting process, you’ll not only enhance the functionality and aesthetics of your cordless drill storage and charging station but also make the entire experience more enjoyable and satisfying.
Tech Integration in Tool Storage
In the realm of DIY projects and workshop organization, the intersection of technology and tool storage presents innovative opportunities to enhance efficiency, safety, and convenience. As we focus on cordless drill storage, integrating technology becomes a game-changer, offering ways to keep our tools charged, organized, and ready at a moment’s notice. This approach not only streamlines the workspace but also elevates the functionality of cordless drill storage solutions.
Smart Charging Stations
The heart of any cordless tool’s productivity lies in its battery’s health and readiness. Smart charging stations revolutionize how we store and charge cordless drills by incorporating intelligent charging technology.
These systems can monitor the battery’s charge level, temperature, and health, ensuring optimal charging without overcharging or damaging the battery. Integrating such technology into cordless drill storage stations extends battery life and ensures your tools are always ready for use.
Digital Inventory Management
Keeping track of various drills, bits, and accessories can be a daunting task, especially in a well-stocked workshop. Digital inventory management systems, integrated into cordless drill storage solutions, offer a seamless way to monitor and manage your tools.
Utilizing RFID tags or Bluetooth technology, these systems can alert you when tools are removed from storage or if a specific item hasn’t been returned, ensuring that every tool is accounted for.
Automated Lighting Systems
Visibility is key in any workshop. Integrating automated lighting systems into cordless drill storage units can significantly enhance usability. Motion-sensor LED lights can illuminate the storage area when you’re nearby, making it easier to find the right drill or accessory, especially in dimly lit environments. This adds convenience and promotes safety by reducing the risk of accidents caused by poor visibility.
Modular Design with Tech Upgrades
As the need for customization and flexibility in workshops grows, modular cordless drill storage solutions equipped with tech upgrades offer a tailored approach. These systems can include built-in USB ports for charging other devices, customizable power tool docks, and even touch screens for controlling various functions.
Modular designs allow for future tech integrations, ensuring your storage solution remains up-to-date with the latest advancements.
Climate Control Features
For enthusiasts and professionals alike, maintaining the optimal condition of cordless drills and batteries is paramount. Integrating climate control features into cordless drill storage solutions can protect your tools from extreme temperatures and humidity, which can affect battery performance and tool longevity.
Augmented Reality (AR) Tool Selection
Augmented Reality (AR) can revolutionize our interaction with cordless drill storage. By incorporating AR interfaces, users can quickly identify the correct drill and attachment for any task. Visuals can overlay the physical storage unit through a smartphone app or AR glasses, highlighting the recommended tool based on the project. This not only saves time but also enhances project accuracy.
Voice-Controlled Systems
Incorporating voice-controlled assistants into cordless drill storage units brings hands-free operation to the workshop. Users can command their storage system to locate a specific drill, learn about its charge status, or even receive maintenance tips. This integration with popular voice assistants like Alexa or Google Assistant adds a layer of convenience, allowing for uninterrupted workflow during projects.
Security Enhancements with Biometrics
Security is critical to tool storage, especially in professional settings where high-value equipment is commonplace. Biometric security features, such as fingerprint or facial recognition, can be integrated into cordless drill storage units to ensure that tools are accessible only to authorized users. This technology deters theft and prevents unauthorized use, safeguarding both the tools and the workspace.
Solar-Powered Charging Stations
Sustainability is becoming increasingly important in all aspects of technology, including tool storage. Solar-powered charging stations for cordless drills offer an eco-friendly alternative to traditional electric chargers. These charging stations can operate independently of the grid by harnessing solar energy, reducing energy costs and promoting renewable energy use in workshops and job sites.
Predictive Maintenance Alerts
Their maintenance heavily influences the longevity and performance of cordless drills. With the integration of predictive maintenance technology into storage solutions, the system can analyze usage patterns, battery conditions, and other performance metrics to predict when a tool may need servicing. Users can receive alerts for preventive maintenance, ensuring that drills are always in optimal condition and reducing the risk of unexpected failures.
Customizable LED Displays
Customizable LED displays on cordless drill storage units offer an interactive way to manage tools. These displays can show battery levels, usage history, or even instructional videos for specific drills. The ability to customize what is displayed based on user preferences or project requirements adds a layer of personalization and efficiency, making tool management more intuitive.
Crafting Chaos-Free!
Tap into the wellspring of your inner craftsman and embark on a captivating journey of creation. Watch in awe as humble materials metamorphose under your skilled hands, shaping into an ingenious masterpiece that seamlessly merges form and function – behold, the cordless drill storage and charging station!
Each step of this enchanting process is like a carefully placed brushstroke on a canvas, a testament to your ingenuity and vision. As you deftly assemble the dividers, a symphony of order begins to play, transforming chaos into cohesion. The dividers align like stars in the night sky, creating compartments that promise not just storage, but an organized haven for your prized cordless drills.
And then, there’s the elegant touch of the drawer pull – a detail that transcends mere practicality. Like a jewel adorning a crown, it adds a touch of sophistication to your creation, turning it from a practical object into a work of art. Every graceful pull reminds you of the seamless fusion of aesthetics and functionality that defines your project.
As you navigate these stages, you’re not merely following instructions but composing a symphony of creativity and craftsmanship. Each twist of a screw, each application of wood glue, becomes a note in this melodic tale of transformation. With every movement, you’re not just building a cordless drill storage and charging station, but channelling your inner artist to create a tangible representation of your skill and passion.
Finally, you’ll have more than just a cordless drill storage and charging station – it’ll be a tribute to your ability to bring order and beauty into your surroundings. It’s a functioning masterpiece created by your hard work and imagination! Happy crafting!
For more ways to organize your work station or garage, read our post on garage shelving solutions!


