Nothing beats fresh, healthy food every day at the dining table. Store-bought vegetables simply can’t match the flavor of homegrown produce. Vine-ripened tomatoes have a fuller flavor. Homegrown squash is without scratches. Leaf lettuce is perfectly crisp. Basil is fresh and aromatic. The list goes on.
Aside from making sure the whole family is well-nourished and eating good quality food, it’s also a great way to lower grocery expenses.
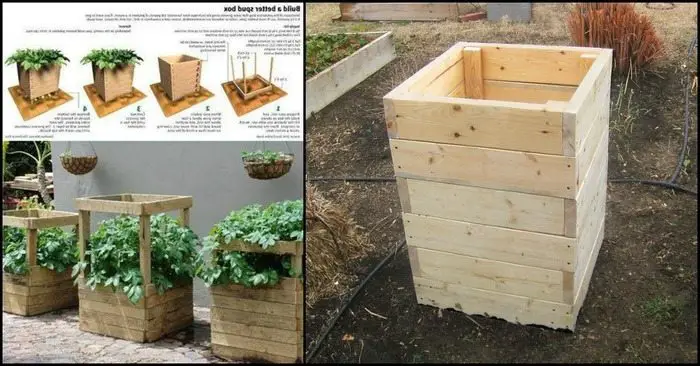
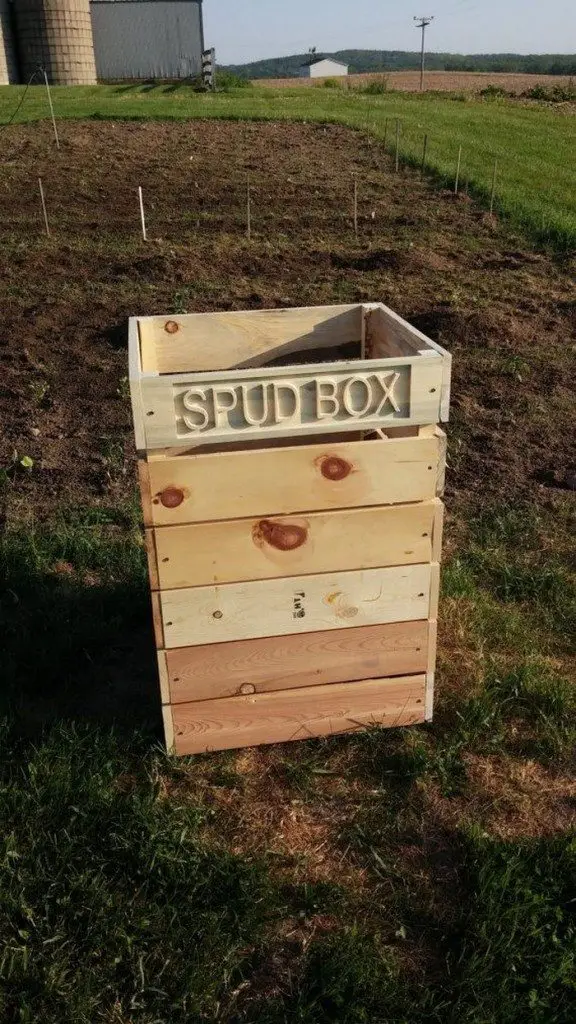
Why not set aside a space to cultivate your very own assortment of homegrown fruits and vegetables? How about the thought of cultivating delectable potatoes in your own backyard? Think about creating a spud box a custom-made sanctuary created just for these delicious tubers!
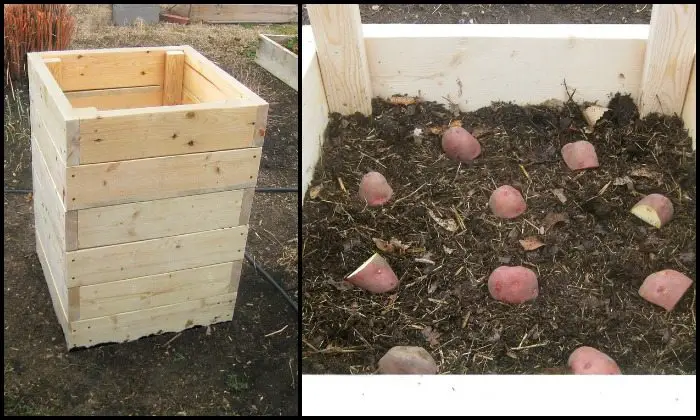
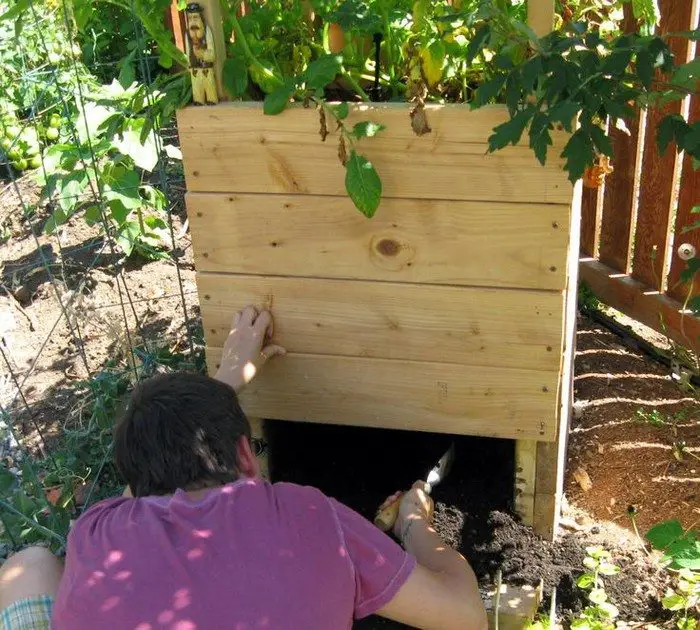
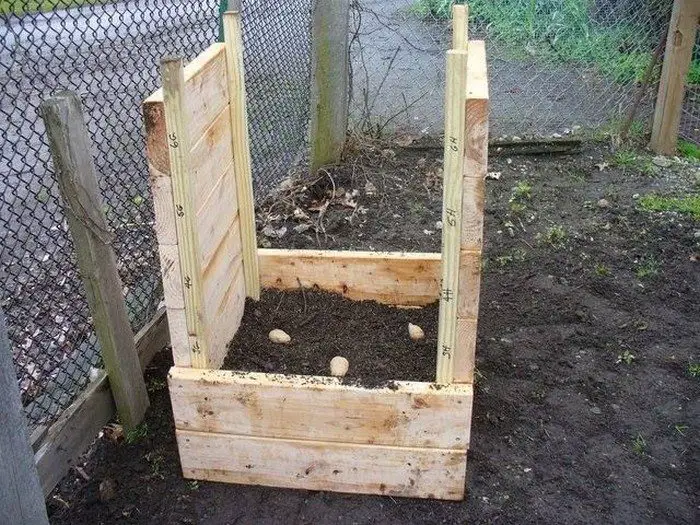
This kind of potato planter is loved for the efficiency it offers. You simply add one level of wood boards and soil from time to time as your plant grows. Its design pushes the potatoes to grow upward, making more areas available for producing more spuds! And when it’s time to harvest, you just have to remove the bottom boards to gain access to the bottom soil. It’s a no-dig, space-saving vertical garden!
Many gardeners really love this kind of planter for growing their own potatoes. And because of this a few versions have been designed and built to make it easier to harvest potatoes and reattach the wood boards.
Have a look at these slightly different versions by viewing our album below. We hope this inspires you to grow your own potatoes knowing how easy it is to do with a spud box!
Contents
Crafting Your 4-Square Feet Spud Box
In this guide, you’ll unveil the secrets to transforming a small space into a thriving haven for potato cultivation. Get ready to embrace the magic of maximizing yield potential while minimizing space, as you create a compact yet dynamic spud box where potatoes flourish beyond imagination.
Excited to unlock a new dimension of homegrown delight?
Materials
- 6 pcs 2″x6″x8′ Untreated Wood Boards
- 2 pcs 2″x2″x6′ Wood Studs (or 1 pc 12′ long Stud)
- 1 box 2 1/2″ Long Deck Screws
- Potting Soil
- Compost
- Finely-Chopped Mulch
Tools
- Drill
- Table/Circular Saw
- Trowel/Shovel
Click on any image to start the lightbox display. Use your Esc key to close the lightbox.
Steps
Ensure you have all the necessary materials and tools at hand. Having everything ready will streamline the crafting process.
Step 1: Measure and Cut the Wood Boards
Using the table or circular saw, cut the 2″x6″x8′ untreated wood boards into:
- 2 boards measuring 4′ in length (these will be the shorter sides of the box)
- 2 boards measuring 2′ in length (these will be the longer sides of the box)
- 2 boards measuring 4′ in length, with a 45-degree angle cut at each end (these will form the box’s top edge)
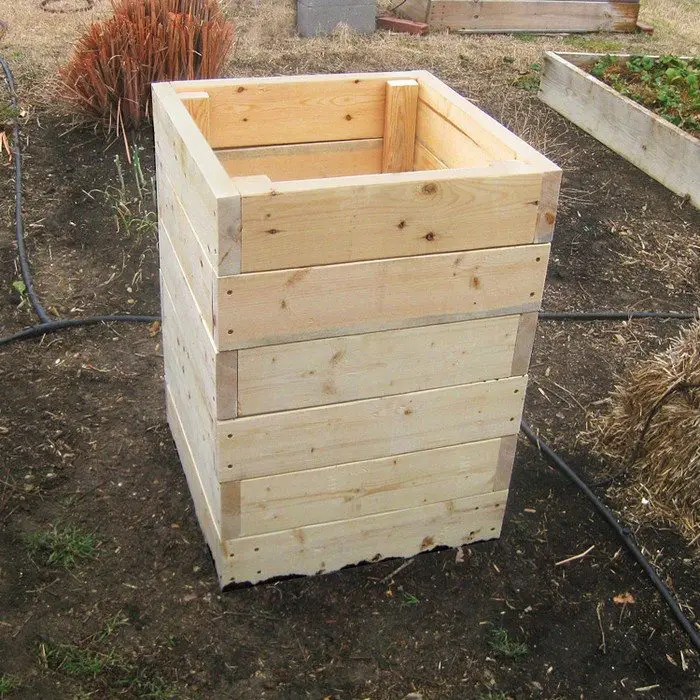
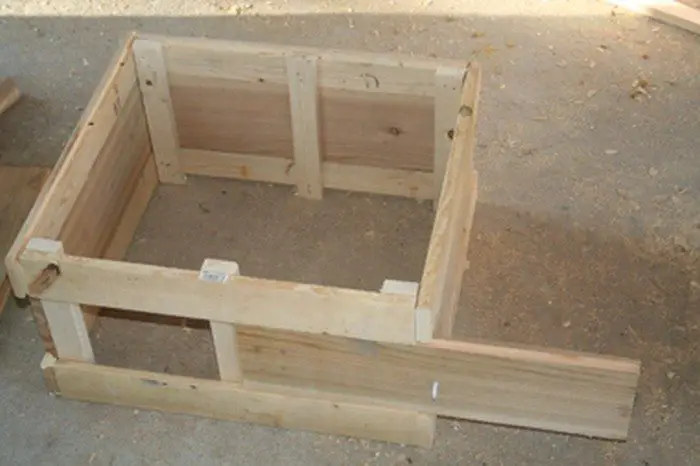
Step 2: Assemble the Box
Lay out the cut boards to form a rectangular box shape. Use the 2 1/2″ deck screws and your drill to secure the corners, connecting the shorter sides to the longer sides. This forms the base of your spud box.
Step 3: Attach the Angled Boards
Secure the 45-degree angle cut boards to the top edges of the box. This will give your spud box a slanted appearance, providing better access to sunlight and rainwater.
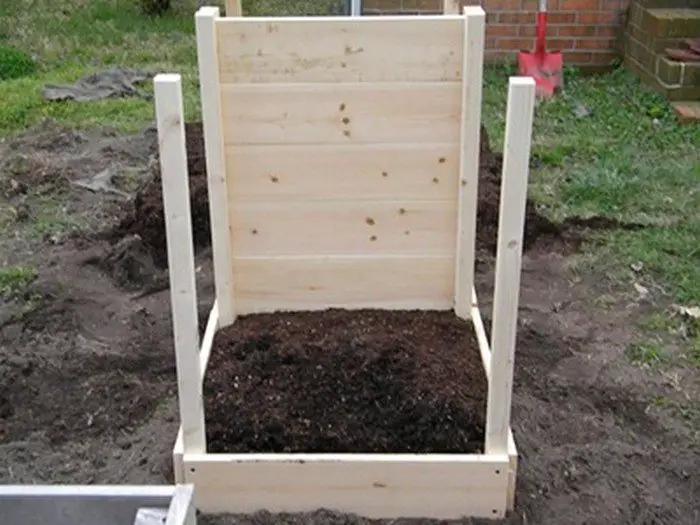
Step 4: Prepare the Studs
If you opt for two 2″x2″x6′ wood studs, divide each one in half to yield four individual sections. Alternatively, should you choose a 12′ long stud, segment it into four equal parts, each measuring 3′ in length. These will be used to create the internal support structure for your spud box.
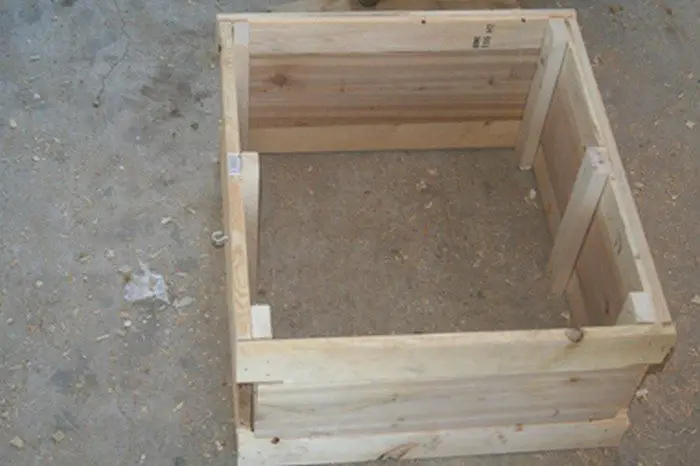
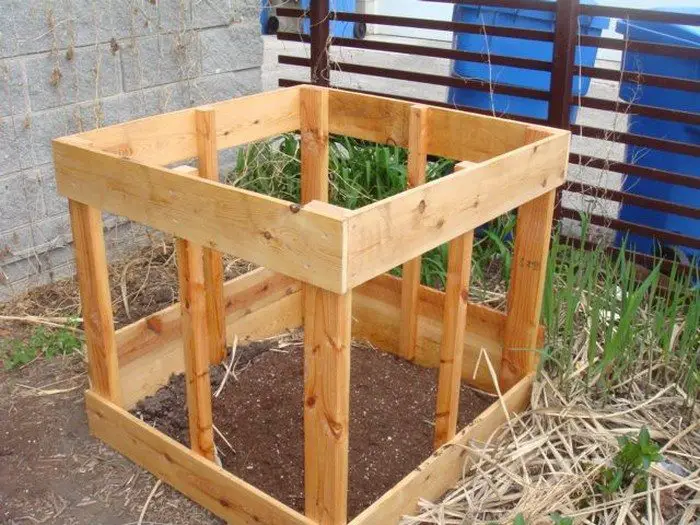
Step 5: Install the Internal Supports
Place the wood studs vertically inside the box, evenly spaced along its length. Secure them to the sides of the box using the deck screws. These supports will provide stability and prevent the sides from bowing out as you fill the box with soil.
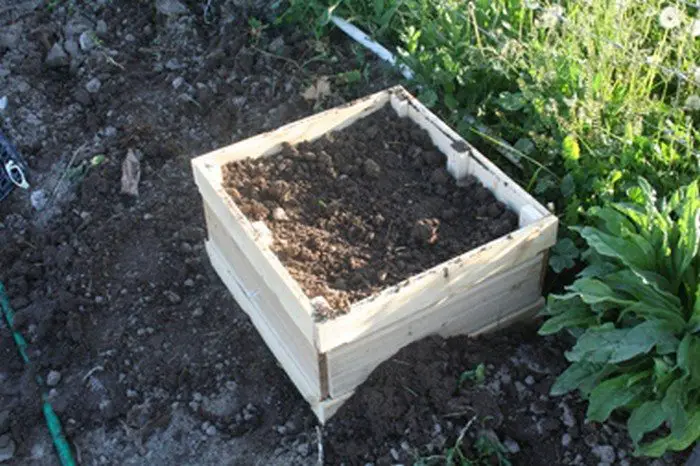
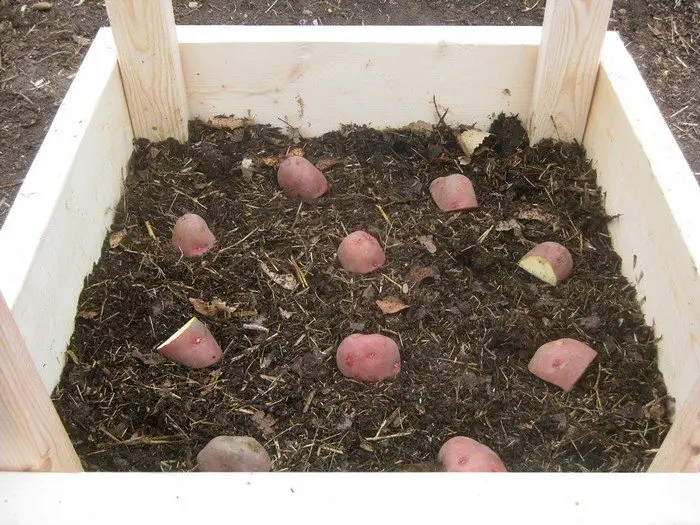
Step 6: Fill With Soil and Compost
Begin by adding a layer of compost. Then, layer a mixture of potting soil and compost, ensuring a nutrient-rich environment for your potatoes to thrive.
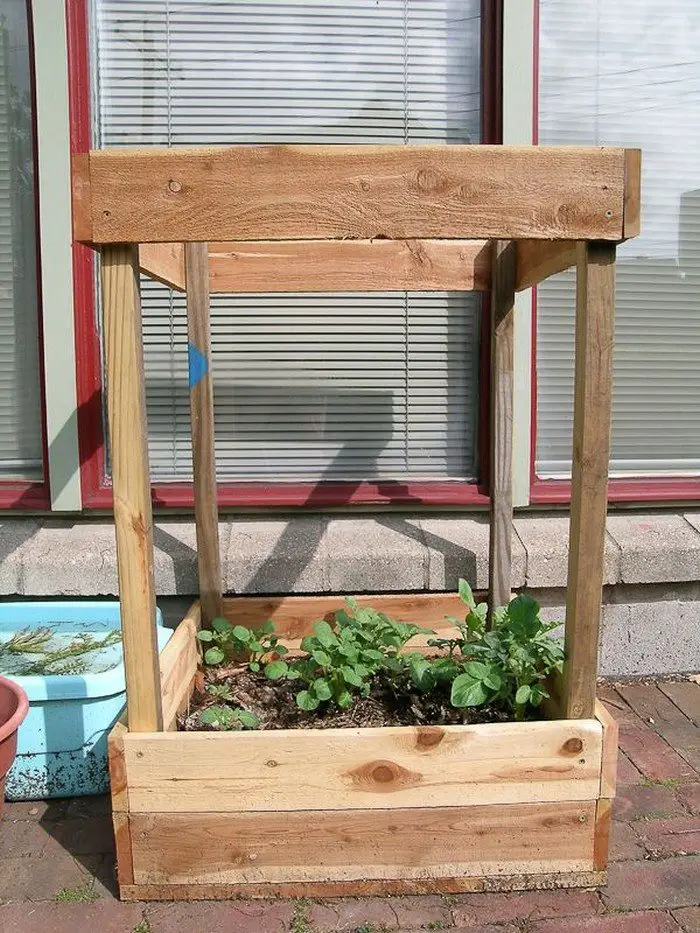
Step 7: Plant Your Potatoes
Dig trenches within the soil mixture and place your potato seeds or seedlings, ensuring they’re evenly spaced. Cover them with soil and gently pat them down.
Step 8: Add Mulch and Water
Spread a layer of finely-chopped mulch over the soil. This will help retain moisture and regulate temperature. Water your potatoes thoroughly, ensuring the soil is evenly moist.
Step 9: Care and Maintenance
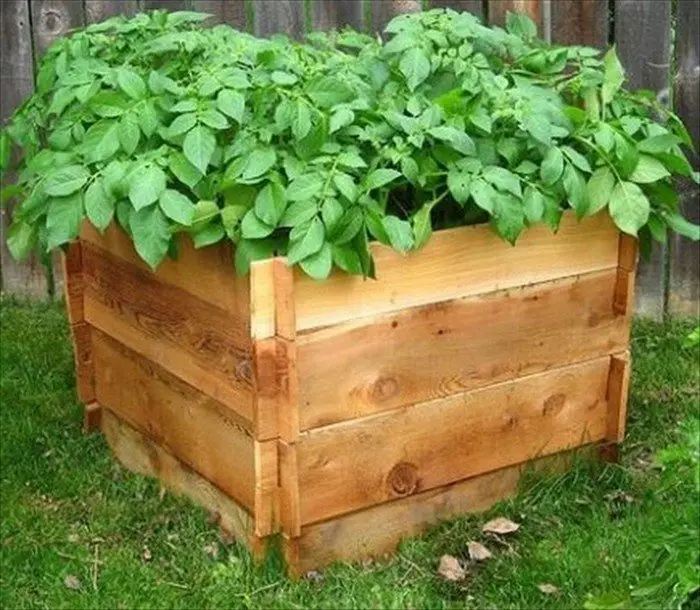
As the potatoes grow, you can add more soil or compost to cover the stems and let them continue to grow upward. Monitor for pests and diseases, and harvest your beautiful potatoes when they’re ready for the picking!
With these steps and your creativity, you’re well on your way to crafting a thriving 4-square feet spud box that promises a bountiful potato harvest. Happy growing!
Pest and Disease Management for Potatoes
Growing potatoes in a spud box is an efficient way to produce a healthy and delicious crop in a small space and presents unique challenges in managing pests and diseases. Vigilance and proactive measures can ensure your spud box becomes a thriving garden space, yielding a bountiful harvest free from detrimental pests and diseases.
Below are some of the common pests and diseases that can hurt your spud production and the methods on preventing these problems.
Common Pests in Spud Boxes
- Colorado Potato Beetle: These beetles and their larvae can devour potato leaves, significantly reducing your plant’s ability to photosynthesize. Regularly inspecting your spud box and manually removing these pests can be effective. Covering your spud box with a fine mesh can prevent them from reaching your plants.
- Aphids: Aphids can spread diseases and weaken potato plants by sucking sap from leaves. Introducing beneficial insects like ladybugs into your spud box ecosystem can naturally control aphid populations.
Prevalent Diseases in Spud Boxes
- Late Blight: This fungal disease can devastate potato crops, causing dark spots on leaves and tubers. Ensure good air circulation in your spud box by not overcrowding plants. Applying copper-based fungicides early on can help prevent its spread.
- Verticillium Wilt: Caused by soil-borne fungi, this disease leads to yellowing and wilting of leaves. Using sterile potting soil and compost in your spud box can significantly reduce the risk of verticillium wilt.
Integrated Pest Management (IPM) for Spud Boxes
Implementing an Integrated Pest Management approach can significantly benefit potato health in spud boxes. Start with selecting disease-resistant potato varieties and ensure a healthy start with quality, disease-free seed potatoes. Crop rotation, even in small-scale spud box gardening, can prevent the buildup of soil-borne diseases. Consider planting potatoes in different spud boxes or areas each year if possible.
Natural Remedies and Preventive Measures
Natural remedies like neem oil or insecticidal soaps can be effective against pests without harming beneficial insects. Encouraging a diverse ecosystem around your spud box, including planting flowers that attract pollinators and predatory insects, can naturally keep pest populations in check.
Regularly removing any diseased or infected plant material from around your spud box is crucial to prevent the spread of disease. Proper sanitation practices, such as cleaning your tools and spud box at the end of the growing season, are also key preventive measures.
By staying vigilant and adopting these management strategies, gardeners can enjoy the rewards of growing potatoes in spud boxes: fresh, tasty, and healthy produce right from their backyard. The success of your spud box garden hinges not only on the care you provide but also on your commitment to preventing and managing the challenges pests and diseases bring.
Small Space, Big Flavour!
This step-by-step journey equips you with the knowledge to craft your very own spud box using untreated wood boards, wood studs, and essential tools like a drill and saw. By cleverly utilizing the limited space, you’ll create a thriving environment that maximizes potato yield.
From the initial task of skillfully assembling the spud box, all the way through the meticulous process of planting your chosen potato varieties, nurturing their growth, and tending to their needs as they flourish, this comprehensive guide serves as your unwavering compass.
It doesn’t stop there; it extends its empowering grasp to the moment of sweet satisfaction – the time when you joyfully reap the rewards of your dedicated efforts. Each step illuminates the path toward transforming even the most confined space into an abundant haven of delicious homegrown potatoes.
So, unleash your inner gardener and relish the joy of cultivating flavorful spuds right in the comfort of your own space! Are you ready to embark on this captivating voyage of growth, exploration, and culinary satisfaction?
Fully embrace the experience as build your own spud box and nurture the growth of these delectable potatoes. It’s going to be a symphony of nature, a testament to your care, and a reminder of the marvels that can be cultivated right within your very own living space!
Grow your own root vegetables at home with these Root Vegetable Grow Bags!


