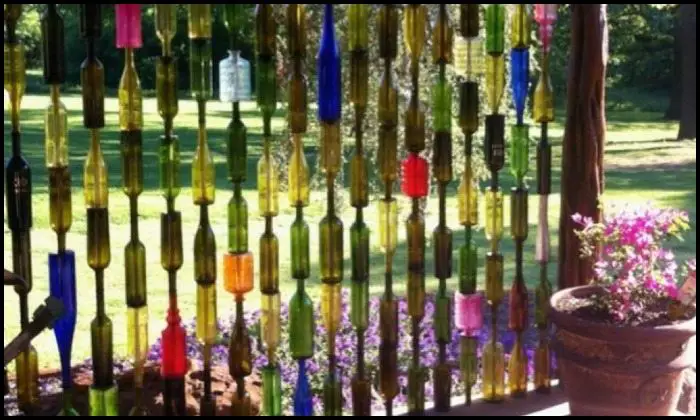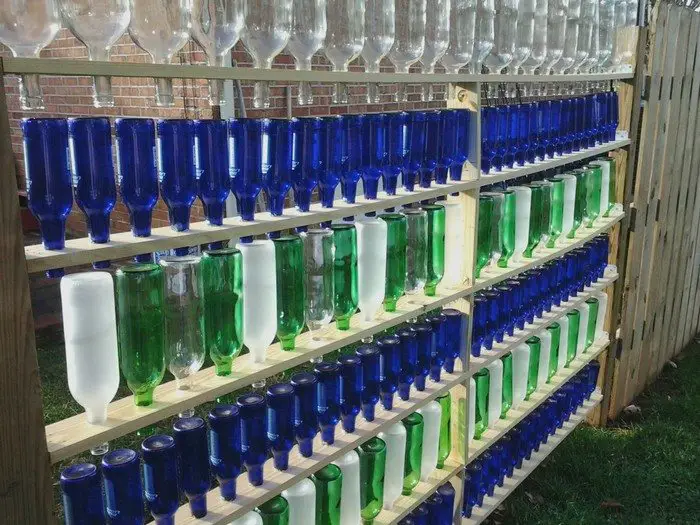
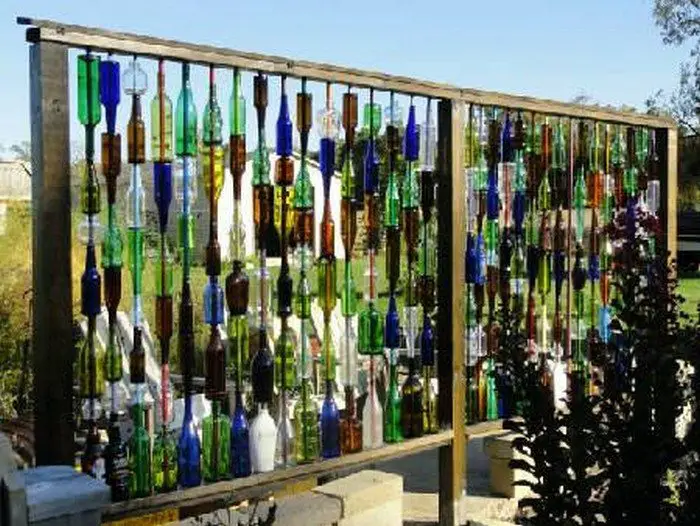
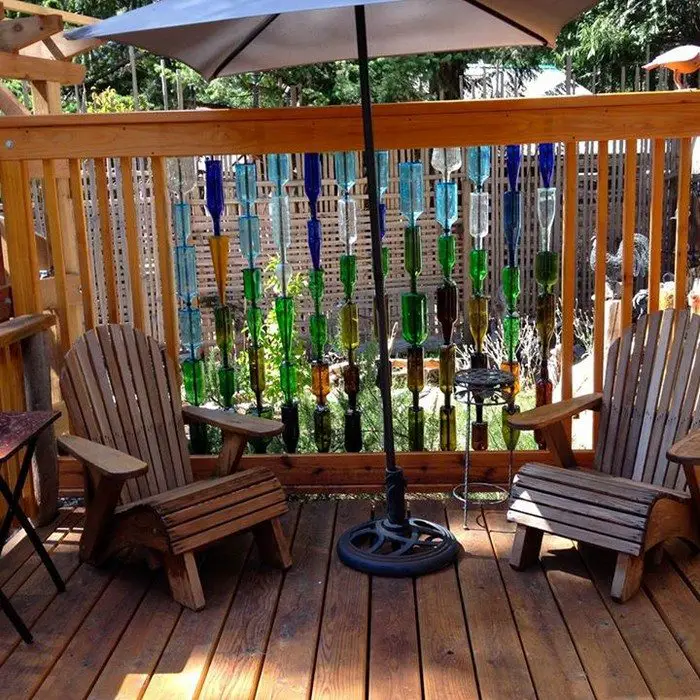
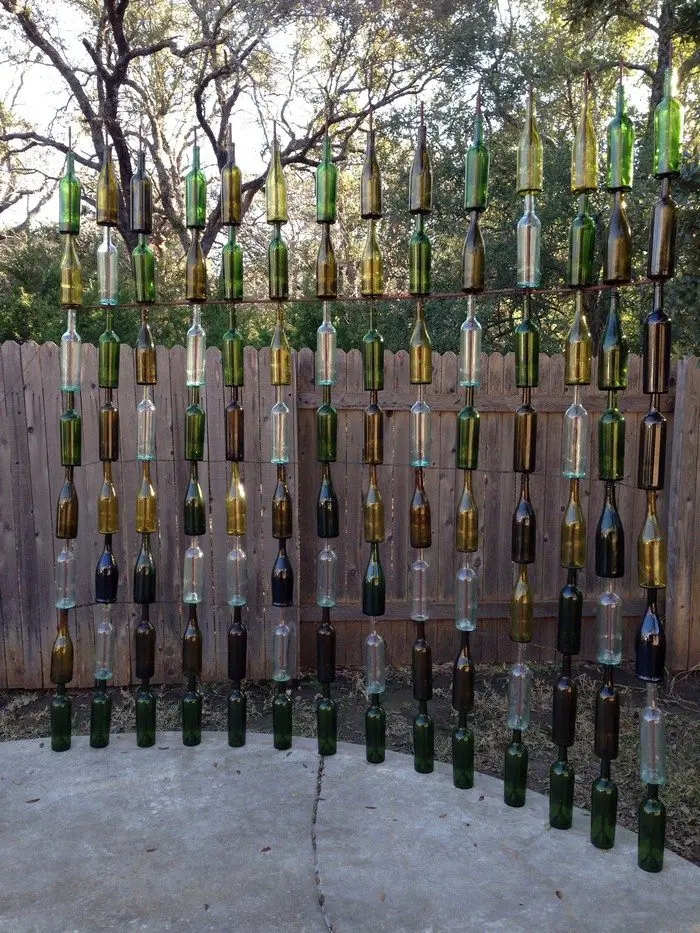
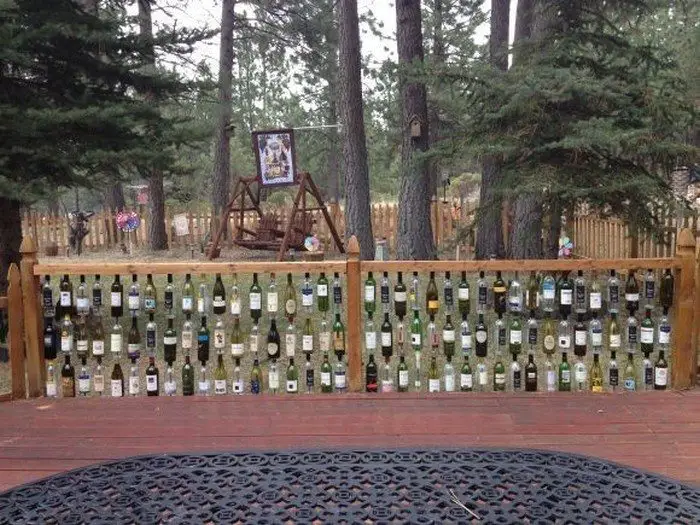
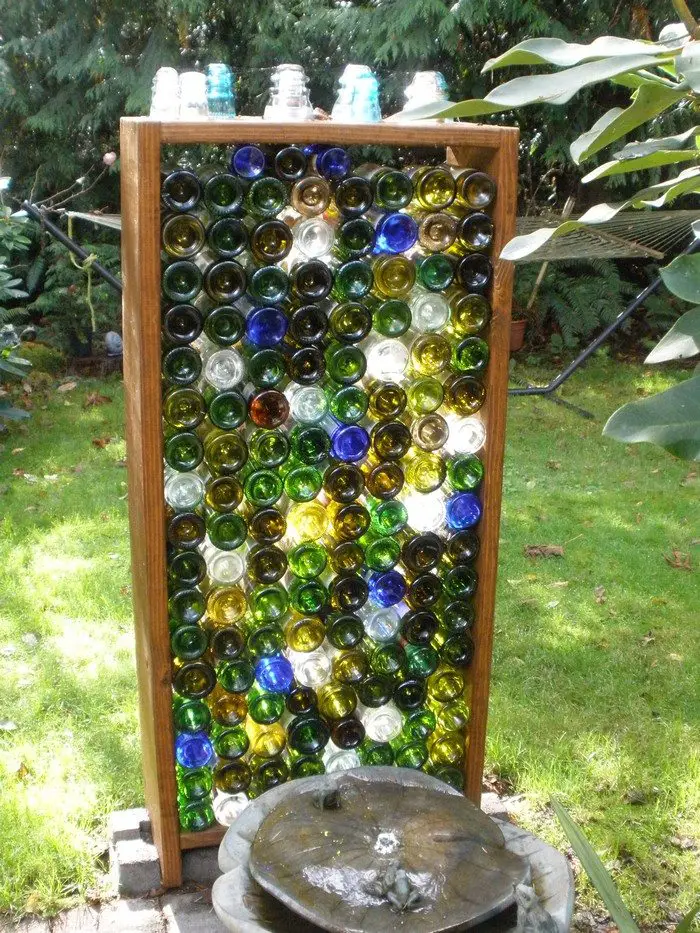
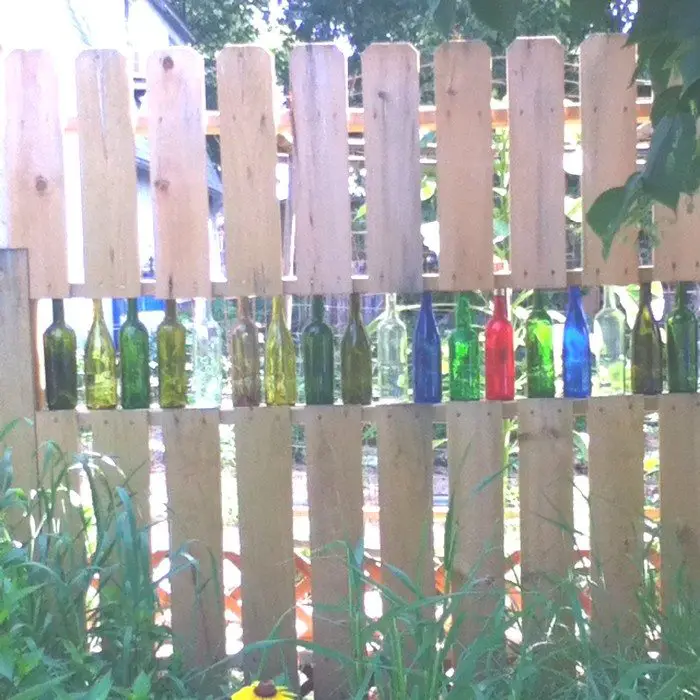
This DIY screen, a bottle privacy fence, is one of the more creative ideas we’ve seen! If you need to make your outdoor area a little more private, then this repurposing project might just be the solution for you!
Contents
Step-by-Step DIY Bottle Privacy Fence: A Fun Tutorial
This unique idea not only adds an artistic touch to your outdoor space, but it’s also eco-friendly and serves as a privacy fence to keep nosy neighbours at bay. Get ready to impress your friends with this creative and sustainable project!
Repurposing bottles adds style to your outdoor space and is environmentally friendly. Creating a unique privacy screen using a variety of coloured and shaped bottles blends well with your yard’s landscape. Avoid clear glass bottles, opt for diverse colours, and experiment with bottles of a single colour for a striking look.
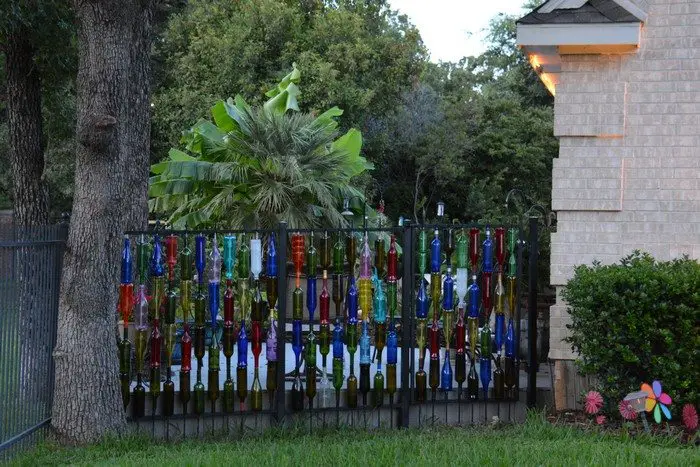
Why Craft Your Own DIY Bottle Privacy Fence
By embarking on this project, you not only enjoy the benefits of a personalized privacy fence but also unlock a world of possibilities for self-expression and environmental consciousness.
- Cost-Effective
- Constructing a bottle privacy fence saves money by using recycled materials and items from home, making it a budget-friendly alternative to buying one.
- Customizable Design
- Creating a DIY privacy screen offers customization options for size, shape, color, arrangement, and pattern. This allows for a unique and personalized outdoor privacy solution.
- Creative Outlet
- Create a privacy fence to express creativity and experiment with art. Let your imagination run wild to design a visually striking screen for your outdoor space.
- Visual Appeal
- A bottle privacy fence enhances your outdoor space with its visual appeal and unique play of light and shadow when sunlight shines through. It adds charm and character to your backyard.
- Eco-Friendly
- Creating a bottle privacy screen promotes sustainability by repurposing waste into a useful item, giving new life to discarded materials.
- Sense of Accomplishment
- Creating something yourself can bring a sense of accomplishment. Building a DIY bottle privacy fence project can be a rewarding experience that boosts your confidence in your skills.
So, you can see why building a DIY bottle privacy fence is a worthwhile endeavour. It combines practicality, creativity, and environmental consciousness, resulting in a unique and functional addition to your outdoor space.
Materials You’ll Need
- Old Wine Bottles – Collect a variety of bottles for an eclectic look or stick to a single type for a sleek, uniform design.
- 1/2″ Rebar – These sturdy rods will support your bottles and create the fence’s vertical structure.
- Wood Frame – A basic frame to hold and stabilize the rebar.
- Hose Washers – To prevent the bottles from sliding down the rebar.
- Acetone – For cleaning bottles and removing labels.
- Gloves – Protect your hands during bottle cleaning and drilling.
- Goggles – Essential safety gear to protect your eyes while working with glass.
- Bucket of Cat Litter – A simple and effective way to dispose of acetone-soaked rags.
Tools You’ll Need
- Drill with 3/4″ Diamond Hole Saw Bit – Used for drilling precise holes in glass.
Click on any image to start the lightbox display. Use your Esc key to close the lightbox.![]()
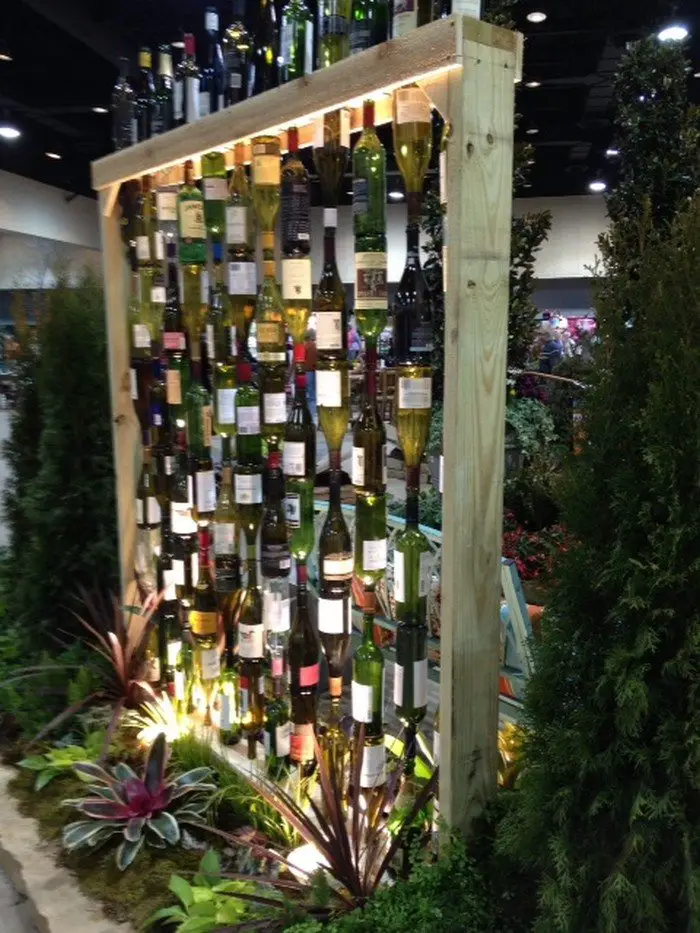

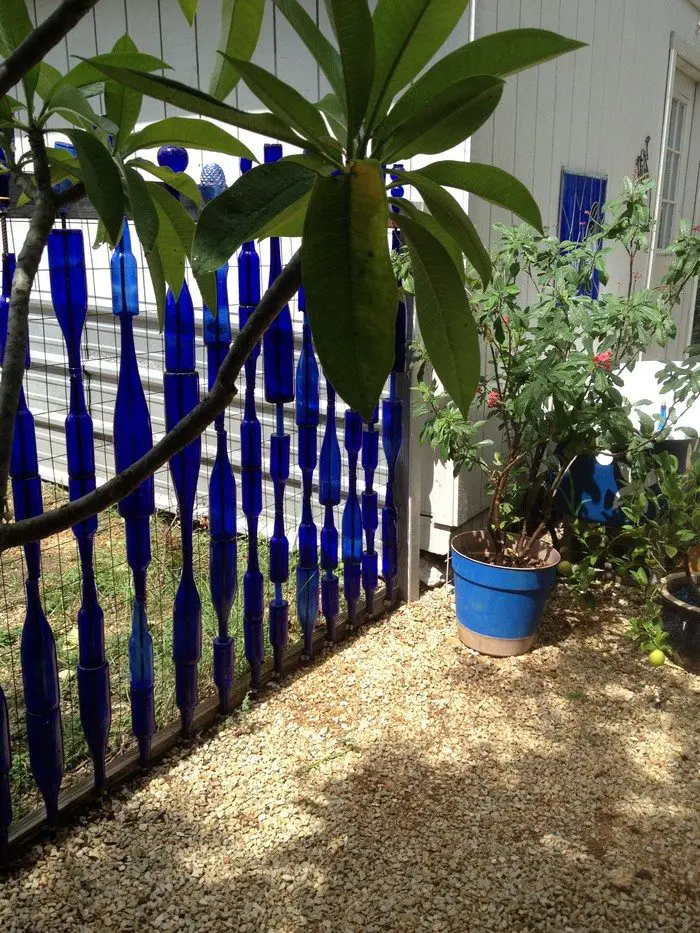

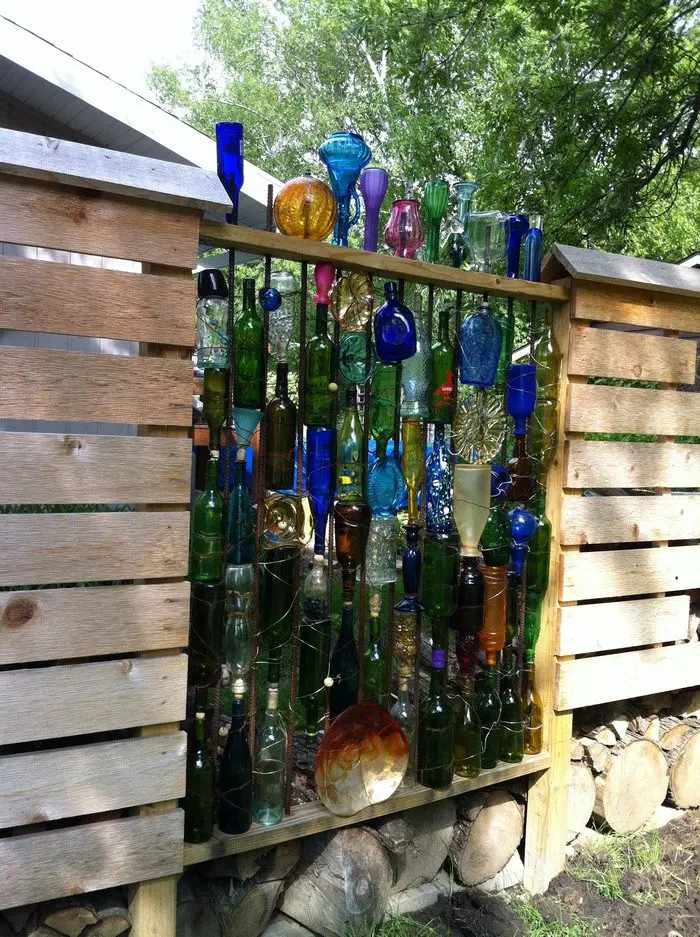
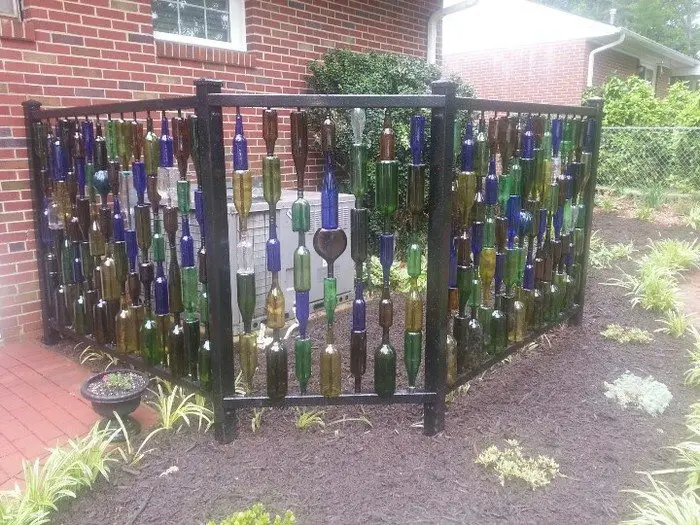
Step-by-Step Instructions
Step 1: Gather and Prepare Materials
- Collect enough wine bottles to cover the area where you want to build your fence. Clean them thoroughly with warm soapy water to remove any residue.
- Soak them in acetone for 15–20 minutes to loosen labels. Scrub off any remaining adhesive with a sponge.
- Sort them by color and size if you’re going for a specific design pattern.
Step 2: Build the Frame
- Construct a simple wooden frame using treated wood for durability. Ensure the frame’s dimensions align with the length and height of your desired fence.
- Install horizontal beams to stabilize the vertical rebar supports.
Step 3: Insert the Rebar
- Space the rebar evenly within the wooden frame, leaving enough room for the bottles to fit between each bar.
- Secure the rebar to the wooden frame using screws or brackets for added stability.
Step 4: Drill Holes in the Bottles
- Wear gloves and goggles to protect yourself.
- Gather Your Tools: You’ll need a diamond drill bit, which is specifically designed for cutting through glass. You can find these at most hardware stores.
- Prepare the Bottle: Submerge it in a basin of water or add water while drilling. This serves two purposes—it stabilizes the bottle and prevents it from overheating during the drilling process.
- Mark the Spot: Use a marker to indicate where you’d like the hole to be. This will help guide your drilling and ensure precision.
- Begin Drilling: Slowly start drilling at the marked spot. Use a gentle yet steady hand to maintain control. Rotate the bottle gradually while the drill is running; this helps to distribute pressure evenly and prevent cracks.
- Take Your Time: Patience is key. Go slow to avoid chipping the glass. Allow the drill bit to do the work without applying excessive force.
Step 5: Thread It onto Rebar
- Start by sliding a hose washer onto the rebar to act as a stopper.
- Carefully thread the wine bottles onto the rebar, alternating colors and sizes if desired.
- Add another hose washer above each bottle to keep it securely in place. Repeat until the rebar is fully covered.
Step 6: Secure the Fence
- Once all the bottles are in place, check the stability of the fence. Tighten any loose connections and ensure the rebar is firmly attached to the wooden frame.
- Anchor the frame securely into the ground using concrete or metal stakes.
Step 7: Add Finishing Touches
- Wipe down the bottles to remove fingerprints or smudges.
- Optionally, install LED string lights inside them for a magical nighttime effect.
Here’s a Video Tutorial for You to Check Out
Get ready to unleash your imagination and craftsmanship as you embark on the journey of crafting a stunning and eco-friendly bottle privacy fence for your outdoor haven.
Thanks to Stacey Hare for this great project. Watch the video tutorial here:
Extra Tips
As you embark on this exciting project, you are worth providing some extra tips and insights that will take your craftsmanship to the next level. Get ready to surpass your own expectations and create a masterpiece that will leave a lasting impression with these bonus suggestions!
- Select the right bottles
- Choose bottles that are sturdy, durable, and of similar size to ensure a consistent and visually appealing privacy fence.
- But why collect these bottles in the first place? Wine bottles, unlike other recyclables, can’t be turned in at regular recycle centers. This constraint inspired a creative solution: upcycling them into a unique fence.
- By repurposing these bottles, not only do you contribute to sustainability, but you also embark on a creative project with a purpose.
- Plan your design
- Before starting your bottle privacy fence project, it is crucial to sketch out a design or pattern for visualizing the arrangement and ensuring a cohesive look.
- This step helps bring your specific motif to life, estimate the number of bottles needed, and identify any necessary additional materials or supports.

Design Variation
There are several common designs for bottle privacy fences that you can consider for your project. Here are a few popular options:
- Vertical Fence
- This design arranges bottles vertically for privacy and style, allowing light to filter through. The cohesive and sleek appearance will enhance your outdoor space.
- Mosaic Pattern
- Create an artistic look with a mosaic pattern using bottles of different shapes and colours for a unique and visually striking fence. This design adds a playful and whimsical touch to your DIY privacy fences.
- Horizontal Fence
- In this design, the bottles are placed horizontally next to each other for a clean and contemporary look that showcases labels or colours. This minimalist approach creates unity and order for a visually pleasing appearance.
- Staggered Pattern
- The staggered bottle privacy fence design brings a fun and dynamic element to your outdoor area. By alternating their placement, you can experiment with various shapes, sizes and colours to create a visually diverse and appealing look.
- This pattern promotes creativity and spontaneity, allowing you to showcase your personal style.
- Curved Fence
- To add elegance to your bottle privacy fence, curve them along the fence line for a graceful look. This design adds organic movement and visual interest, mimicking nature’s curves for a harmonious outdoor environment. Get creative with arrangements, patterns, and colours to personalize your fence.
Decorate and customize
Be sure to create a unique and customized look. Enhance the visual appeal of your DIY bottle privacy fence by incorporating additional decorative elements such as string lights, coloured glass, or artistic designs.
Consider the overall theme and atmosphere of your outdoor space when selecting decorative elements. Whether you prefer a rustic, bohemian, or contemporary style, there are numerous ways to incorporate your personal flair and make your DIY bottle privacy fence a true reflection of your taste and personality.
You may also explore artistic designs, such as painting or etching patterns onto the bottles, to elevate the aesthetic appeal of your privacy fence. However, use appropriate materials and techniques for painting or etching glass.
Research suitable paints or glass etching solutions that are weather-resistant and designed for outdoor use. Additionally, ensure proper safety precautions are taken when working with paints or chemicals.
Maintain and Clean
Maintain your bottle privacy fence by cleaning it regularly with a gentle cleanser and soft cloth. Use a mild solution of warm water and soap to remove dirt and debris. Rinse thoroughly with clean water and air dry. Avoid harsh chemicals and abrasive materials to prevent damage.
DIY Fence for the Budget-Savvy!
A DIY bottle privacy fence is not just a project—it’s an opportunity to showcase your creativity, embrace sustainable practices, and transform your outdoor space into a unique haven. By repurposing discarded wine bottles, you create something beautiful and functional, proving that style and eco-friendliness go hand in hand.
Whether you’re looking for a cost-effective solution, an artistic outlet, or a way to elevate your backyard’s visual appeal, this project ticks all the boxes. Plus, the satisfaction of creating something with your own hands is unmatched. So, why wait?
Ready to start crafting your own masterpiece? Gather your materials, follow the steps, and let your imagination run wild! Share your finished project with us—we’d love to see how you’ve brought your vision to life. Start today and make your outdoor space truly one-of-a-kind!
Frequently Asked Questions
- What type of bottles should you use?
- You can use any type of glass bottle, but wine and beer bottles are commonly chosen due to their uniform shape and size. Using bottles of similar dimensions will give your fence a more cohesive look.
- How do you secure the bottles to the fence posts?
- Place the bottles upside down over the tops of the wooden posts and pack concrete or mortar mix around them. Ensure the bottles are firmly set before proceeding to the next one.
- Can you create patterns or designs with the bottles?
- Absolutely! Get creative with the arrangement of the bottles to create patterns, spell out words, or incorporate different coloured bottles for a unique twist.
- How do you ensure the fence is sturdy and stable?
- Dig holes for the wooden posts deep enough to provide adequate support, usually around 2 feet deep. Make sure to tamp the soil firmly around the posts and allow the concrete or mortar to cure completely.
- Do I need to seal the bottles?
- Sealing the bottles with a waterproof sealant is optional but can help protect them from the elements and extend their lifespan. However, it’s not always necessary if the bottles are securely mounted.
- How do you maintain the fence over time?
- Periodically inspect the fence for any loose or damaged bottles and replace or re-secure them as needed. Additionally, cleaning the bottles with a glass cleaner can help maintain their appearance.
- Can you incorporate lighting into the fence?
- Yes! You can add solar-powered LED lights inside the bottles to create a stunning nighttime effect. Simply place the lights inside the bottles before securing them to the fence posts.
- Is this project suitable for beginners?
- Building a bottle privacy fence can be a fun and rewarding project for DIY enthusiasts of all skill levels. Just be sure to follow safety precautions and take your time to ensure a quality result.

