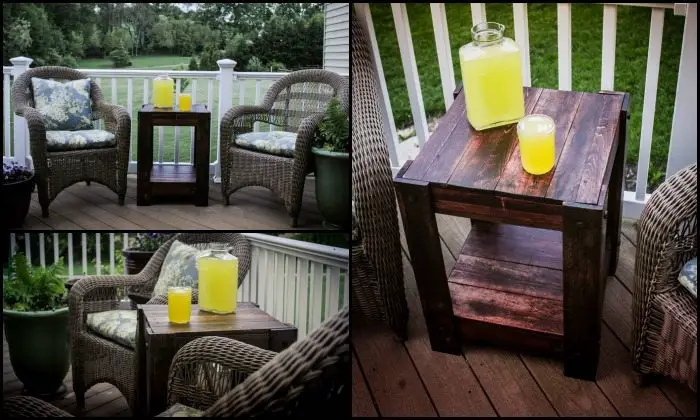
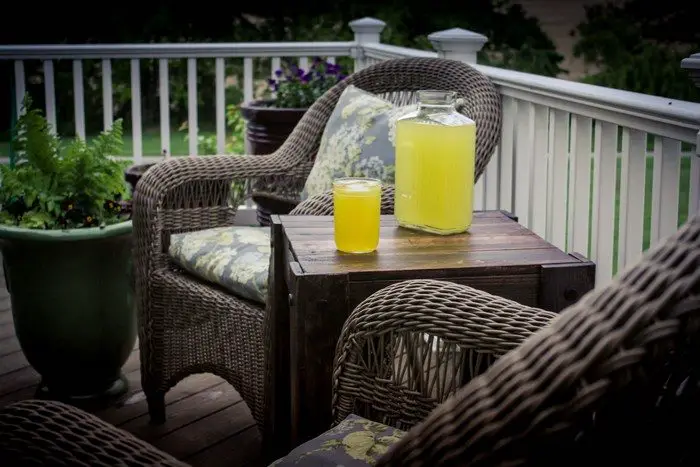
It’s a simple yet stylish furniture piece for your outdoor living area. This end table is another great project using one of our favorite resources to work with… pallets!
This DIY furniture is very easy to build. It’s a perfect project for those working with pallets for the first time.
And though this article says ‘pallet’, you can definitely use other timber such as offcuts from a previous project or pieces from old furniture. What’s important is – and what makes this end table beautiful – that they are made with very inexpensive or free material! Just finished building your deck? Then you might have some decent leftovers you can use.
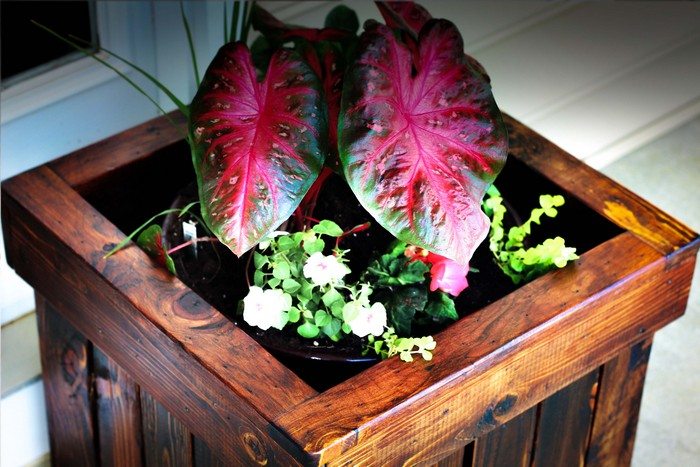
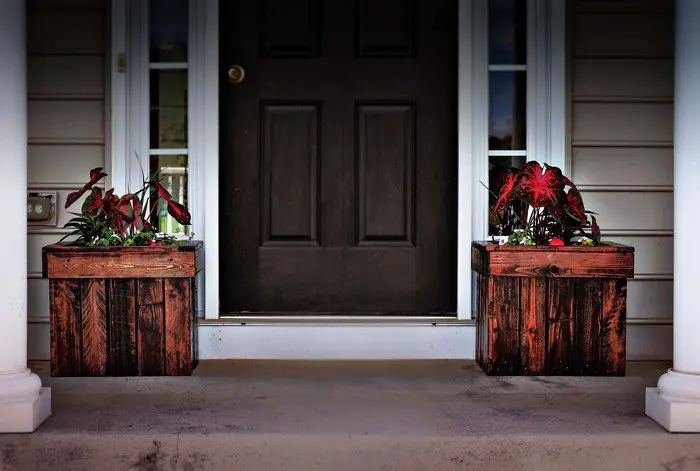
Imagine taking a break, enjoying your drink, or having a good conversation with your loved ones with this end table and a comfortable set of chairs. You can even complete your outdoor living area with a matching pallet planter!
Read on to learn how easy it is to build this pallet end table and see the matching pallet planter which you can also try building!
Materials:
- Pallet
- 1 1/4″ Finishing Nails
- Wood Glue
- Wood Stain
- Outdoor Urethane
Tools:
- Measuring Tape
- Jigsaw or Circular saw
- Pry
- Sander
- Hammer
- Drill
Steps:

Find free pallets from Craigslist. If not available, you can purchase them locally for very little money. (Learn more about pallets and where you can get them here!)
When searching through the pallet stack, look for the pallets with the most usable wood. The length of the slats is ~ 3 feet. The thickness varies from ½ to ¾ thick. The width of the slats can vary from 2.5 to 6 inches.
Breaking the pallets apart takes a decent amount of work. Use a jig or circular saw to cut the ends. Pry the wood from the center support. This should give you 8 to 14 boards per pallet. Remove nails from slats.
Before you start cutting, determine the best pieces to get the desired width (see drawing). I had multiple long pieces with cracks and/or damage down one side. I was able to cut the damage off and still have usable pieces.
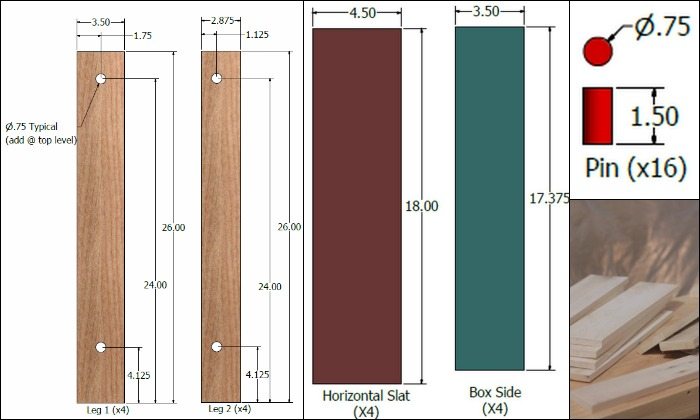
Cut pieces per drawings. After cutting, sand with course sandpaper to remove rough spots or major staining/paint…unless that is your desired look.
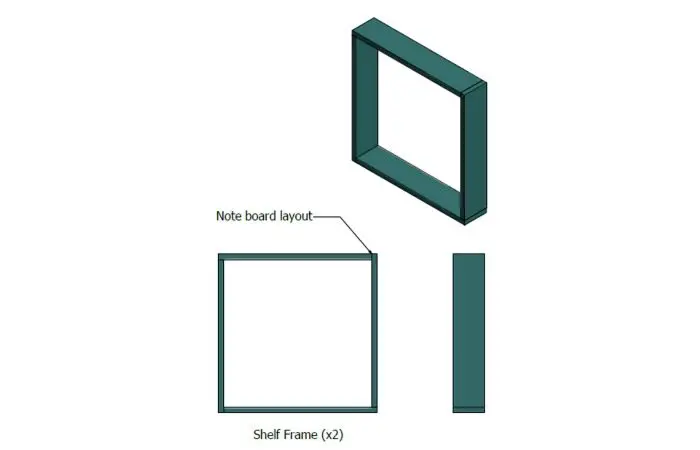
Assemble the two frames (nail & glue). Note how it is put together – should be a square.
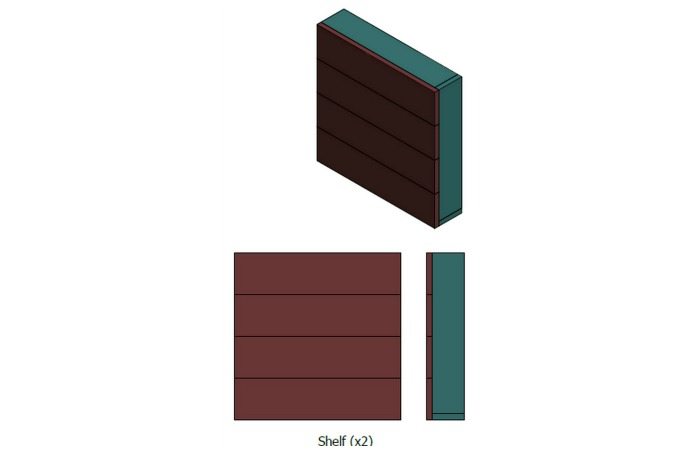
Attach horizontal slats to frames (nail & glue).
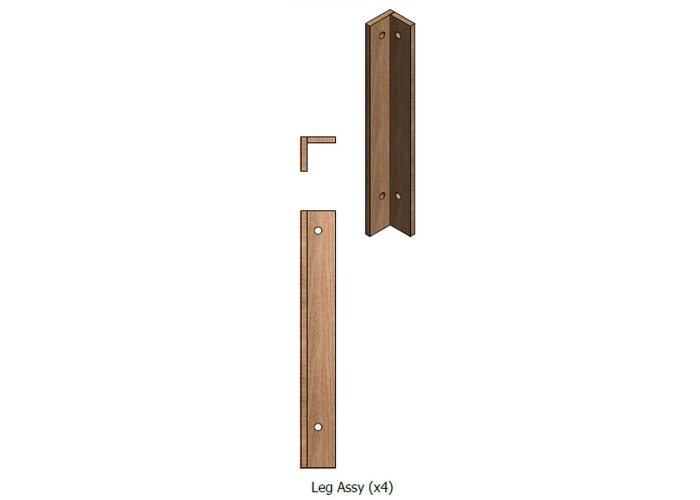
Nail and glue legs as shown.
Now you’re parts are all ready for final assembly…
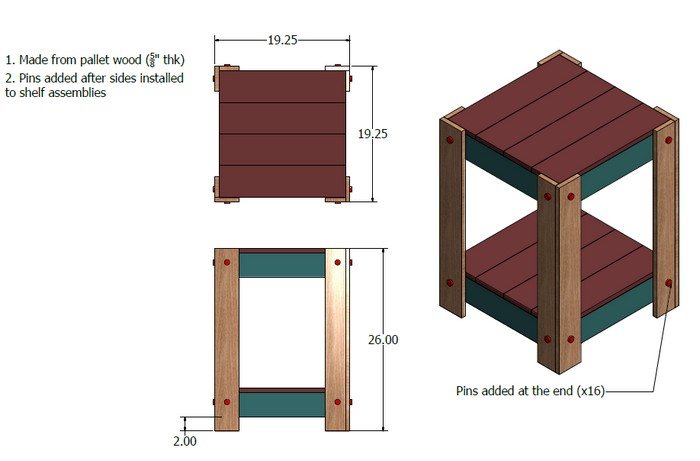
Attach the legs as shown (nail & glue). Drill holes for the pins. Insert and glue into place.
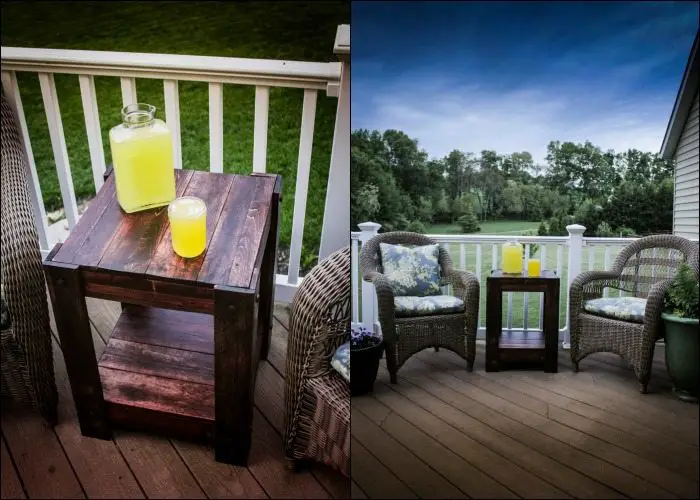
Here are photos of the final product:
See the matching pallet planters!
Thanks to mtairymd for this great project!


