
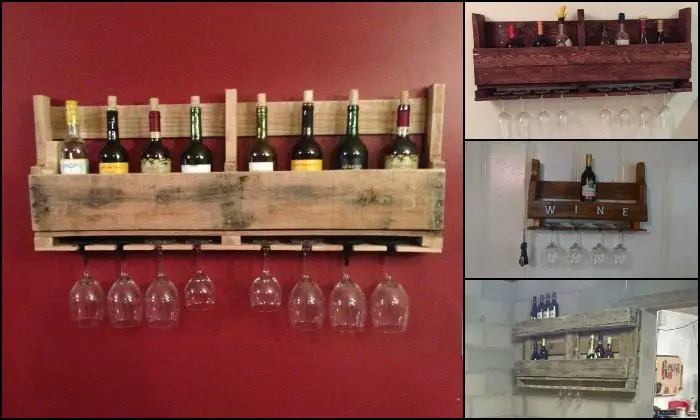
A DIY pallet wine rack is not only a cheap, simple, and easy-to-do project, but also an elegant way to store wine bottles and glasses!
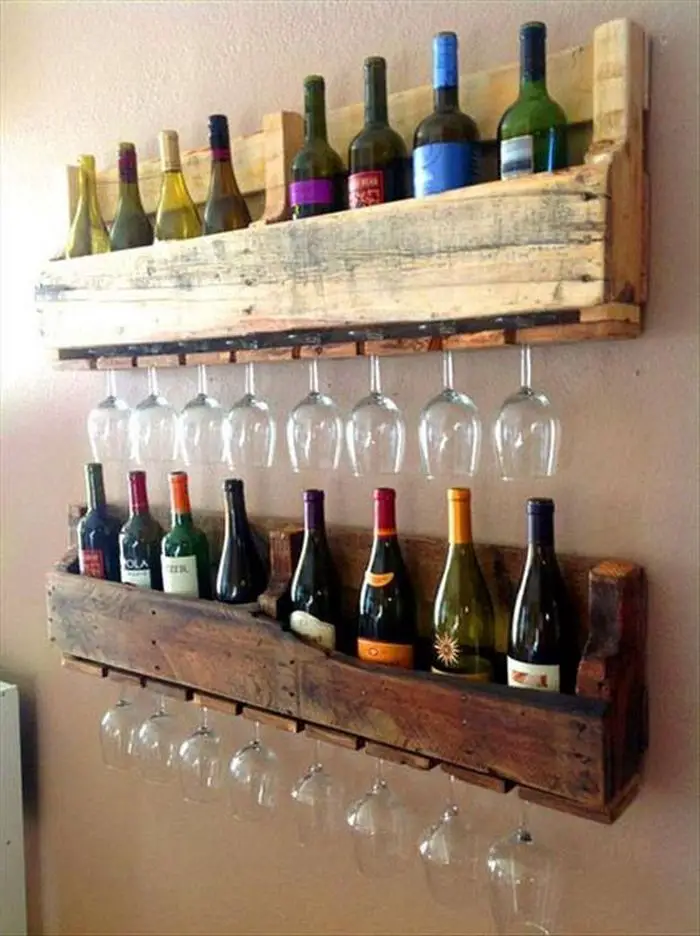
Now we know that some of you prefer storing wine bottles horizontally. This storage idea is perfect for wine lovers who don’t leave their wine unconsumed for too long. :)
BUT this pallet wine rack can definitely be used in slightly different ways! Instead of hiding beautiful empty wine bottles in your garage or storage room while thinking of bottle recycling projects, why not display them with this rack? Mount the pallet rack in your kitchen or dining area and you now have a decor/storage! You can also use this storage for other bottles such as liquor.
Read on to learn how to make this DIY pallet wine rack! And while you’re at it, how about making some for your wine-loving friends, too? :)
Contents
Building a Pallet Wine Rack
Materials:
- Pallet
- 3″ Screws
- 2 1/2″ Screws
- Wood Stain (optional)
Tools:
- Saw
- Hammer
- Pry
- Drill
- Sander
- Wood Clamps
Steps:
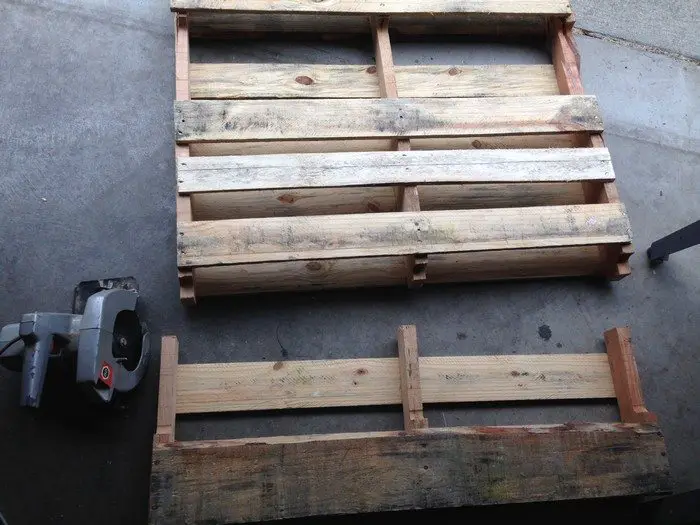
Use a circular saw or hand saw and cut in the indention of the pallet where forklift forks go. The height of the wine rack will be roughly 16-17 inches tall depending on where you cut it.
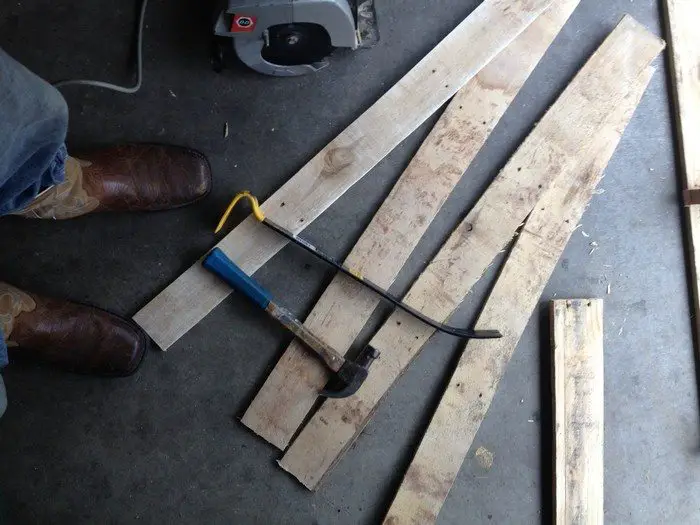
You’ll need two boards for the bottom of the wine rack, you can use the center of the pallet to get these boards. Using a hammer and a pry bar or whatever you have to get in between the boards, hammer it in and pry them off. This may take some practice and be frustrating because the ends tend to crack and break, but eventually, you’ll get the hang of it or get quality wood that won’t crack.
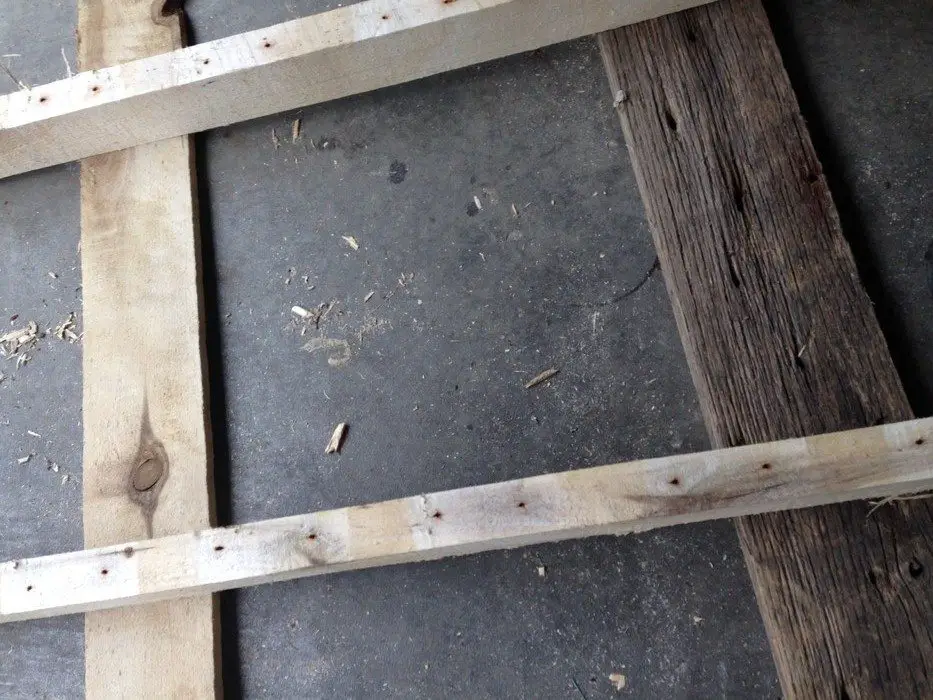
You’ll need 3 smaller pieces to separate the board that holds the glasses and supports the bottom. You can get these by cutting up the bigger section of pallet that the boards are nailed in to. The pieces need to be the length of the board and 1×1 or a little bigger if you’d like. You can use a hand saw to cut them up or whatever you have. I used a circular saw to cut them off the pallet then used a band saw to cut them to dimension.
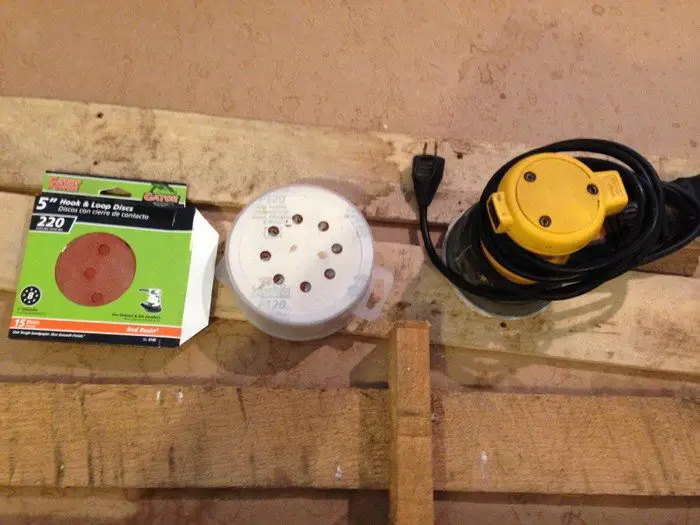
Pallets are usually rough so I sand them down to make them look better and prevent getting splinters. Depending on how rough it is, I just used 120 grit and then 220 grit to finish.
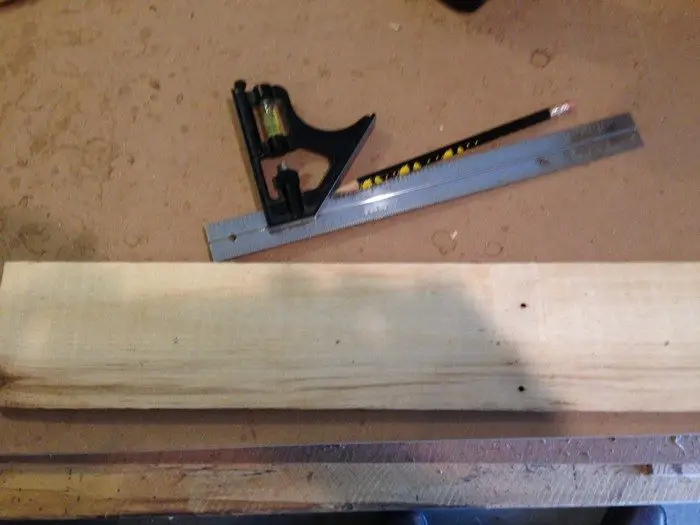
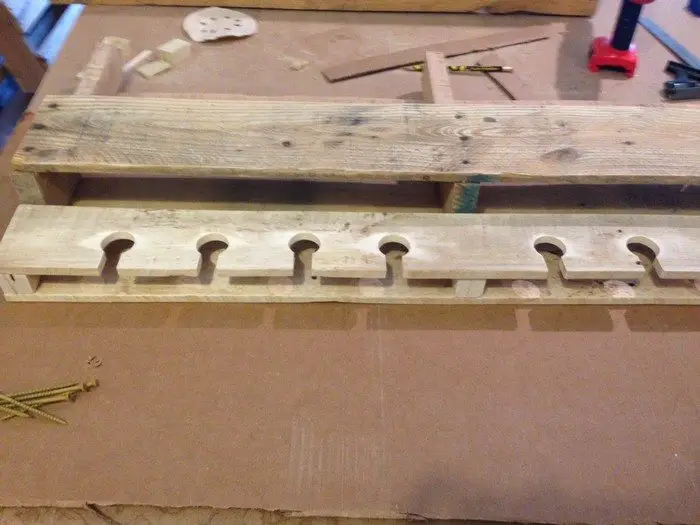
On one board you need to make holes for the wine glasses. Most pallets are going to be around 40 inches wide and I used around the standard size wine glass but you can make the sizes fit your needs. For mine, I mark 4.5 inches in from the edge and then mark 3 more holes of that one 4 inches from the next. The depth I make them is 1.5-1.75 inches into the board. Then I do the same to the other side.
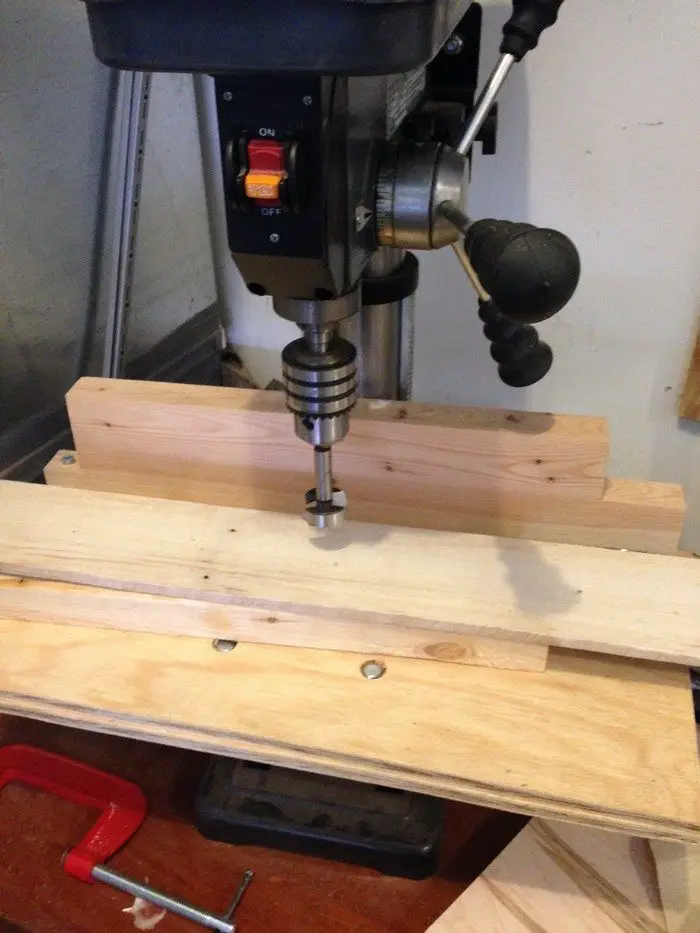
I use a 1-3/8 inch Forstner bit on my drill press but you can use a hand drill if you don’t have one, and drill out your marked holes.
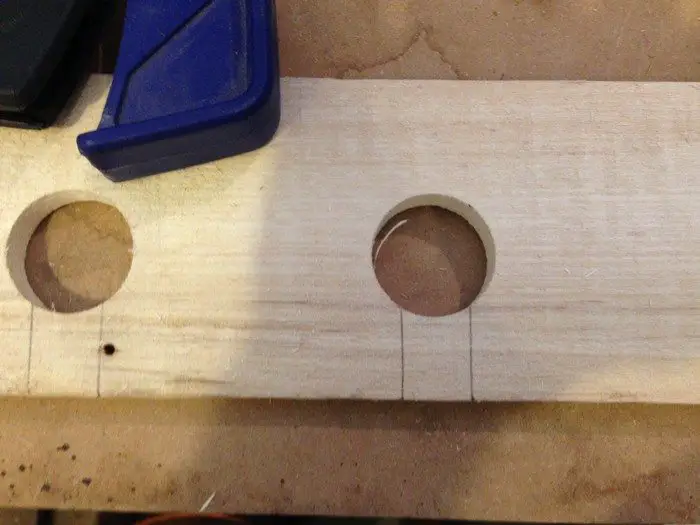
I just use a piece of wood around an inch wide, center it on the hole, and mark where I need to make the cuts. Using whatever saw you have, cut the pieces out and sand the rough edges.
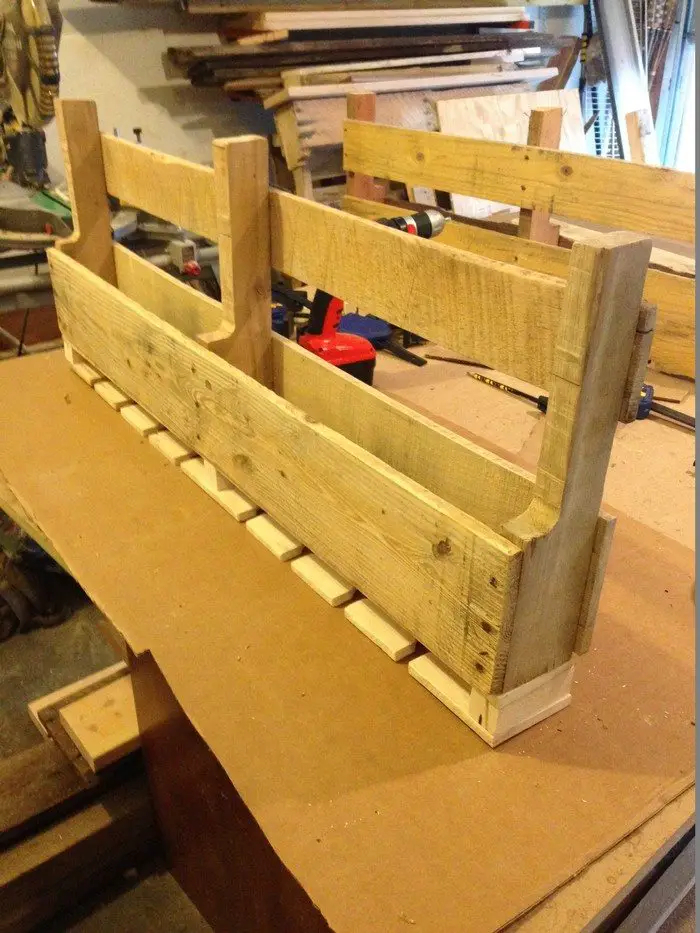
I put the boards together and lined them up with the bottom of the rack to make sure everything went together well. I clamp them to my table pre-drill the holes and countersink them. I use 3-inch screws to put it all together but you can use smaller screws and put it together in sections if you’d like. Make sure you pre-drill all your holes either way so it doesn’t split the wood.
The wine rack is done, now all you have to do is hang it. I use 2, 2.5-inch screws and put them in studs because of all the weight from the wine bottles. Depending on where you’re hanging it and the location of the studs, I put them in one stud, skip one, and put them in the other so there are 32 inches between screws. Make sure you use a level before putting in the second screw.
Thanks to gixxerjoe04 for this great project!
Why Choose a Pallet Wine Rack?
A pallet wine rack is more than just a functional storage solution—it’s a stylish, eco-friendly, and budget-friendly way to display your wine collection. Whether you’re a seasoned DIYer or just starting out, using a recycled pallet for a wine rack offers several advantages that make it a top choice for home decor.
Cost-Effective and Budget-Friendly
Buying a pre-made wine rack can be expensive, especially if you’re looking for a rustic or custom design. A pallet wine rack, on the other hand, costs little to nothing if you source pallets for free. The only expenses are a few screws, sandpaper, and optional wood stain or paint, making it one of the most affordable DIY projects.
Eco-Friendly and Sustainable
Repurposing old pallets helps reduce waste and supports sustainable living. Instead of discarding wooden pallets, turning them into a wine rack gives them a second life while reducing the demand for new materials. If you enjoy upcycling, this project aligns perfectly with an eco-conscious lifestyle.
Unique Rustic Aesthetic
The natural, aged look of pallet wood gives any area charm. A pallet wine rack fits rustic, industrial, or even modern home décor whether you leave it untreated for a raw, farmhouse vibe or stain it to match the interior of your house.
Fully Customizable
A DIY pallet wine rack may be customized to meet your needs unlike store-bought wine shelves. You may change the scale, add more glass slots, or include additional shelves for accessories as bottle openers and corkscrews. Paint, etching, or ornamental hooks let you also personalize it.
Durable and Sturdy
Pallets are a great material for a wine rack as they are made to manage large loads. A pallet wine rack, correctly fastened to the wall, may store several bottles and glasses without running the danger of breaking or drooping with time.
Easy to Build with Basic Tools
Building a pallet wine rack requires not sophisticated woodworking knowledge. Enough tools—saw, drill, sandpaper, screws—to finish the project are Anyone who likes working with wood will find this step-by-step approach beginner-friendly and a terrific do-it-yourself hobby.
Storing and presenting your wine creatively, sustainably, and economically is with a pallet wine rack. Whether you’re creating one for a buddy who loves wine or for yourself, this do-it-yourself project blends utility with flair in a way that store-bought choices just cannot compare.
How to Customize Your Pallet Wine Rack
A DIY pallet wine rack is a great way to store and display your favorite bottles, but you don’t have to settle for a basic design. With a little creativity, you can customize your pallet wine rack to match your home’s decor, add extra functionality, and make it truly unique. Whether you want to enhance its aesthetic appeal, increase its storage capacity, or add special features, there are plenty of ways to personalize your wine rack.
Choose the Right Finish
The finish you apply to your pallet wine rack can dramatically change its appearance. If you love the natural rustic look, a simple sanding followed by a clear sealant will keep the wood’s raw beauty intact. Staining the wood in warm, rich tones can give it a more polished and elegant touch. For a modern or farmhouse-style look, consider painting it white, black, or a distressed color to match your existing decor.
Add Personalized Engravings or Stencils
Personalized engravings add a unique touch to your wine rack. You can carve your family name, a favorite quote about wine, or even the names of your favorite vintages. If you don’t have engraving tools, stencils and wood-burning kits are great alternatives. Use them to add decorative patterns or lettering that reflect your personality.
Incorporate Extra Storage Options
A standard pallet wine rack holds bottles and glasses, but you can modify the design to add more storage features. Attach small shelves or hooks to store wine accessories like corkscrews, bottle openers, and coasters. If you have extra pallet wood, create a built-in shelf above the wine rack for storing additional bottles, candles, or small potted plants for a stylish display.
Install LED Lighting for a Sophisticated Look
Adding LED strip lights or small battery-powered puck lights underneath the rack creates a soft glow highlighting your wine collection. This enhances the aesthetics and makes it easier to find bottles in dim lighting. Choose warm white lighting for a cozy ambiance or colored LEDs for a modern, fun effect.
Use Decorative Metal or Glass Accents
Mixing materials can give your pallet wine rack a high-end look. Consider adding metal brackets or decorative ironwork to create an industrial feel. If you want a sleeker design, replace a wooden section with a frosted or stained glass piece. These small details can elevate the overall look of your DIY creation.
Customize the Glass Slots
Most DIY pallet wine racks have simple slots for hanging wine glasses, but you can modify this feature to fit different glass sizes. Widen the slots for larger glasses like goblets or martini glasses. You can also create a separate holder for champagne flutes if you like storing different drinkware.
Experiment with Unique Shapes and Layouts
A traditional pallet wine rack is rectangular, but you don’t have to stick with that shape. Get creative by cutting the wood into an arch, triangle, or asymmetrical design. If you have multiple pallets, try stacking them vertically to make a tall, multi-level wine display.
Make It Mobile with Casters
If you want a wine rack that isn’t fixed to the wall, consider turning it into a mobile cart. Attach sturdy casters to the bottom to move it around your home as needed. This works especially well for outdoor entertaining or if you often rearrange your furniture.
Use Chalkboard or Labeling for Organization
If you have a growing wine collection, labeling can help keep everything organized. Paint a small section with chalkboard paint and use it to write the names of the wines, the year they were made, or tasting notes. You can also attach small wooden or metal labels for a more refined look.
Customizing your pallet wine rack transforms a simple DIY project into a beautiful, functional, and personalized home feature. Whether you prefer a minimalist, rustic, or modern design, these ideas will help you create a wine rack that perfectly fits your style.
Different Ways to Use a Pallet Wine Rack
A pallet wine rack is designed to store and display wine bottles, but its versatility allows it to serve many other purposes. With a few modifications, this simple DIY project can be transformed into a functional and stylish piece for various storage and decor needs. Whether you want to repurpose it for other beverages, kitchen organization, or even outdoor use, there are countless ways to make the most of your pallet wine rack.
Liquor and Spirits Display
A pallet wine rack can double as a liquor shelf if you enjoy collecting whiskey, vodka, rum, or other spirits. Instead of limiting it to wine bottles, use it to display your favorite brands. Adding hooks or small shelves can make space for cocktail-making essentials like shakers, strainers, and glasses, turning it into a complete home bar setup.
Coffee Bar Organizer
A pallet wine rack can be repurposed as a stylish coffee station. Use the bottle slots to store flavored syrups or coffee beans in glass jars, and hang coffee mugs from the glass holders. Attach a small chalkboard or label section to write down your favorite brews or daily coffee specials. It’s a great way to keep everything in one place while adding a rustic touch to your kitchen.
Kitchen Spice Rack
For those who love cooking, a pallet wine rack can be converted into a spice organizer. Instead of wine bottles, use the slots to store jars of spices, herbs, and cooking oils. You can also install small hooks for measuring spoons, ladles, or other kitchen tools. This saves space and makes spices easily accessible while you cook.
Bathroom Towel and Toiletry Shelf
A pallet wine rack isn’t just for the kitchen—it can be an excellent addition to a bathroom. The bottle slots can hold rolled-up towels, while the glass holders can store toiletries like shampoo, lotion, and essential oils. For a spa-like atmosphere, add scented candles or small potted plants.
Bookshelf or Magazine Holder
A modified pallet wine rack can make a unique bookshelf or magazine holder. Store books upright in the bottle slots or lay them flat for a stacked look. The glass slots can be used to hang magazines or newspapers, making it a perfect reading nook organizer.
Planter and Herb Garden
If you love gardening, turn your pallet wine rack into a vertical planter. The slots can hold small potted plants, succulents, or herbs like basil, mint, and rosemary. This works well for indoor herb gardens in the kitchen or as a decorative wall-mounted garden for patios and balconies.
Outdoor Beverage Holder
For outdoor gatherings, use a pallet wine rack as a beverage station. Locate it near your grill or patio area with bottled drinks, glasses, and bar essentials. If you attach hooks or bottle openers, it becomes a convenient drink-serving area for guests.
DIY Craft Storage
A pallet wine rack can also serve as a craft supply organizer. Store paint bottles, brushes, yarn, or other small supplies in the slots while using the glass holders to hang scissors, ribbons, or crafting tools. This setup keeps materials organized and within reach while working on projects.
Baby Room Storage
For parents, a pallet wine rack can be transformed into nursery storage. Use the slots to store baby essentials like diapers, wipes, and lotions. Hang small baskets for extra items like bibs and pacifiers. It keeps baby supplies neatly arranged while adding a charming, rustic touch to the nursery.
A pallet wine rack is far more versatile than it seems. With a little creativity, it can be adapted for almost any space in your home. Whether you need extra storage, organization, or a unique decorative piece, this simple DIY project can be repurposed to fit your needs perfectly.
Conclusion
Building a pallet wine rack is a simple yet rewarding DIY project combining functionality and creativity. It provides an affordable and stylish way to store and display wine while allowing for endless customization options. Whether you’re making one for yourself or as a gift, a pallet wine rack adds a rustic charm to any space while keeping your favorite bottles within easy reach.
We have more ways to upcycle pallet racks. Check out our bike rack project next!


