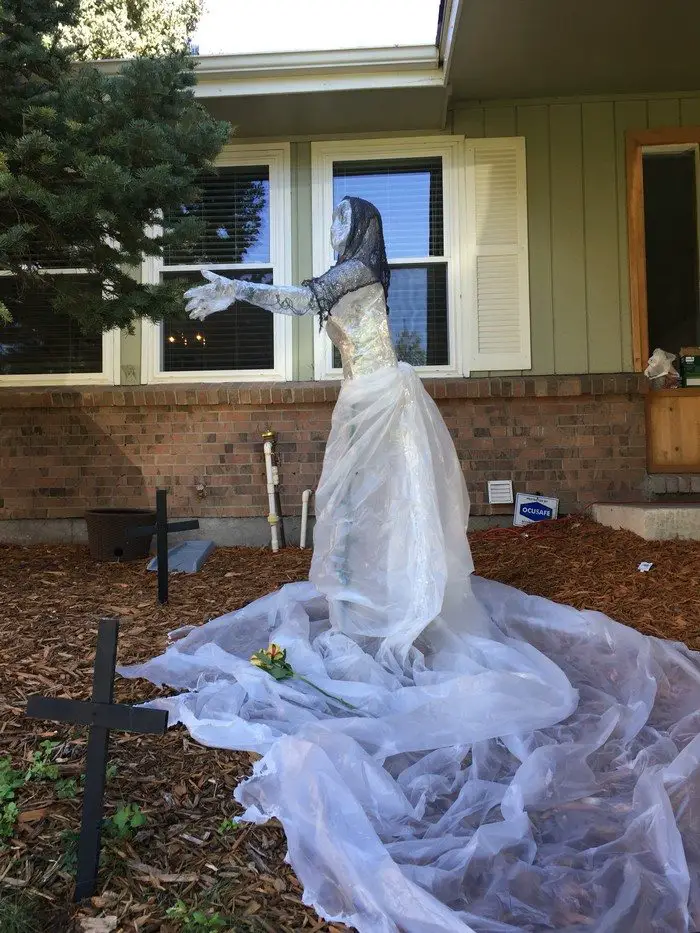
A packing tape ghost is a sure way to give your neighbours a good scare and creep them out. And it’s effortless to make!
This DIY ghost decor is suitable as a weekend project since it is a bit time-consuming. However, it’s really easy to make regardless of what kind of ghost you wish to display.
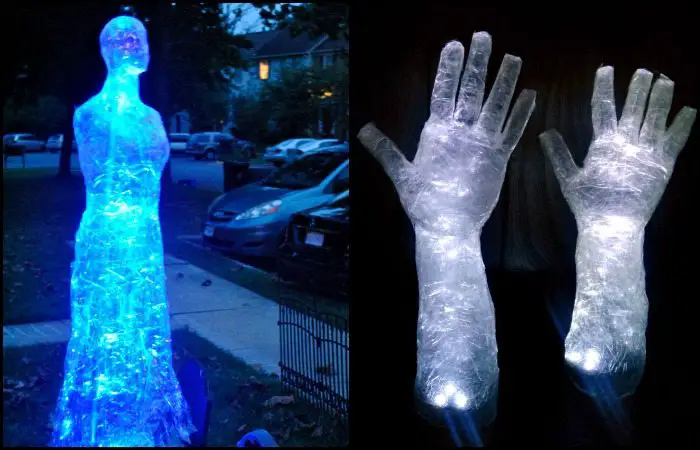
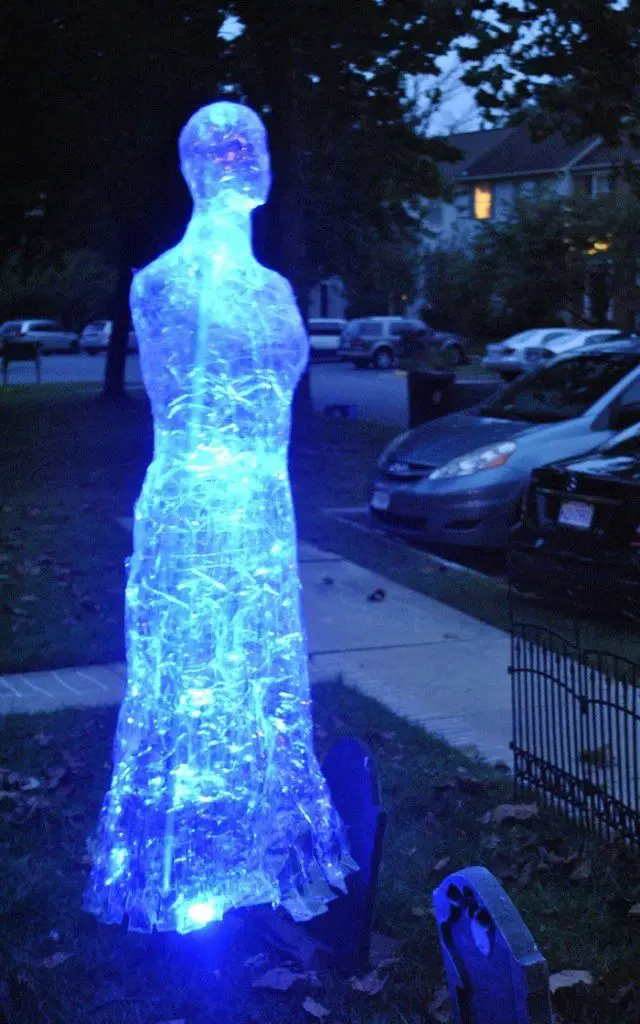
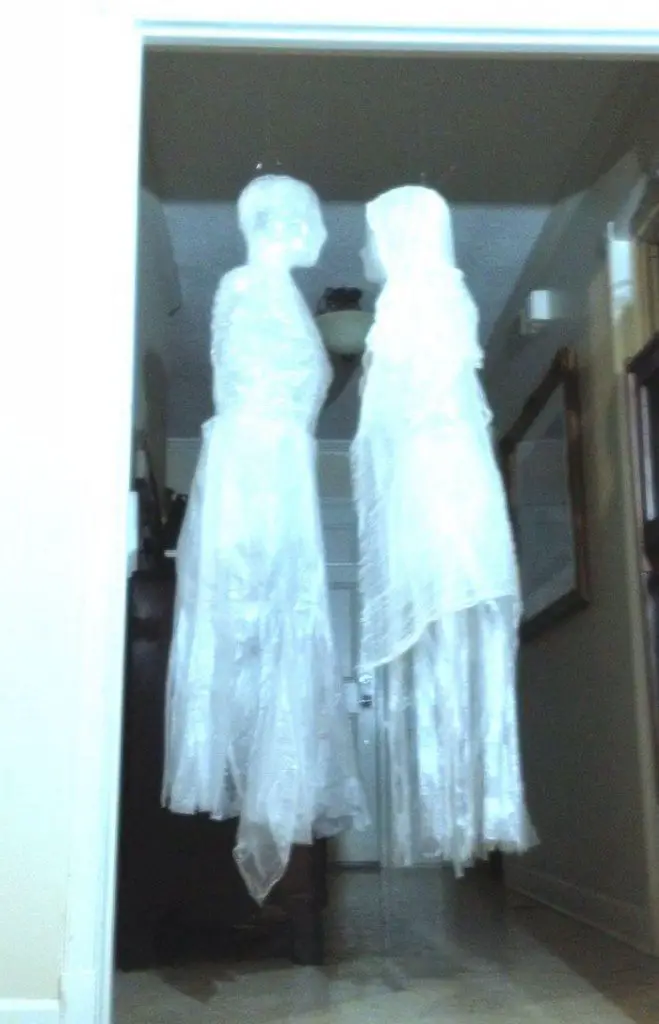
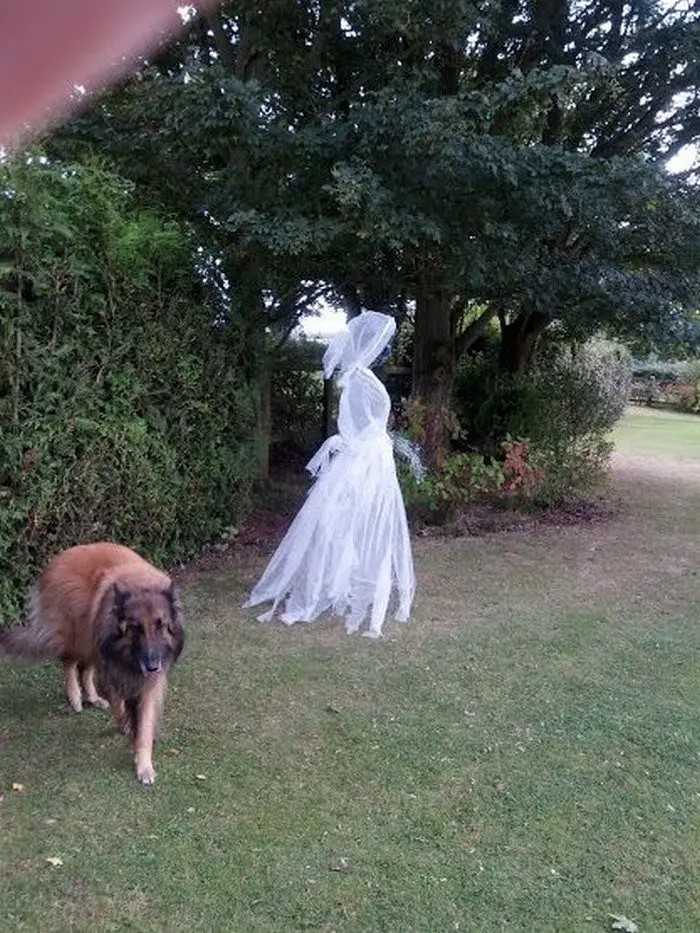
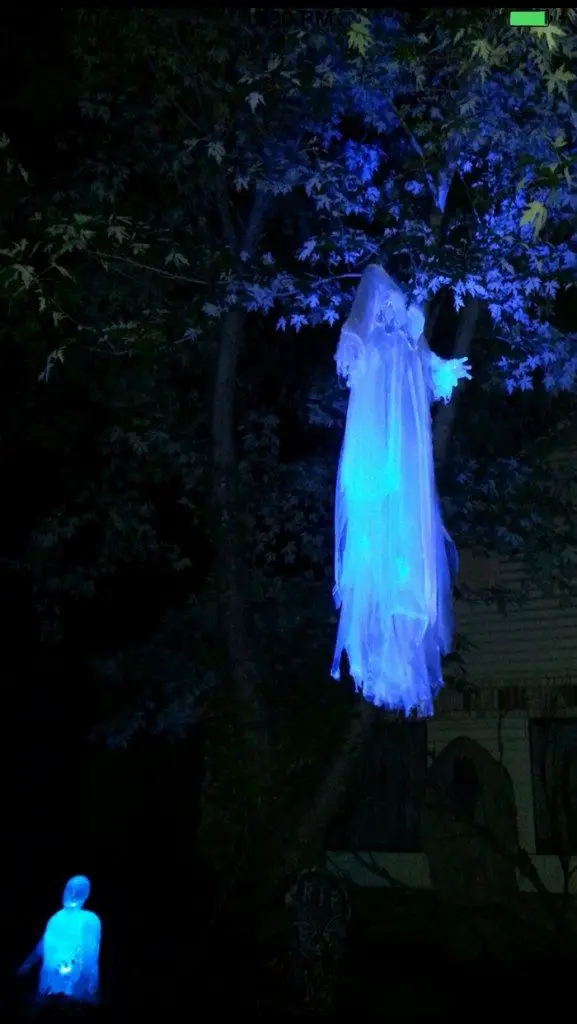
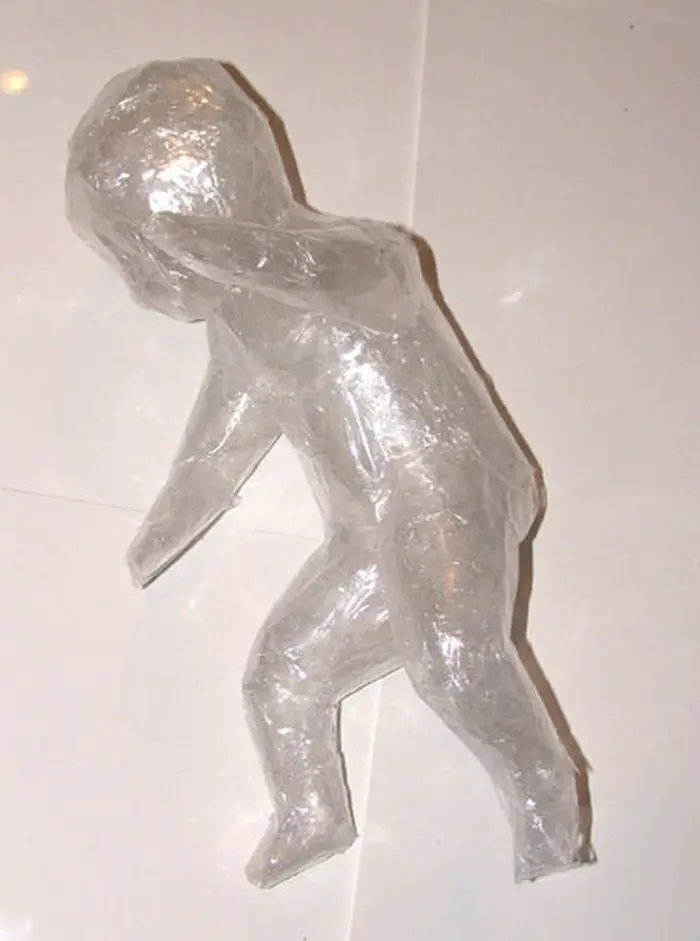
Lady ghosts with long dresses are one of the scariest. We also find baby ghosts very creepy, too!
The only and most important thing you must have is very common — clear packing tape. You can use a real person to shape the ‘body’ if you don’t have a mannequin or dress form. Don’t use a real person’s head for moulding the ghost’s head though! You’ll have to be resourceful if you don’t have a wig head :)
To do this, simply wrap your form with the packing tape sticky side out first, so that you can easily separate the tape from the model once you’re done. You can also attach white plastic bags to the ghost form as part of its dress or even as its hair for movement!
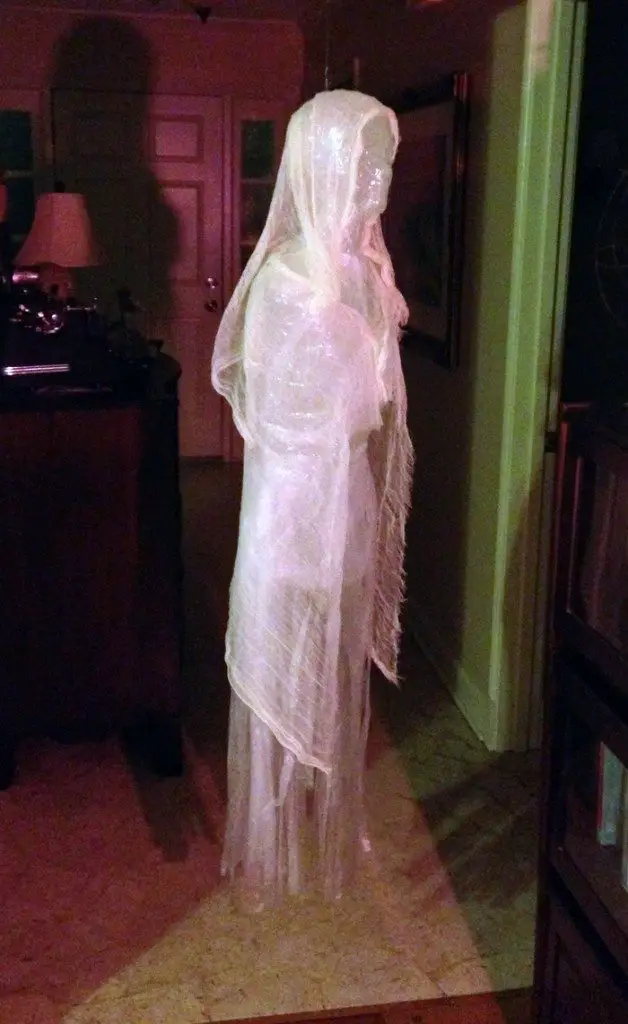
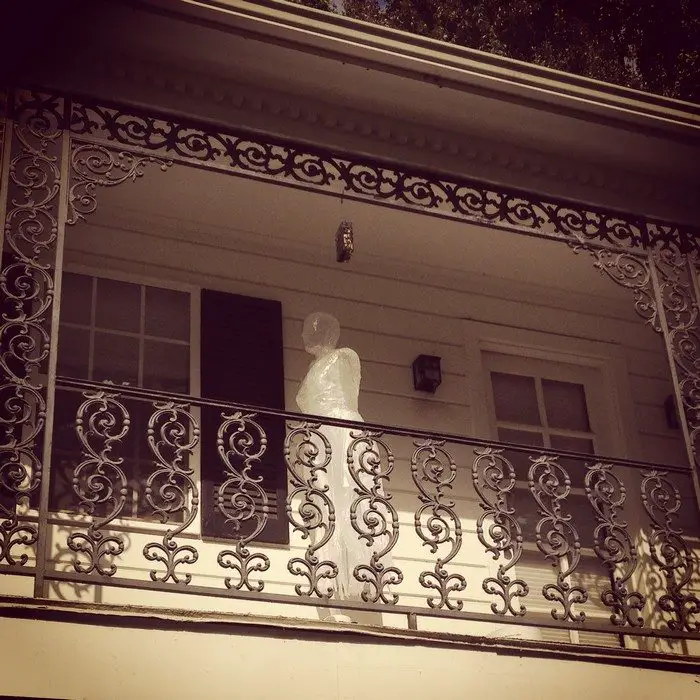
This is not just outdoor decor. This Halloween idea is also perfect indoors, especially since you can hang the ghosts on your ceiling, giving a floating effect!
Does this look like a good Halloween prank for your friends or family? Have a look at our album of packing tape ghosts below and get the link to the full tutorial below!
Contents
How to Make a Packing Tape Ghost
Are you ready to transform a few simple materials into a hauntingly impressive decoration that will send shivers down anyone’s spine? Whether you’re gearing up for Halloween, a themed party, or simply want to add a touch of eerie elegance to your space, this craft is bound to wrap you in excitement.
Unveil the secrets behind crafting your very own translucent and ethereal apparition using just packing tape and a dash of imagination. Get ready to embark on a ghostly crafting adventure that’s both fun and surprisingly simple.
Dive into the eerie art of making a packing tape ghost in seven spine-tingling steps!
Materials
- 3 rolls of Clear Packing Tape
- White Plastic Bags (optional)
- Dress Form, Mannequin or a Real Person
- Wig Head
- LED Lights (like these)
- PVC Pipes / any stand you have available or a Hook and Strings (if you want to hang your ghost indoors)
Tools
- Cutter
- Scissors
Click on any image to start lightbox display. Use your Esc key to close the lightbox.![]()


Steps
You’ll be shocked at the uncanny elegance you can make with only a few rolls of transparent packaging tape and some creativity. Here’s the fascinating process of creating your own packing tape ghost.
Step 1: Prepare the Structure
Begin by setting up your chosen foundation for the ghostly figure. Whether it’s a dress form, a mannequin, or even a real person, ensure it’s in a stable and desired pose. Place a wig head on top to serve as the head of your ghost.
Step 2: Cover the Form
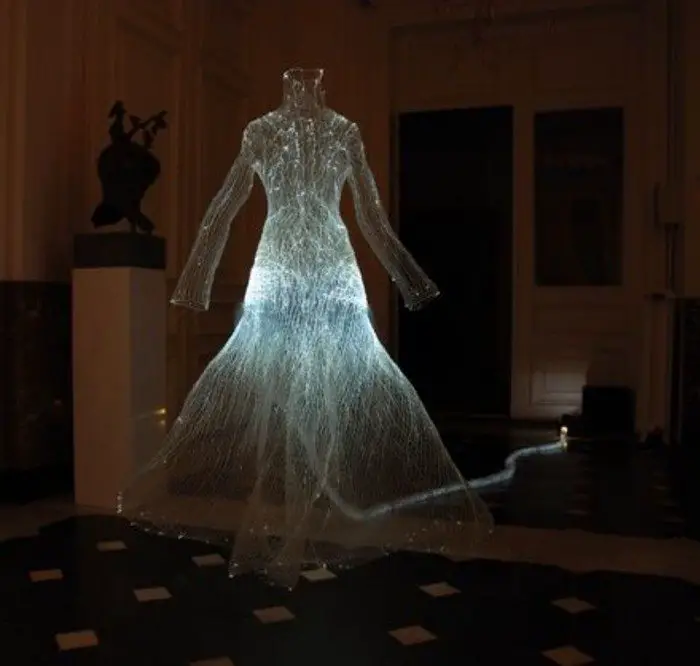
Start wrapping the entire structure with clear packing tape. Layer by layer, the tape will create a translucent effect, capturing the ghostly essence. Take your time to ensure smooth and even coverage, allowing the shape and details to emerge.
Step 3: Add Details
For a more realistic look, use additional layers of tape to accentuate specific features like the face, arms, and folds in the fabric. This step is where the character of your ghost truly comes to life.
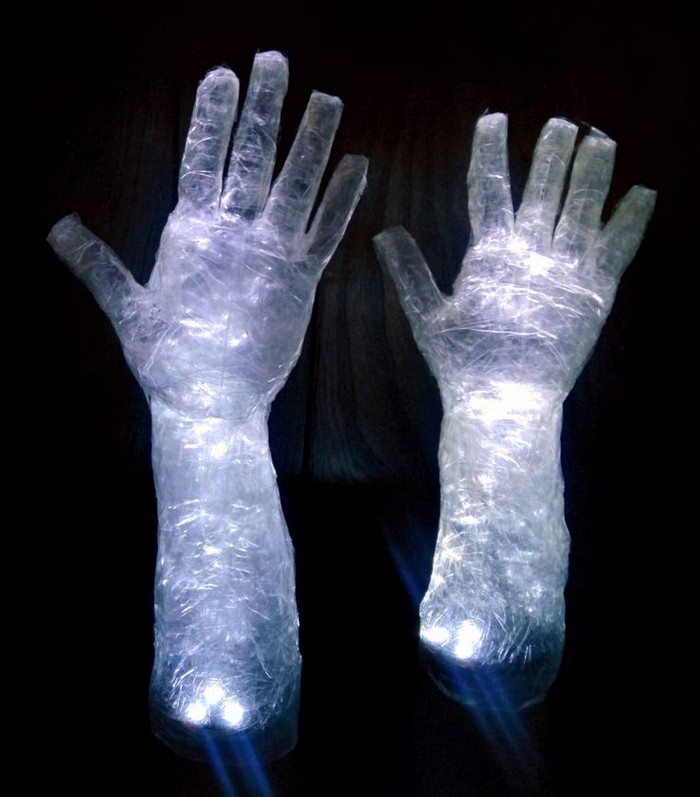
Step 4: Enhance with LED Lights
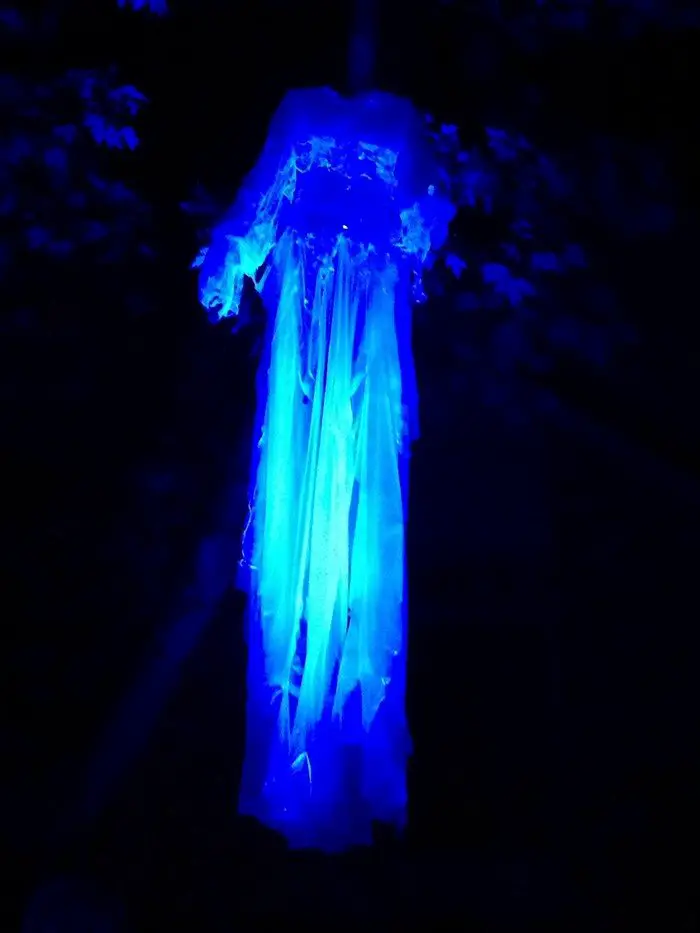
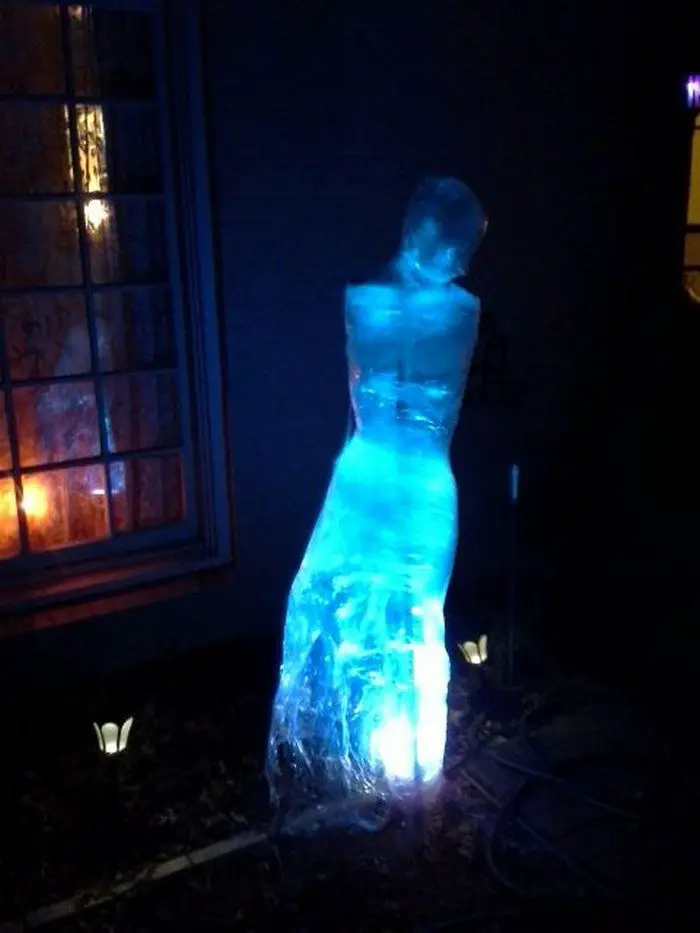
Introduce an enchanting glow by weaving LED lights within the layers of tape. This will add an ethereal luminescence that emanates from within, giving your ghost an otherworldly allure.
Step 5: Reinforce and Sculpt
Pay attention to any areas that might need additional reinforcement. Use the cutter to gently trim and sculpt the tape, refining the shape and texture of your ghost. You have the option to affix white plastic bags to the ghost’s structure, either as an integral part of its attire or even as a dynamic element mimicking hair.
Step 6: Stand or Hang
If you’re positioning your ghost outdoors, use PVC pipes or any available stand to ensure it stands steady. For indoor placement, hang the ghost using hooks and strings to create a floating effect.
Step 7: Illuminate and Enjoy
Finally, flip the switch on your LED lights to illuminate your stunning creation. Step back and admire the eerie elegance you’ve crafted with just a few materials and some creative flair.
With these seven simple steps, you’ve conjured a captivating packing tape ghost that’s sure to be the highlight of any setting. Embrace the spooky spirit and let your imagination soar as you unveil your very own masterpiece of ghostly artistry.
Here’s an extra tip for elevating your creative endeavor: if you are feeling particularly inspired, consider crafting decorative lanterns using old glass bottles. This imaginative extension of your project adds a touch of vintage charm and ambiance to your space, enhancing the mystical aura of your packing tape ghost.
Safety Tips and Tricks
When creating a packing tape ghost, safety is key. Working with packing tape and LED lights can be a fun and creative. Yet, handling these materials with care is essential to ensure a safe crafting experience. Here are some safety tips and tricks to keep in mind.
Choose the Right Workspace
Creating a packing tape ghost demands creativity and a mindful preparation of your crafting area. Opt for a well-ventilated, spacious room where air can circulate freely. This is particularly important when working with packing tape, as the adhesive can sometimes emit a mild odor that might be overwhelming in enclosed spaces.
A spacious area also allows you to maneuver large pieces of tape and the ghost’s form without restrictions, ensuring your ghost takes shape exactly as you envision. Moreover, LED lights, an essential element in bringing your packing tape ghost to life, come with their own set of handling requirements. While generally safe, these lights involve electrical components that should be managed carefully to avoid damage or short circuits.
Therefore, a clean and organized workspace is paramount. Clear your area of unnecessary items to prevent accidents and have a seamless crafting experience. An organized space not only aids in preventing mishaps but also enhances your overall productivity and enjoyment of the project.
Handling Packing Tape Safely
When embarking on the journey of creating a packing tape ghost, it’s vital to prioritize your safety, especially regarding handling packing tape. Prolonged exposure to the tape’s adhesive can lead to skin irritation or discomfort, particularly for sensitive skin.
To mitigate this risk, consider wearing gloves while working. This simple precaution can make the process more comfortable, allowing you to focus on the creativity and fun aspects of crafting your ghost.
Cutting the packing tape is another step where caution is essential. While it might be tempting to use whatever is at hand to cut the tape, safety and precision are key.
Utilizing scissors or a tape dispenser ensures a clean cut and significantly reduces the risk of accidents. Avoid using your teeth or improvised sharp objects, as these methods can lead to injuries or uneven, messy cuts that may detract from the ghost’s appearance.
LED Lights Safety
When creating a packing tape ghost, integrating LED lights can transform your decoration from simply spooky to spectacularly eerie. However, these lights, while generally safe and energy-efficient, come with considerations for safe handling.
Opt for battery-operated or low-voltage LED lights to minimize any electrical risk. These options are safer because they reduce the likelihood of electrical mishaps and are easier to integrate into crafts like the packing tape ghost.
Moreover, if your design involves plug-in LED lights, be mindful of the electrical load on your sockets. Overloading sockets is a common hazard, especially when enthusiasm for crafting leads to using multiple light sets. To prevent this, distribute your plug-in lights across different outlets or stick to battery-operated ones for a safer crafting experience.
Before incorporating the lights into your packing tape ghost, thoroughly check for damaged wires or bulbs. Damaged electrical components can pose a risk to the safety of your project and everyone around it.
Avoid Fire Hazards
The unique combination of packing tape and LED lights in crafting a packing tape ghost requires a vigilant approach to avoid fire hazards. LED lights, though generally cool to the touch, can generate heat when used improperly or when defective.
Ensuring that the lights you choose do not heat up excessively is crucial. Such a precaution prevents the risk of packing tape from melting or deforming, which could ruin your ghost and present a fire risk.
When placing LED lights inside your packing tape ghost, strategic positioning is key. Ensure there’s enough space between the lights and the tape to allow for heat dissipation. This careful placement not only maintains the integrity of your ghost but also ensures long-term safety.
Always remember to turn off or unplug your LED lights when they are not in use, especially if you will not be around to monitor them. This simple habit can significantly reduce any risk of overheating and extend the life of your ghostly creation.
Safe Crafting with Kids
Involving kids in making a packing tape ghost can be a delightful experience, fostering creativity and family bonding. However, when children are part of the crafting process, supervising their use of materials becomes even more critical.
Pay special attention to how they handle scissors and LED lights. Teaching children safe practices from the start instills a sense of responsibility and ensures a safe crafting environment.
Educate them on the importance of not poking the LED bulbs, which could lead to breakage or malfunction. Also, guide them on safely cutting packing tape, showing them how to use scissors carefully to avoid accidents.
These safety lessons allow children to enjoy creating a packing tape ghost while learning the value of careful crafting. Through supervision and education, crafting with kids becomes an enjoyable and safe activity that culminates in creating a hauntingly beautiful packing tape ghost.
Setting the Scene: Creating a Haunted Environment
Creating the perfect haunted environment to showcase your packing tape ghost involves more than just placing your ghostly creation in a random spot. It’s about crafting an atmosphere that enhances the eerie presence of your ghost, making it a focal point of spookiness that captivates and terrifies. Here’s how you can set the scene for a truly haunted experience.
Choose a Spooky Location
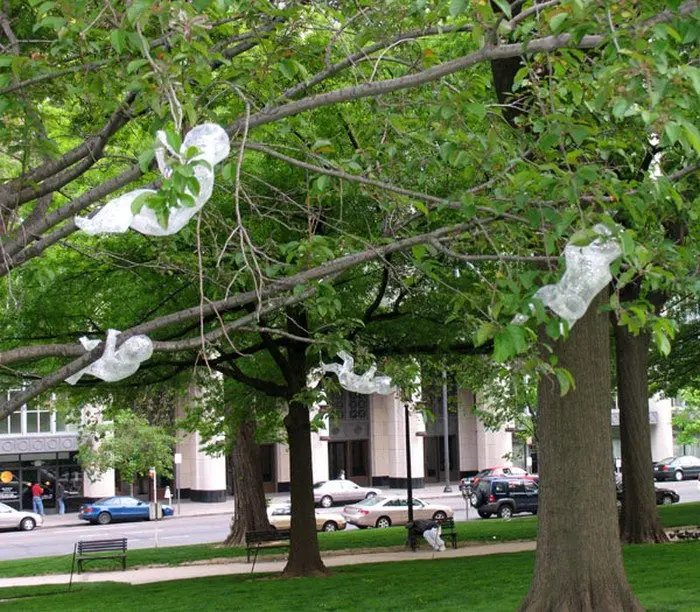
Finding the perfect spot for your packing tape ghost is key to creating a truly eerie atmosphere. Think about areas that naturally evoke a sense of unease or curiosity. Dimly lit parts of your garden or yard, especially those with natural cover like trees or bushes, can serve as an ideal backdrop. These settings allow the ghost to merge with the shadows, appearing and disappearing in a way that can make anyone’s imagination run wild.
Consider placing the ghost near a window that doesn’t receive much light inside your home, or in a typically dim hallway. The lack of light adds to the mysterious vibe and allows the ghost to become a subtly disturbing presence. The goal is to exploit natural shadows and low visibility, making your packing tape ghost seem as if it’s part of the surrounding darkness, watching silently from the sidelines.
Utilize Lighting to Your Advantage
Lighting is pivotal in setting the right mood for your haunted scene. Low-light sources, such as flickering candles or soft LED lights, can dramatically alter the appearance of your packing tape ghost. Position these lights to cast shadows that elongate or distort the ghost’s shape, creating an uncanny effect that suggests movement or otherworldly presence.
Consider placing lights at unusual angles to throw off viewers’ perceptions, making the ghost appear to float or drift. A carefully positioned spotlight, hidden from direct view, can illuminate the ghost in a way that makes it seem to glow from within, enhancing its spectral quality. Remember, the key is subtlety; you want to suggest rather than reveal, letting the viewers’ imaginations fill in the shadows with their deepest fears.
Add Eerie Sound Effects
Sound is an incredibly powerful tool for creating an immersive atmosphere around your packing tape ghost. The right background noises can transform a spooky setting into a deeply unsettling experience.
Whispers, almost invisible, can give the impression that the ghost is murmuring secrets from beyond. The creak of a door or the sudden, sharp sound of a floorboard can startle visitors, heightening their anticipation and fear.
Installing hidden speakers around your ghost’s location allows you to control the auditory experience of your visitors, enveloping them in a cocoon of spookiness. You might even coordinate the sounds with the ghost’s “actions” or the viewers’ movements, creating interactive moments that leave a lasting impression. These eerie sound effects ensure that the presence of your packing tape ghost is not only seen but felt, deep in the bones of anyone who dares to come close.
Incorporate Additional Ghostly Figures
While your packing tape ghost might be the star of the show, adding other ghostly figures can create a narrative or theme. Smaller tape ghosts, spectral shapes, or even shadow figures painted on walls can suggest an entire haunt, rather than a single entity. This builds a story that visitors can immerse themselves in, enhancing the overall experience.
Use Fog for a Mysterious Effect
A fog machine can add a layer of mystery and depth to your haunted environment. Fog swirling around the feet of your packing tape ghost or filling the space with a misty haze can transform any setting into a scene straight out of a horror story. It obscures the base of the ghost, giving it a truly floating appearance.
Set the Scene with Props
Incorporate thematic props that complement your packing tape ghost. Old books, vintage furniture, or even crafted potion bottles can add to the ambiance, making the space feel like a haunted house frozen in time. Choose props that align with the story or theme you’re aiming to convey with your ghostly display.
Spectral DIY Delight!
Crafting your very own packing tape ghost is an opportunity to infuse your space with a unique touch of spectral charm that store-bought decorations simply can’t replicate. By investing your creativity, you not only add a personal flair but also engage in a gratifying DIY project that stands out from the ordinary.
Plus, the process is a fun and engaging way to bond with friends, family, or your own creativity, making your living space feel a touch more enchanting and enigmatic. So, why settle for ordinary when you can conjure your very own extraordinary packing tape ghost?
Unleash your inner crafter and conjure an aura of spine-tingling delight with this guide on making a packing tape ghost. In just seven straightforward steps, you’ll transform mundane materials into a mesmerizing masterpiece of spectral charm. Wrapping layers of clear packing tape around your chosen form, you’ll sculpt an ethereal figure that captivates the eye and stirs the imagination.
Your packing tape ghost becomes a canvas of imaginative expression, embodying the spirit of both craftsmanship and the mysterious allure of the unknown. Whether you choose to suspend your ghost indoors, where its eerie elegance can grace your living space with an otherworldly charm, or to let it boldly stand outdoors, beckoning curious glances and hushed whispers, you’re embracing the true essence of do-it-yourself magic.
As the LED lights shimmer and dance within, your ghost will come alive with a bewitching radiance that celebrates the synergy of ingenuity and spectral beauty. It’s an invitation to revel in your artistic accomplishment, an emblem of the bewitching potential locked within a roll of packing tape, and a testament to the enchanting power of bringing your very own spectral vision to life.
Channel your creativity, let the spookiness unfurl, and revel in the bewitching beauty of your very own packing tape ghost!
Conclusion
A packing tape ghost is not just about creating a decoration. It’s an opportunity to delve into the art of the eerie, transforming simple materials into a masterpiece of spookiness. Choosing the right location, leveraging lighting creatively, and incorporating chilling sound effects elevate the experience from mere viewing to an immersive encounter. Each element, from the ghost’s placement to the ambient sounds that fill the air, is crucial in bringing the haunted scene to life.
For more spooky decorations, check out our living head illusion Halloween project next!


