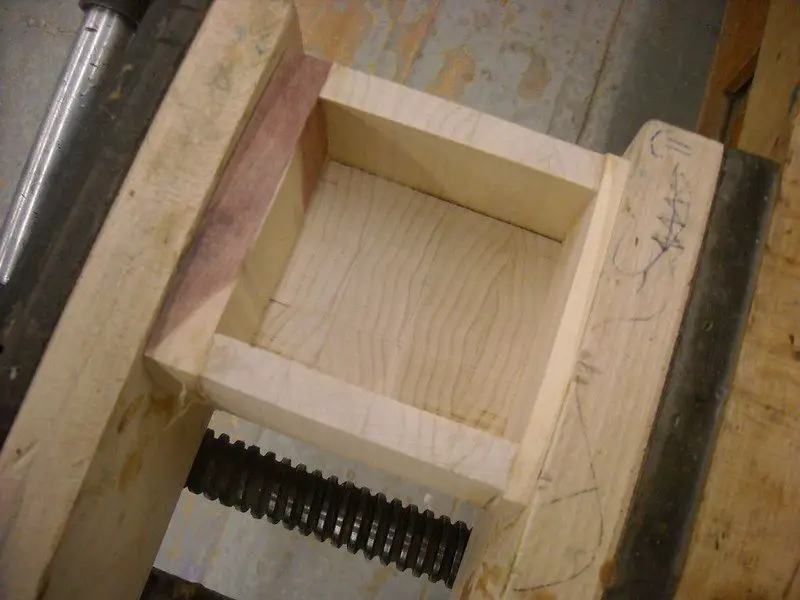
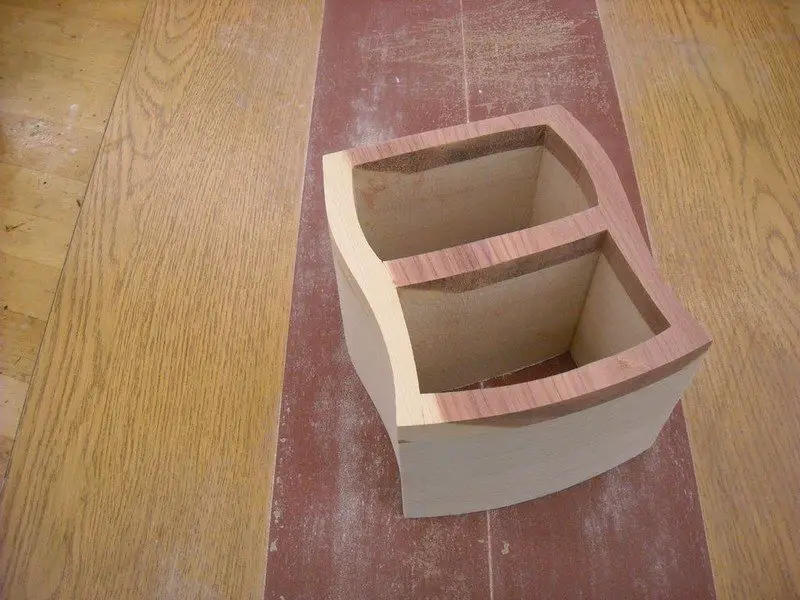
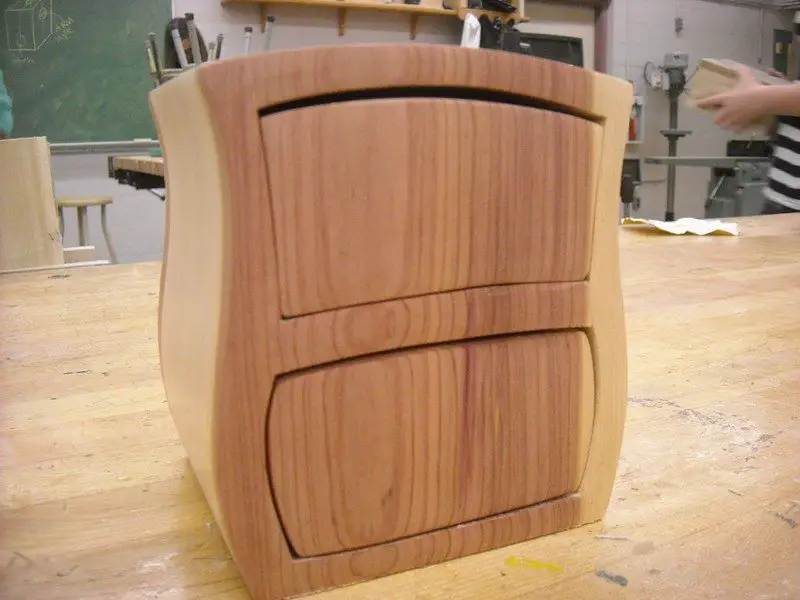
Now glue the front and back bandsaw box piece back on that you cut off earlier. Be really careful to line up the edges… if they DON’T line up they won’t fit back into the box. HEY PRESTO! you now have a drawer with a space to hold stuff.
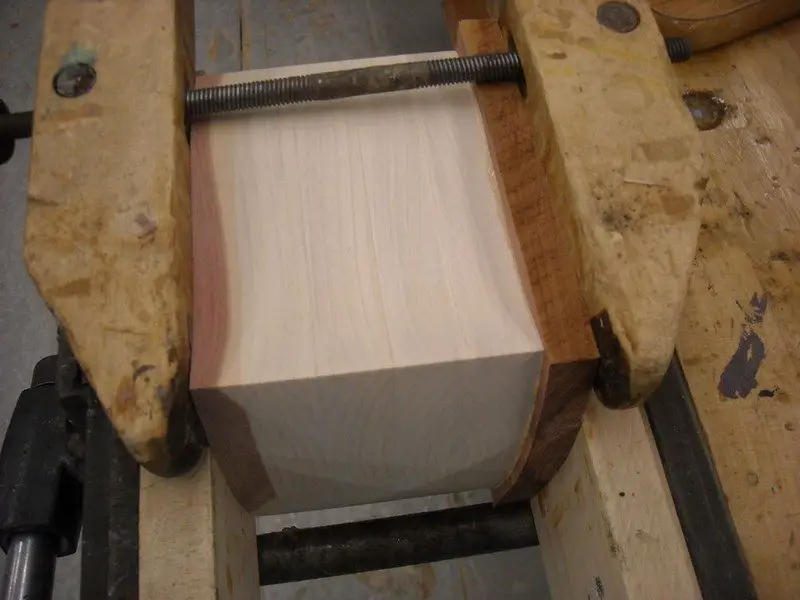
Now’s a good time to attach a back to the bandsaw box. Use the same thickness and type of wood unless you’re going for a different look. I rough cut a piece, apply glue to the back of the box and clamp it well. Don’t glue it with the drawers in. If a kid DOES do that, the best option is to drill a hole in the back, stick in a dowel and tap (or POUND) the drawer out.
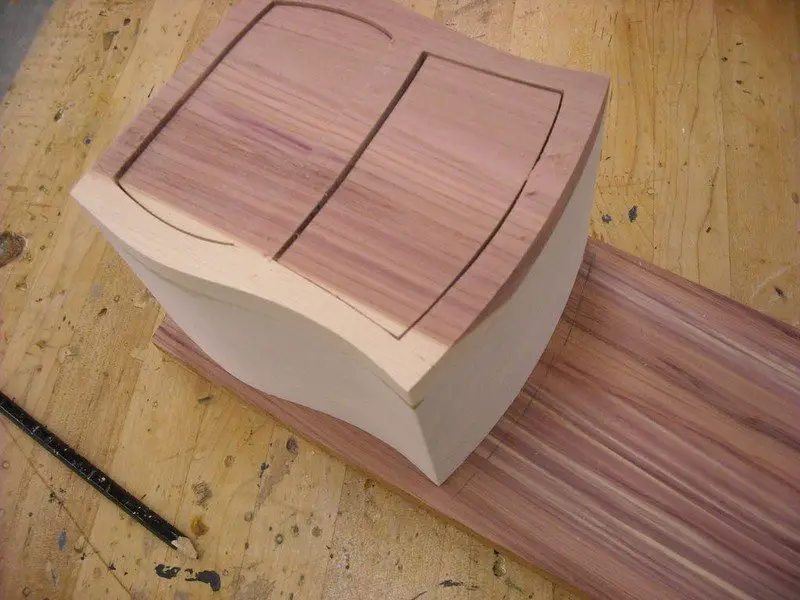
Once the glue is dry use the bandsaw to flush cut the back down. I let the kids use a spindle sander with a big (3″) sleeve attached at this point. Hand sanding works well too.
Most of us know how to sand but kids… well, not so much. Usually they jump right into using 320 Grit, sand furiously for 30 minutes and marvel at how smooth it is… What they don’t know is how rough it will look as soon as they put on the finish.
Heres a good analogy I came up with at one point. I ask the kids if they have ever seen someone try to mow a lawn thats really really deep. I go into detail about the wet grass spewing out the mower until it clogs up and how horrible it looks once its all done…
I than ask them if they’ve noticed how the wheels on the lawnmower go up and down so that the mower will take off less at a time… would it make more sense, i ask, if they would raise the mower as much as possible, cut the long grass than lower the mower and maybe even do it 3 or 4 times lowering it each time? They all nod and agree so at just the right moment i strike! HA (i say) THAT is EXACTLY what SANDING is like!!!
They often look confused until i explain that the grains on the wood all stand up and starting with a high number grit like 320 or 220 is like cutting long grass with a low mower. They need to start at a rough grit like 80 than sand like crazy with the grain until all the scratches are gone. The wood won’t be smooth until they move up through the grits from 80 to 120 to 150 or 180 and final finish with a 220 or a 320.
While i’m telling the story I am sanding a piece of bandsaw box wood through all the levels… not making a big deal of it but casually mentioning details as i go along… The last step is the finish. I like to use beeswax because its non toxic and smells good.
I pull out the rag, give the wood I’m working on a buff with the wax and man you should hear the students. They oooohh and aaahh and than they all start asking to touch it. Amazing results and the kids are inspired to do a really good job.
Teaching is so cool.
We hope this tutorial has inspired you to try this project with your kids!
Thanks to stumitch for this great project!
We have more educational project for kids. Check out our DIY playhouse project!
FAQ: Bandsaw Box
- How do you make the bandsaw box drawer?
- Crafting a bandsaw box drawer requires precise steps to achieve a clean and functional design. Start by cutting the front and back faces off the drawer blank using a bandsaw, maintaining steady and careful movements for accuracy. Sketch the bottom and side walls on the exposed middle section, ensuring they offset around 5/16 inch for uniformity, and cut along these lines.
- Assemble the drawer by gluing the front, back, and middle sections, securing them with clamps while aligning the wood grain for a seamless appearance. Finish by sanding the exterior to remove saw marks, keeping the dimensions intact for a snug fit within the box.
- What finishing touches can be applied to a bandsaw box?
- Adding the finishing touches to your bandsaw box enhances its look and usability. Start by using a 1/8″ round-over bit to soften the edges and give the box a refined, smooth feel. Sand the exterior of the shell and drawer to remove imperfections and prepare the surface for finishing.
- Apply a quality rub-on oil to enrich the wood’s natural beauty and provide protection. For added elegance, flock the interior of the drawer and shell with a soft, velvet-like lining, and complete the look by attaching a stylish pull or knob to the drawer for both function and aesthetic appeal.
- What steps are involved in completing the bandsaw box shell?
- Completing the bandsaw box shell requires careful gluing, sanding, and alignment. Start by gluing the entrance cut with F-style clamps, ensuring stability while the glue sets, and keep the template in place to maintain the proper shape. Once dried, attach the back of the shell, aligning the grain carefully to make the seam nearly invisible, and secure it with clamps until fully dry.
- After removing the clamps, sand the exterior using a disc and spindle sander to refine the shape, while leaving the interior untouched since it will be flocked later. Finally, remove the paper templates to reveal the clean surface, leaving the shell ready for final finishing steps.
- How do you cut the bandsaw box shell?
- Cutting the bandsaw box shell requires precision and patience to achieve a clean and accurate shape. Start by marking your design clearly on the wood, ensuring the outline is easy to follow. Cut just outside the marked lines to leave room for adjustments during sanding, and always use a sharp bandsaw blade for smoother cuts and safer operation.
- Guide the material gently through the blade without forcing it, allowing the saw to work efficiently. Rough edges are fine at this stage, as they can be easily smoothed out during the sanding process, ensuring a polished final result.
- How do you cut out the drawer from the bandsaw box shell?
- To cut out the drawer from a bandsaw box shell, start by safely setting aside the back piece you previously cut, as it will be essential for reassembly. Identify the entry point on the shell based on your project template, which serves as your cutting guide.
- Use the bandsaw to cut down the center of the marked thick line with precision, aiming to divide the line evenly for a clean drawer extraction. Maintain a steady grip, let the blade work naturally with gentle pressure, and once the drawer piece is free, set it aside for shaping or reassembly. This careful approach ensures a smooth and accurate drawer cut.
- How do you apply and use bandsaw box templates?
- Applying and using bandsaw box templates requires precision to achieve accurate results. Start by printing the template at 100% size to ensure the dimensions remain true to the design. Apply a light, even coat of spray adhesive, like 3M’s Super 77, to the back of the template and let it sit for about 60 seconds until tacky.
- Carefully position the template on the wood, pressing from one edge to the other to avoid air bubbles and ensure a secure fit. This process ensures the template stays in place, providing a reliable guide for precise cuts on your bandsaw box project.
- What is the method for cutting the back of a bandsaw box?
- Cutting the back of a bandsaw box requires precision and care to maintain the piece’s integrity. Start by adjusting the bandsaw fence to approximately 1/2 inch from the blade, ensuring an even cut through the back of the box.
- Slowly and steadily feed the box into the blade, allowing it to cut smoothly while avoiding rough edges or damage. Maintain firm yet gentle pressure to guide the box, keeping your hands at a safe distance to ensure control and a clean, precise cut. These steps prepare the box for seamless reassembly and the next stages of your project.
- What is the best blade to use for making bandsaw boxes?
- Choosing the right bandsaw blade is essential for crafting bandsaw boxes with precision and efficiency. A 3/16″ blade width is ideal for navigating tight curves without binding, while a blade with 4 TPI strikes a balance by allowing effective waste clearance without over-smoothing the cuts.
- Larger gullets between the teeth help remove sawdust efficiently, preventing buildup that could cause burning or hinder movement. A 3/16″ blade with 4 TPI and a skip tooth design is the optimal choice for cutting thick blanks, ensuring clean cuts, maneuverability, and minimal dust interference.
- What level of experience or tools are needed?
- Creating bandsaw boxes does not require extensive woodworking experience or a vast array of expensive tools, making them accessible to beginners.
- What are the creative possibilities with bandsaw boxes?
- There is a wide range of design options available, allowing for diverse shapes and sizes that cater to personal creativity and unique preferences.
- How long does it take to make a bandsaw box?
- Bandsaw boxes can typically be completed within a single day, offering a quick turnaround for those eager to finish a woodworking project swiftly.
- What materials can be used to make bandsaw boxes?
- You can craft bandsaw boxes using leftover wood pieces, making them a sustainable choice that utilizes materials you might already have.


