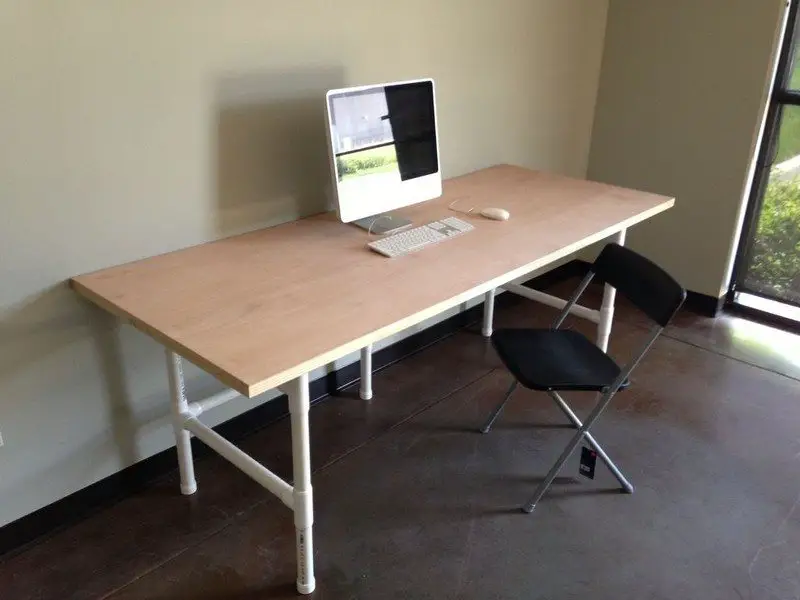
Need a REALLY wide table for you to work on? Buying one can be expensive. This DIY PVC table solves your budget concern, plus it’s relatively easy to build!
It’s ideal for those who work with a team that needs more than one unit as each only costs around $74. Imagine the amount of money saved as compared to store-bought desks! The one I made is less than half what you would pay for a store-bought table.
This DIY desk uses a hollow core door tabletop which can be used for simple workloads like computer work, crafting, drawing or kids’ table. If you are planning to use this table as a workbench, you can use a solid core door and steel pipes instead.
This desk measures 80 x 36 inches! What’s even better is that this table doesn’t shake or wobble. ;)
Is this the desk perfect for your needs?
Building a PVC Table
Materials
- Hollow Core Door
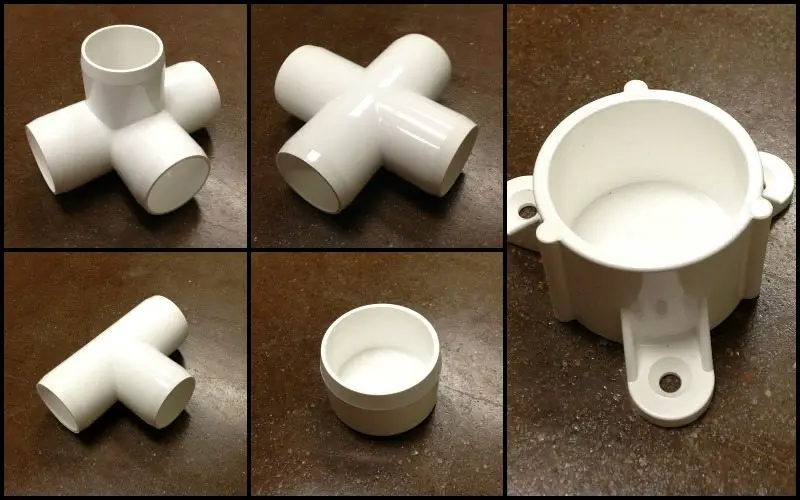
- Furniture Grade PVC Fittings
- 5 x 1-1/4” PVC External Caps (F114EEC)
- 5 x 1-1/4” PVC Table Caps (F114ECT)
- 4 x 1-1/4” PVC 4-Way Tees (F1144WT)
- 4 x 1-1/4” PVC Regular Tees (F114TEE)
- 2 x 1-1/4” PVC Crosses (F114CRX)
- Plumbing Grade PVC Pipe (see list in the first step)
- 1-1/4″ to 1-1/2″ long threaded Screws
- Drywall Screw Inserts
- PVC Cement
Tools
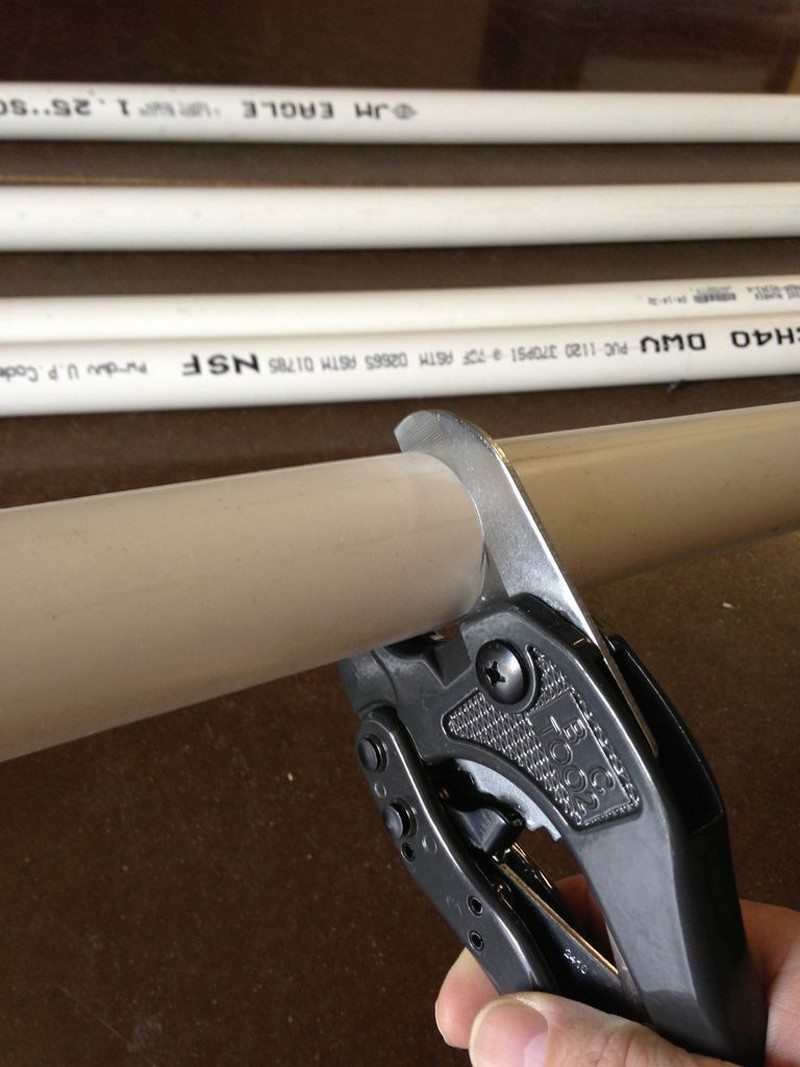
- Hacksaw, Ratcheting Plastic Pipe Cutter, or Power Miter Saw (for cutting pipes)
- Power Drill
- Measuring Tape
Instructions
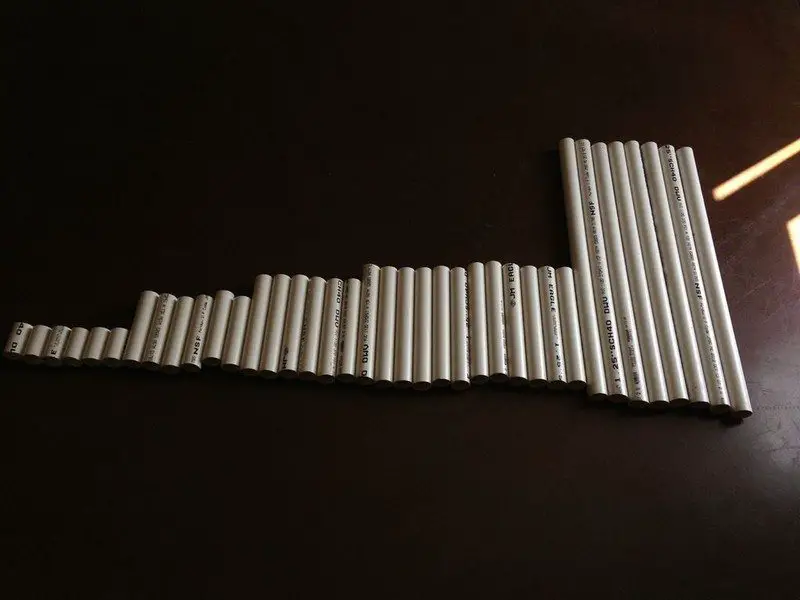
I used plumbing grade pipe to keep the PVC table costs low, as shipping of furniture grade pipe, while much more attractive, ridged and strong, can be expensive. I used off-the-shelf pipe for home depot, at $3.60 for a 10’ stick, with a total of four (4) sticks being used (or 40 feet). The pipe was cut to the following lengths and quantities:
- A quantity of five (5) 3” lengths.
- A quantity of ten (10) 12” lengths.
- A quantity of four (4) 20” lengths.
- A quantity of four (4) 30” lengths.
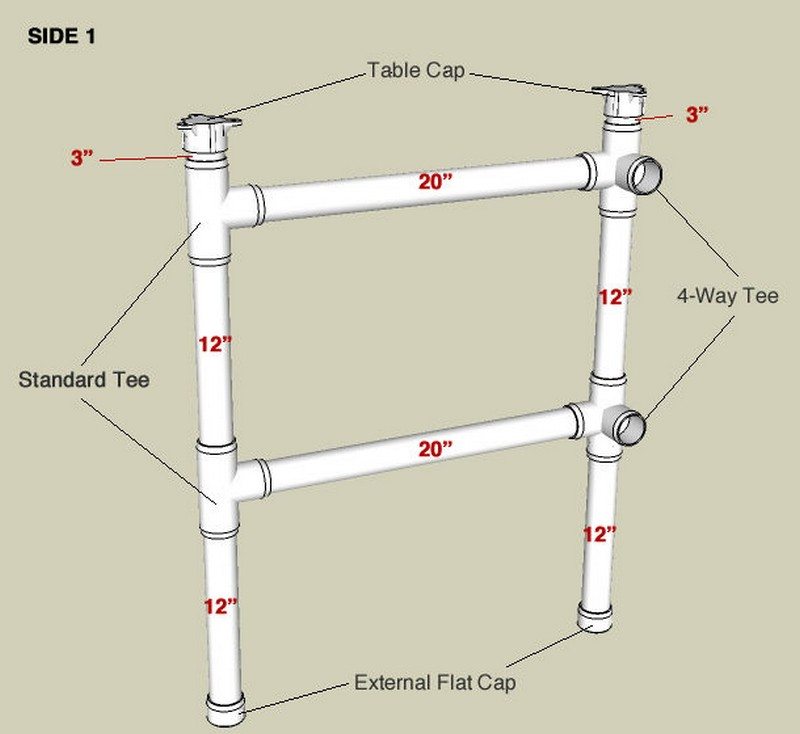
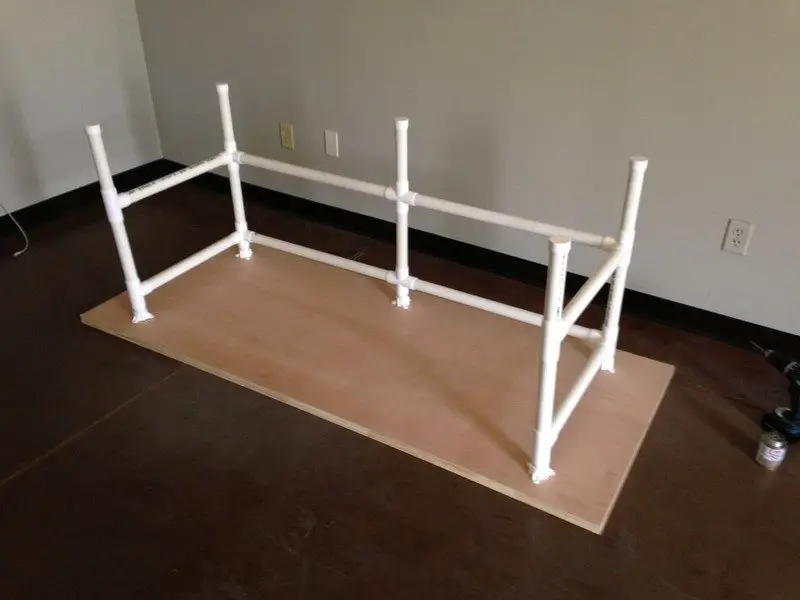
The first step to making your PVC table is to assemble to the first of the two sides of the PVC frame using the Tees, 4-Way Tees, the End Caps and the Table Caps, as shown in the attached photo. Fitting placement is in BLACK, and the pipe size to use is shown in RED. This will be ‘SIDE 1’, or the left side of the table.
I recommend a dry fit first for your PVC table, THEN pull everything apart and reassemble using PVC Cement. As many of you know, once you apply PVC cement, it will not come apart again.
Apply the PVC cement to the inside of the fitting at the ‘stop’ point of the fitting only. Make sure things are being inserted the way they should for your PVC table, then press the pipe into the fitting and hold for 30 seconds to secure the weld.
NOTE: THE SEQUEL: If you don’t want to use PVC cement (as it is noxious indoors), use 1/2″ screws between where the the pipe and fitting meet to secure them both in place.

The next step is exactly the same as the previous, however, you want to build your ‘SIDE 2’ or the right side of the table as a mirror image to the SIDE 1, so that the ports on the 4-Way Tees face the other direction, when in the rear.
Another diagram is attached which shows pipe and fitting placement, with pipe in RED and fittings in BLACK.
Continued Page 2…


