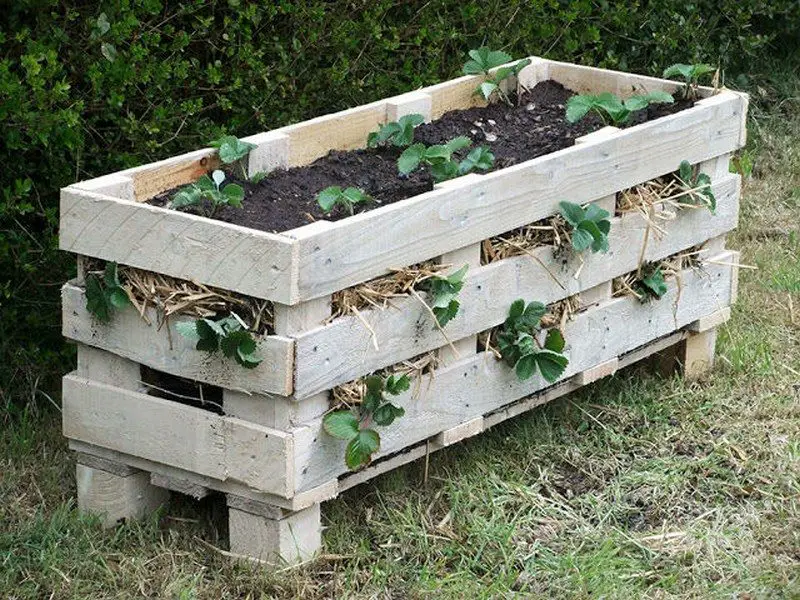
If you’re thinking of growing strawberries, then a pallet strawberry planter is perfect for you. The material is inexpensive and is readily available.
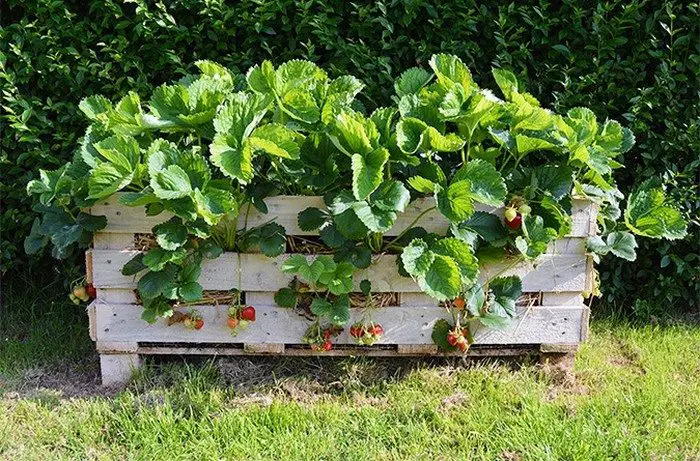
The owner always wanted to try recycling pallets and turning them into a planter for growing garden produce. However, she found that most examples are poorly executed, and are not aesthetically pleasing.
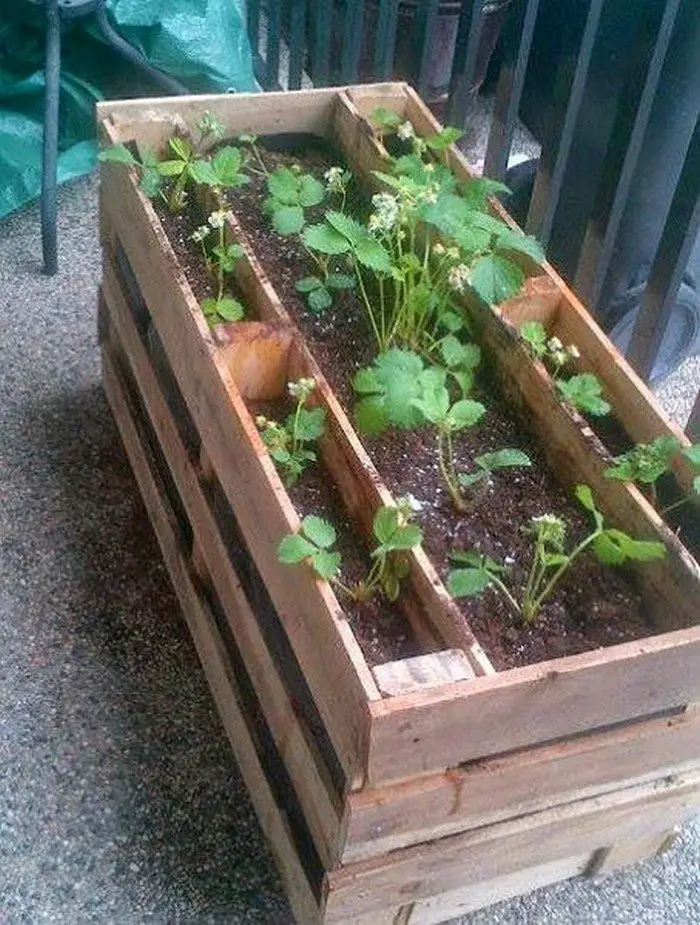
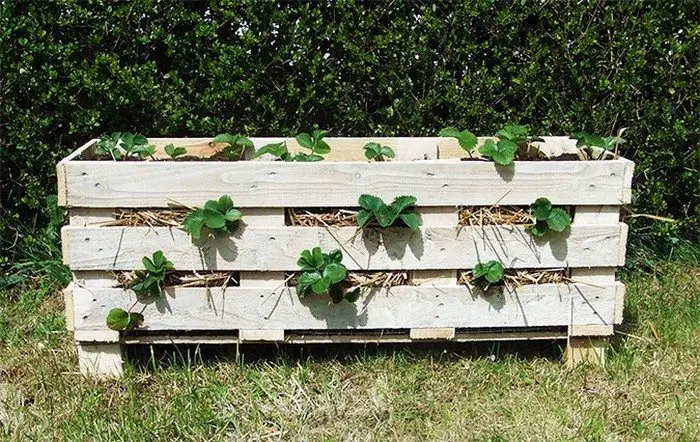
Although not convinced with the idea, she tried it out. The result is this clever strawberry planter made from reclaimed pallets. It’s very easy to build. Anyone comfortable with using a hammer and a handsaw can build one. It’s a great-looking planter that won’t cost you a fortune.
Contents
Building a Pallet Strawberry Planter
Materials
- 1 Pallet – good condition
- 1-1/2″ and 3” Screws and Nails
- Non-toxic Paint
- Straw – to serve as an organic erosion barrier
- Wire Mesh/Hardware Cloth
- Fabric
Tools
- Tape Measure
- Jigsaw
- Drill
- Chisel
- Paint Brush
- Hammer
Click on any image to start the lightbox display. Use your Esc key to close the lightbox.![]()

Steps:

First of all, choosing materials for your pallet strawberry planter involves a bit of know-how. You need pallets that are in good condition, without rot, and which have not been treated with chemical insecticides. Most people are probably not aware of this but pallets that cross international borders must be either heat-treated or sprayed to stop the spread of foreign pests.
Whether you think this is a good idea or not for your pallet strawberry planter, you certainly do not want pesticide-soaked furniture or objects in your garden let alone your home. Not only can it kill off insects that eat your crops but it can indiscriminately kill all the beneficial insects too. There’s also the possibility of your plants absorbing these chemicals into their tissues and your tasty strawberries!
To help you find the right type of material for your pallet strawberry planter I’ve put together a diagram of what to look for when you spot one. By international law, a pallet must be stamped twice with certain information which includes whether it’s been sprayed. Keep clear of any pallets that have been printed with the letters MB.
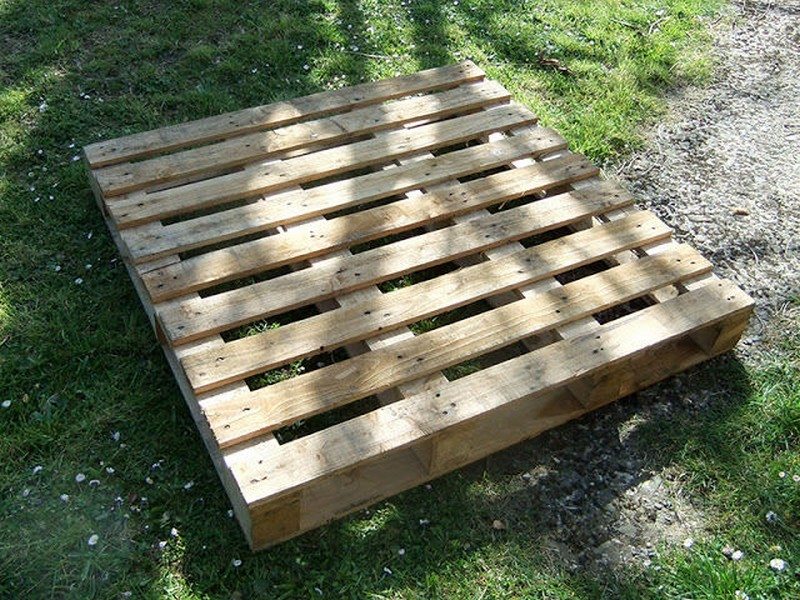
For this project, you will also need to look for a pallet that has six or nine planks making up its main surface. The reason for this is that the first major step will be slicing the pallet up into three equal-sized pieces (both six and nine are divisible by three). If there’s such a thing as a pallet with twelve planks then all the better because that means you can build an even larger planter.
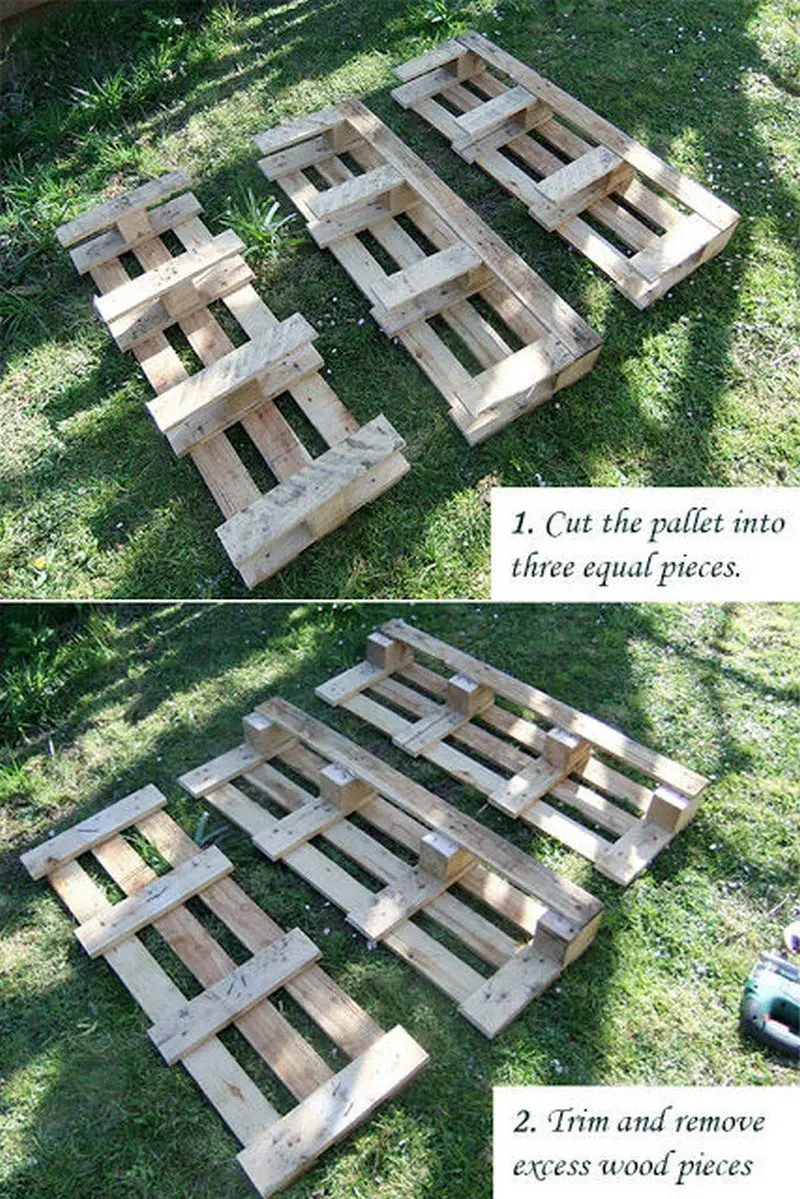
The easiest way to do this is to cut and lay the pallet so that the long planks are in parallel with your position. If your pallet has nine planks, as mine did, then count over three planks and then see the wood between the third and fourth planks. Saw right in the middle, to keep things easy and to ensure that all of your proportions remain correct. Continue another three planks and cut again. Remember that you’ll have to see the exact places on both the front and back of the wood for your pallet strawberry planter.
You’ll have three pieces of pallet now, all of the same height and width for your pallet strawberry planter. Two of the pallets will be formed from the top and bottom and will have chunky blocks securely fixed to them between one of three planks on the front side and the single one left on the other.
You’ll want to trim off the excess wood jutting up from each one of these wooden blocks for your pallet strawberry planter. Please refer to the images for steps one and two. Though I chose not to do it in this project, you could also remove that single plank on the back side. If you do this then you could have a deeper pallet strawberry planter – it’s up to you.
The piece that made up the center part of the pallet also has thick wooden blocks sandwiched between its front side and stubby planks on the other. Pull these blocks and stubby planks off but keep them in reserve – you’ll need them to complete the pallet strawberry planter. If there are nails sticking up after removing these pieces then either hammer them flat or remove them completely.
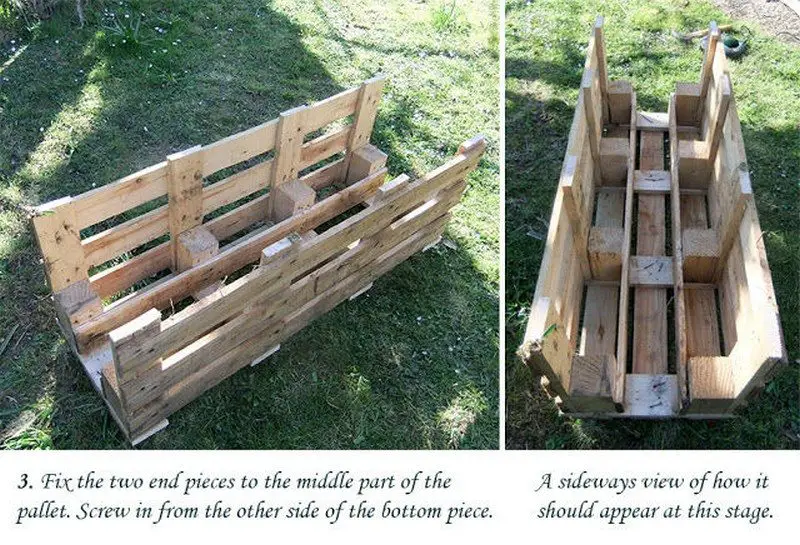
Fix the two end pieces to the middle part of the pallet. Screw in from the other side of the middle (bottom) piece.
The two end pieces will be the sides of your planter and the middle piece is the bottom of your pallet strawberry planter. Though the image shows the structure right way up, it’s easier to flip it over to fix the bottom piece to the sides. You’ll want to screw or nail the bottom piece into the wooden blocks still attached to the side pieces.
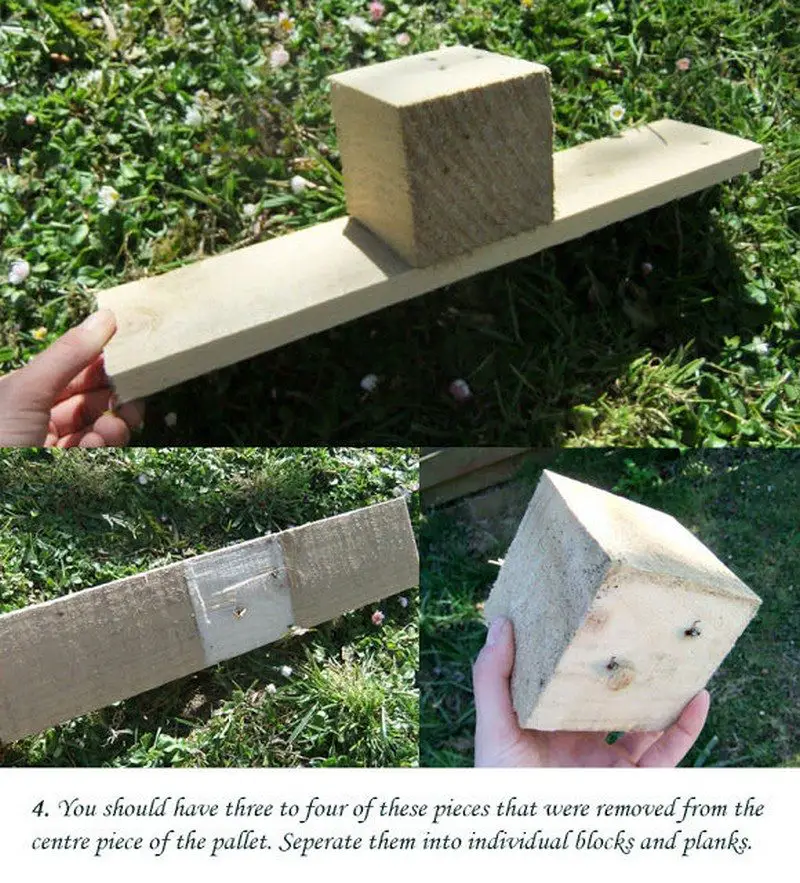
You should have three to four of these pieces that were removed from the centre piece of the pallet. Separate them into individual blocks and planks.
This is easier said than done if you don’t have the right tools when making your pallet strawberry planter. Since pallet wood that has been heat treated can be brittle if you try to pull the plank off with the tongs of a hammer.
If you have a heavy duty chisel then I recommend that you use it to separate the block and the plank and sever the nails in two. If you’re planning on doing any more pallet strawberry planter you could really save yourself a lot of tears and invest in one along with an iron mallet down at your local hardware store. If any of your pieces have bits of nails sticking out then try to hammer them flat.
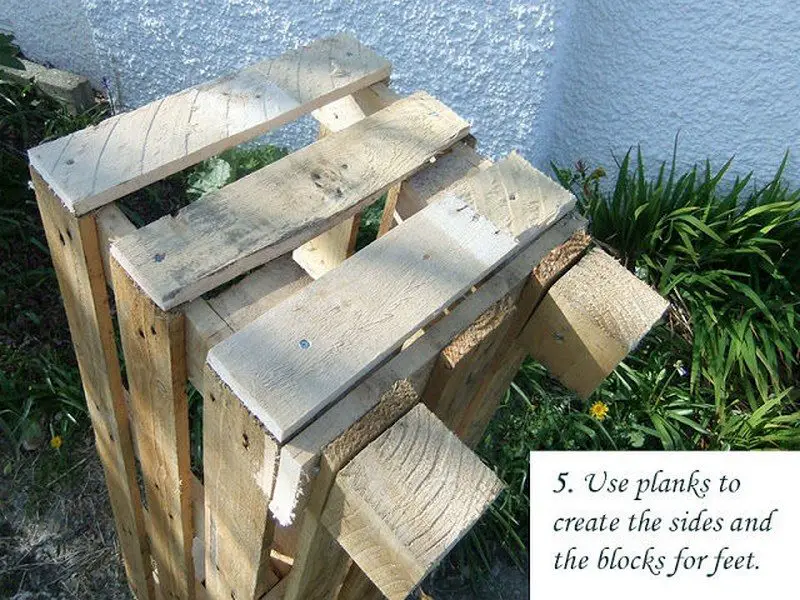
If you’ve followed the directions for your pallet strawberry planter in the first step and sawed in the middle between the long planks. Then the little planks leftover from step four should all be approximately the same length.
They will also be the same width you need to create the shorter sides of your planter. If your original pallet was the same size as mine then you’ll have four of these planks to make up two pieces for each side. The bottom planks for each of the shorter sides can be created by re-using the bits of wood you cut off the side pieces in step two. For a more pleasing and symmetrical effect, line the small side planks up with the planks along the front and back pieces.
Attaching the wooden blocks as feet can be a bit tricky and in the end I drove very long screws in sideways to attach them to the bottom of the planter. Putting feet on the piece will help with drainage and slow down the process of the bottom rotting. I think they also make the planter look nicer.
I can foresee some people finding pallets of slightly different sizes to mine and being left with less small planks and blocks in this step. It’s more likely that you’ll end up with three of each rather than four, especially if you’re using a smaller pallet. In this case you’ll be cobbling together more scraps to make an additional side piece and having to find a fourth block to use as the last foot. In this case, I’d look at removing one of the inner blocks from the side pieces to use.
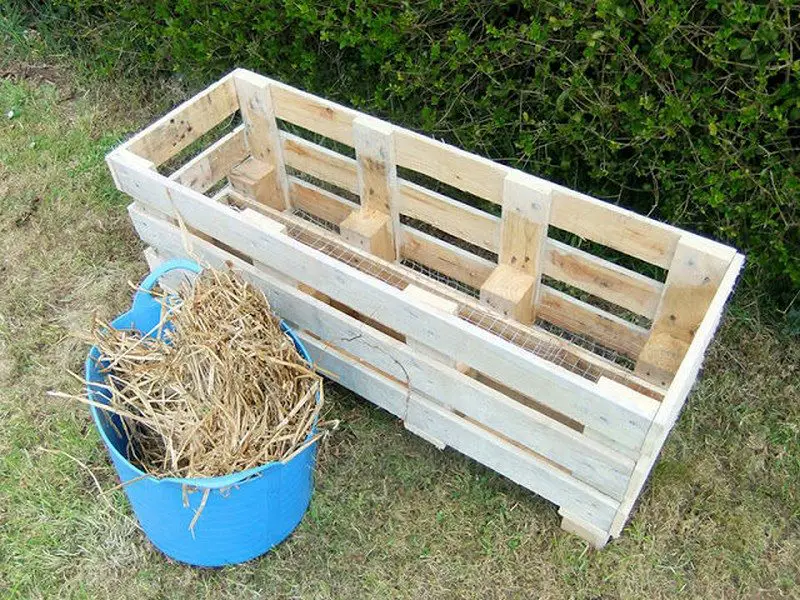
Well almost :) Turn your pallet strawberry planter right way up and have a look at it. Does it feel sturdy? Are the feet wobbly? Are there extra bits of wood sticking up that you could trim back? Once you feel the pallet strawberry planter is complete then either plant it up as is or use a non-toxic outdoor wood paint to paint the exterior. Being wood, this piece will eventually rot down but some tlc now can help extend its life.
Don’t know where to get pallets? Get all the details on where you can find them here: Pallets – where do you get them?
To ensure that the pallets you found are safe to use for your pallet strawberry planter, read all the facts – and instructions on how to dismantle pallets: Pallets – fact and fiction (or how to tell a safe pallet from a toxic one)…
Ask first before taking any pallet. Branded pallets are not single-use.
Thanks to
Creative Design and Decoration Ideas
Transforming a pallet strawberry planter into a visually appealing garden feature not only enhances the aesthetic of your outdoor space but also showcases your creativity. With a few simple design and decoration ideas, your pallet strawberry planter can become a standout piece that reflects your personal style while serving as a functional garden element.
Let’s explore some creative ways to add flair to your pallet strawberry planter.
Paint and Stain
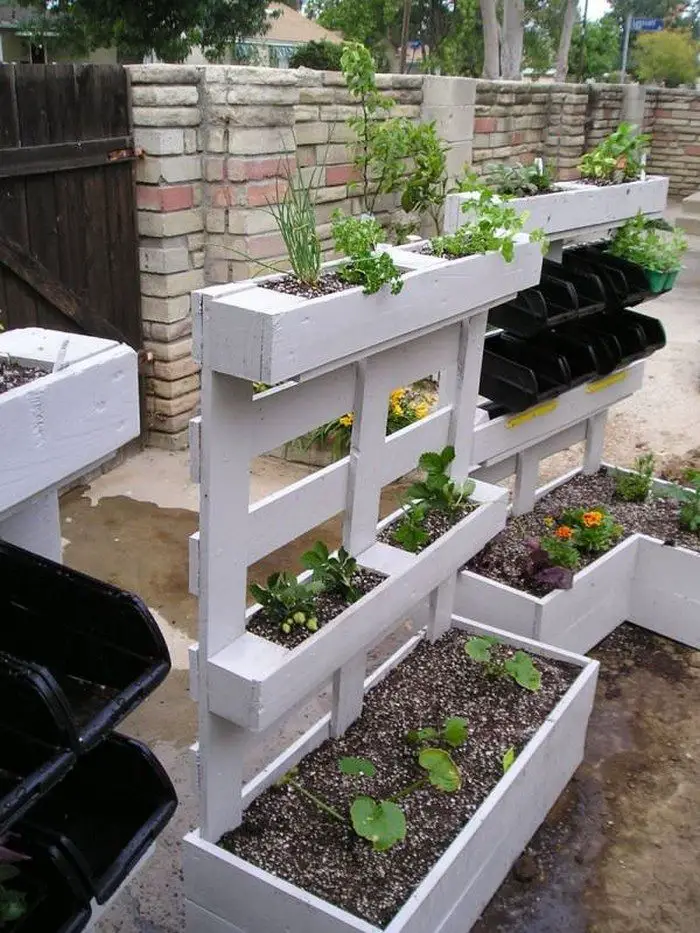
- Color It Up: A coat of paint can breathe new life into your pallet strawberry planter. Choose non-toxic, outdoor paints in colors that complement your garden’s palette. Bright colors can add a playful touch, while more subdued tones can help the planter blend seamlessly with its surroundings.
- Stain for a Natural Look: If you prefer a more rustic or natural aesthetic, applying a wood stain can enhance the pallet’s texture and grain. Opt for eco-friendly and non-toxic stains to ensure the safety of your strawberries and the environment.
Artistic Touches
- Stencil Art: Add a personal touch to your pallet strawberry planter by using stencils. Floral patterns, geometric designs, or even the names of the strawberry varieties planted can turn the pallet into a canvas, showcasing your artistic flair.
- Freehand Painting: For those who are artistically inclined, freehand painting on your pallet strawberry planter offers endless possibilities. Whether it’s a landscape scene, garden motifs, or abstract art, your design can make the planter a unique piece of garden art.
Adding Accessories
- Decorative Hardware: Attaching decorative hardware, such as vintage handles or ornate corner pieces, can give your pallet strawberry planter an elegant upgrade. These small details can make a big impact, adding character and style.
- Rope Accents: Wrapping rope around the edges or handles of the pallet strawberry planter can enhance its texture and add a nautical or rustic vibe. Choose natural fibers for an organic look that complements the garden setting.
Lighting Enhancements
- Solar Lights: Embedding solar-powered lights into your pallet strawberry planter can transform it into a glowing garden feature at night. Position the lights to highlight the strawberries or illuminate pathways, creating a magical nighttime garden ambiance.
- LED Strip Lights: For a modern twist, consider adding waterproof LED strip lights under the edges of the pallet strawberry planter. This can provide soft, ambient lighting that accentuates the planter’s design and makes it a focal point after sunset.
Natural Embellishments
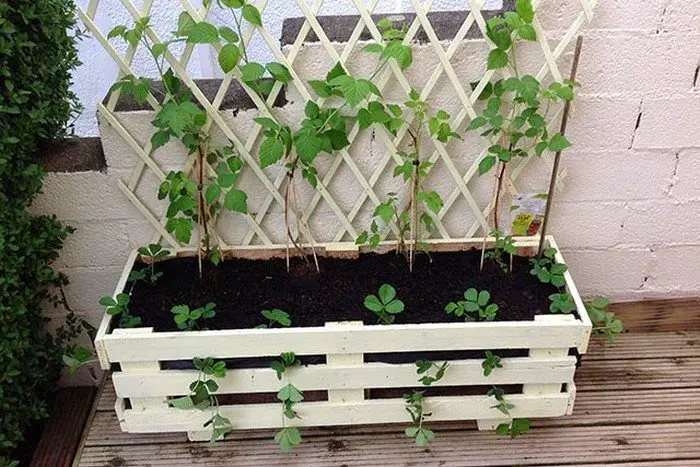
- Climbing Plants: Integrate climbing plants around your pallet strawberry planter to create a living decoration. Plants like ivy or sweet peas can weave through the pallet slats, adding greenery and enhancing the planter’s natural appeal.
- Hanging Elements: Attach small hanging pots or decorations from the sides of the pallet strawberry planter. This can add depth and interest, allowing you to incorporate more plant varieties or decorative elements.
Maximizing Yield in a Small Space
Increasing the yield of strawberries in a confined space requires strategic planning and innovative gardening techniques. A pallet strawberry planter, with its unique structure and vertical design, offers an excellent solution for growing strawberries efficiently in small gardens, balconies, or patios. By optimizing the available space and creating ideal growing conditions, you can significantly increase your strawberry harvest.
Let’s explore some key strategies to maximize yield in your pallet strawberry planter.
Vertical Gardening
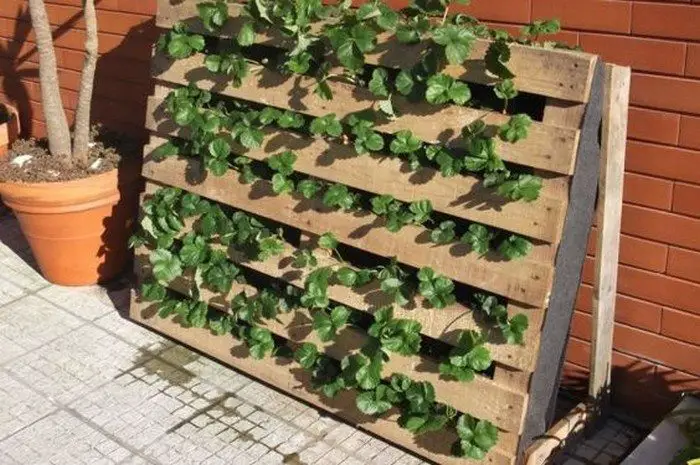
Utilize the vertical design of your pallet strawberry planter to grow more strawberries in less ground space. Planting strawberries in each available slat or section maximizes the growing area, allowing for a higher density of plants.
Optimal Plant Selection
Select strawberry varieties known for producing runners. These varieties can fill in empty spaces in the pallet, increasing the number of plants and thus the potential yield from the same planter.
Efficient Plant Management
Guide the runners to empty spots within the pallet strawberry planter. This natural propagation method increases your plant density without the need for additional plants, enhancing the overall yield.
While encouraging some runner growth is beneficial, too many can sap energy from fruit production. Prune excess runners to focus the plants’ energy on producing strawberries rather than additional foliage.
Soil and Fertilization
Ensure your pallet strawberry planter is filled with rich, well-draining soil. Strawberries thrive in fertile soil that retains moisture without becoming waterlogged, which is crucial for maximizing fruit production.
Feed your strawberries with organic fertilizers high in potassium and phosphorus to promote flowering and fruiting. Avoid over-fertilizing, particularly with nitrogen-heavy fertilizers, as this can lead to lush foliage at the expense of fruit.
Watering Techniques
Effective watering techniques are crucial for the success of your pallet strawberry planter. Strawberries have specific moisture needs; too little water and the berries won’t develop properly, too much and you risk root rot and other water-related diseases.
- Consistent Soil Moisture: The key to thriving strawberry plants is maintaining a consistent level of soil moisture. Check the soil regularly, ensuring it remains moist but not waterlogged. During hot weather or windy conditions, you may need to water more frequently to prevent the soil from drying out.
- Drip Irrigation System: Installing a drip irrigation system can significantly improve water efficiency and ensure that your strawberries receive a steady supply of moisture. This system delivers water directly to the base of each plant, minimizing evaporation and waste. It’s an ideal solution for keeping the soil evenly moist, particularly in the unique structure of a pallet strawberry planter.
- Mulching: Applying a layer of organic mulch around your strawberry plants can help retain soil moisture, reduce water evaporation, and keep the roots cool. Straw, pine needles, or shredded leaves are excellent mulch choices for strawberries. Mulch also helps prevent weed growth, which can compete with your strawberries for water.
- Watering Time: Water your strawberries early in the morning to ensure that the water goes deep into the soil and reaches the roots. Morning watering also allows the foliage to dry before evening, reducing the risk of fungal diseases.
Pest and Disease Management
A healthy pallet strawberry planter requires vigilance and proactive measures to prevent pests and diseases from compromising your crop.
- Regular Monitoring: Regularly inspect your strawberry plants for signs of pests or diseases. Early detection is key to managing potential issues before they escalate. Look for common strawberry pests such as slugs, snails, spider mites, and aphids, as well as symptoms of diseases like powdery mildew or leaf spot.
- Organic Pest Control Methods: When dealing with pests, opt for organic control methods to keep your garden safe for both the environment and your family. Neem oil, diatomaceous earth, and insecticidal soaps can be effective against a variety of pests without harming beneficial insects. Encouraging natural predators, such as ladybugs and lacewings, can also help control pest populations.
- Good Air Circulation: Proper air circulation is crucial for preventing fungal diseases in your pallet strawberry planter. Avoid overcrowding by spacing your strawberry plants adequately. This ensures that air can circulate freely around each plant, reducing humidity and the risk of fungal infections.
- Cleanliness: Keep the area around your pallet strawberry planter clean and free of debris. Remove any fallen leaves or rotting fruit, as these can harbor pests and diseases. At the end of the growing season, clear out the planter to remove any plant material that could carry over diseases to the next season.
- Crop Rotation: If possible, rotate your crops each year to prevent soil-borne diseases from building up. While this can be challenging with a fixed structure like a pallet planter, changing the soil or moving the planter to a new location (if feasible) can help mitigate this risk.
Pollination Enhancement
Encourage bees and other pollinators to visit your pallet strawberry planter by planting pollinator-friendly flowers nearby. Pollination is crucial for fruit set and maximizing yields.
Seasonal Adjustments
Use cloches or row covers to protect early blooms from frost and extend the growing season in the fall. This can lead to an earlier start and a longer harvest period, increasing the total yield from your pallet strawberry planter.
By implementing these strategies, you can optimize the space in your pallet strawberry planter for maximum strawberry production. Vertical gardening, careful selection and management of plants, and attentive care can transform your pallet into a highly productive strawberry garden, even in the smallest of spaces.
Conclusion
Building a pallet strawberry planter offers a sustainable and space-efficient way to grow strawberries, even in limited areas. This approach not only enhances garden aesthetics but also promotes eco-friendly gardening practices through the reuse of materials. The resulting yield of fresh, juicy strawberries directly from your garden underscores the practical and environmental benefits of adopting such innovative gardening methods.

