
MAIN ROOF SUPPORTS:
- Cut up the roof supports from 90mmx35mm (just like everything else).
- 4x2400mm lengths, each cut down the middle makes the 8 primary supports.
- 2x2400mm lengths, each cut into 4 makes the 8 secondary supports.
I live in a snow-free zone. If you are going to be snowed on you’ll probably want a greater roof pitch (e.g. make them 9′ or 10′ long instead of 8′ long) AND stronger beams.
I could say I figured out the exact roof pitch I wanted, used some more math to get the required length of the supports, then used that to figure the size of the ring I needed if the supports were 8′(2400mm) long, but I didn’t. I decided I wanted a 1&1/2′ (450mm) ring, and that I didn’t care what pitch the roof ended up at, so long as it wasn’t flat.
I stood in the back yard with a half-assembled yurt and no centre ring, put a ladder in the middle, and propped the top ends of the roof supports on the top of the ladder (a 10′ ladder I think), and guestimated that it would be fine.
I built the ring and I put it together, and it’s close enough. I could increase the pitch a little, but heck it works the way it is, so why change it?

ROOF SUPPORT CONNECTIONS:
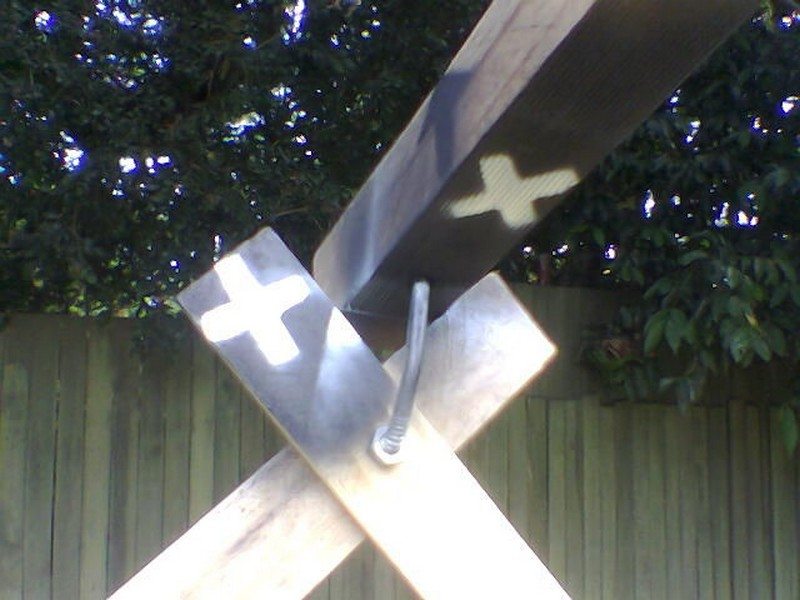
Use a steel “pin” on the top of the wall, and have a hole drilled into the roof timbers at an angle matching the pitch of the roof. The steel pin on the frame goes into the hole on the roof timber, and creates a joint. Have a look at the pictures, and you’ll see what I mean.
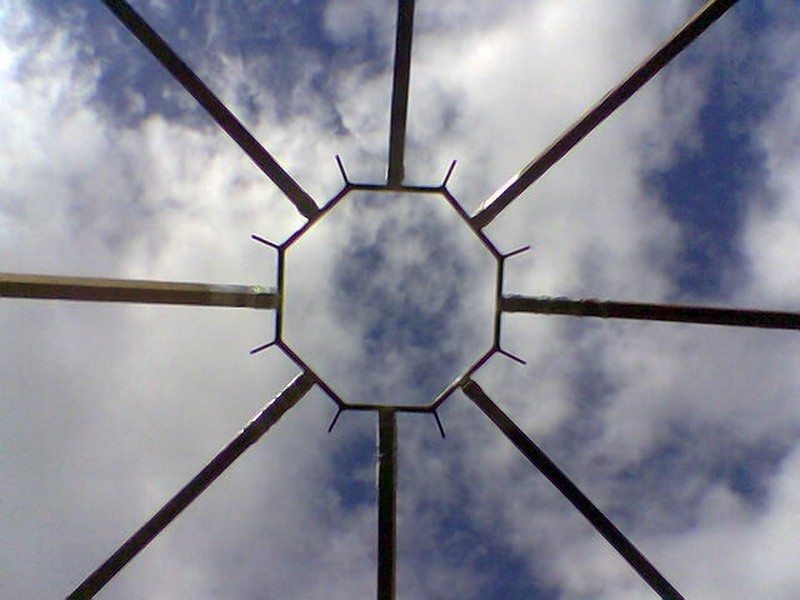
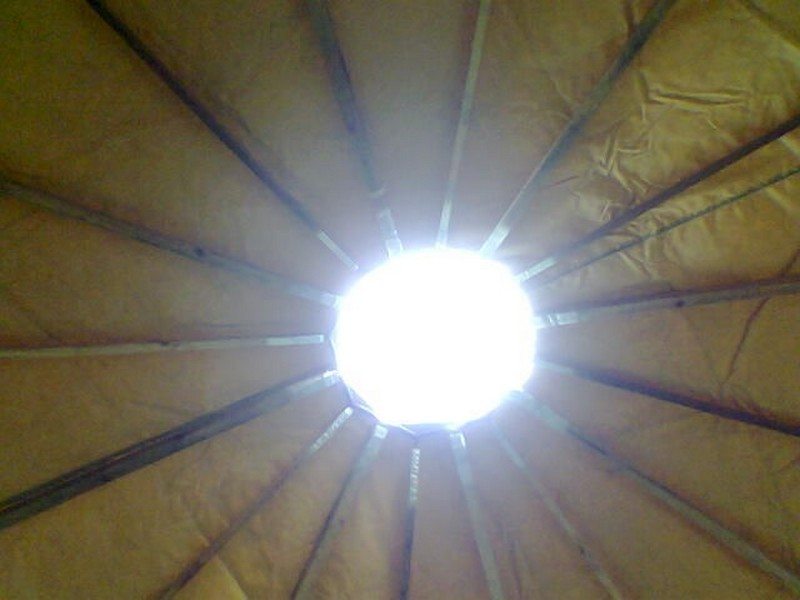
The whole purpose of the ‘hub’ is simply a way of connecting the centre of the roof all together while also giving a centre ‘vent’ or ‘port’ for circulation/ventilation/smoke/watching the stars.
I own a welder, and have reasonable metal working skills, so I made a 450mm (1&1/2′) ring from solid metal 15mm rod (actually an octagon, but it looks like a circle if you don’t look to closely!), and off of that I welded 8 large (15mm round) ‘prongs’, and 8 smaller 8mm round ‘prongs’ (one for each of the 16 roof supports), I arranged these so that they were angled down at the same pitch as the roof is supposed to be (whatever you worked it out to be for your tent, I just guessed).
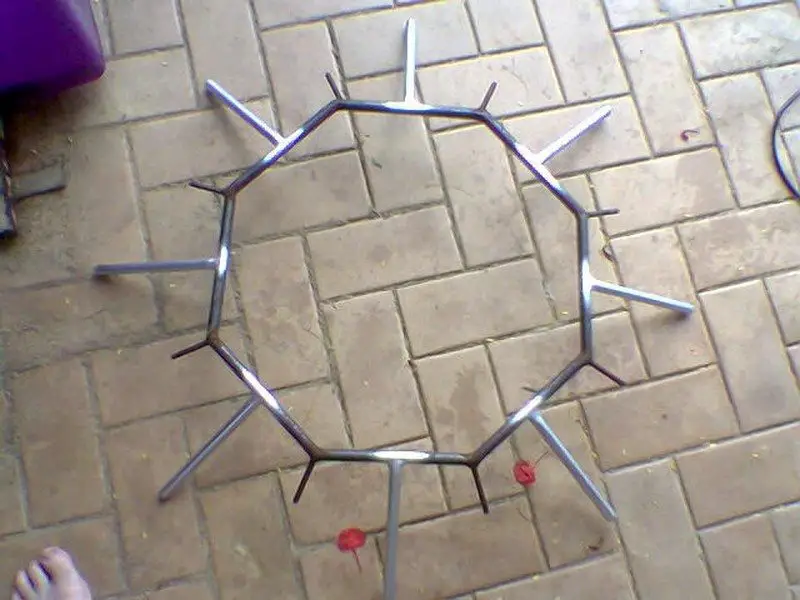
To join the roof timbers to this steel “star”, I then VERY CAREFULLY drilled a very deep 16mm or a 9mm hole long-ways straight into the end of the roof supports/timbers. (I bought 2 spade bits (16&9mm) and a “spade bit extender” in order to drill a really deep hole. I drilled about 200mm into the timber end for the large supports, and made the large ‘prongs’ 220mm long, and 100/120mm for the smaller ‘prongs’).
The remaining metal components that need to be manufactured in some way or another are:
Metal Pins – for pinning the doorframe to the wall lattice. These are just bent steel 6mm (1/4″) rod. They need to be removable so that the yurt can be dis-assembled, and re-assembled easily. I made the ones in the picture from a piece of mild steel 150mm long, with a 50mm (2″) handle/bend at one end.
Newer ones I actually make by purchasing galvanised tent pegs (just like the one shown), and cutting them in half. It’s easier, and they don’t rust so much.
Bending them is actually really easy with one end in a bench vice and hitting the other end with a hammer (start lightly, don’t rush it, or you’ll create cracks).
Continued Page 4…


