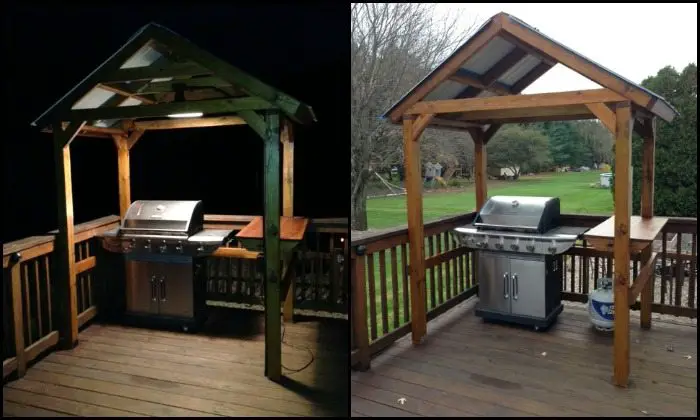
Having a small backyard doesn’t mean you can’t have a proper grilling station! If you enjoy hosting BBQ parties in the limited space of your outdoor area, then building a grill gazebo is the best idea for your home.
This grill gazebo design is easy, quick and straightforward, but it’ll make a huge difference in your grilling experience. It gives you a dedicated work area with just enough counter space for you to move around efficiently. It also protects you from the harsh sunlight during the summer, as well as from sudden showers.
Just don’t forget to allow for plenty of ventilation so as not to accidentally smoke yourself too! ;)
Does your backyard need a grill gazebo?
Click on any image to start lightbox display. Use your Esc key to close the lightbox. ?
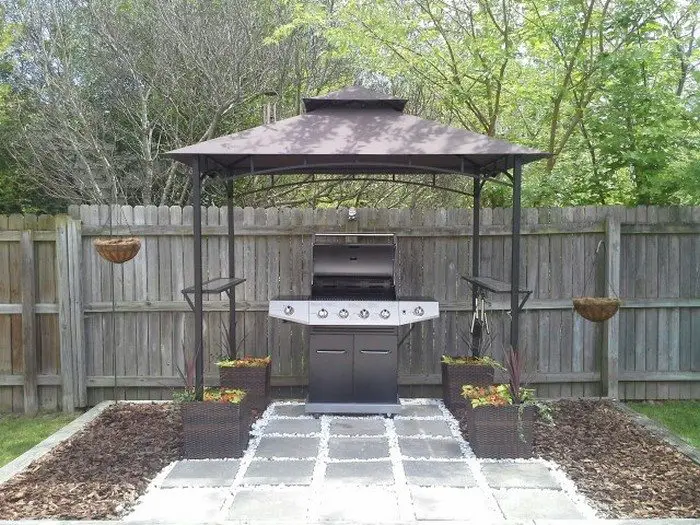
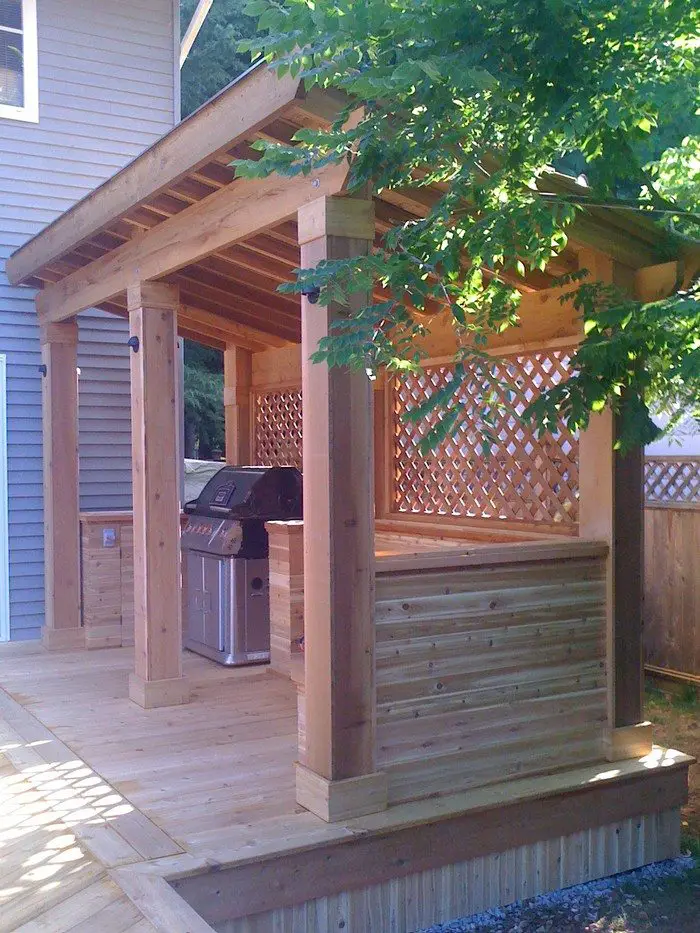
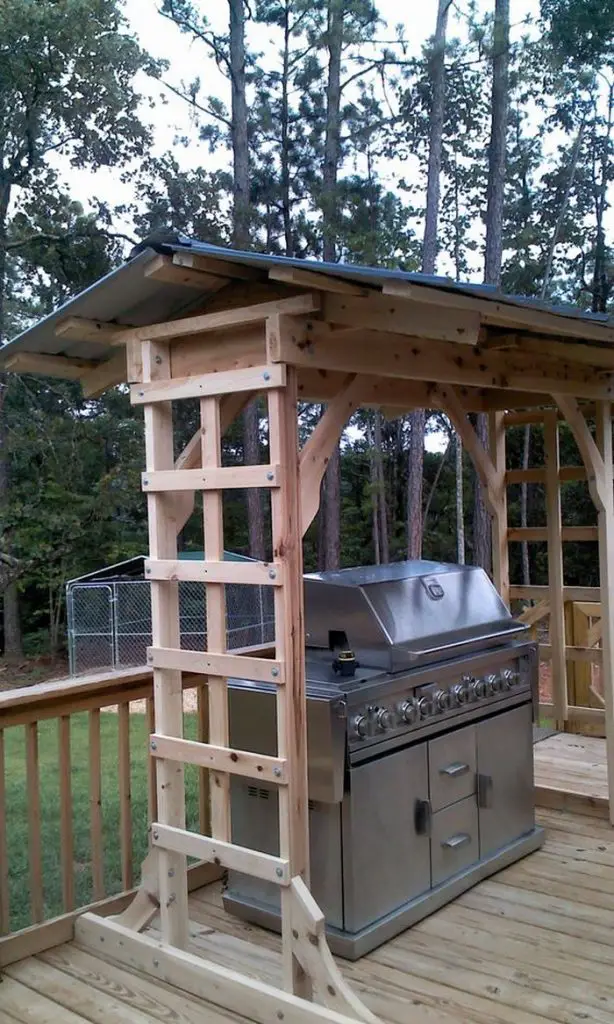

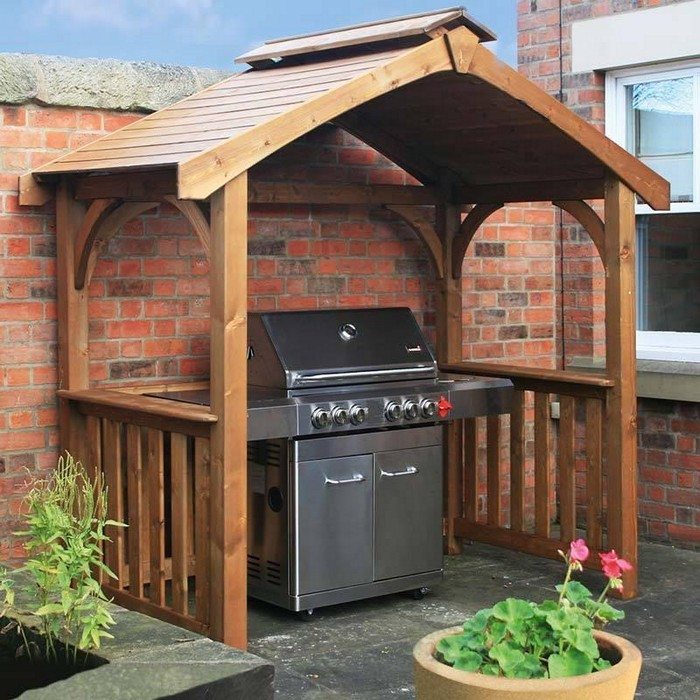
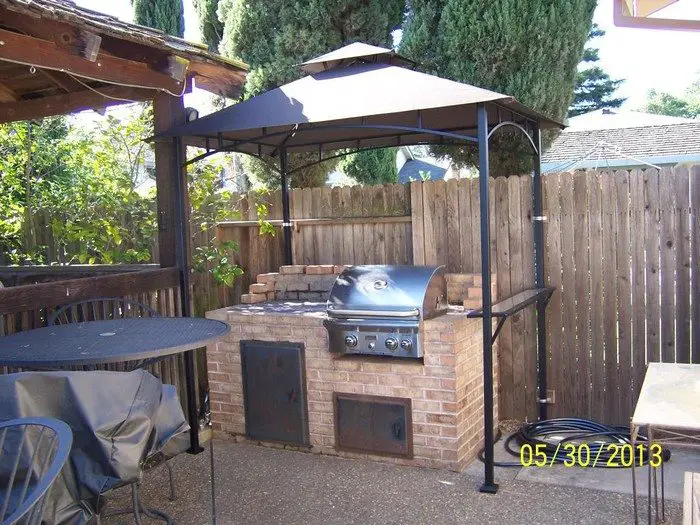
Thank you to imgur for sharing your thoughts on grill gazebos.
Contents
Five Stunning Designs When Building a Grill Gazebo
When considering a covered cooking area in your backyard, its important to know which design fits your preference. Below are the bbq gazebo ideas to choose from:
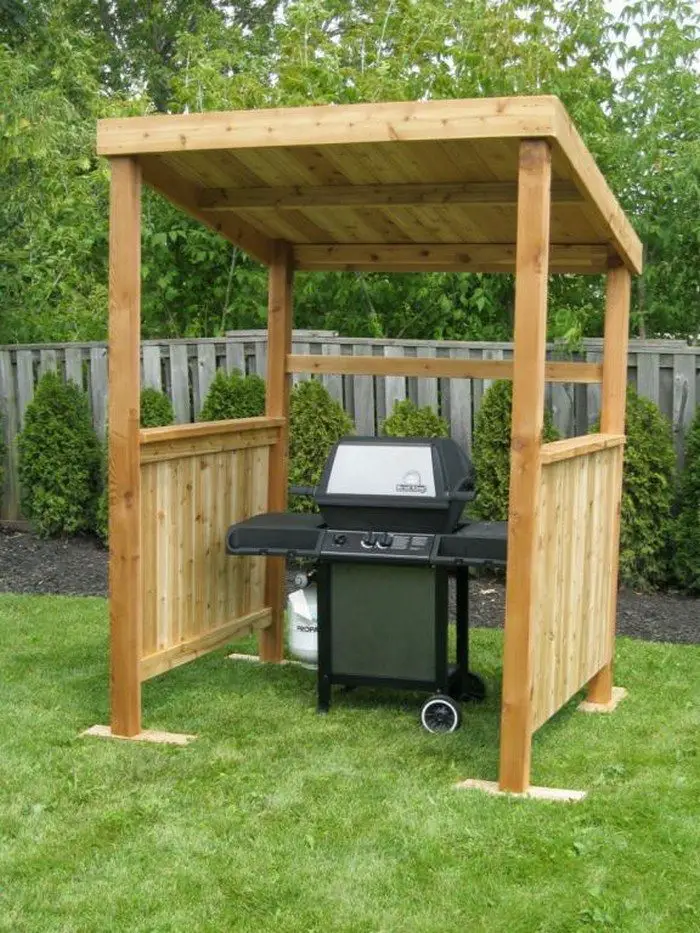
Rustic Wooden Pavilion
The Rustic Wooden Pavilion is one of the grill gazebo plans that offers a charming and functional addition to your outdoor space, combining the timeless appeal of natural wood with practical design features. Crafted from sturdy timber beams, the pavilion boasts a robust structure that can withstand the elements while providing a welcoming shelter for your grill. The sloped roof design not only adds architectural interest but also ensures efficient rainwater runoff, keeping your cooking area dry and protected during inclement weather.
With its open sides, the pavilion promotes excellent airflow, allowing smoke from the grill to dissipate easily while providing a spacious and airy atmosphere for outdoor cooking and entertaining. The natural wood finish adds warmth and character to your backyard, creating a cozy retreat where family and friends can gather to enjoy delicious meals and lively conversation. Whether you’re hosting a summer barbecue or simply relaxing with a book on a lazy.
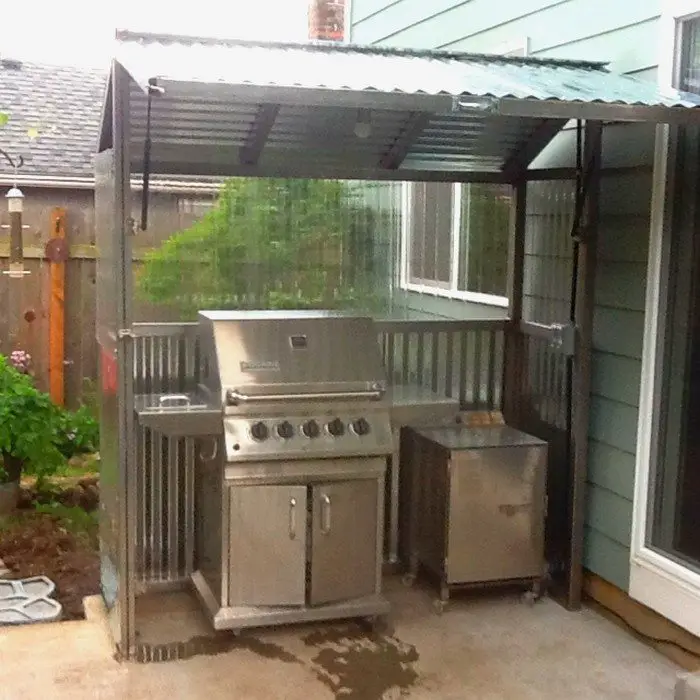
Modern Metal Canopy
The sleek and minimalist Modern Metal Canopy design offers a contemporary twist to your outdoor cooking area. Featuring a metal canopy supported by clean lines and geometric shapes, this design exudes sophistication and modernity. The sleek metal finish complements contemporary outdoor decor styles, adding a touch of elegance to your backyard space.
The open design of the canopy ensures plenty of airflow and natural light, creating a bright and inviting atmosphere for outdoor cooking and entertaining. Whether you’re grilling up a feast for friends or enjoying a quiet evening with family, the Modern Metal Canopy provides a stylish backdrop for your outdoor gatherings.
To enhance the ambience, consider incorporating string lights or LED strips to add warmth and illuminate the space during evening gatherings. Additionally, potted plants or hanging baskets can introduce a touch of greenery, softening the industrial aesthetic of the metal canopy and creating a more inviting atmosphere. With its sleek design and contemporary flair, the Modern Metal Canopy is sure to elevate your outdoor entertaining experience.
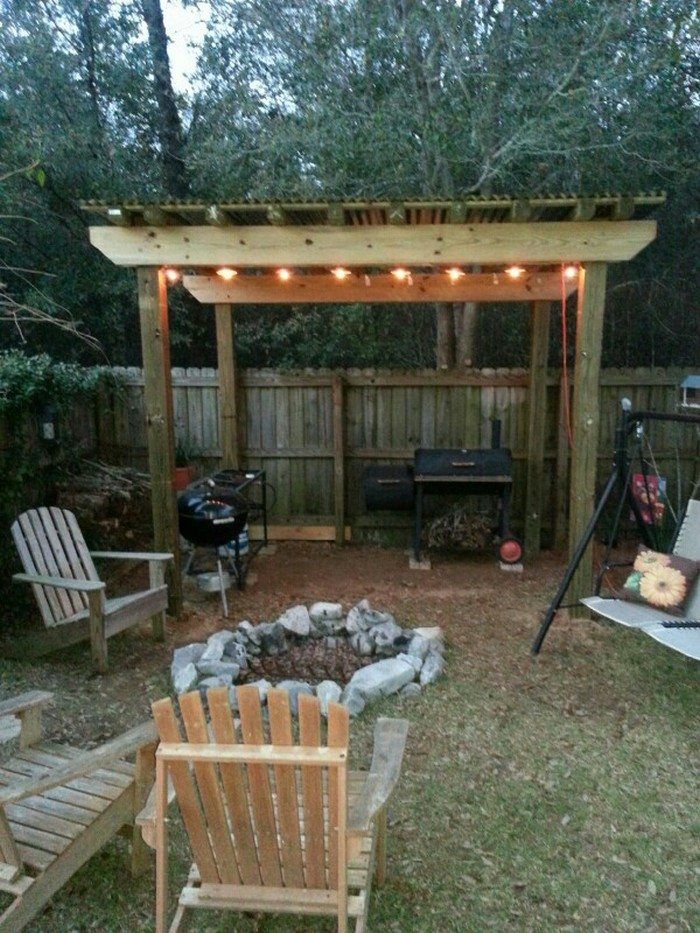
Classic Pergola with Vines
A pergola-style grill gazebo is a timeless and elegant choice for your outdoor cooking area. Characterized by its open lattice roof, this design offers a combination of partial shade and filtered sunlight, creating a comfortable and inviting space for outdoor dining and relaxation. The lattice roof allows vines or climbing plants to grow and intertwine, adding a touch of natural beauty and enhancing the overall ambience of your backyard.
With its classic design, the pergola-style grill gazebo adds a sense of romance and elegance to your outdoor space, creating a charming backdrop for gatherings with family and friends. Whether you’re hosting a casual barbecue or an intimate dinner party, the pergola provides the perfect setting for memorable outdoor experiences.
To further enhance the ambiance, consider adding outdoor lighting such as string lights or lanterns to create a warm and inviting atmosphere after dark. You can also incorporate comfortable seating and cozy furnishings to make the space inviting and comfortable for guests. With its timeless appeal and versatile design, a pergola-style grill gazebo is sure to become the focal point of your backyard and a favourite gathering spot for years to come.
Tropical Thatched Roof Hut
Immerse yourself in the serene ambience of a tropical paradise with the enchanting allure of a thatched roof hut designed for your outdoor cooking area. Crafted from natural thatch material, this unique structure offers not only exceptional protection from the sun’s scorching rays and unexpected rain showers but also exudes an authentic island charm that transports you to a blissful oasis of relaxation.
The thatched roof provides excellent insulation against the heat, keeping the interior of the hut comfortably cool even on the hottest days. Meanwhile, its porous nature allows refreshing cool breezes to flow freely through the open sides, creating a pleasant and inviting atmosphere for outdoor cooking and dining. With the gentle rustle of palm leaves overhead and the soothing sounds of nature in the background, every moment spent in this tropical haven is a delightful escape from the hustle and bustle of daily life.
To complete the look, adorn your thatched roof hut with furnishings and decor that capture the essence of island living. Opt for rattan furniture with plush cushions for comfortable seating, inviting guests to relax and unwind in style. Surround the hut with lush tropical plants and vibrant flowers, infusing the space with lush greenery and exotic blooms. Enhance the ambience with bamboo accents, such as tiki torches or lanterns, to add a touch of rustic elegance to the overall aesthetic.
Whether you’re hosting a laid-back barbecue with friends or enjoying a romantic dinner under the stars, a thatched roof hut design transforms your outdoor cooking area into a tranquil retreat where you can escape the stresses of everyday life and indulge in the simple pleasures of tropical living.
With its natural beauty and relaxed vibe, this enchanting structure creates a captivating focal point in your backyard, turning every outdoor gathering into an unforgettable island-inspired experience.
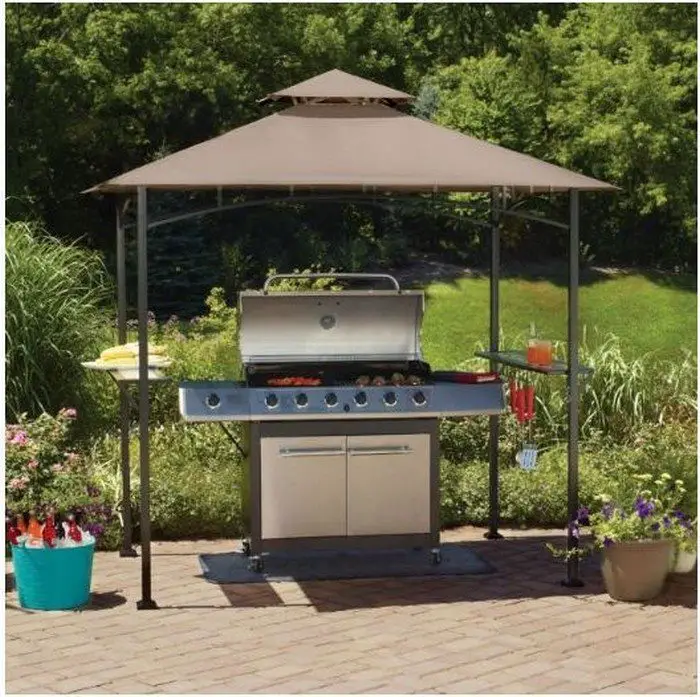
Contemporary Retractable Awning
A grill gazebo with a retractable awning stands as a pinnacle of versatility and convenience in outdoor living. Its innovative design empowers you to effortlessly tailor the level of shade and protection according to the prevailing weather conditions and your personal preferences.
Whether you seek complete coverage to shield against intense sunlight or partial shade to relish the warmth of the sun’s rays, the retractable awning grants you the flexibility to curate the outdoor environment to your liking with ease.
Crafted with sleek lines and modern materials, this design seamlessly integrates into contemporary outdoor spaces, effortlessly marrying practicality with style. The clean and minimalist aesthetic not only complements a variety of outdoor decor themes but also adds a touch of sophistication to your backyard ambience. Whether your outdoor area boasts a modern patio ensemble or a traditional garden retreat, a grill gazebo with a retractable awning elevates the visual appeal while delivering practical benefits.
In addition to its aesthetic allure, the retractable awning significantly enhances the usability of your outdoor cooking space. By allowing you to regulate the amount of shade and protection, it ensures that you can comfortably enjoy outdoor gatherings regardless of the weather conditions.
Whether you’re hosting a summer barbecue or an intimate dinner party, the retractable awning provides you with the flexibility to curate the perfect ambience for your outdoor events, fostering a memorable and enjoyable experience for you and your guests.
Each of these designs offers unique features and aesthetics to enhance your outdoor cooking experience. Whether you prefer rustic charm, modern elegance, or tropical flair, there’s a grill gazebo design to suit your backyard style and elevate your outdoor living space.
Tips for Building a Grill Gazebos in Your Backyard

- 1. Consider the Space: Before selecting a design, assess the available space in your backyard. Choose a size and style that complement the dimensions and aesthetics of your outdoor area. Ensure that there’s enough room for both the grill gazebo and additional seating or landscaping elements.
- 2. Match the Style: Harmonize the design of your grill gazebo with the overall style of your backyard. Whether your outdoor space boasts a rustic, modern, or tropical vibe, select a design that complements the existing decor. This ensures a cohesive look and enhances the visual appeal of your backyard. Pay attention to the materials and finishes of the gazebo. Ensure they align with the materials used in your backyard’s design. For instance, if your backyard features a lot of metal accents, choose a gazebo with metal frames or details to maintain consistency. Coordinate the colours of the gazebo with the colour palette of your backyard. Whether you prefer matching or contrasting colours, aim for harmony in the colour scheme to create a cohesive look.
- 3. Focus on Functionality: While aesthetics are important, prioritize functionality when designing your grill gazebo. Ensure that it provides adequate protection for your grill and cooking area, with features such as a sturdy roof, ample ventilation, and space for accessories. Consider adding shelves, hooks, or storage compartments for convenience.
- 4. Incorporate Decorative Elements: Elevate the beauty of your grill gazebo with decorative elements that reflect your style. Add potted plants, hanging baskets, string lights, or outdoor artwork to enhance the ambience and create a welcoming atmosphere. These small touches can make a big difference in the overall look and feel of your backyard space.
- 5. Optimize Comfort: Create a comfortable and inviting outdoor cooking and dining area by incorporating cozy seating, shade solutions, and amenities such as fans or heaters. Consider adding a dining table, chairs, or a lounge area where you and your guests can relax and enjoy meals together. Don’t forget to include elements that provide relief from the sun, such as umbrellas or retractable awnings.
By considering these tips, you can design beautiful and functional grill gazebos that enhance the enjoyment of your outdoor living space and create unforgettable moments with family and friends.
The Wrap Up
A small backyard shouldn’t limit your ability to enjoy outdoor cooking and entertaining. Building a grill gazebo in a compact outdoor space is a great way to maximize functionality and create a dedicated area for grilling while still leaving room for other activities.
This example underscores the notion that limited space doesn’t have to limit your outdoor entertaining possibilities. By carefully planning the layout and choosing multifunctional furniture and accessories, you can create a functional and visually appealing grilling station in even the smallest of backyards.
With a dash of creativity and attention to detail, you can transform your compact outdoor space into a charming and inviting area for hosting BBQ parties and gatherings, and making cherished memories with loved ones.
FAQ: Building a Grill Gazebo
- What is a grill gazebo?
- A grill gazebo is a sheltered structure designed to protect outdoor grills and cooking areas from weather while enhancing convenience. These gazebos often include features like shelves, hooks, and countertops to improve functionality.
- They are made from durable materials such as wood, metal, or synthetic options like aluminum and vinyl, with each material offering unique benefits in durability, maintenance, and appearance. Available in various designs, grill gazebos can suit traditional, rustic, or modern aesthetics to complement any backyard space.
- What are the benefits of a grill gazebo?
- Grill gazebos provide essential protection for grills and cooking areas from rain, sun, wind, and snow, enabling year-round outdoor cooking. They create a designated, organized grilling space that enhances the backyard’s aesthetics while maintaining functionality.
- By shielding the grill and cooking area from weather, these structures allow for uninterrupted use, even during colder seasons or inclement weather. This versatility makes grill gazebos an excellent investment for maximizing your outdoor cooking experience throughout the year.
- How do you choose the right grill gazebo for my backyard?
- When selecting a grill gazebo, consider your grill size, backyard space, and desired features like shelves, countertops, or storage to enhance functionality. Assess your cooking habits and storage needs to ensure the gazebo meets your practical requirements. Choose a design that complements your outdoor decor while aligning with your style preferences.
- Establish a budget that includes both the initial cost and the long-term durability of the structure, ensuring it offers lasting value. By balancing functionality, aesthetics, and cost, you can select the perfect gazebo for your outdoor cooking space.
- Are grill gazebos easy to assemble?
- The ease of assembling a grill gazebo depends on its design and complexity, with some models requiring professional installation and others suited for DIY assembly. Begin by reading the manufacturer’s instructions carefully and gathering all tools and materials to ensure a smooth process.
- For larger or heavier gazebos, enlist help to make lifting and positioning components safer and more efficient. After assembly, inspect the structure thoroughly to confirm it is stable and securely anchored, adjusting as needed to eliminate any wobbling or instability. Following these steps ensures a safe and well-built gazebo for your outdoor cooking area.
- How do you maintain a grill gazebo?
- Regular cleaning is essential to keep your grill gazebo in top condition. Use a mild detergent and water to wash away dirt, debris, and grease, then rinse thoroughly and allow it to dry completely before use. Inspect the structure periodically for wear, such as loose screws, cracks, rust, or corrosion, and address issues promptly to prevent further damage.
- Ensure the roof and supports remain secure by tightening bolts, replacing worn components, and reinforcing areas as needed, particularly in regions with strong winds or harsh weather. These maintenance steps will prolong the gazebo’s durability and functionality.
- What safety tips should be considered when building and using a grill gazebo?
- Safety is crucial when planning and using a grill gazebo to ensure a secure outdoor cooking experience. Position your grill away from flammable materials like railings or branches to reduce fire risks. Use a deck mat under the grill to protect your patio from heat damage and catch hot drips, keeping the area safe and tidy.
- Always keep a fully charged fire extinguisher nearby and never leave the grill unattended, ensuring quick action in case of an emergency. Following these precautions lets you grill with confidence and peace of mind.
- What are the steps involved in building a grill gazebo from start to finish?
- A grill gazebo enhances your outdoor space and creates a perfect cooking area. Start by laying an 8×14-foot prestained concrete slab as the foundation and gathering roofing materials. Construct the structure by preparing and aligning posts, assembling trusses with accurate slope measurements, and securing them with braces and purlins for stability.
- Install roofing panels with stops for alignment, and finish with decorative trims, a tabletop, shelves, and skirt boards to complete the look. Once the structure is stable and polished, add your grill and enjoy a stylish and functional outdoor centerpiece.
- What are the steps for installing the roofing on a grill gazebo?
- Start by preparing guides with two stacked 2×4 pieces on the edge of the bottom purlin to ensure a consistent 1-1/2-inch overhang. Position and secure J-channels along the outer edges of the purlins, cutting them to fit neatly at the peak and attaching them with pole barn screws.
- Slide the first roofing panel into the J-channel, guiding it to the 2×4 stop, and secure it following the manufacturer’s screw pattern. Add and align additional panels before attaching the ridge cap, allowing a four-inch overhang on each side, centering it on the top purlins, and trimming it neatly to meet the J-channels for a polished finish.
- What are the benefits of using Western red cedar for building a grill gazebo?
- Western red cedar is an excellent choice for grill gazebos due to its durability, aesthetic appeal, and long-term value. It naturally resists rot and insects, ensuring it withstands outdoor conditions without losing integrity. Its warm hues and fine grain add elegance to your gazebo, aging beautifully with a patina that enhances your space.
- While it may require some upkeep to maintain its appearance, its longevity and minimal repair needs make it a sustainable and cost-effective investment.
- How long does it take to build a DIY grill gazebo and what is the complexity level?
- Building a DIY grill gazebo typically takes several days, depending on your experience and the design’s complexity. This timeline includes planning, gathering materials, construction, and finishing touches, making it ideal to dedicate a few consecutive days to avoid delays.
- The project is considered intermediate in complexity, requiring carpentry skills, familiarity with tools, and the ability to follow detailed plans. With proper preparation, this project is manageable and offers a rewarding way to enhance your outdoor space.
- How do you build and install the trusses for a grill gazebo?
- To build and install trusses for your grill gazebo, start by assembling the trusses securely. Attach the top chords to the bottom chord using two 6-inch screws at each connection for strength. Cut and fit webbing boards, trimming one end at a 20-degree angle and fastening them with 6-inch screws at each end for stability.
- When installing, carefully raise and position the trusses over the frame, securing them with screws or bolts and ensuring they are aligned properly. Regularly check for straightness and spacing during installation to maintain uniformity and structural integrity.
- How do you properly lay out post locations for a grill gazebo?
- Accurately laying out post locations is crucial for a sturdy grill gazebo. Begin by setting up a pair of sawhorses and placing the bottom truss chords on them for alignment. Use two 12-foot 2x4s as a temporary template to mark the post bases. Measure 28.5 inches inward from each end of the bottom truss chord and draw precise lines using a framing square.
- Mark three additional lines, each spaced 3.5 inches apart, for consistent post placement. Double-check all measurements and adjust as needed to ensure the foundation is stable and ready for construction.
- What is the process for installing the tabletop, shelf, and skirt boards on a grill gazebo?
- To install the tabletop, shelf, and skirt boards on a grill gazebo, start by cutting and securing the tabletop boards snugly between the posts with trim-head screws. Next, measure and trim the shelf boards to size, ensuring cut edges are concealed by the skirt board.
- Cut and install the skirt boards, centering the first board and working outward for a precise fit against the posts. Remove any temporary braces and stain all cut edges for a polished finish. Once complete, your gazebo is ready to house your grill and enhance your outdoor space.
- What is the best way to cut and install the top chords for the gazebo roof?
- To achieve the proper 4/12 slope, align your framing square at the 4-inch and 12-inch marks to mark the top chord angle. Use a circular saw for the initial cut, ensuring accuracy, and finish any incomplete sections with a handsaw for a clean edge.
- Check that all top chords are cut uniformly to maintain consistency in the roof’s fit. If mistakes occur, adjust your positioning and correct the alignment to avoid gaps during installation. Careful preparation and precision will result in a well-crafted and visually appealing gazebo roof.
- How do you assemble tabletop and shelf frames for a grill gazebo?
- Start by cutting the tabletop frame components to size, marking 41 inches from the base of the posts for the frame top. Attach the frame ends one inch from the post edges with 3-inch wood screws, then add side boards and skirt nailers for a clean finish and extra support.
- For the shelf frame, mark 15 inches from the base for the top, secure the ends and side boards, and attach the center braces 20 inches from each post. Use angled screws where needed for stability and concealment. These steps create sturdy and precise frames for your gazebo, combining functionality and aesthetics.

