Before ‘The Sims’ there were Dollhouses!
There’s something about dollhouses that appeals to both kids and adults. When it comes to these playtime activities, everyone is a kid at heart.
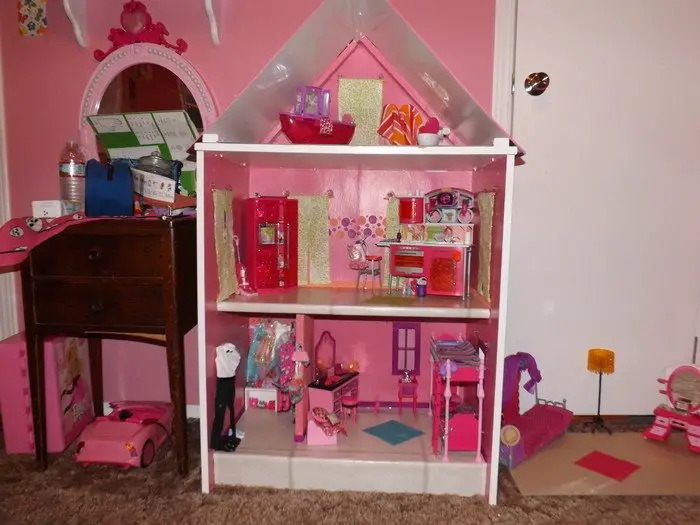
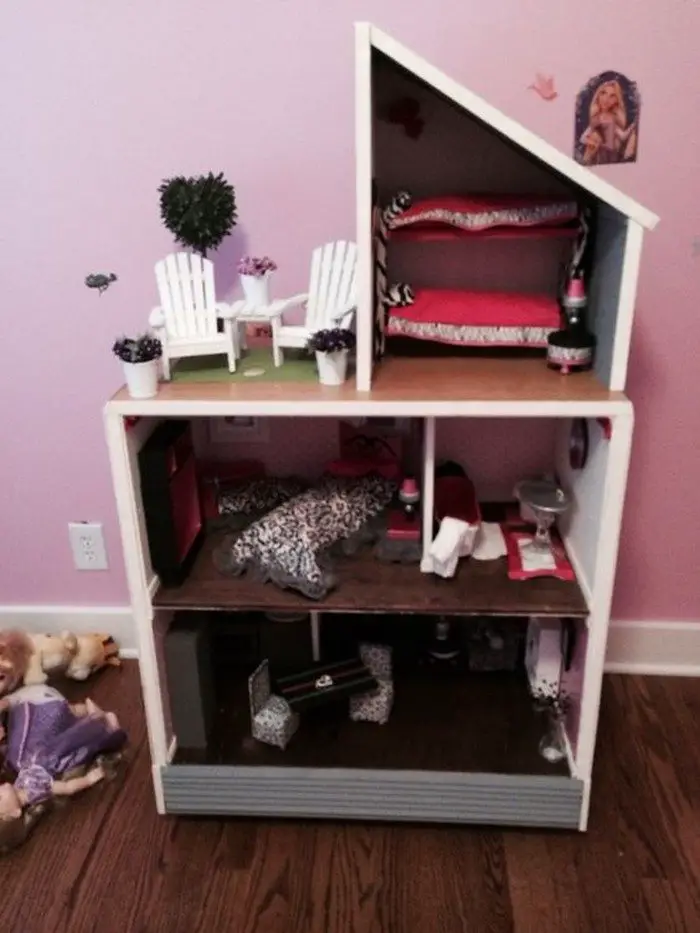
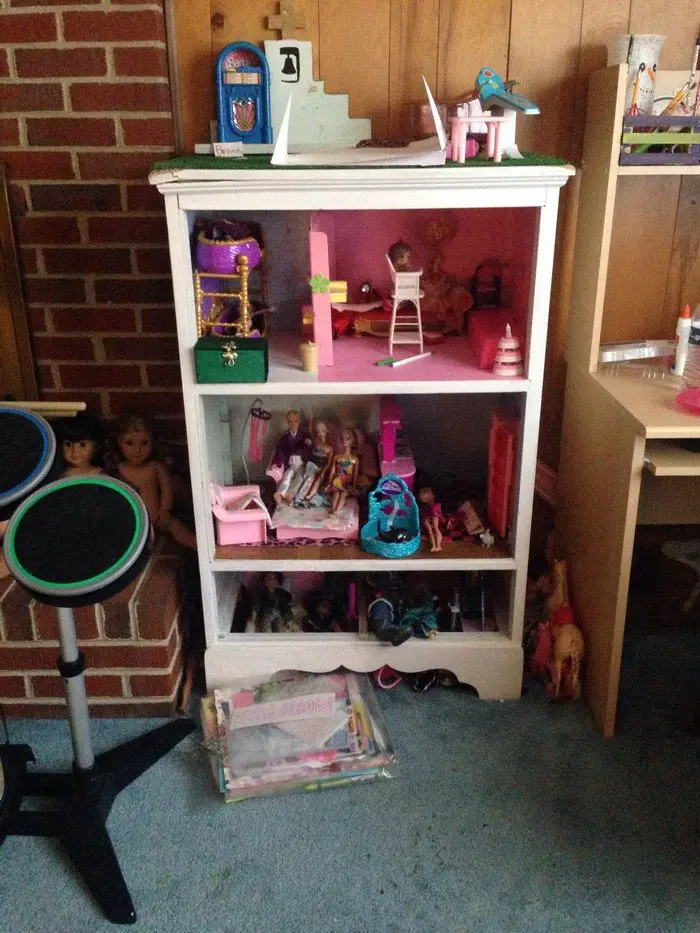
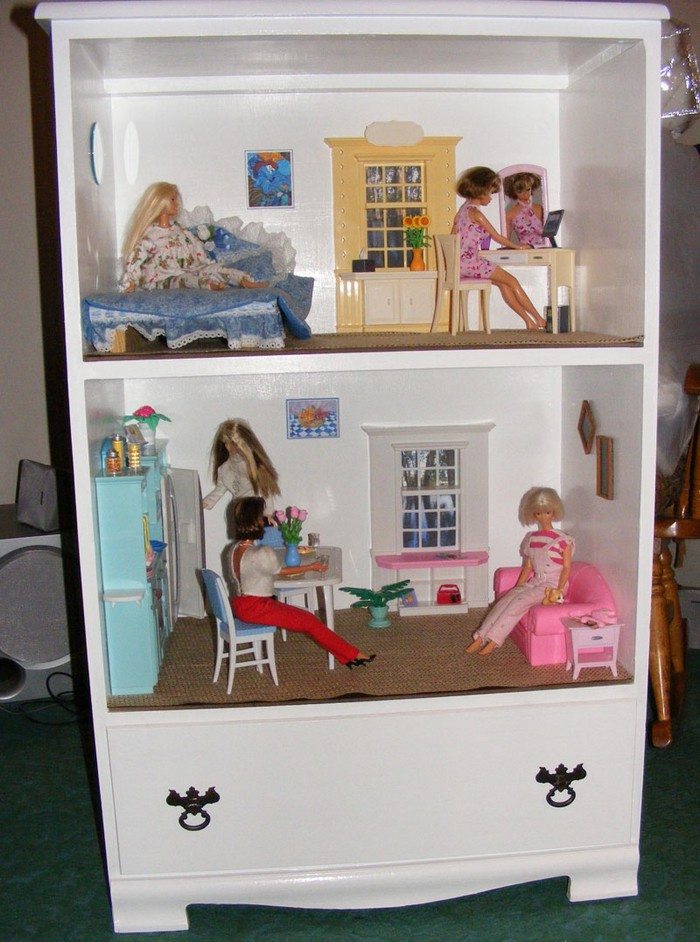
If you’re someone who likes dollhouses (or The Sims), here’s a brilliant recycling idea you are going to love!
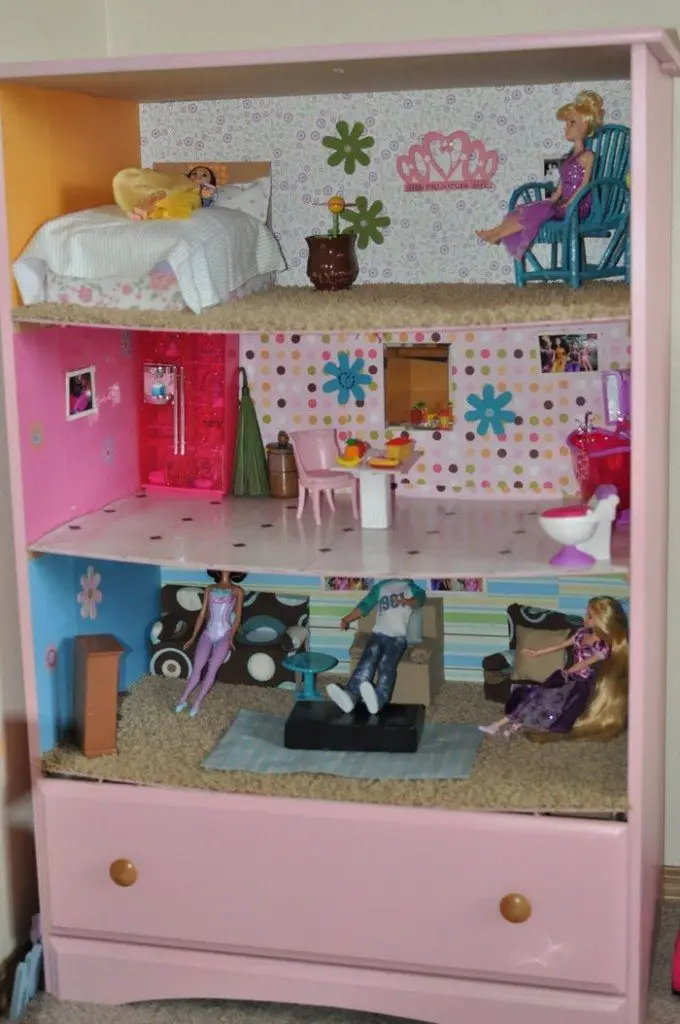
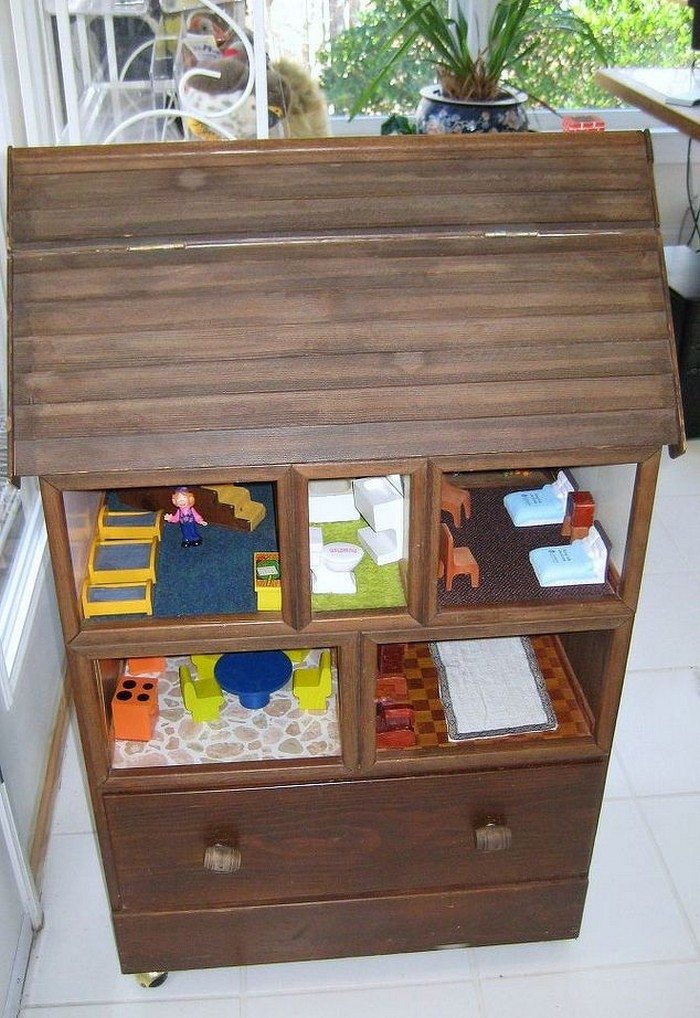
Do you have an old and unwanted dresser? If you have one, here’s a great idea to repurpose it. Turn your old dresser into a doll house.
It’s definitely a fun project to do. The duration of renovation would depend on the kind of dresser and the number of details you would like to put in it. You can install some lighting, make room for an attic, add a garden, or a roof deck!
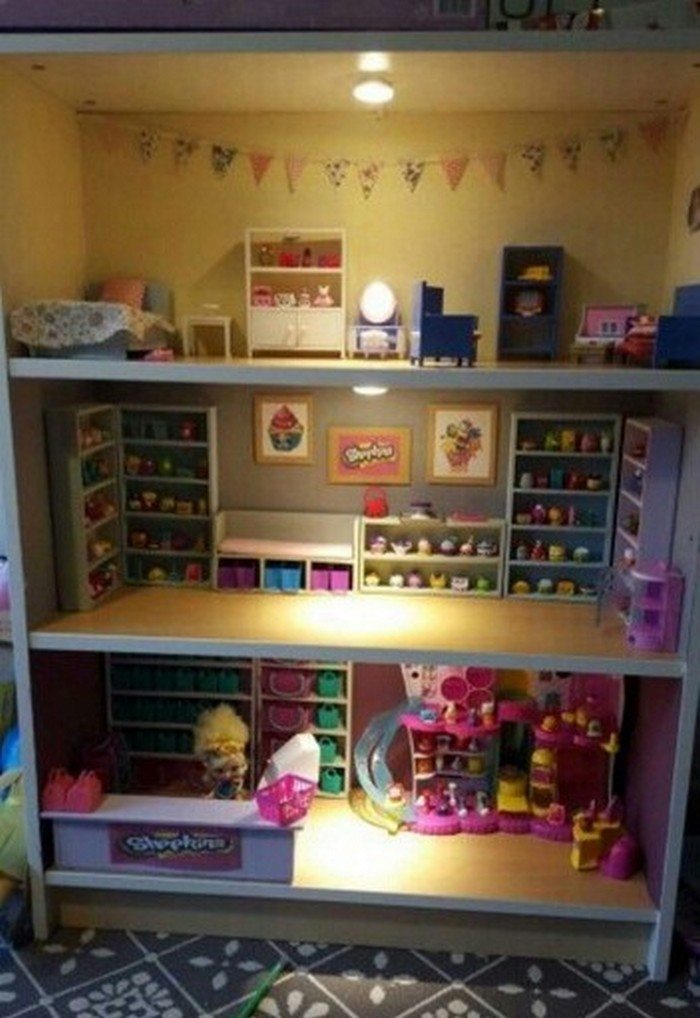
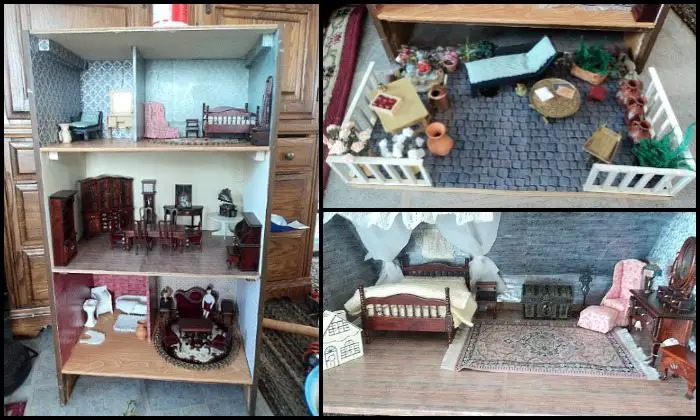
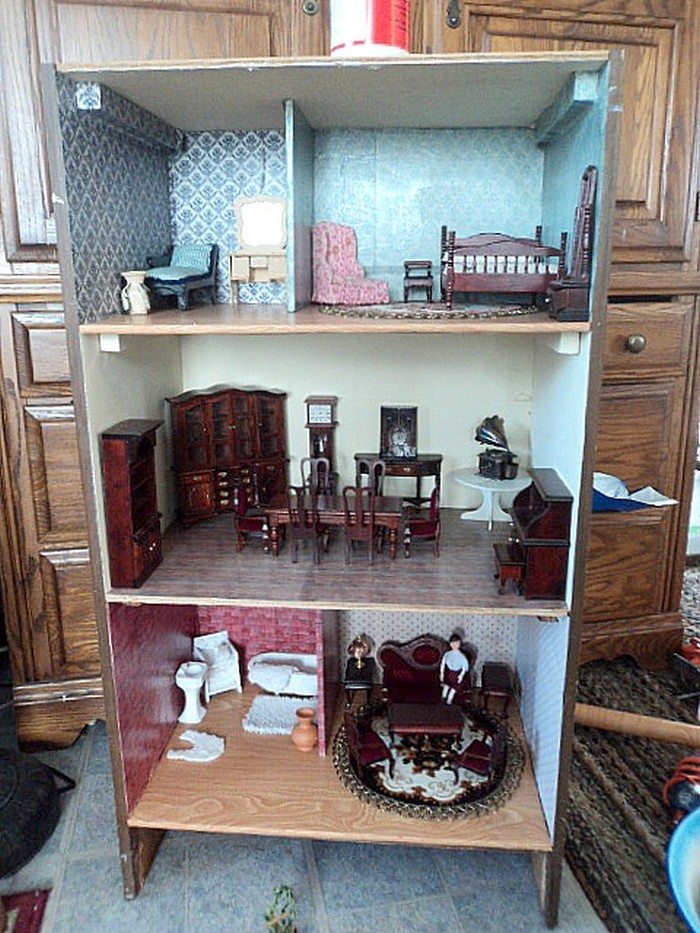
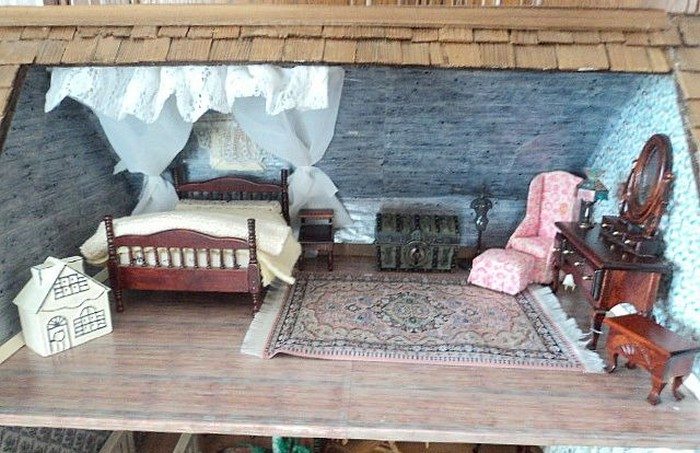
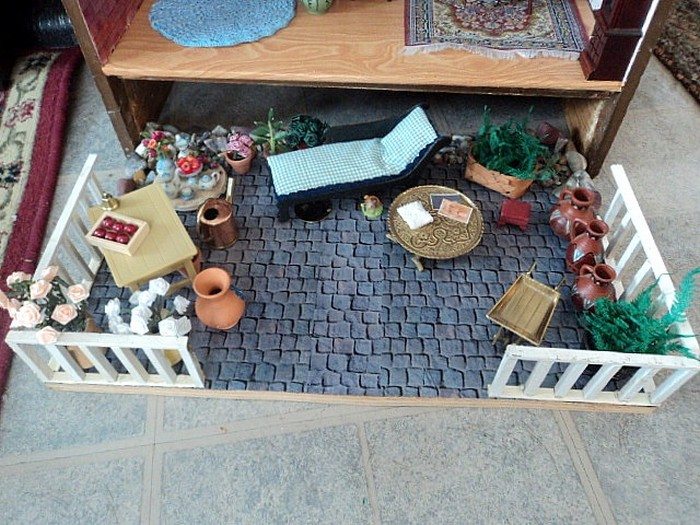
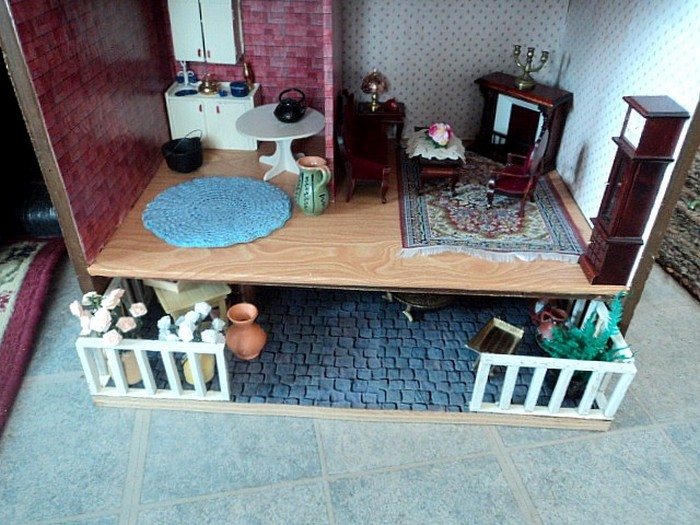
You can take your time and enjoy designing and building your dollhouse! Get some inspiration by viewing our album below :)
Thinking of making an old dresser dollhouse for your kids? One good idea you might want to do is to retain the bottom drawer(s) for storing other toys!
What are you waiting for? Get started to converting your old dresser into a doll house.
Contents
Turning an Old Dresser Into a Doll House
Materials
- Old Dresser
- Paint or Wallpaper Sticker
- Doll House Furniture Kit
Tools
- Measuring Tape
- Saw
- Cordless Drill
- Hammer
Instructions
Step 1: Prepare the Dresser
- Start by totally cleaning the dresser to get rid of any trash or dust.
- To help you arrange your dollhouse, find the dresser’s inside measurements. Decide where and how many rooms you wish for.
- Remove any extraneous internal components that might compromise your design using the saw. To produce a smooth surface, be sure you sand any sharp edges.
Step 2: Design the Interior
- Choose a paint color or wallpaper sticker to cover the inside walls of the dresser. This will be the backdrop of your dollhouse rooms.
- Carefully apply the paint or stick the wallpaper inside each section of the dresser. Allow the paint to dry completely if you are painting.
Step 3: Install Dividers for Rooms
- If you want to create separate rooms within a single drawer or shelf, use the saw to cut pieces of wood or sturdy cardboard to size.
- Use the cordless drill and hammer to secure these dividers into place. Make sure they are stable and safely installed.
Step 4: Add Floors and Ceilings
- Measure and cut pieces of thin plywood or heavy cardboard for the floors and ceilings between levels of the dresser.
- Install these pieces using the cordless drill. Secure them firmly to ensure they can support the weight of the furniture and play.
Step 5: Assemble and Arrange Furniture
- Assemble any furniture pieces from the kit that require assembly. Follow the instructions provided with your kit.
- Arrange the furniture in each room according to your design. Consider different layouts to see what looks best and provides functional play space.
Step 6: Final Touches
- Add decorative touches to enhance the realism and charm of your dollhouse. You might hang tiny curtains over the windows or place small rugs in each room.
- Ensure all paint and glue are dry, and sharp edges are covered or sanded down to make the dollhouse safe for play.
Step 7: Enjoy Your New Dollhouse
- Introduce the dollhouse to your kids or display it in your home. Enjoy the unique piece you’ve created, and watch as it becomes a center of imagination and play.
Click on any image to start the lightbox display. Use your Esc key to close the lightbox. ?
Thanks to Homemade Obsessions for this great project. You can get step-by-step instructions here…
Designing Your Dollhouse Interior
Turning an old dresser into a doll house offers a unique opportunity to unleash your creativity and create a personalized play area or decorative piece. As you will be designing the layout, choosing a color scheme, and selecting furniture that bring the miniature world inside your dresser to life, this project lets you think like an architect and an interior designer.
Here’s how you create a dollhouse out of your old dresser’s inside, so making sure every room captures charm and character.
Layout Planning
When converting an old dresser into a doll house, start by envisioning the function of each space within the dresser. Think about the number of rooms you will have and their purposes, that of a kitchen, living room, bedroom, or bathroom, for example. On paper, map out the arrangement using a pencil, allowing space for every intended room. A coherent and useful dollhouse layout depends on this early planning.
Choosing a Color Scheme
The color scheme sets the mood for your old dresser into a doll house. Choose colors that complement one another and improve the whole aesthetic for a harmonic inside. While strong colors might provide a modern touch, light pastels give a soft, classic look fit for a dollhouse. If the dollhouse is meant for play, think about using non-toxic paint to guarantee it’s safe for kids. To see how your colors look under various lighting, paint swatches inside the dresser or on wood scraps.
Wall Treatments and Flooring
Apply wallpaper or a coat of paint to transform the interior walls of your old dresser into a doll house. Wallpaper stickers are an excellent option for adding detailed patterns that might be difficult to paint by hand. Depending on the room’s purpose, you can use printed paper that mimics hardwood flooring, tiles, or carpets for flooring. Ensure the wall treatments and flooring materials are securely adhered to prevent them from peeling off during play or over time.
Furniture and Fixtures
Selecting the right furniture and fixtures is essential in bringing your old dresser into a doll house to life. You can either purchase a dollhouse furniture kit or make your own miniature furniture to fit the scale of your dresser.
Remember the era and style you want to reflect in the dollhouse’s decor when choosing furniture. For a cohesive look, stick to one style period, whether it’s Victorian, modern, or rustic. Ensure that each piece is proportional to the rooms in the dresser to maintain an authentic and pleasing aesthetic.
Decorative Accents
The final touches when designing your old dresser into a doll house involve adding decorative accents that personalize the space. Consider crafting miniature books, vases, or artworks to place around the rooms.
Curtains, rugs, and tiny light fixtures can make the dollhouse feel more homey and realistic. These small details will enhance the visual appeal of your dollhouse and can make it a captivating project and a conversation piece.
Safety and Durability
Lastly, when designing your old dresser into a doll house, prioritize safety and durability, especially if it will be used by children. Smooth out any sharp edges and secure all small pieces to prevent choking hazards. Use durable materials and secure all decorative elements firmly to withstand regular play.
By following these steps, you can transform an old dresser into a doll house that’s not only beautiful and functional but also a testament to your creativity and craft skills. This project can provide hours of entertainment and become a cherished heirloom in your family.
Adding Functional Elements
Transforming an old dresser into a doll house can be more than just a visual delight; adding functional elements can bring life and interactivity to your creation. This enhances the play experience and makes the doll house feel more realistic. Here’s how you can incorporate working features such as lights, elevators, and other movable components into your old dresser into a doll house.
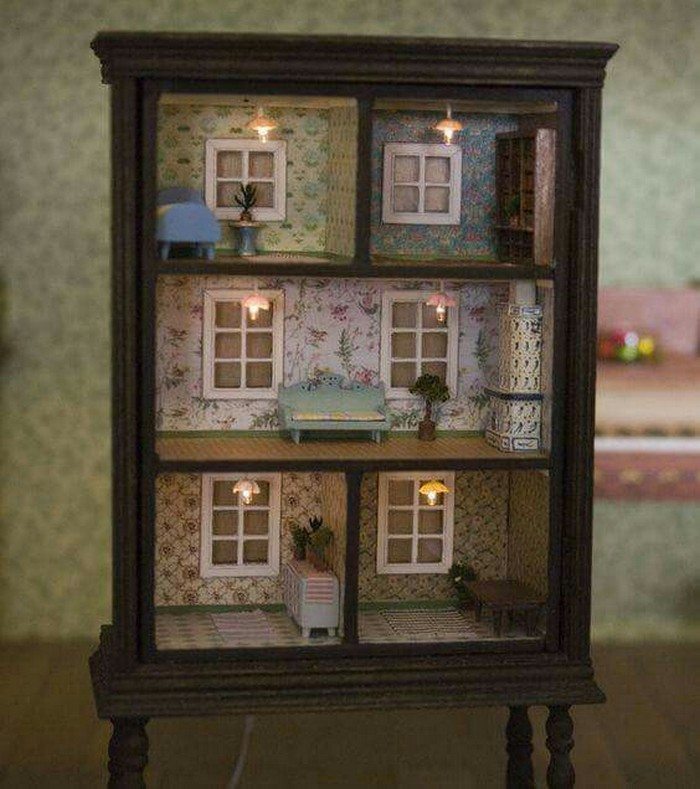
Installing Miniature Lighting
Adding lighting to your old dresser into a doll house can dramatically change the ambiance and enhance the detailed work of the interior decor. Use small LED lights that are battery-operated to avoid complex wiring. You can place these lights under ceilings, inside rooms, or even as exterior lights.
Secure the lights with small brackets or strong adhesive that won’t damage the paint or wallpaper. Always ensure that the battery packs are easily accessible for changes but hidden from plain view to maintain the aesthetic.
Creating Opening and Closing Features
To bring an interactive element to your old dresser into a doll house, consider making doors and windows that open and close. Use thin balsa wood or sturdy cardboard to craft these features. Hinges can be made from small pieces of fabric or leather, allowing the doors and windows to move freely. This addition not only adds realism but also increases the engagement a child or viewer can have with the doll house.
Building a Miniature Elevator
For multi-level doll houses, a miniature elevator can add a fun and functional feature. This can be created using a small box or container that fits within the dresser’s frame. Install a simple pulley system with string and small hooks to act as the elevator mechanism.
The pulley system can be manually operated from the outside, allowing movement from one floor to another. It’s a fascinating feature that adds an element of engineering to your old dresser into a doll house.
Adding Movable Walls
Movable walls can transform the space inside the doll house, allowing for a customizable play area or display. Attach walls on sliders or hinges that can be easily adjusted or removed. This flexibility can make the doll house adaptable for different scenarios or games, providing more options for use and interaction.
Integrating these functional elements into your old dresser into a doll house enhances its value and entertainment potential. It becomes not just a static model but a dynamic environment that invites interaction and storytelling.
Conclusion
Transforming an old dresser into a doll house is a rewarding project that combines creativity with recycling. It gives new life to a piece of furniture that might otherwise be discarded. Throughout this process, you can tailor every aspect to your personal style and functional preferences, making the doll house truly one-of-a-kind. From selecting color schemes and crafting miniature furniture to installing functional elements like lighting and movable parts, each step offers a chance to enhance skills in design and craftsmanship.
We have more projects for your kids. Check out our playbeds for kids project!


