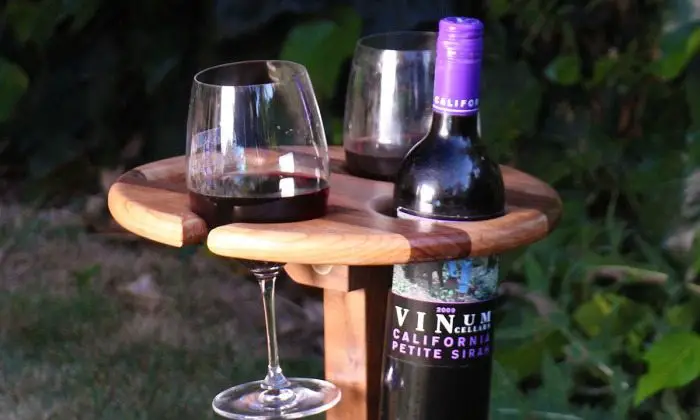
Do you like having a glass of wine when camping, on a picnic or when you’re simply unwinding in your backyard? Finding a level surface for that bottle and your glasses isn’t always easy. Here’s a simple project that can change that by giving you a stable table anywhere!
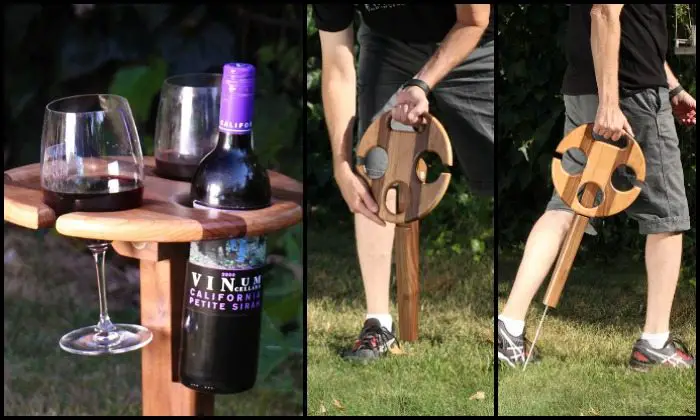
Drinking a glass of wine outdoors is difficult if you don’t have a flat, stable surface to put your glasses (and bottle) on. By making yourself this portable wine table, you can relax and enjoy your drink just about anywhere without worrying about spilling or your glasses breaking!
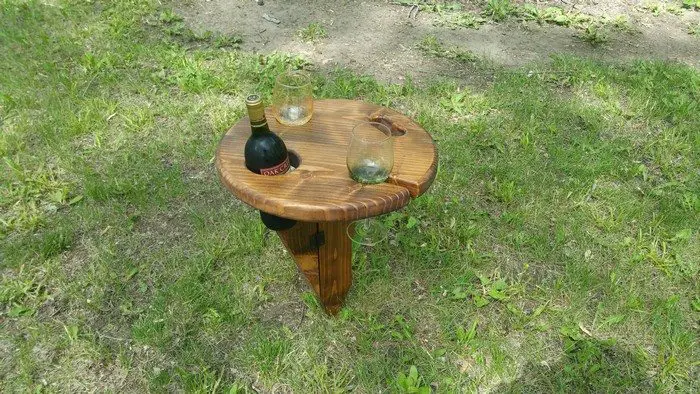
If you already have the the right tools, you can easily make your own portable wine table. If you don’t have the tools listed below, there are many alternate ways to get the same result. Even a simple jigsaw and some patience will yield a great result! You can even make more as DIY gifts to friends and family who also love having a glass of wine every now and then. :)
Is this going to be your next project?
Now if you think that you don’t have the time, tools or skills that needed to DIY, here are some great options you can get instead. :)
Contents
Crafting a Portable Wine Table
Materials
- Timber
- 1/4″ Steel Rod
- Wood Glue
- Wood Dowel
- Gel Epoxy
Tools
- Hole Saw
- Mandrel (to hold hole saws)
- Forstner Bit
- Router Roundover Bit
- Flush Trim Saw
- Wood Clamps
Instructions
Step 1: Prepare the Timber
- Choose your timber based on the desired size and shape of your wine table. A good starting point could be a piece approximately 24 inches by 18 inches.
- Using the flush trim saw, cut the timber to your desired dimensions. Sand the edges to smooth them out.
Step 2: Marking for Holes
- Determine the placement of your wine bottle and glasses on the timber. Leave adequate space around each item to prevent tipping.
- Mark the center points for the holes. You’ll need a larger hole for the wine bottle and smaller ones for the wine glasses.
Step 3: Cutting Holes
- Attach the appropriate hole saw to the mandrel based on the size of the wine bottle. Drill a hole at the marked center point for the bottle.
- Switch to smaller hole saw sizes and repeat the process for the wine glasses.
Step 4: Smooth the Edges
- Using the router equipped with a roundover bit, smooth the edges of the holes you’ve drilled. This prevents glasses and the bottle from chipping.
Step 5: Assemble the Legs
- Cut the steel rod into four equal lengths—these will serve as the legs of your table.
- Drill holes into each corner of the underside of the table using the Forstner bit. Ensure the holes are slightly smaller than the steel rods for a tight fit.
- Insert the steel rods into the holes. Use gel epoxy to secure them in place. Allow it to cure as per the product instructions.
Step 6: Adding Stability with Dowels
- Cut wood dowels to create cross braces between each pair of legs. This will add stability to the table.
- Drill small holes into the legs where the dowels will fit. Use wood glue to secure the dowels into place.
Step 7: Final Touches
- Apply a final sanding to the entire table to ensure all surfaces are smooth and even.
- You can finish the table with a sealant or paint of your choice to protect it against weather elements and enhance its appearance.
Step 8: Testing and Adjustments
- Once everything is dry and set, test the stability of the table by gently pressing on different areas to ensure it doesn’t wobble.
- Make any necessary adjustments to the legs or dowels to ensure the table is stable and level.
Click on any image to start lightbox display. Use your Esc key to close the lightbox.![]()
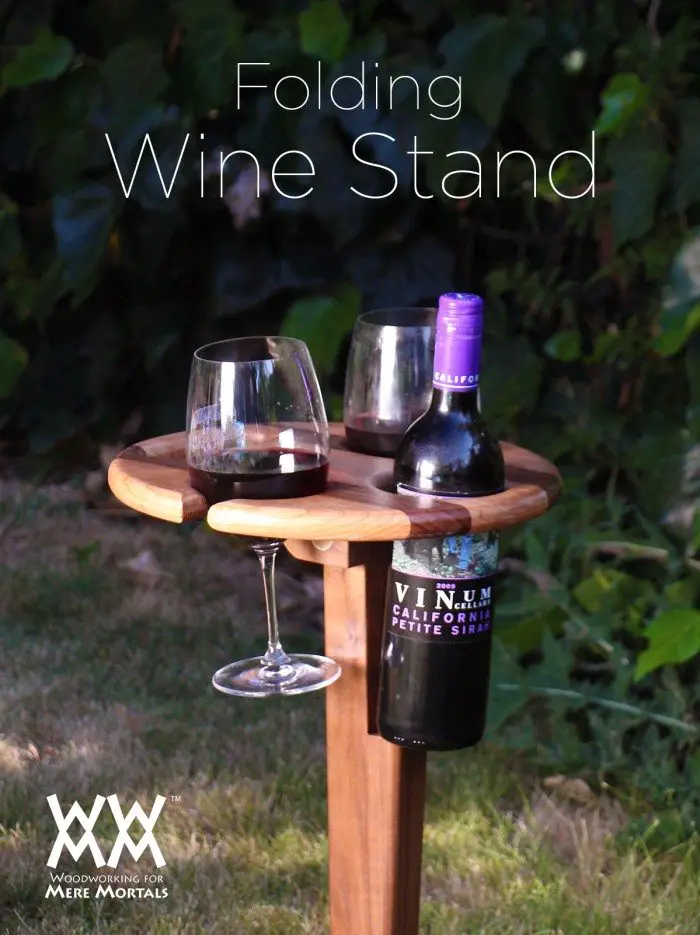
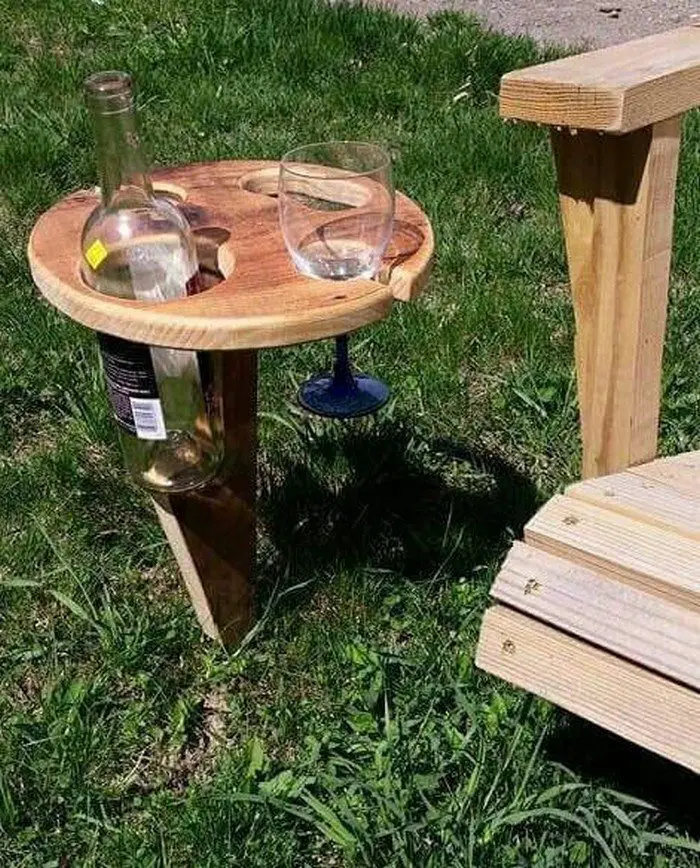
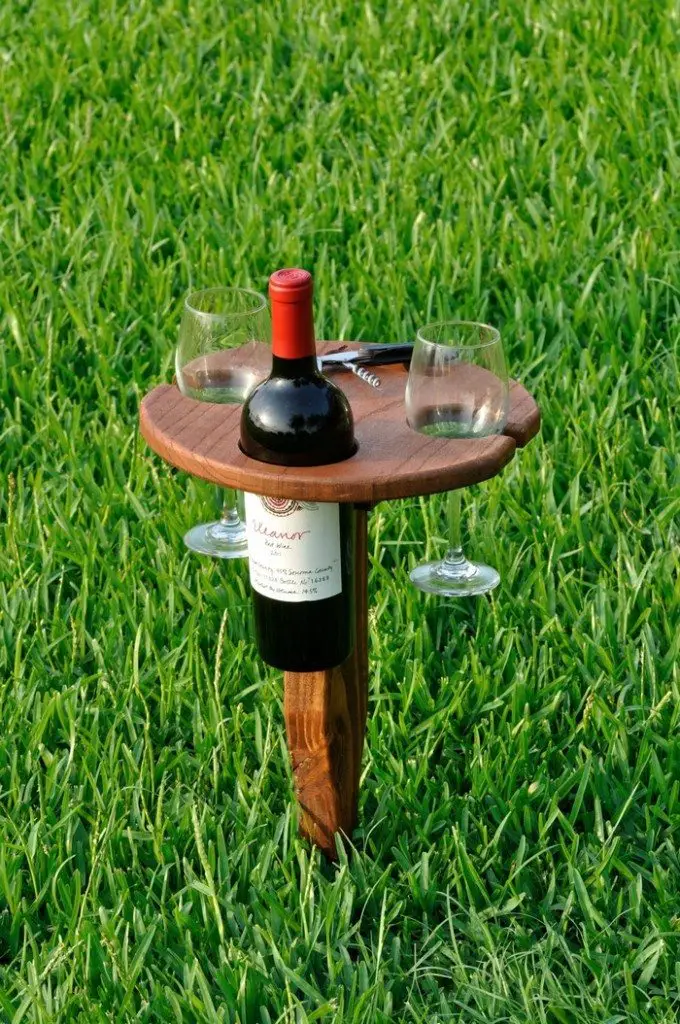
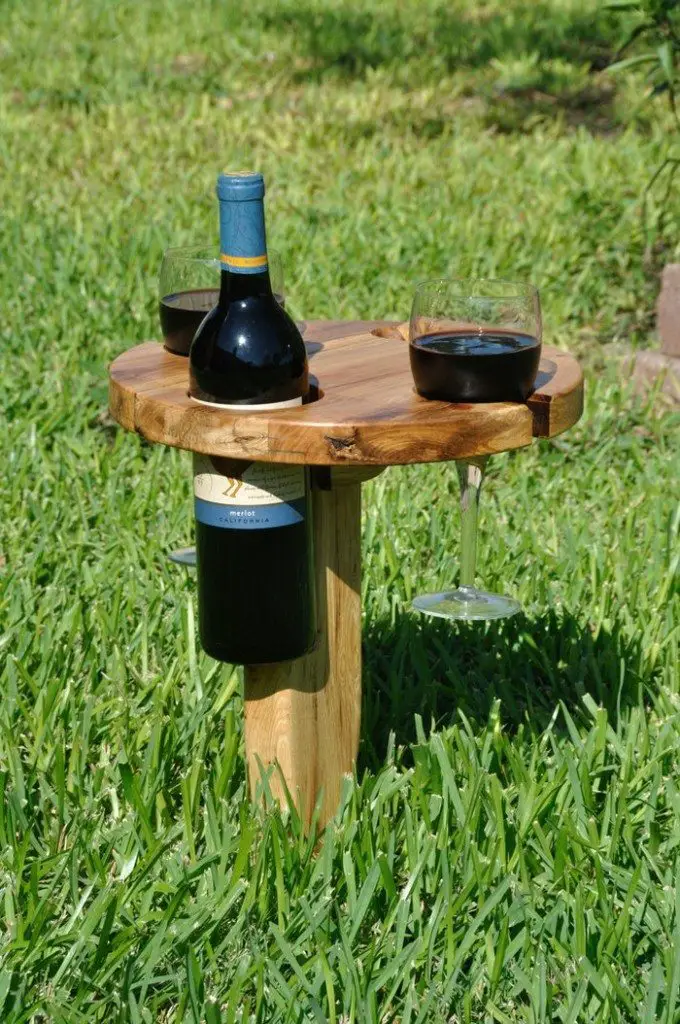
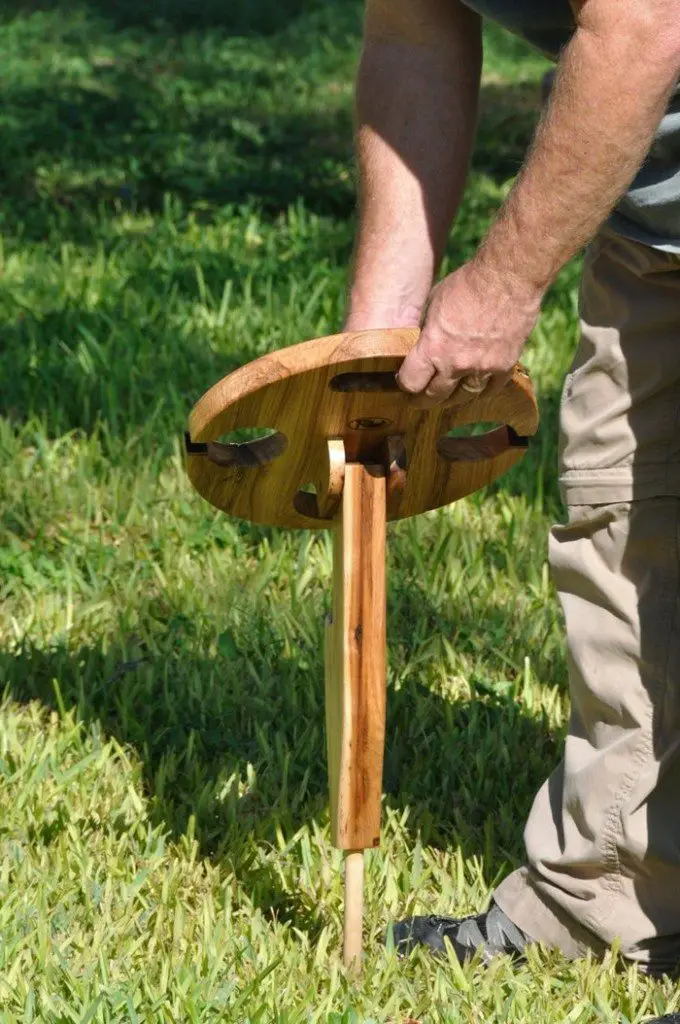
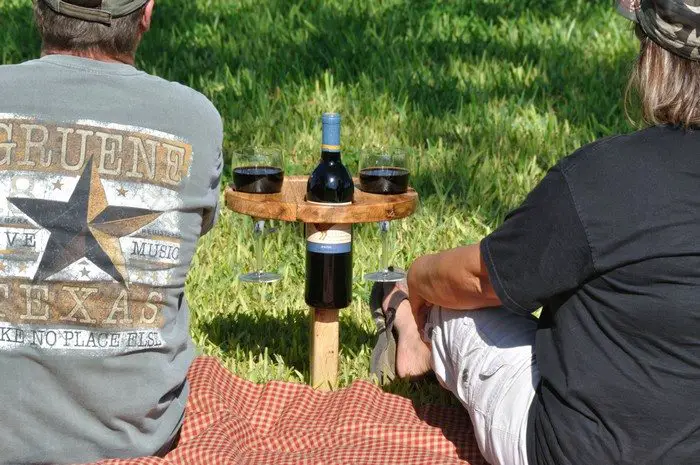
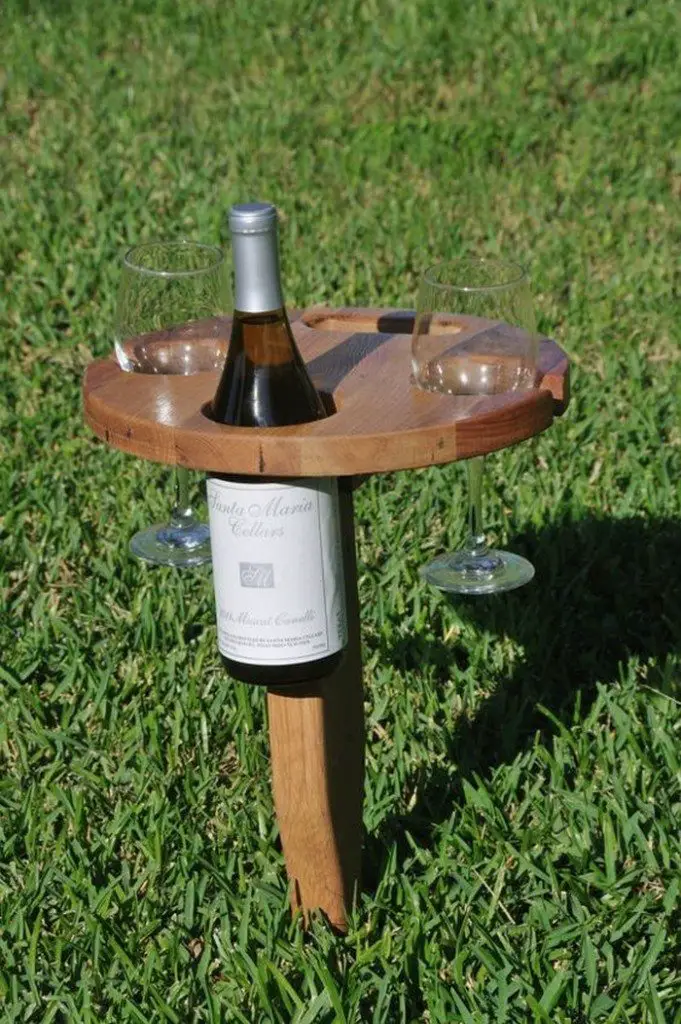
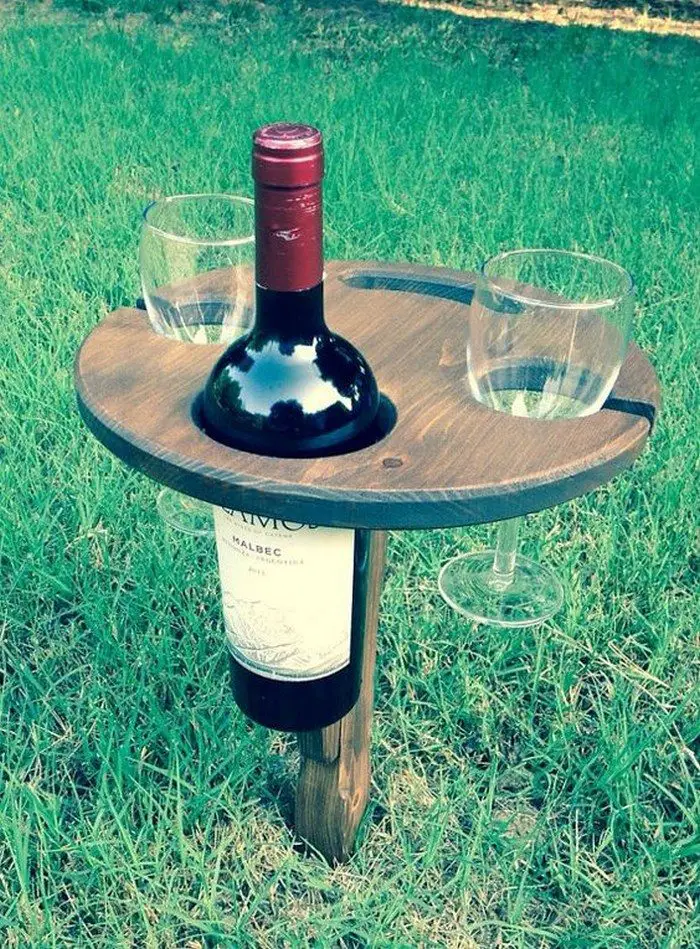
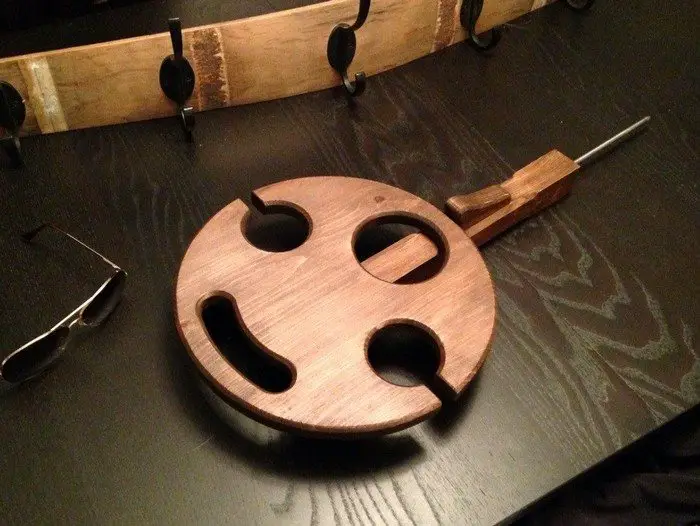
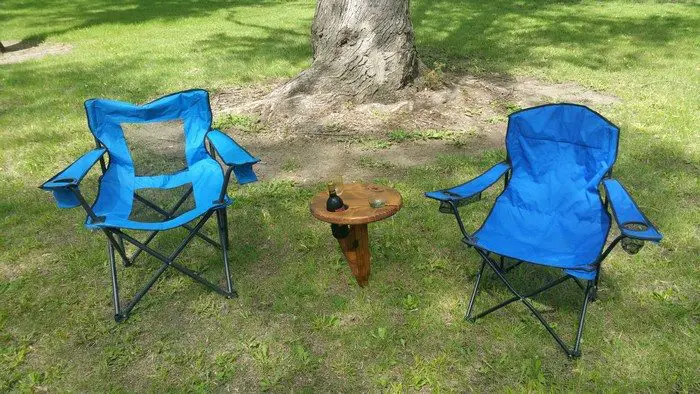
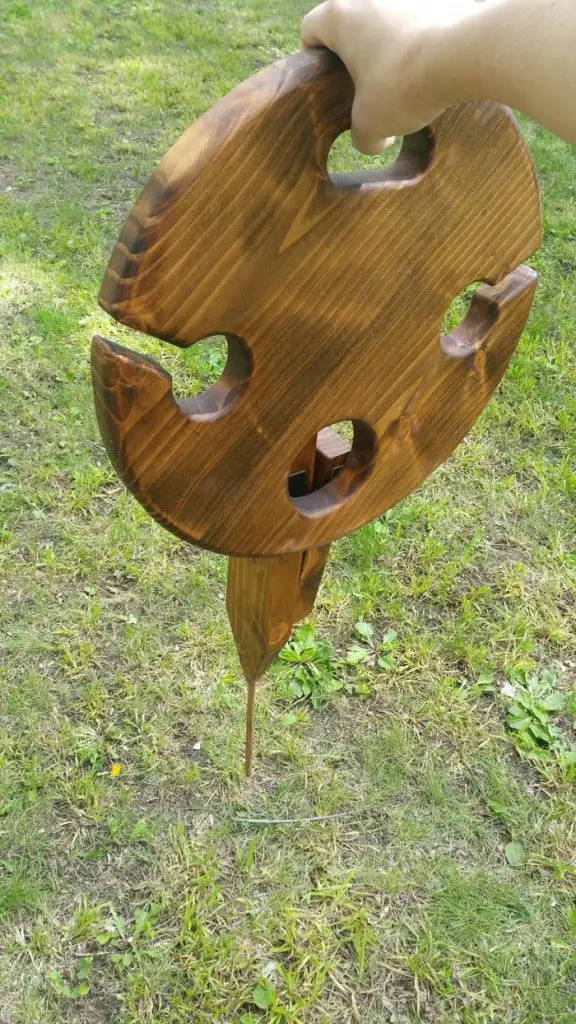

You can get more step-by-step instructions from Woodworking for Mere Mortals over here…
Wine Pairing and Entertainment Tips
Enhance your outdoor gatherings with perfect wine pairings and engaging entertainment that complements your new DIY project. A portable wine table is not only a stylish addition to any picnic or backyard event, but it also serves as a functional piece that can elevate your hosting game.
Here are some wine pairing and entertainment tips to make the most out of your portable wine table.
Wine Pairing Tips
- Consider the Setting: When selecting wine for an outdoor setting, consider the environment and the mood you want to set. A light, refreshing white or rosé is perfect for daytime picnics, while a full-bodied red might be more suited for an elegant sunset gathering. Your portable wine table will keep these beverages stable and ready to serve, enhancing the ambiance and convenience.
- Match with Menu: Align your wine choices with the picnic menu. If you’re serving light appetizers or seafood, crisp whites like Sauvignon Blanc or Pinot Grigio work well. For heartier meals like grilled meats, choose robust reds such as Cabernet Sauvignon or Malbec. The convenience of a portable wine table makes it easy to switch between wines as you change courses, keeping everything accessible and organized.
- Local Flavors: Incorporate local wines into your selection to add a unique touch to your gathering. This not only supports local businesses but also gives your guests a taste of the region. Display these local specialties on your portable wine table for guests to explore and enjoy.
Entertainment Tips
- Games and Activities: Choose games that complement the relaxed vibe of a wine-centric gathering. Classic outdoor games like bocce ball, croquet, or card games can be enjoyed by guests of all ages. Set these games up around your portable wine table to keep everyone engaged and entertained.
- Music to Set the Mood: Create a playlist that matches the tone of the event. Whether it’s smooth jazz, acoustic, or soft rock, music can enhance the atmosphere. A portable speaker can be placed near the wine table, allowing your guests to enjoy their favorite tunes while sipping on their chosen wines.
- Themed Nights: Plan themed wine nights, such as “A Night in Italy” or “California Wine Tasting,” where the wine, food, and decorations align with the theme. Use your portable wine table as the centerpiece, decorated according to the theme, making it not only functional but also a key part of your decor.
By using these tips, your portable wine table will become more than just a piece of furniture; it will be the hub of entertainment and enjoyment at your outdoor gatherings.
Portable Wine Table Accessories
Complete your outdoor dining experience with necessary accessories for your portable wine table. These additions give your outside events a little flair and ease in addition to improving the usefulness of your table. These essential accessories will guarantee your portable wine table is the talk of the town whether you’re throwing a backyard dinner, beach party, or picnic.
Essential Accessories for Your Portable Wine Table
- Wine Glass Holders: Attach wine glass holders to your portable wine table to secure your glasses, preventing spills and breakage. These holders can clip onto the table’s edge or integrate into its design, providing a safe spot for each glass and keeping the surface clutter-free.
- Tablecloth and Clips: A stylish tablecloth not only enhances the look of your portable wine table but also protects the surface. Opt for a cloth that complements the outdoor setting. Secure it with tablecloth clips to prevent it from blowing away in the wind, ensuring your setup remains neat and elegant.
- Portable Lighting: Add portable, battery-operated LED lights or a small lamp to your wine table setup. These lights improve visibility as the evening progresses, creating a cozy and inviting ambiance. They can be placed directly on the table or hung overhead if your table includes an umbrella or canopy attachment.
Decorative and Functional Add-Ons
- Centerpiece Decorations: Enhance the aesthetic of your portable wine table with simple, elegant centerpieces such as a vase of flowers, a lantern, or a decorative candle arrangement. These elements not only beautify the table but also set the tone for a delightful dining experience.
- Umbrella or Canopy: For daytime use, consider attaching an umbrella or canopy to your portable wine table. This accessory provides shade, making it comfortable for guests to enjoy their wine and food without the harsh sun. It also adds a layer of protection for your food and drinks.
- Cooling Bucket: Integrate a built-in or attachable cooling bucket to your portable wine table. This convenient feature keeps your wine at the perfect temperature throughout the event, ensuring each glass is as refreshing as the first. A cooling bucket is especially useful during warm weather gatherings.
By incorporating these accessories into your portable wine table setup, you enhance both the functionality and the aesthetic appeal of your outdoor events. Each accessory is designed to complement the convenience and style of your portable wine table, ensuring every gathering is effortlessly enjoyable.
Conclusion
Crafting a portable wine table is a rewarding DIY project that combines practicality with style. With the right tools and materials, anyone can create a stable, functional surface ideal for enjoying wine outdoors. This custom piece not only adds a personal touch to gatherings but also ensures that every outdoor event is equipped for elegance and convenience.
We have more creative picnic projects. Check out our suitcase picnic table guide!

