Step 12: Making the frame for the windows- Pt 3
I countersunk a hole at four corners for a 2″ deck screw. I had them left over from an earlier project, so while they weren’t free, they were in inventory.
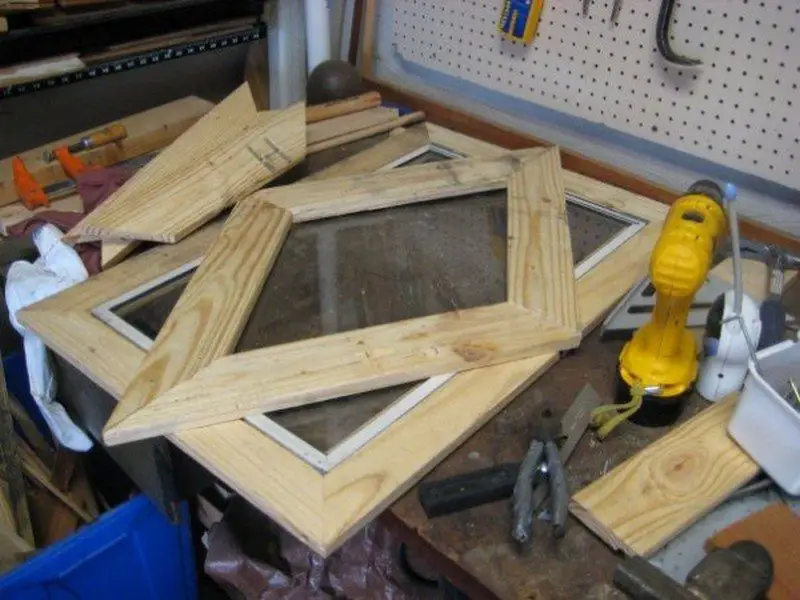
Step 13: Frame for the Windows, cont.
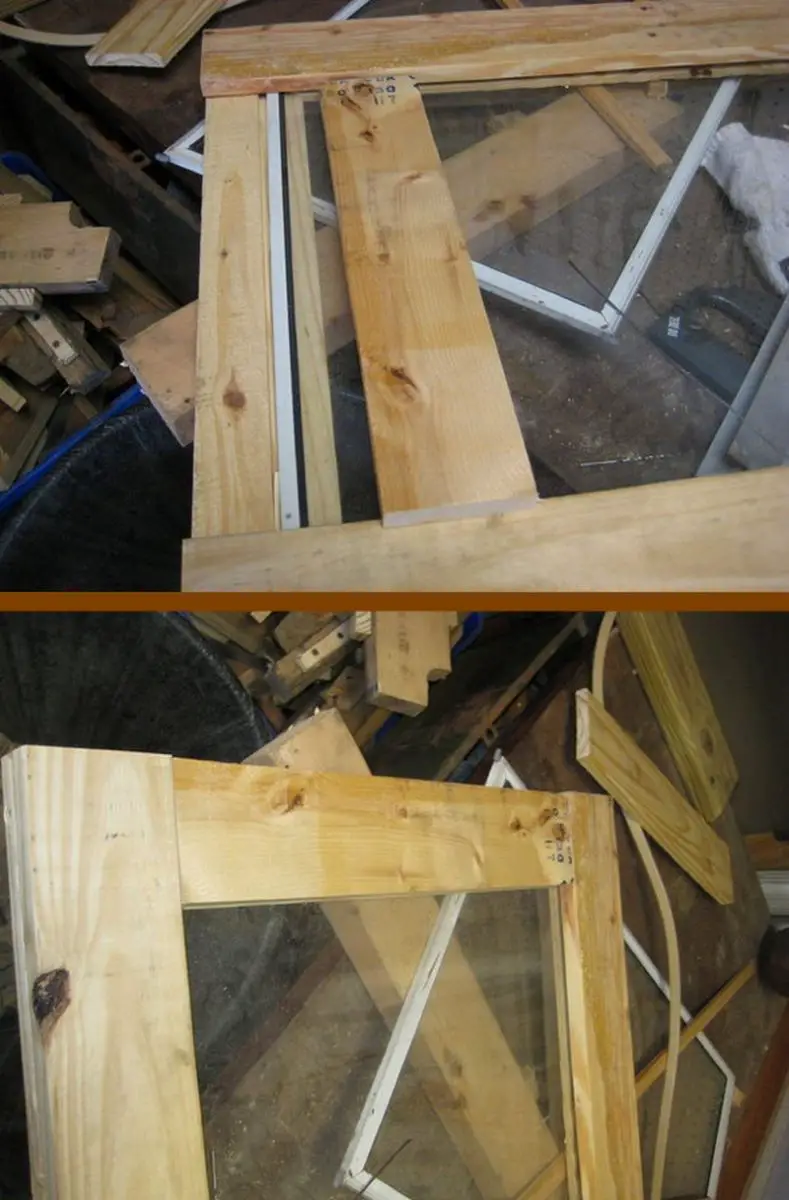
I finished the double windows by backing the frame with more 1×4’s. I just butted them together. The first picture shows the first two boards (horizontal, in the background and foreground. The board perpendicular is shown in the proper position in picture number (2). I put two 1″ wood screws in each corner, driven straight through into the undelying frame. You’ll want to countersink them.
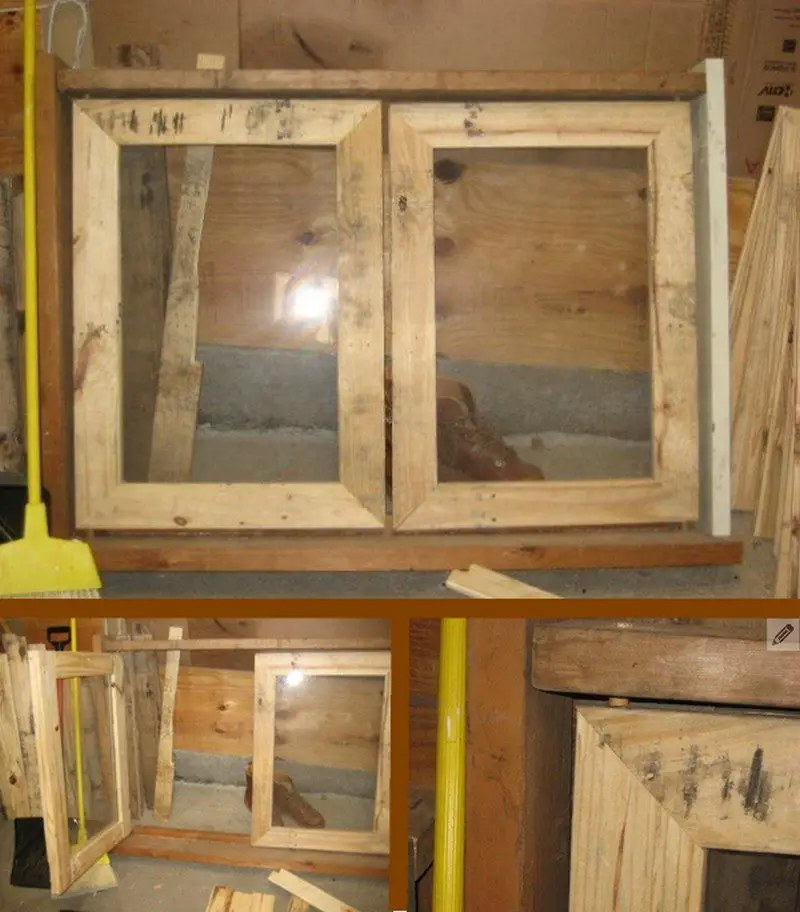
Step 14: Building the double “ice cream window”
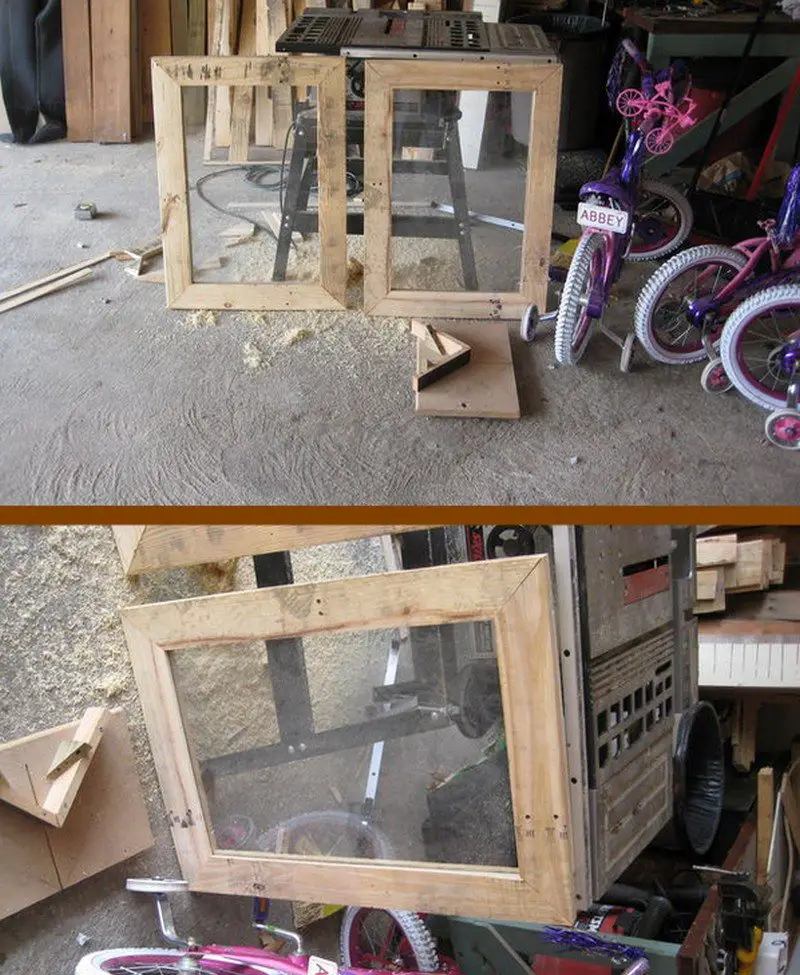
Here they are, complete and ready for their casing. This will be the front, gable-end double window.
Step 15: Ice cream window, continued
I built a frame for the whole works out of some 2×6 lumber a nice guy in a nearby town gave me. He posted it on Craigslist and gave me a whole bunch of 2×6’s, 2×8’s, and 2×10’s. The joints are simply butted and screwed together with two inch deck screws. The “hinges” are pieces of an old dowel I had.
I would later build a rough opening for the whole thing, slide it in, and fasten it with long screws into the playhouse. I measured ahead; the overall depth of the window matched combined width of the framing, the siding, and the interior paneling. It was a simple matter to attach mouldings to the exterior and interior when it was time for the finish work. I also later added two handles, some wood strips to make it weather-tight, and a simple hook and eye lock to keep it shut when not in use.
If you look at the finished product in the later photos, you’ll see that there are also wooden “x’s” in each pane. These were simply glued, directly to the glass.
Image Notes
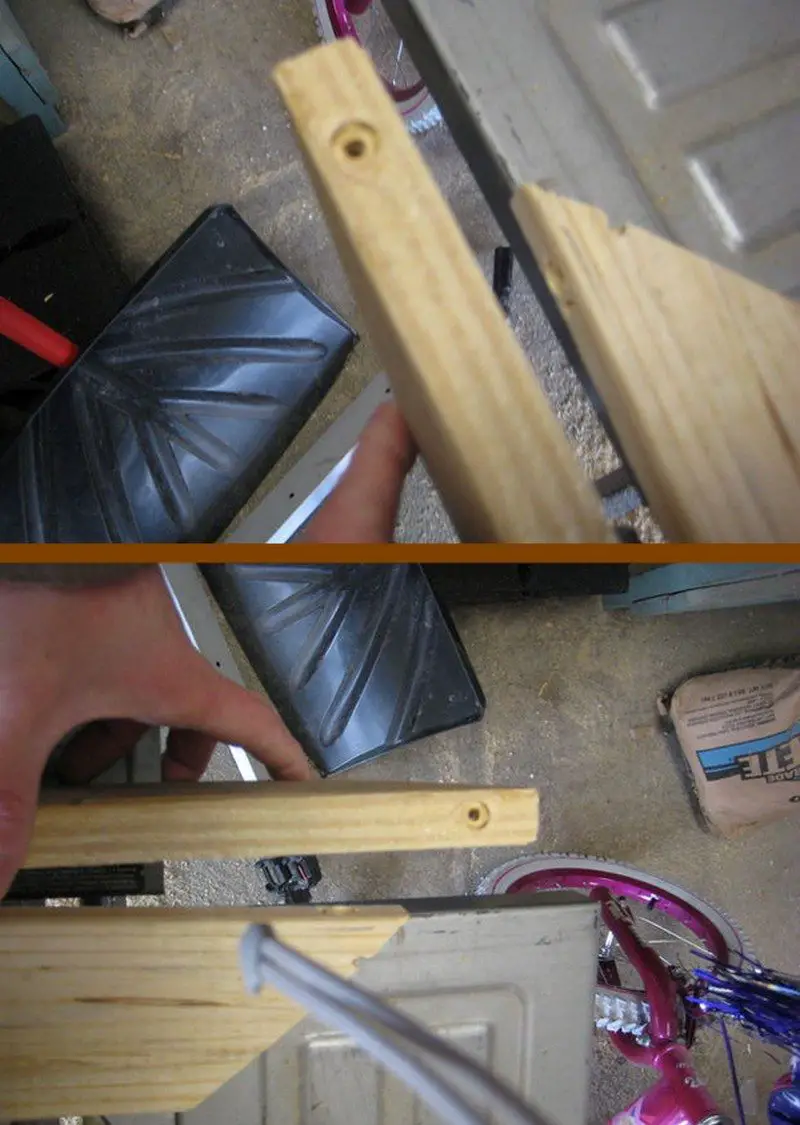
1. I made the “hinges” from an old wood dowel.
Step 16: The diamond-shaped porthole
The diamond window was easy. I made the frame the same way, then cut a diamond shape and screwed it to the top. I glazed it later on with some old window putty to make it water tight.
Step 17: Finally– the real work! The playhouse floor/deck.
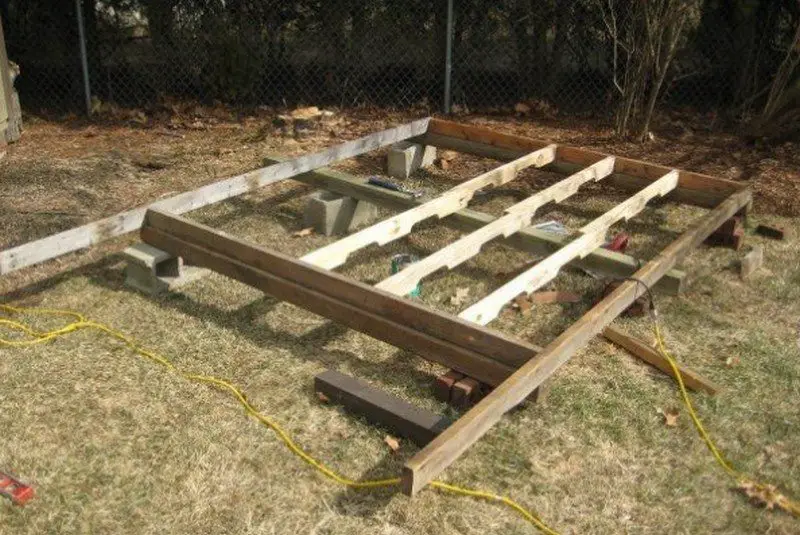
I finally got tired of fooling around in the garage and decided to get started. It was cold (February), but I was eager and full of energy after being shut up all winter. I salvaged a bunch of old 4×4’s and set them on some bricks and cinder blocks (all free). I built a 8×10 square from reclaimed pressure-treated 2×4’s I got from a guy who had torn down his deck. He posted them on craigslist and I’ve been using them for every single project I’ve done over the last few years. He gave me almost 500 linear feet of 2×6’s!
I leveled the whole thing by adding and removing bricks. You’ll want to do that under the 4×4’s. When it was close, I laid across the pallet 2×4’s using the center 4×4 as a stringer. This worked very well as I did not need to cut any of the 2×4’s– I simply laid them side to side.
Notice the funky pallet 2×4’s in the picture– they have small, half-oval sections missing. This is where you would slide in the pallet jack.
The overall area is approx. 8×10. The playhouse itself is 8X8, the two-foot protruding section is where the deck will go. Throughout the build process, I constantly had to adjust spacing and the like to accomodate the roughly 4-foot 2×4’s and 30″ 1x (one by) lumber. I had various pieces of plywood for the floor, but I also had to make sure that the floor joists were no further apart than 15″, in case I had to use any of the 1×6’s. Why 15″? Because the short lengths of lumber need to have an alternating “butt” end, much like brickwork. A long, continuous joint would be too weak. By alernating, you add strength.
Step 18: Floor, continued
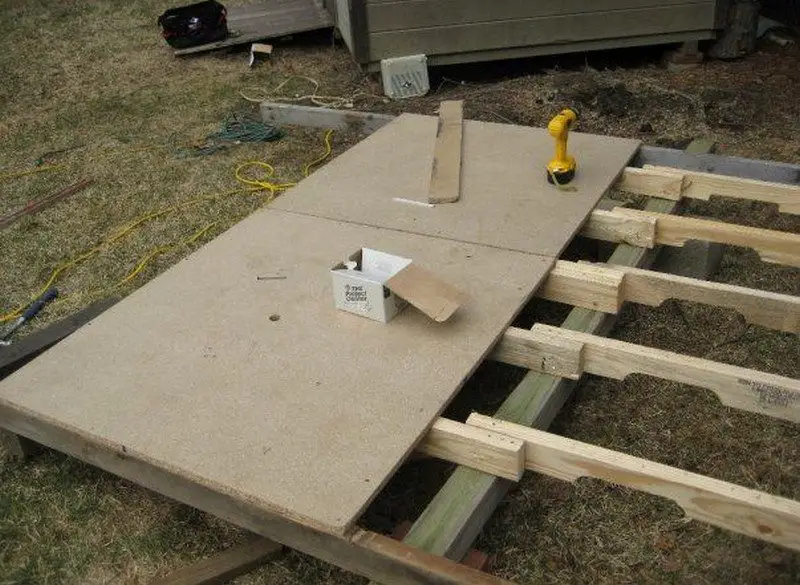
The particleboard came from….what else? Pallets. I actually grabbed a bunch of them just for the 3/4 inch particleboard. The underlying wood, the 2×4’s and the 1x’s weren’t really up to par (they were oak and hard as granite), but I found a use for them here and there. The particleboard caused me some concern later when it began to rain. I thought they’d fall apart, but they actually held up well.
You can see the middle beam where the 2×4’s meet really well in this picture. I toe-nailed all the 2x lumber to the 4×4’s, every two feet or so. This is important– I may want to move the whole structure at a later date.
Step 19: Framing
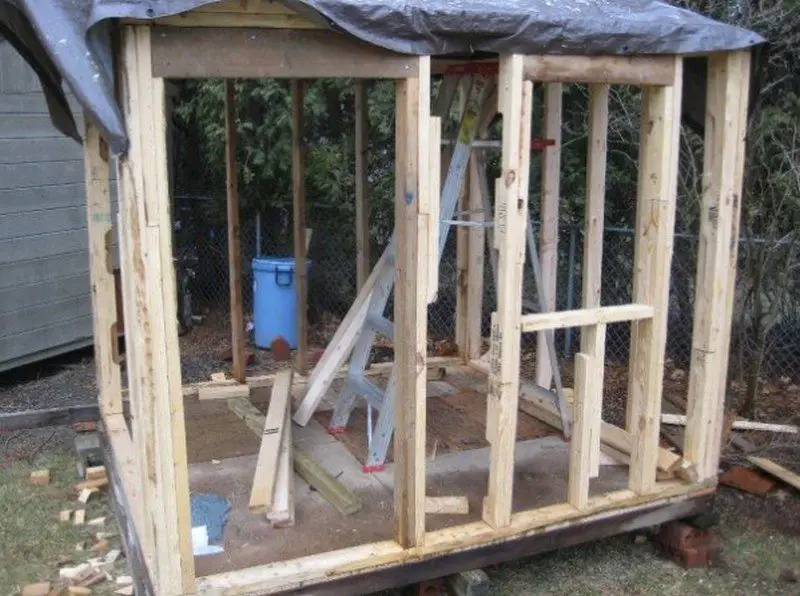
The frame goes up:
I actually ended up running out of 4-foot pallet 2×4’s and purchased approx. (20) bargain 2×4’s for a dollar each. They weren’t exactly straight, but for $20, it wasn’t bad. Notice the 2×6 and 2×8 headers. This was more free wood I got off of Craigslist.
There are two doors, one in the front and one in the back. In this photo, you can see the rough opening for the diamond-shaped window and the front door. The 2×4 at the bottom of the doorway was cut out later.
The 2×4’s, spliced together and ugly, are 15″ inches apart. This is because the siding will be 30″ pieces of 1×4, with a staggered vertical seam. If you need some help with basic framing, check out google– there are some great sites out there. Basically, though, you should worry about optimizing the material you have without sacrificing safety. The tarp was to keep everything dry until the roof went up.
Step 20: Framing, continued
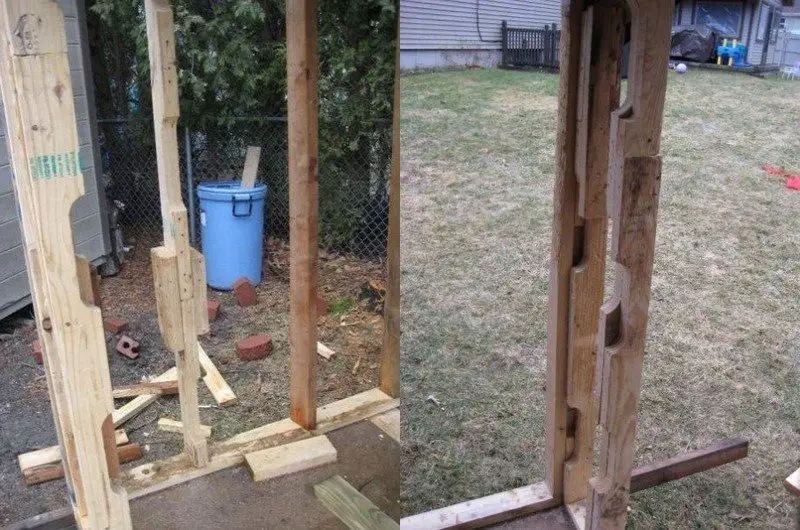
I never imagined just what a pain in the butt it would be to splice (scab) the 4-foot 2×4’s together. The wood was really hard and overall it just was not fun. I gave up on anything being square almost immediately. Because I planned on siding the playhouse with the 30″ pallet 1×4’s and 1×6’s, each stud was placed 15″ on center, rather than 16″. This allowed me to stagger the vertical joints.
Step 21: Ice cream window framing
This header is most likely overkill, but I wanted a very large opening. Some day, when the kids outgrow this, it’ll be converted into a garage for a riding mower. This will give me a very large door! It is dimensional lumber (ie, it really is 2″ thick and 6″ wide, not 1.5″ and 5.5″). There are two pieces sandwiched together.


