Remember when you were just a tiny kid, and you wished you grew faster so you can finally enjoy things more? Like a good meal during a picnic? Or drawing time? Everybody goes through that awkward stage when everything is just too big for comfort, which is why this easy project for the kids works. If you have ‘dwarfs’ at home, this is something they will surely love!
This project is great when you love having picnics in your backyard and you have many little, active kids in the family. Build them this outdoor table and they can all play and eat together while the adults relax and enjoy the picnic, too!
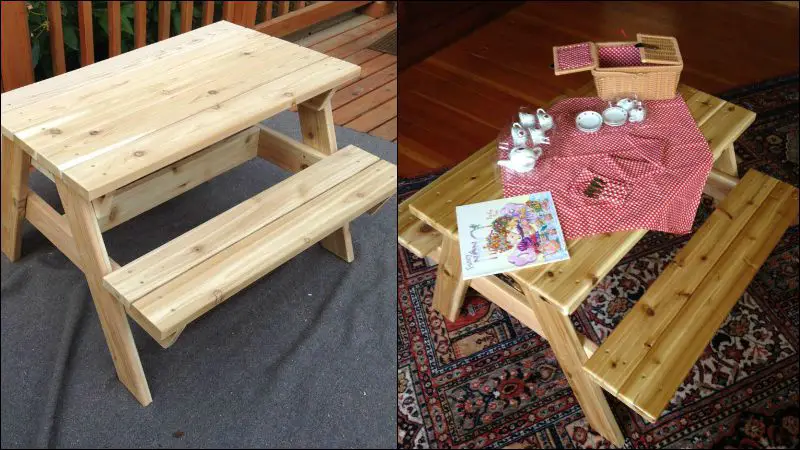
Of course, this can also serve as an indoor table where your children can play, color, or study comfortably.
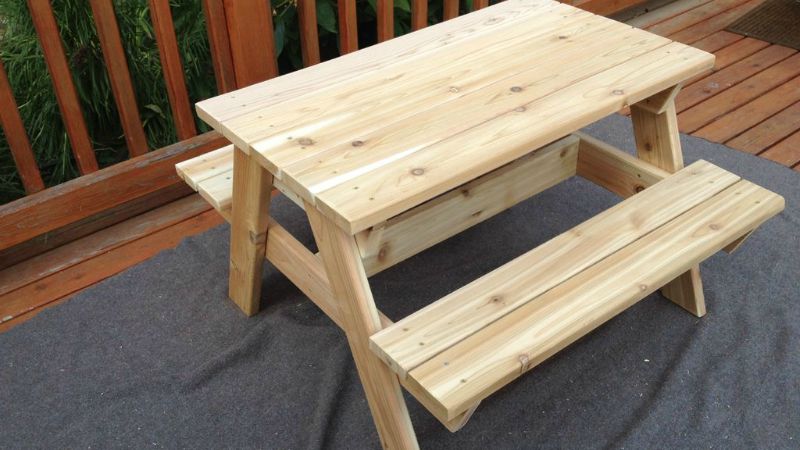
This little DIY picnic table is good for up to six-year-olds or so. It’s simple and hence very easy to build, even for first-time DIY-ers.
Do you have kids who need this?
Materials:
- 8 Cedar 1″ x 4″ x 8′ Deck Boards
- 75 pcs 1 5/8″ Deck Screws or Bolts for a nicer and sturdier build
- Sandpaper
- Varnish / Stain
Tools:
- Tape Measure
- Table Saw / Miter Saw
- Drill
- Kreg Jig
Steps:

Here is the cutting list:
- 2 – Trapezoidal Seat Supports with the longer end at 33″; angle the ends at 22 1/2 degrees
- 2 – Trapezoidal Tabletop Supports with the longer end at 17″; angle the ends at 22 1/2 degrees
- 2 – Center Supports at 25 1/2″; square ends
- 4 – Legs (parallelograms) at 21″; 22 1/2 degree angles
- 9 – Slats for Tabletop and Seats; 31″ long

Choose the best-looking top pieces that look good together and put them face-down on something soft. Align the ends and put the top supports and one of the spacers on as shown. Line everything up, put two screws in each end, then flip it over to attach the top.
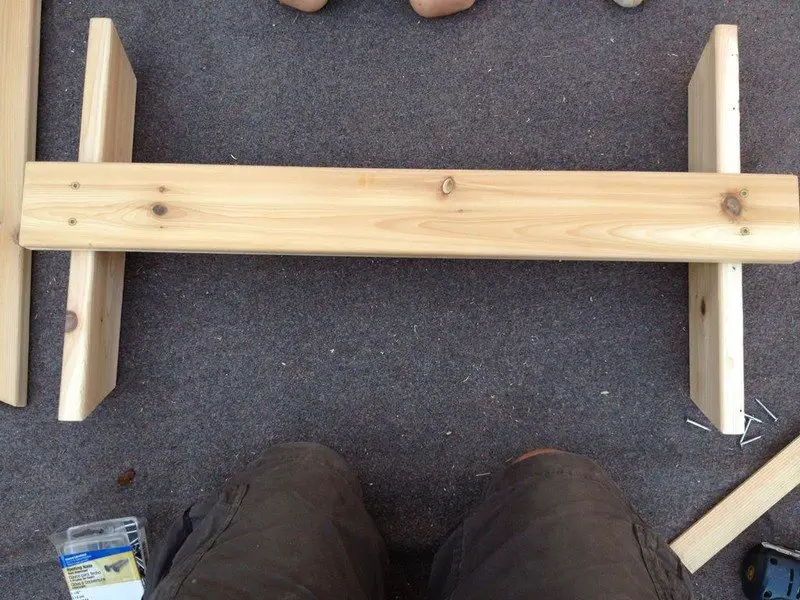
Center and align the top center board and screw it down to the top support with two evenly-spaced screws at each end.
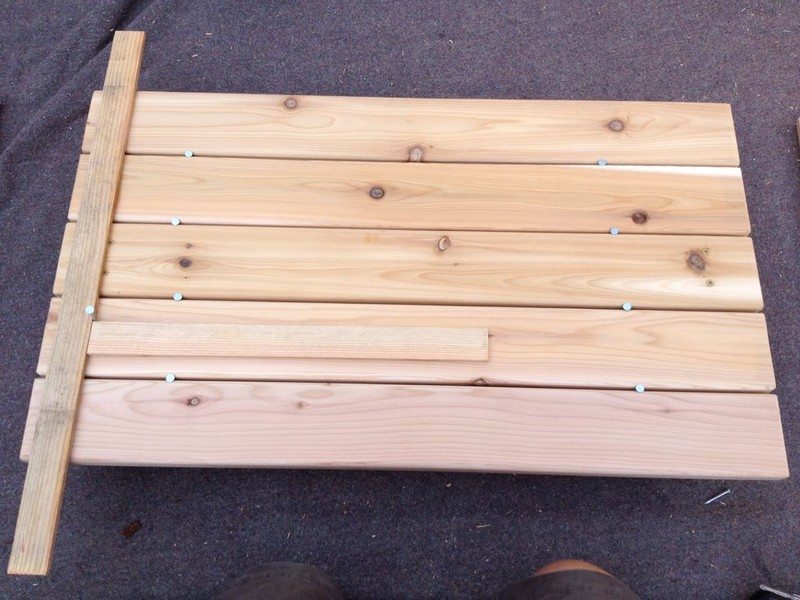
Add the rest of the boards, spaced with nails, or tight against each other. (I made the first 10 or so with spaces, but as they age, I think tight against each other is better.)
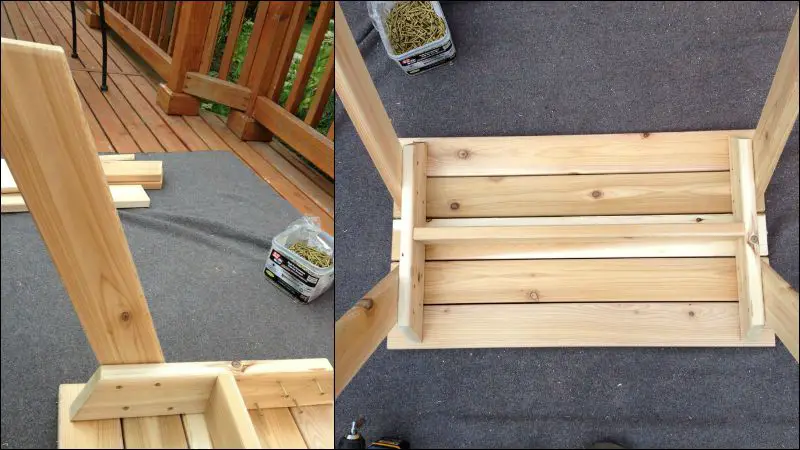
Line the legs up so that the outer edge of the leg is right near the bottom corner of the top support board and put four screws in from the inside. You might want to do two legs on a side first, then put one screw in each of the other legs in order to turn the table over and level it before putting in the remaining screws.
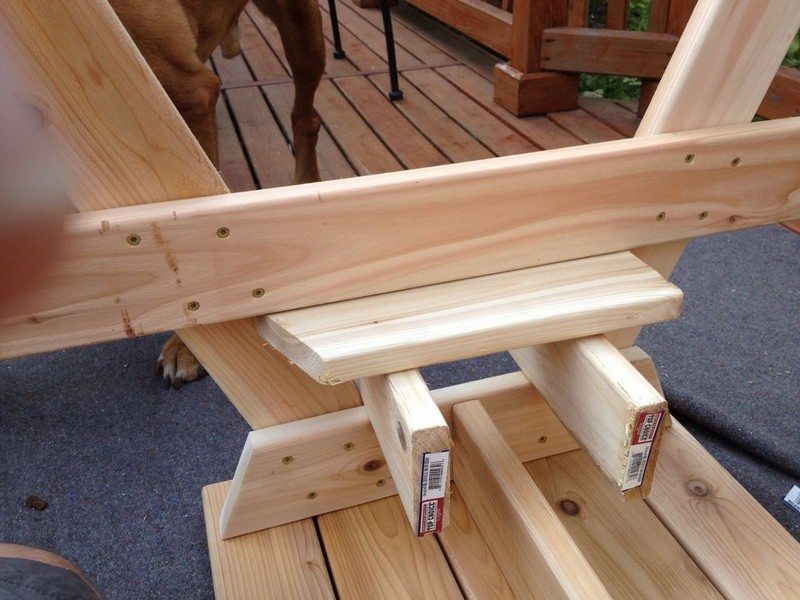
This spacing works well for me: with the table upside down, one scrap piece on end, one on its side, and screw the seat supports on.
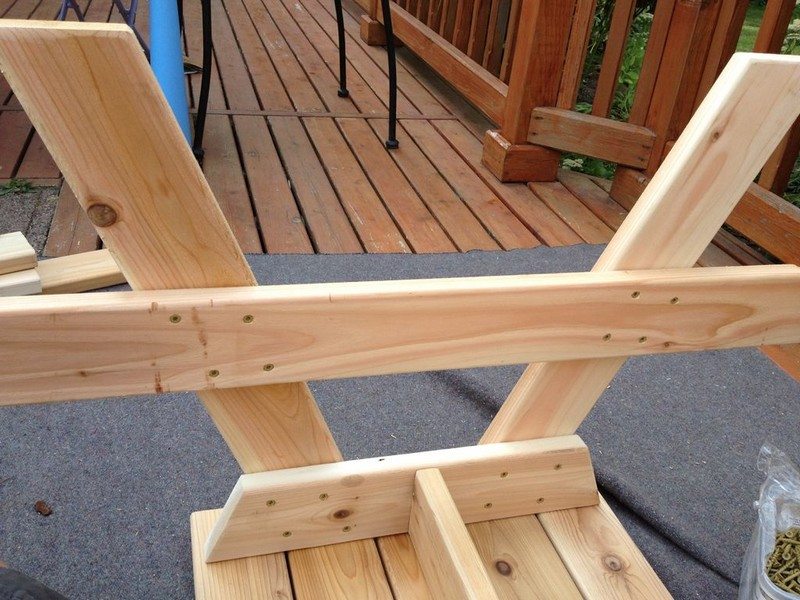
Make sure they’re evenly spaced on each side.
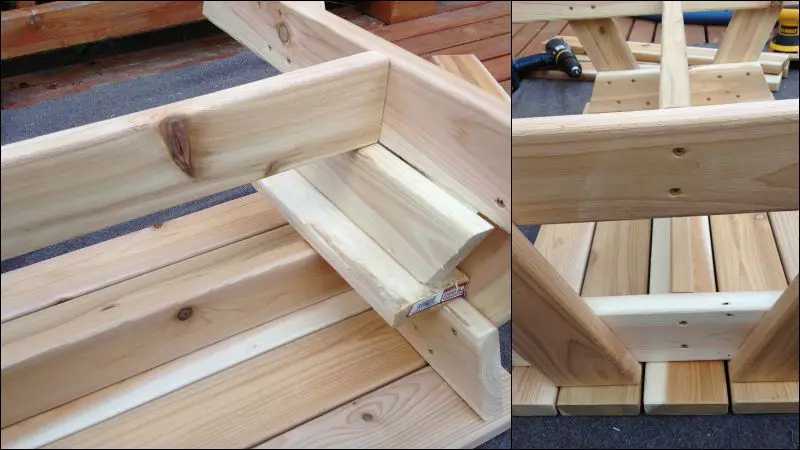
Put in the lower spacer with two screws from each end. I use 3″ screws if I have any.
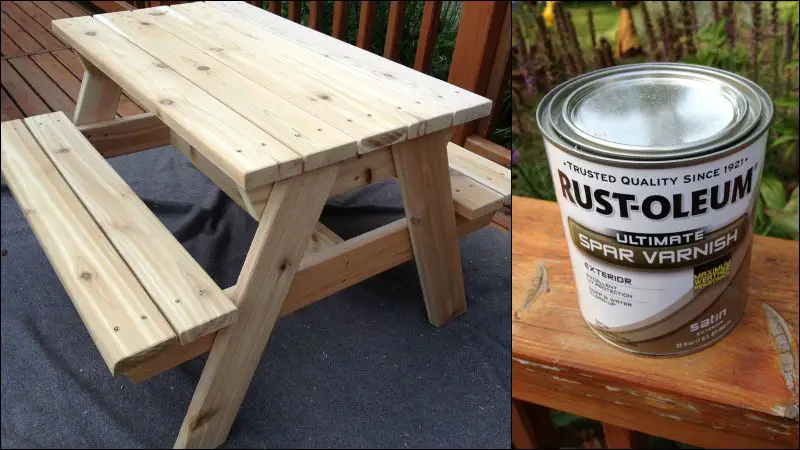
Put the Seats on to finish up, then sand as fine as you care to.
I’m in the Pacific Northwest, so it takes six coats of varnish to make it two years, or you can let the table gray naturally. One thought about natural though – without the varnish, ketchup and mustard stains aren’t very wipeable.
It’s all set for a china tea set.
One warning. As soon as your friends with children see these, you’ll be making them for birthdays and Christmas for years.
Thanks to kputney for this great project!


