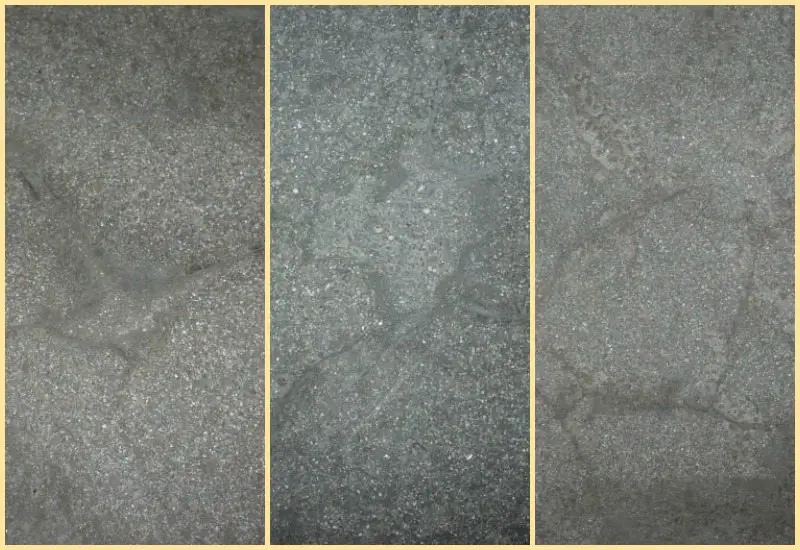
Hopefully you’ve learned from our mistakes and your countertop looks perfect at this point. If you decided to build yours exactly like ours(mistakes and all), you’ll need to patch up any cracks. These three cracked areas resulted from the melamine being tapped too hard during the air bubble removal. The surface looked great otherwise. It dried with an almost granite look to it from the black tint we added during mixing. (The large lighter spots in the pictures are from the flash). While these cracks were concerning at first, we decided it would be relatively easy to attempt to repair them, as well as being a good learning tool for others who may experience something similar.
We had also decided that by this step it would only cost us about $150 to build an entirely new countertop so, worst case, we could always build another later if this one didn’t end up to our liking.
We began by going over the entire surface with a wire brush. This opened up any small air pockets that were hiding beneath a very thin layer of concrete. This may seem like going backwards, but it enabled the small pinholes to be filled in the next step.
It’s important to know your color to concrete ratio if you’re using tint in the mix so you can mix a slurry with the same ratio. We did two slurry passes: the first made with the same Quikrete 5000, the second with Fu-Tung Cheng’s slurry mix.
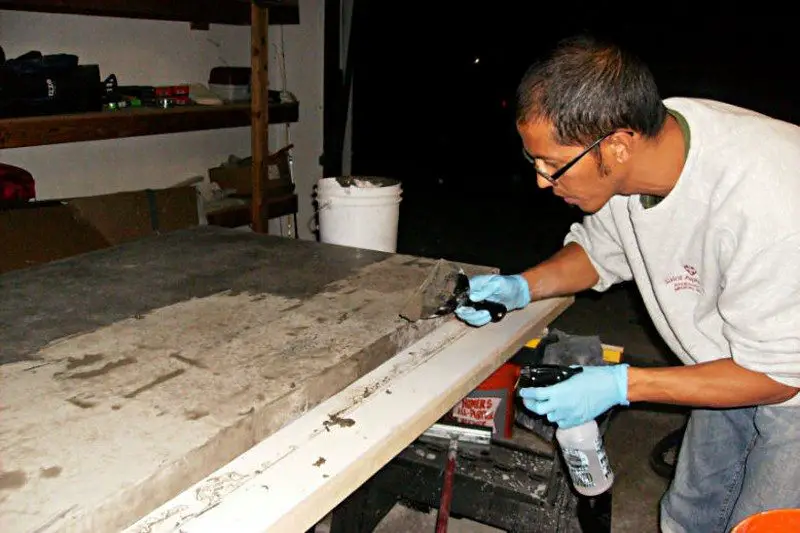
This is applied with a trowel or putty knife, allowed to dry, then sanded down to smooth it. The holes and cracks filled nicely, and while the top was nice and smooth when we finished, the thing we noticed was a lack of the same “granite” look to the finish in the 3 large cracked areas.

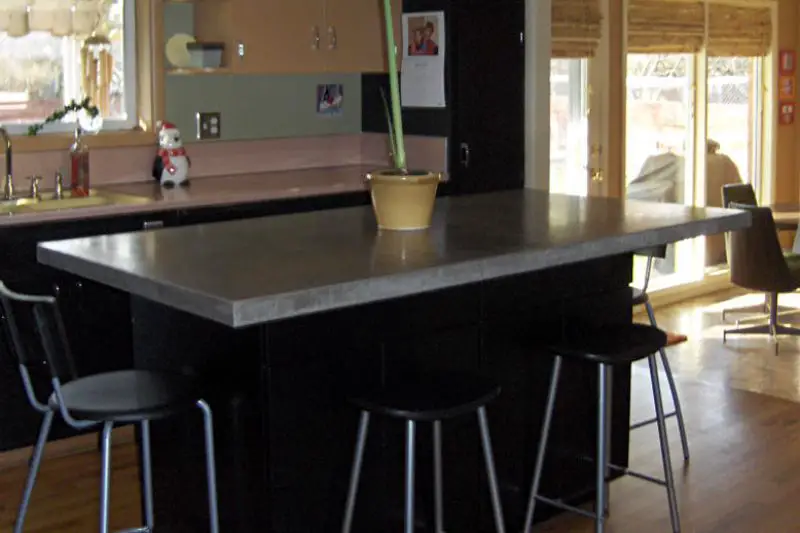
The final step is applying the finish of your choice. We used a food safe polyurethane.
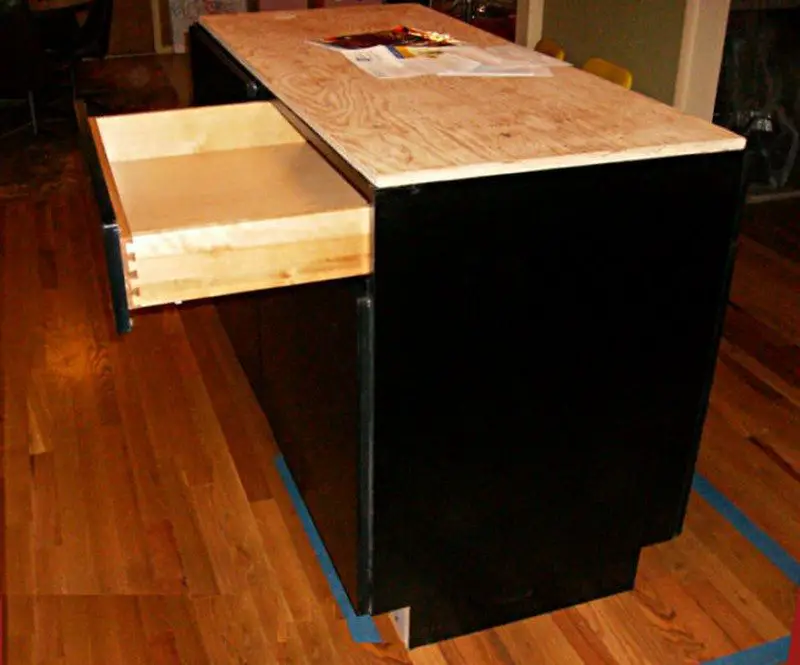
To install the countertop, we attached a sheet of 3/4 inch plywood to the top of the cabinets by screwing it into the corner braces from inside. This allows for easy removal of the top later if we decide to replace it. We applied a liberal amount of construction adhesive to the plywood and set the countertop onto it. Again…not a step you want to do without several people assisting.
After the adhesive has dried, you’ll want to wax the top for the final finish.
Hopefully this has encouraged you to go ahead and try to build your own concrete countertop. We learned a lot through the process and are considering possibly doing another one in 6 months or so. While this project does take a fair amount of time as far as drying and so forth, overall, we didn’t have a lot of man hours in the actual construction. Have fun, get creative, and read about additional techniques for personal touches you can add to your top. No matter how it turns out, there’s a lot of satisfaction in knowing you built it yourself.
Is this your next project for your kitchen?
Thanks to bkr1969 for this great project.


