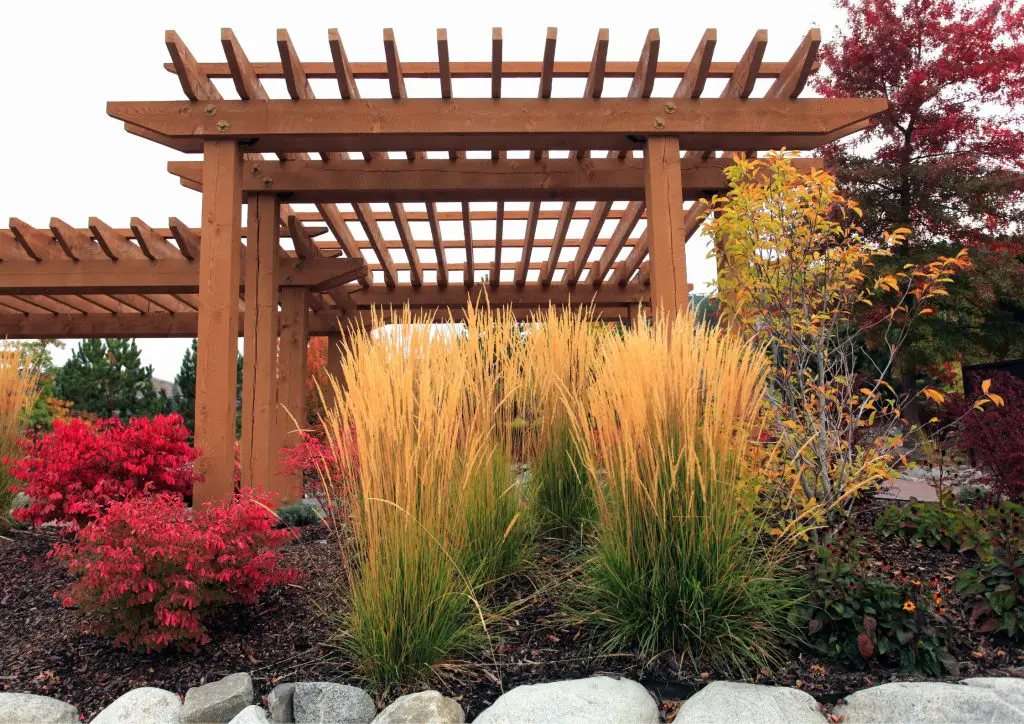
If you’re dreaming of a more inviting backyard, why not consider building a DIY pergola? This beautiful structure not only boosts the aesthetics of your outdoor space but also provides a shaded sanctuary for relaxation and entertainment.
Contents
- 1 Build Your Backyard Retreat: Tips for Designing a DIY Pergola
Build Your Backyard Retreat: Tips for Designing a DIY Pergola
Whether you are an experienced DIY enthusiast or a novice looking to embark on a new project, this comprehensive guide will assist you in constructing your very own pergola from beginning to end.
Let’s transform your backyard into a stunning retreat where memories are made!
Materials and Tools Needed
Materials:
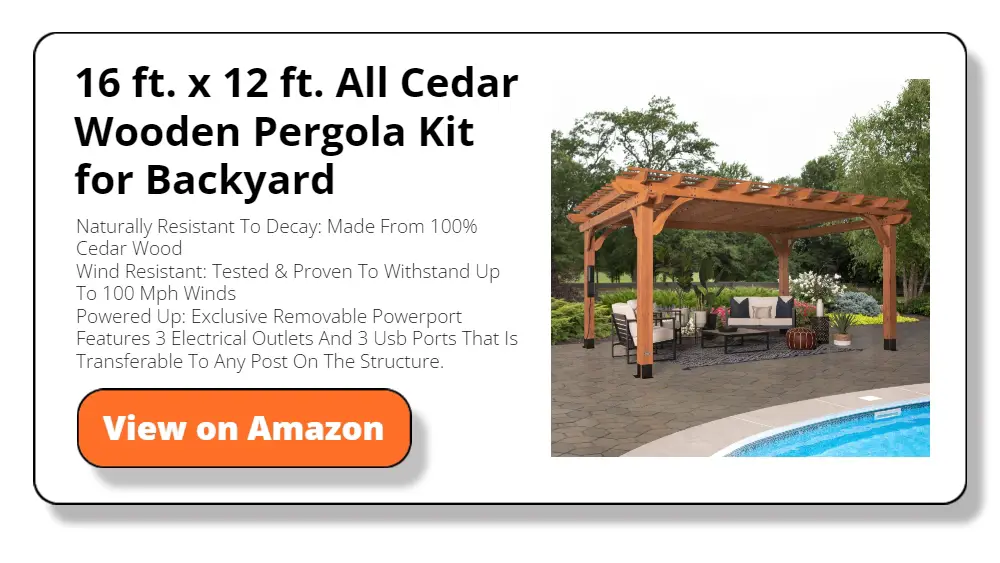
- Wood: Depending on your budget and style preferences, cedar or redwood are excellent choices due to their durability and resistance to rot. You’ll need:
- Posts: These are the vertical supports. Depending on the size of your pergola, you might need 4-6 posts.
- Beams: These will lie horizontally atop the posts.
- Rafters: These are smaller beams that will run perpendicular to the main beams at the top of the structure.
- Concrete mix: This is essential for setting your posts solidly in the ground. You’ll need enough to fill the holes you dig for your posts.
- Metal brackets and screws: These will help secure the beams to the posts and the rafters to the beams.
Tools:
- Drill and Circular saw: These tools will be used for making holes and cutting your wood to the correct dimensions.
- Measuring tape, Level, and Ladder: Important for precise measurements and ensuring everything is perfectly horizontal and vertical.
- Paint or wood stain: This is optional but recommended for a finished look and additional protection against the elements.
- Shovel or post-hole digger: For digging holes for your posts.
- Wheelbarrow: Handy for mixing concrete.
- Hammer and Wrench: Needed for securing various parts together.
Step-by-Step Guide
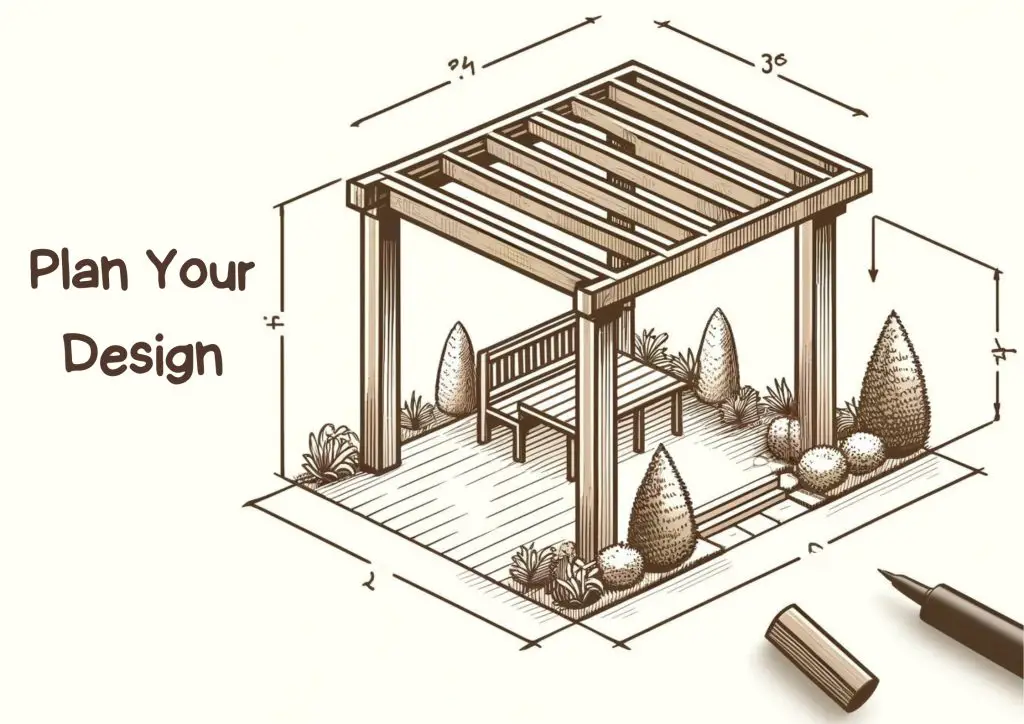
Step 1: Plan Your Design
Before you start building your DIY pergola, it’s crucial to thoroughly plan your design. This step is foundational to ensuring that the rest of your project goes smoothly. Here’s how you can effectively plan the design of your DIY pergola:
Sketch Out the Design
Begin by drawing a rough sketch of your pergola. This doesn’t have to be an architectural blueprint, but it should include basic dimensions and an outline of the structure. Decide on the height, width, and depth of your pergola.
Consider how many posts you will need and where they will be placed. Drawing your design will help you visualize the final product and guide you in purchasing the correct amount of materials.
Choose the Location
Selecting the right location for your DIY pergola is just as important as the design. You’ll want to consider several factors:
- Sun Exposure: Think about how the sun moves across your yard. Placing your DIY pergola in a location that gets optimal morning light but shaded afternoon sun can make it a comfortable retreat throughout the day.
- Ground Surface: Choose a level area to simplify the building process. If your desired location isn’t level, you may need to level it out or adjust your design to accommodate the slope.
- Proximity to Home: Building your DIY pergola close to your house can make it a seamless extension of your living space, but placing it further in the garden can create a distinct, secluded nook.
Consider the Path of the Sun
The orientation of your DIY pergola can greatly affect its usability. By understanding the path of the sun over your yard, you can position your DIY pergola to provide shade during the hottest parts of the day, enhancing comfort. Use apps or tools that track sun paths to help position your structure effectively.
Check Local Building Codes
Before you begin construction, it’s essential to check with your local building authority to see if you need a permit to build a DIY pergola. Some areas have specific restrictions on structure sizes, types, and placements.
Obtaining a permit might seem like a hassle, but it ensures that your pergola is built to code and can prevent costly penalties or required changes in the future.
By maintaining a focus on thoughtful planning and preparation in building your DIY pergola, you ensure that the project is not only successful but also a valuable addition to your home.
Step 2: Prepare the Site
When embarking on the construction of your DIY pergola, the preparation of the building site is a critical step that sets the foundation for everything that follows.
Start by selecting a flat, level area in your backyard. This choice is crucial, as it ensures the stability of your DIY pergola and reduces the complexity of construction.
Clear the Site
Begin the preparation process by clearing the selected site of any grass, rocks, and debris. This step is essential to prevent any unevenness once the structure is built. If the ground is covered in turf, you might want to use a spade or a sod cutter to remove the grass more effectively, ensuring that the surface underneath is smooth and even.
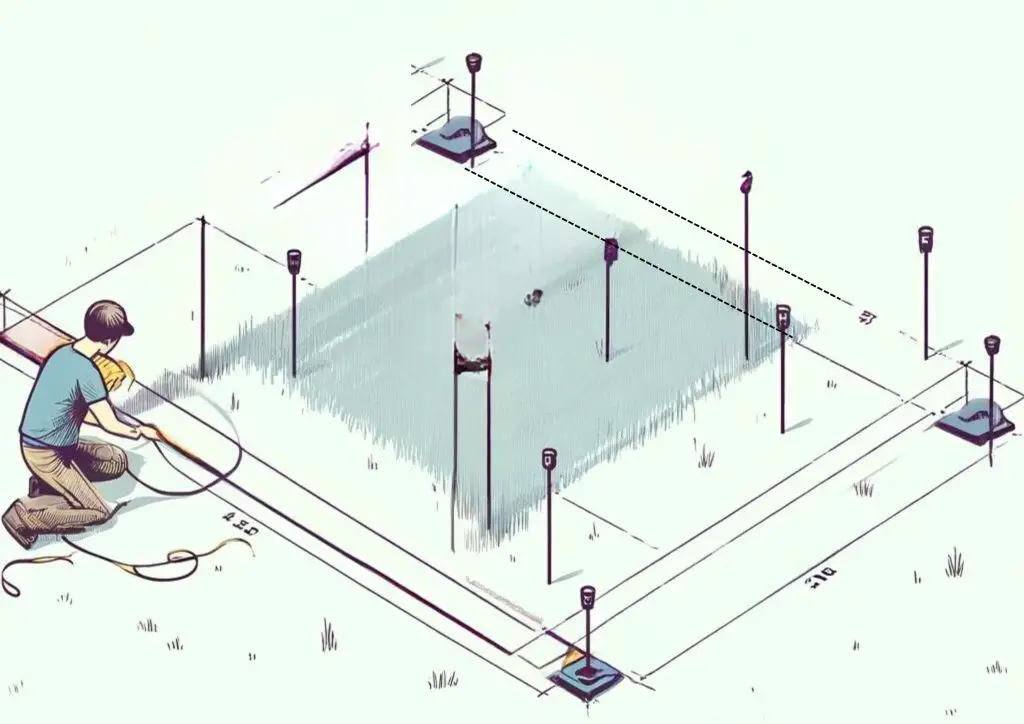
Mark the Layout
With the site cleared, the next step is to outline the exact dimensions of your DIY pergola directly on the ground. Use a measuring tape to measure the length and width of your intended structure.
It’s a good idea to drive small stakes at each corner, and then use string to connect them, creating a visual representation of the pergola’s footprint. This outline will serve as a precise guide for where you will need to dig post holes.
Check for Level
After marking the ground, use a long level to check that the surface area within your outline is even. If you discover any significant dips or mounds, you may need to do some minor landscaping. Shoveling soil from higher areas to fill in lower ones can help achieve a level base, which is vital for the upright and stable installation of the DIY pergola posts.
Confirm Dimensions
Once your area is marked and leveled, take a moment to double-check your measurements. Ensuring the accuracy of your dimensions at this stage will prevent issues during the actual construction of your DIY pergola, making the installation of posts and beams smoother and more straightforward.
By thoroughly preparing the site, you are laying a solid groundwork for your DIY pergola, which not only facilitates a smoother building process but also contributes to the longevity and stability of the structure.
This meticulous preparation ensures that the pergola will be a safe, enjoyable, and beautiful addition to your backyard for years to come.
Step 3: Set the Posts
Setting the posts correctly is arguably the most critical part of constructing your DIY pergola. It involves careful digging, positioning, and securing of the posts that will support the entire structure.
Digging the Holes
First, use a shovel or a post-hole digger to dig the holes at each of the marked points on your site layout. The holes should be about 1 foot wide and 2 feet deep.
This depth is recommended to ensure that about one-third of the height of your posts is buried underground, which helps stabilize the structure against wind and weight. For DIY pergolas in areas with deeper frost lines or high wind conditions, consider digging a little deeper to enhance stability.
Setting the Posts
Once the holes are dug, it’s time to set the posts. Place each post into its respective hole. It’s crucial at this stage to use a level to ensure that each post is perfectly vertical (plumb). An incorrectly aligned post can lead to issues with the overall stability and aesthetics of the finished pergola.
With the posts positioned and levelled, prepare your concrete mix. Follow the package instructions carefully to mix the concrete in a wheelbarrow or a large bucket. Once mixed, pour the concrete around each post.
Be sure to fill each hole to just a few inches below the ground level, leaving enough room for topsoil or finish landscaping later. Use a stick or a tool to poke into the concrete mix; this helps remove any air pockets and ensures the concrete surrounds the post evenly.
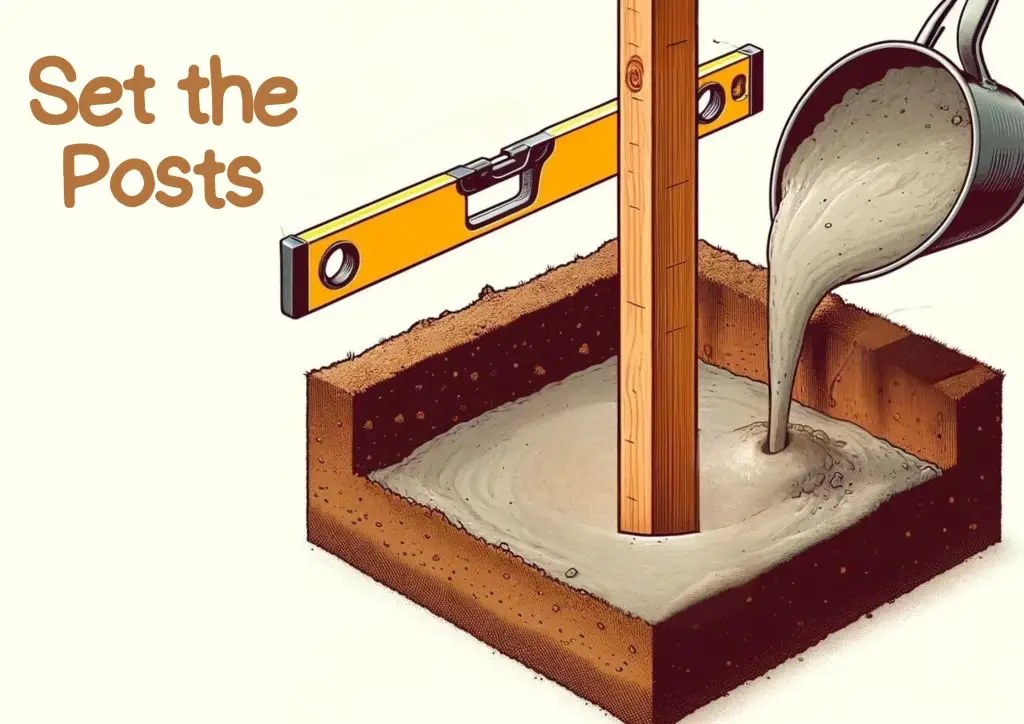
After pouring the concrete, recheck the alignment of each post with your level. Adjustments should be made quickly before the concrete begins to set. You can temporarily brace the posts with stakes and strings to hold them vertical if needed.
Allow the concrete to cure for at least 24 hours before proceeding with any further construction. The curing process is crucial as it solidifies the foundation of your DIY pergola.
In some cases, depending on weather conditions and the type of concrete used, it might be advisable to wait longer (up to 48 hours) to ensure the concrete has completely hardened and achieved maximum strength.
Once the concrete has cured, perform a final check on the level and alignment of the posts. This is your last chance to make any necessary adjustments before the structure becomes permanent.
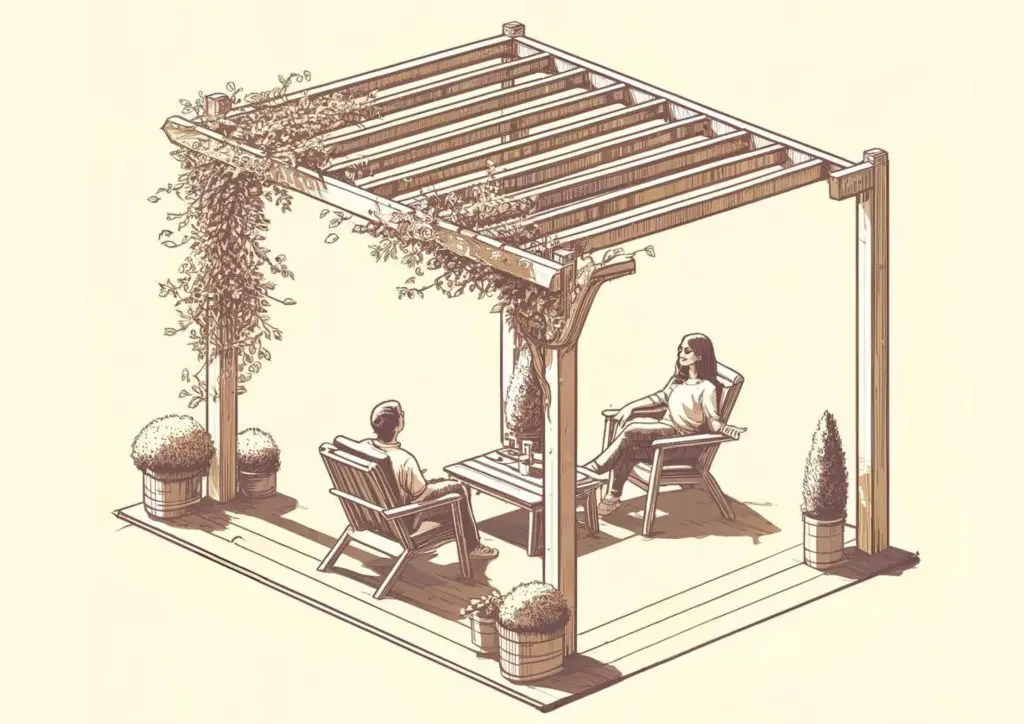
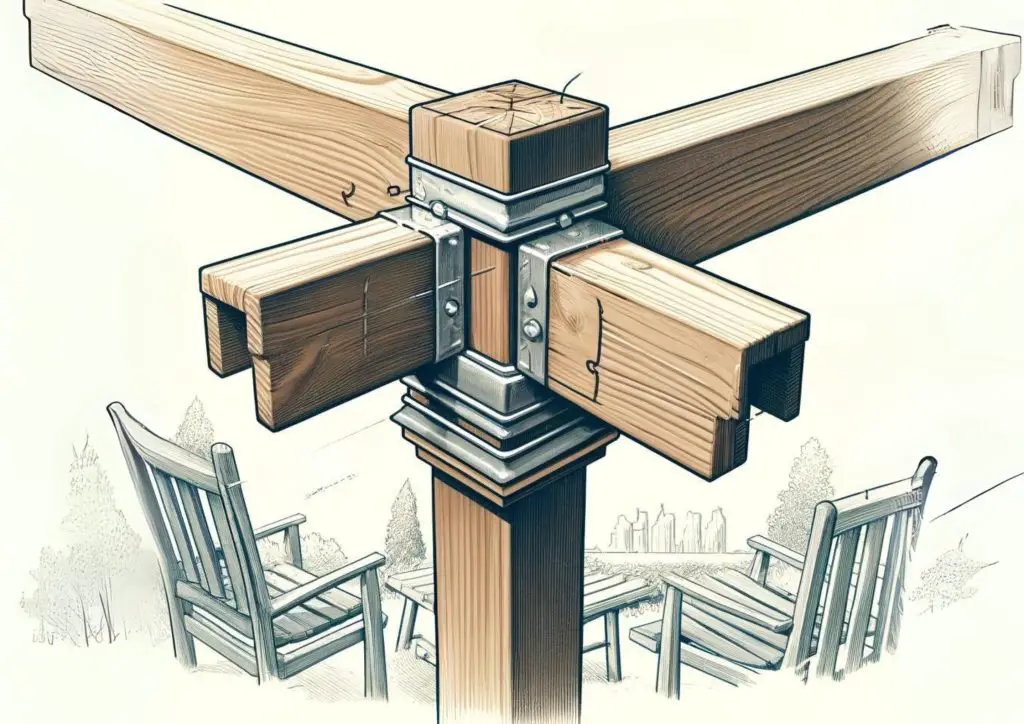
Step 4: Attach the Beams
Attaching the beams is a critical step in constructing your DIY pergola, as these will provide the main horizontal support for the structure. Properly installed beams ensure your pergola is stable and durable.
Measure and Cut the Beams
First, measure the distance between the tops of the posts where the beams will rest. This measurement will determine the length of the beams. If your DIY pergola design includes an overhang, remember to add this extra length to each beam.
Using a circular saw, cut the beams to the required length. Ensure each cut is straight to maintain a clean and professional look.
Joining Beams for Larger Pergolas
For larger pergolas, a single beam may not span the entire length between posts. In this case, you will need to join two beams over a post. To do this, align the ends of two beams at the center of a post.
Use metal plates or joining brackets to connect the beams securely. Make sure the join is robust and level, as this is crucial for the overall stability of your pergola.
Positioning the Beams
Once your beams are ready, lift them into position across the tops of the posts. It’s helpful to have assistance during this step, as beams can be heavy and cumbersome to maneuver. As you place each beam, use a spirit level to check that they are perfectly horizontal.
Adjust as necessary before securing them in place. This ensures that your pergola’s roof will have a level appearance and proper drainage when it rains.
Securing the Beams
Attach each beam to the posts using metal brackets and screws. Position the brackets at each end of the beams where they meet the posts. Secure the brackets with screws that are suitable for outdoor use, to prevent rusting and corrosion.
Use at least two screws per bracket to ensure a tight and secure fit that can withstand weather conditions and the weight of the structure.
Notching the Posts
For additional stability and a more integrated appearance, you can notch the posts so that the beams sit flush with the top. To notch the posts, measure and mark the width and depth of your beams on each post.
Use a handsaw or a circular saw to cut out the marked area, then chisel out any remaining pieces. This method not only enhances the structural integrity of your pergola but also gives it a cleaner, more crafted look.
After all beams are securely attached, step back and inspect the structure from different angles to ensure everything is aligned and level. Tighten any loose brackets and make necessary adjustments. This final check is important to prevent any issues once the entire structure is completed.
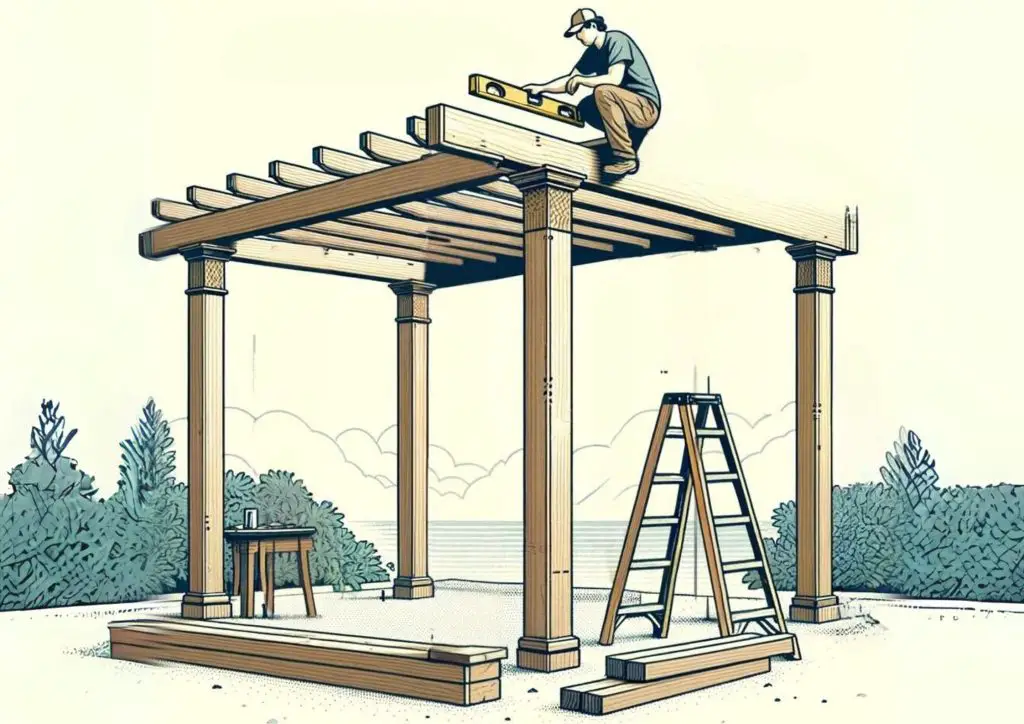
Step 5: Install the Rafters
Installing the rafters is the next crucial step in constructing your DIY pergola, as these horizontal pieces add both functionality and aesthetic appeal to the structure.
First, measure and cut the rafters to your desired length, ensuring they extend slightly beyond the beams to create an attractive overhang. Use a circular saw for precise cuts, keeping the edges smooth for a professional finish.
Arrange the rafters evenly across the top of the beams. A typical spacing is between 12 to 24 inches apart, depending on the size of your pergola and how much shade you want it to provide. Use a tape measure to ensure consistent spacing between each rafter.
Attach each rafter to the beams using screws suitable for outdoor use. Start at one end and work your way to the other, securing each rafter in place.
Use a level as you go to make sure each rafter is perfectly horizontal. This step is important to ensure that your pergola’s roof is not only visually pleasing but also structurally sound.
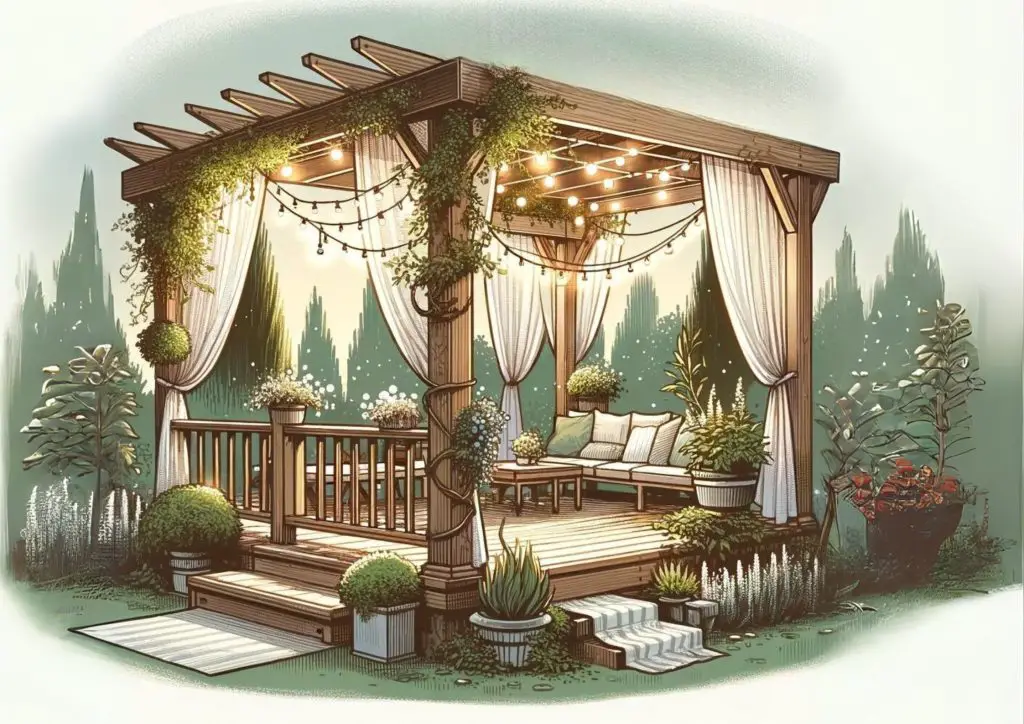
Step 6: Add Finishing Touches
Adding finishing touches to your DIY pergola not only protects the structure but also allows you to personalize it to match your style and backyard decor.
Apply Paint or Stain
Once the pergola is fully assembled, apply a coat of paint or wood stain to protect the wood from the elements and to enhance its appearance. Choose a color or finish that complements your home and garden’s existing style.
Use a brush or roller for even coverage and allow the paint or stain to dry completely, according to the manufacturer’s instructions.
Personalize Your Pergola
After the paint or stain has dried, consider adding personal touches:
- Outdoor Lights: String lights or solar-powered lamps can create a cozy atmosphere in the evenings.
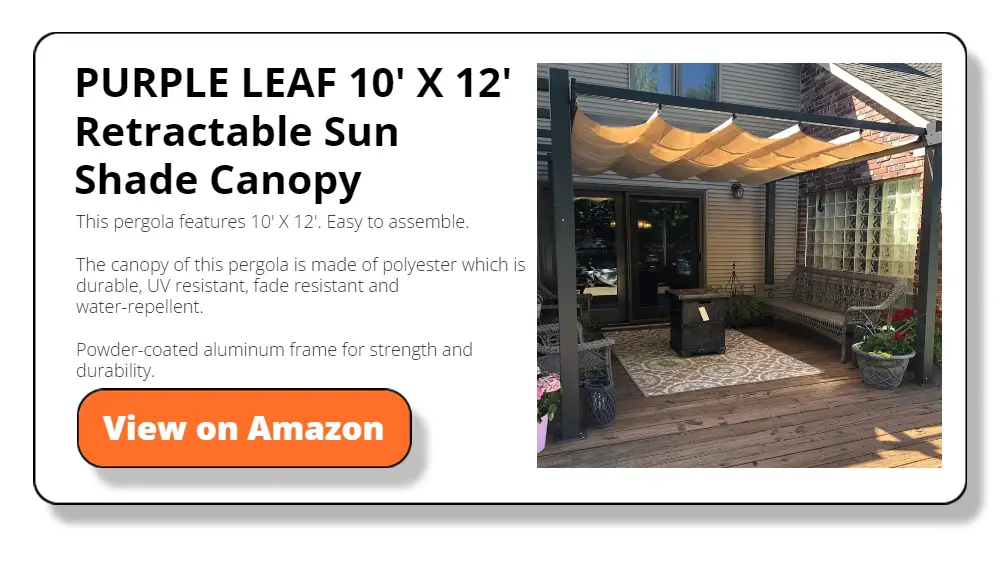
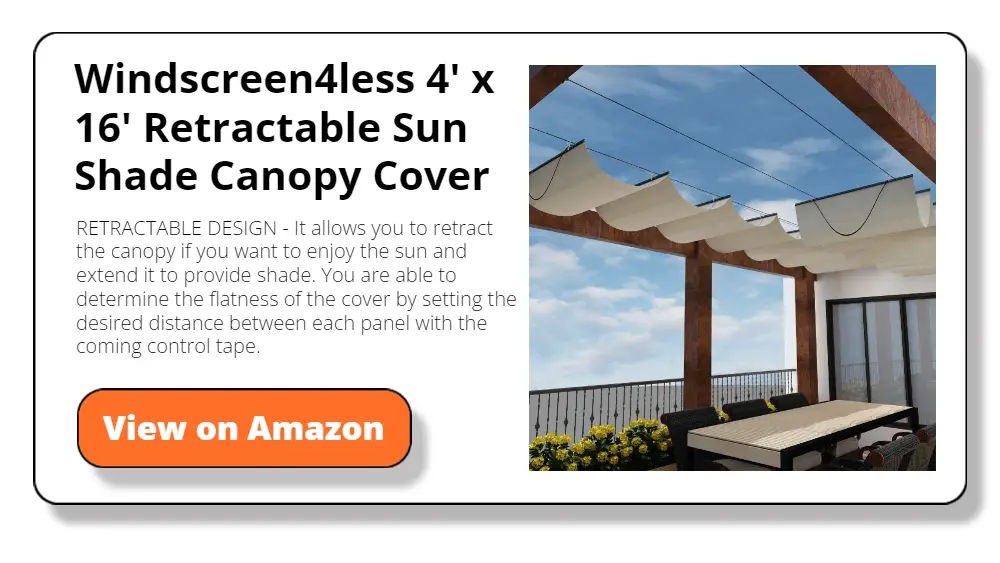
- Fabric Coverings: Install curtains or a retractable canopy to provide extra shade and privacy.
- Climbing Plants: Plant vines such as ivy, grapevines, or wisteria at the base of your pergola. These plants will climb up and over the structure, adding natural beauty and additional shade over time.
These enhancements not only improve the functionality of your pergola but also make it a unique and inviting focal point in your backyard.
Additional Tips for Success
Choosing the Right Wood: While cedar and redwood are popular for their resistance to decay, consider your local climate and other available materials. Pressure-treated pine can be a more affordable option but may require more maintenance over time.
Customizing Your Design: While the basic structure of a DIY pergola is fairly straightforward, you can customize it to better fit your personal taste and backyard layout. Consider adding cross-beams for more intricate shadow patterns or incorporating a trellis on one side for climbing plants.
Dealing with Weather Conditions: If you live in an area with heavy snowfall or strong winds, reinforce your pergola by using thicker beams and rafters. Also, securing the structure to a concrete foundation can add stability.
Regular Maintenance: To ensure your pergola lasts for many years, perform regular maintenance. This includes checking for any cracks or splinters in the wood, reapplying sealant or stain as needed, and tightening all hardware.
Decor and Accessories: Once your pergola is built, consider the decor. String lights, sun shades, or even an outdoor chandelier can enhance the ambience. Add comfortable seating and weather-resistant decorations to make your pergola a cozy, inviting space.
Wrapping Up
Building a DIY pergola is not just about enhancing your backyard; it’s about creating a space where you can relax and make lasting memories with your loved ones. The steps outlined in this guide will help you through the process, from planning and preparation to the finishing touches that make your pergola uniquely yours.
Remember, each step in constructing your pergola is an opportunity to tailor the space to your lifestyle and preferences. Whether you’re hosting summer barbecues, enjoying quiet mornings, or simply looking for a new project, your new pergola is sure to be the centrepiece of your outdoor space.
With the right tools, materials, and a bit of elbow grease, you can build a beautiful DIY pergola that will transform your backyard into a stunning outdoor retreat. By following this guide, you’ll not only have built a structure but also gained the confidence to tackle more DIY projects in the future. So grab your tools, gather your materials, and start building the pergola of your dreams today!


