
After graduating from college, I moved to my very first apartment. It was so small – less than 50 m2. When you have limited living space, you do your best to maximize what you have. This is why I love furniture items that double as storage.
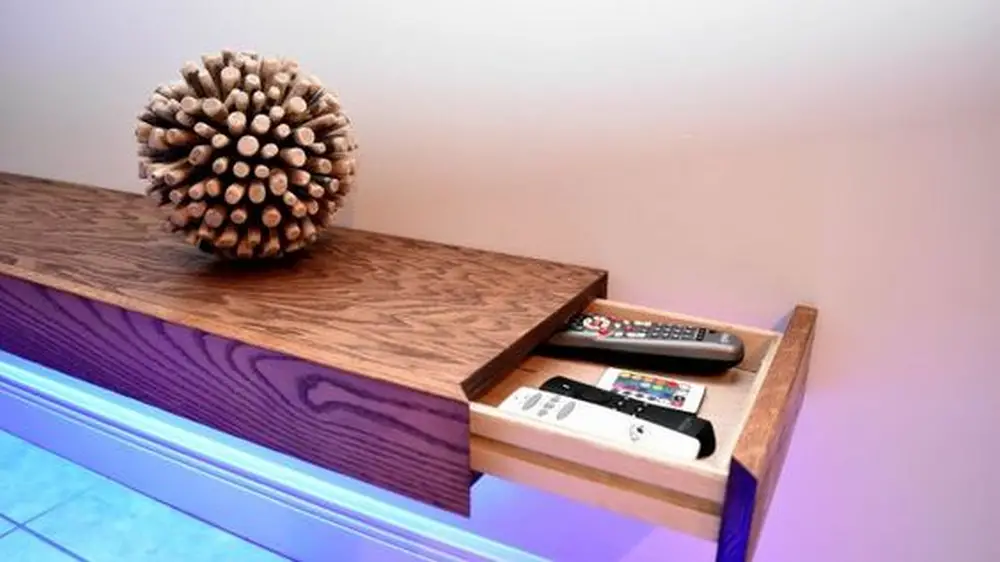
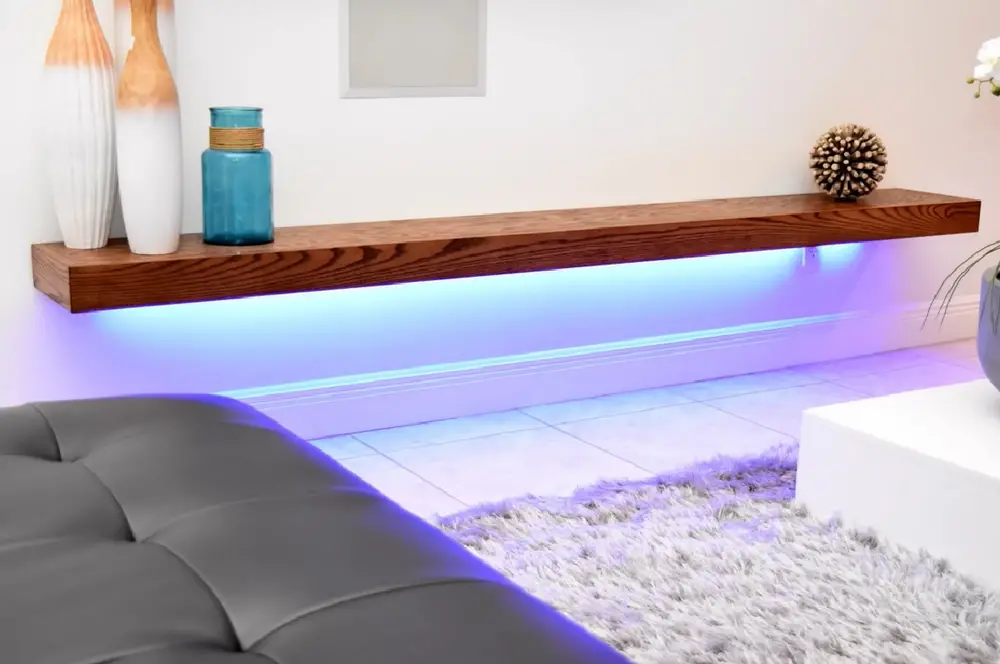
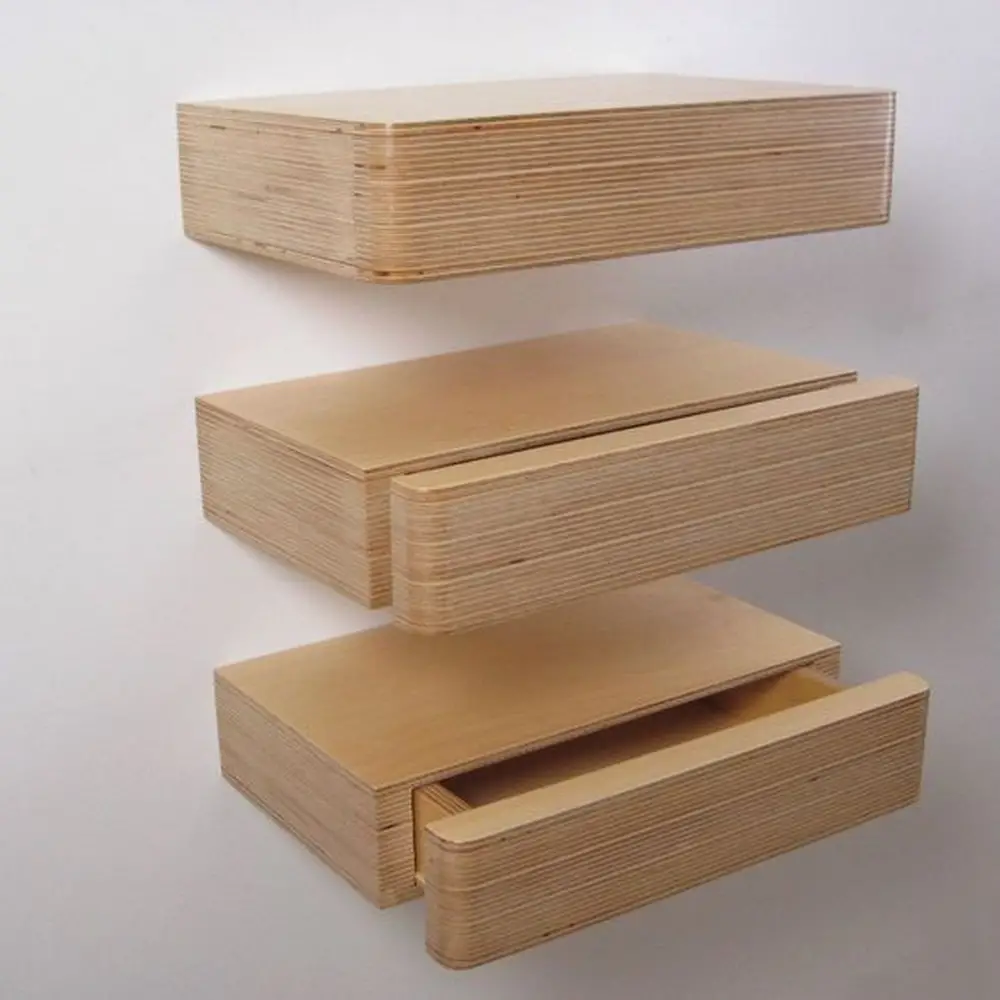
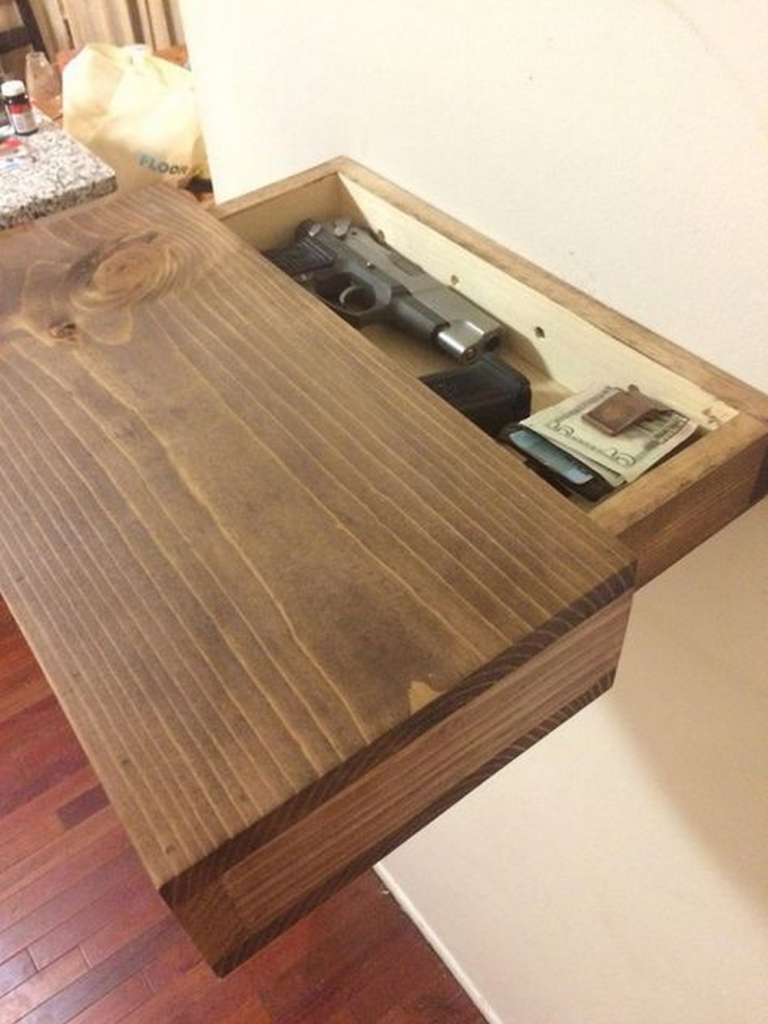
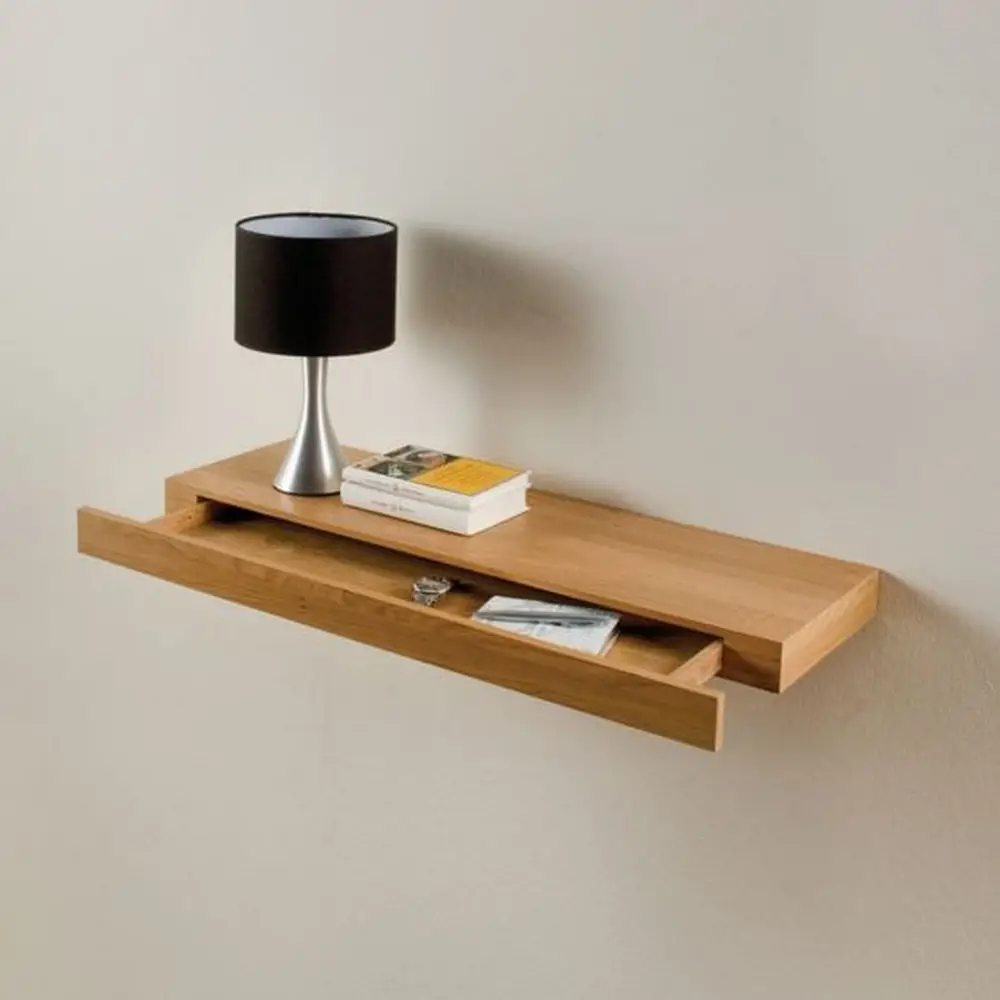
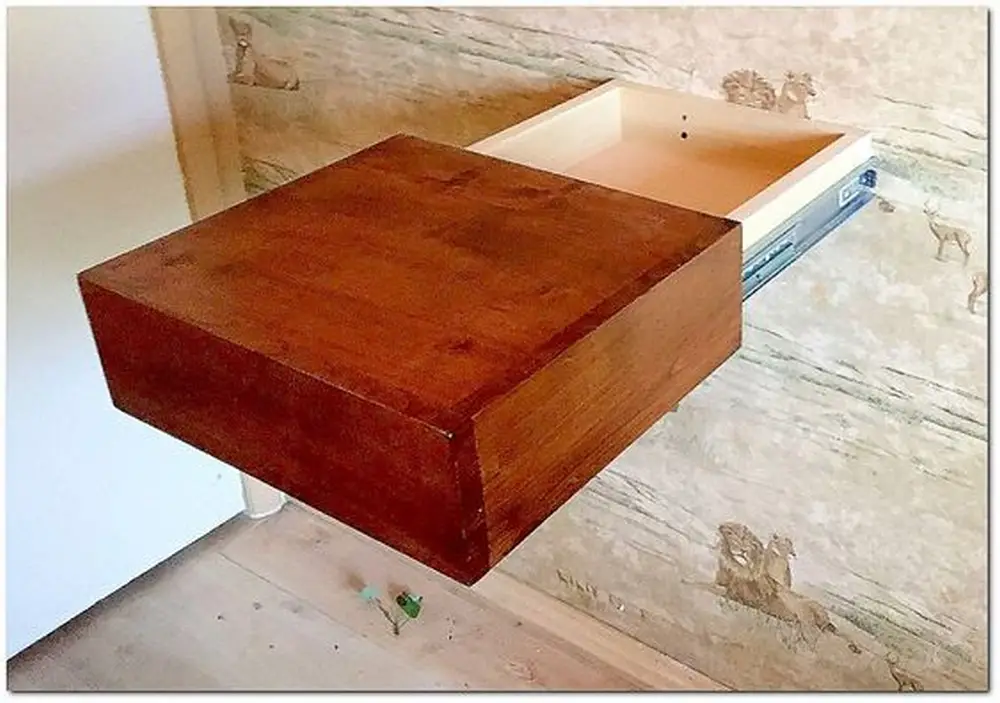
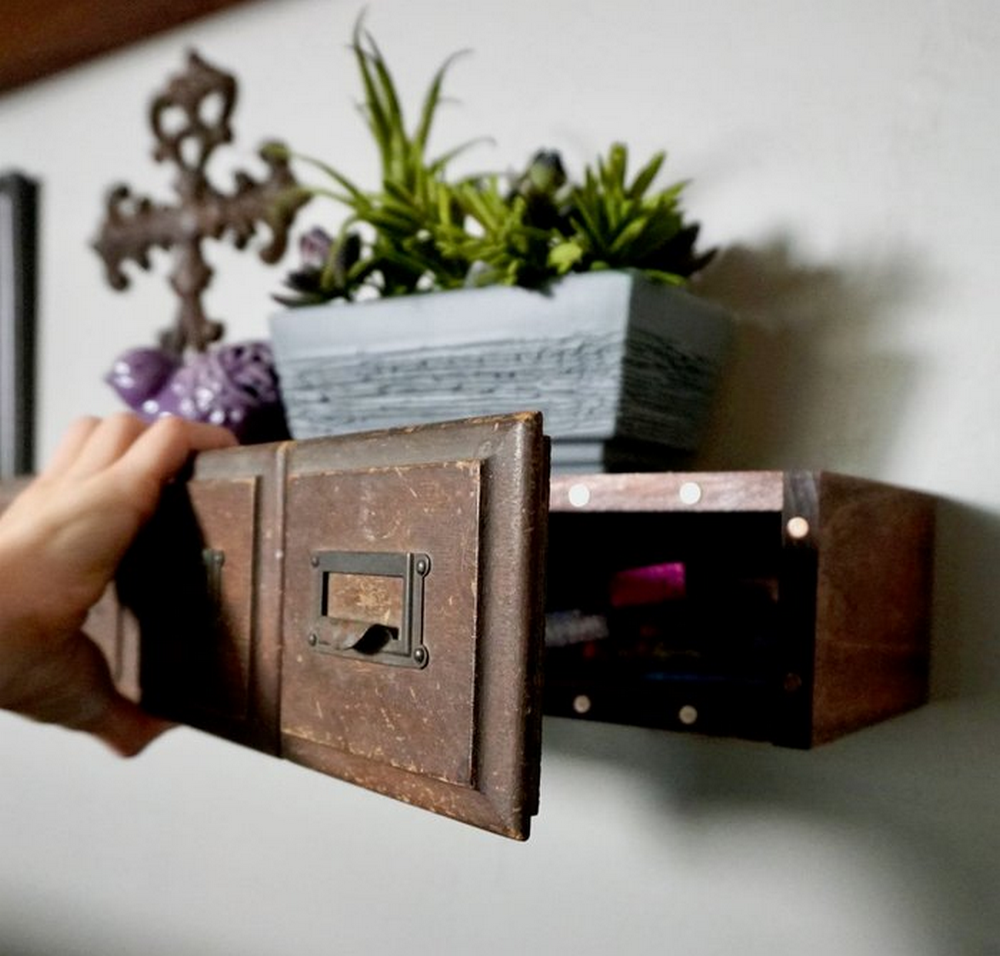
Today, my husband and I live with our kids in a home large enough for the family to freely move around. But one thing stuck with me – I still go for practical home furnishing. This is why I was really impressed when I came across this DIY project. It’s for a floating shelf with storage. I like that it’s minimalist in design and that I can store things inside it, too!
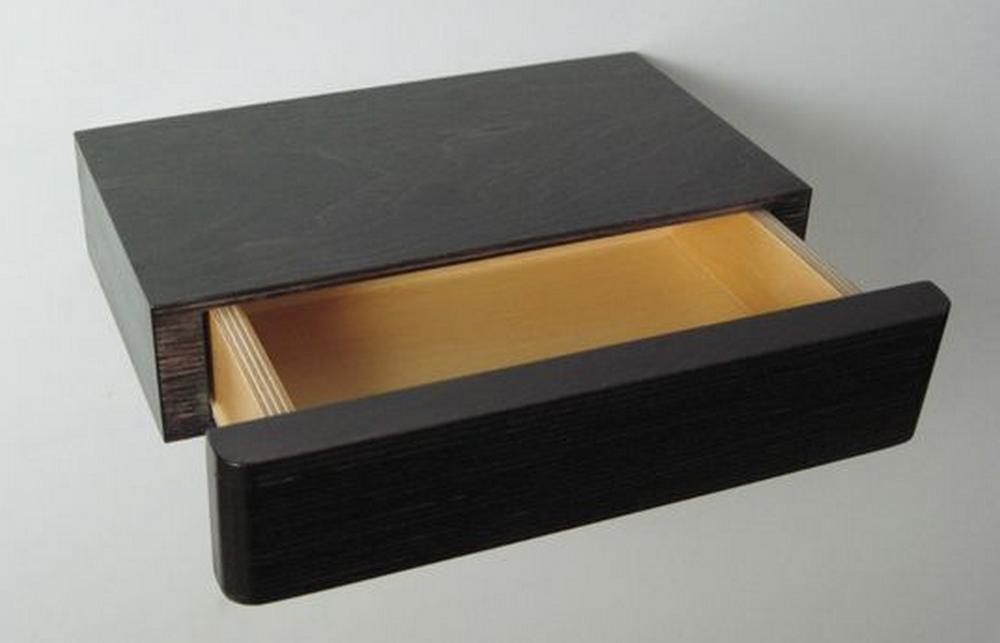
If you’re planning on taking on this project but have limited woodworking skills, seek help. The shelf will come out great if done correctly. I had one made by a good friend and I loved it!
Contents
Building a Floating Shelf
Materials
- Wooden board
- Wire
- Gel Stain
- Pre-stain Conditioner
- Wood glue
- Screws
Tools
- Circular Saw Crosscut Jig
- Measuring Tape
- Drill
- Heat Gun
- Shrink Tube
- Pocket Hole Jig
- Trim Router
- Table Router
- Table Saw
- Biscuit Joiner
- Circular Saw
- Band Saw
- Clamp
Instructions
Step 1: Design and Measurements
- Plan the Shelf Dimensions: Determine the length, depth, and thickness of your floating shelf based on the space where it will be mounted.
- Sketch the Shelf: Include the hidden storage compartment in your design.
Step 2: Cutting the Wood
- Cut the Wooden Board: Use the table saw to cut your wooden board to the planned dimensions.
- Shape the Edges: Use the trim router to round the edges for a smooth finish.
Step 3: Create the Storage Compartment
- Mark the Compartment: Use the measuring tape to mark out the compartment on one of the larger wooden pieces.
- Cut the Compartment: Use the circular saw and the band saw to cut out the compartment carefully.
- Smooth the Interior: Smooth the interior of the compartment with sandpaper or a smaller trim router.
Step 4: Assembly
- Drill Pocket Holes: Use the pocket hole jig to drill holes for securing the pieces together.
- Assemble the Shelf: Apply wood glue to the edges, and clamp the pieces together. Secure them with screws.
- Fit the Storage Lid: Ensure the compartment lid fits snugly and opens and closes easily. Adjust as necessary.
Step 5: Stain and Finish
- Apply Pre-stain Conditioner: Use a cloth to apply the pre-stain conditioner, ensuring even coverage to prevent blotching.
- Stain the Wood: Apply gel stain evenly over the wood. Allow it to penetrate and then wipe off excess stain.
- Finish with Wire Detail: If desired, add decorative wire details using the drill to create holes and threading the wire through. Secure with a heat gun and shrink tube.
Step 6: Mounting the Shelf
- Prepare for Installation: Measure and mark the wall where the shelf will be mounted.
- Secure the Mounting Hardware: Drill holes in the wall and screw in the mounting brackets or a French cleat system.
- Attach the Shelf: Place the shelf on the brackets or cleat, ensuring it is perfectly horizontal. Secure it with screws from underneath or from the inside of the storage compartment for a hidden fix.
Step 7: Final Touches
- Inspect and Clean: Check the shelf for any sharp edges or loose wire. Clean off any excess glue or stain.
- Load the Shelf: Once secure, you can start using the shelf and hidden storage.
Click on any image to start the lightbox display. Use your Esc key to close the lightbox.
If you need visual instructions, check out the video below.
Floating Shelf Installation Challenges
Installing a floating shelf may seem straightforward, but it often comes with unique challenges that can make the process trickier than anticipated. Here are some common issues you might encounter when setting up your floating shelf and how to effectively address them.
Uneven Wall Surfaces
One of the main challenges with installing a floating shelf is dealing with uneven wall surfaces. These irregularities can prevent the shelf from sitting flush against the wall, leading to stability issues.
Solution: Use a level to identify high and low spots. You can either sand down the high spots or fill in the low spots with joint compound. For minor inconsistencies, consider using shims behind the shelf to achieve a level installation.
Finding Wall Studs
For the floating shelf to hold weight without sagging or falling, it must be securely anchored to wall studs. However, studs are not always located where you ideally want to place your shelf.
Solution: Use a stud finder to locate the studs in your wall. If the placement of studs does not align with your preferred shelf location, use heavy-duty wall anchors designed for drywall. Ensure they are rated for the weight your shelf will carry.
Installing Heavy Loads
A floating shelf needs to support not just its own weight but also that of the items placed on it. The challenge increases with heavier loads.
Solution: Ensure that both the wall mounts and the shelf material are robust enough to handle the load. Opt for thicker and denser wood or incorporate metal supports within the shelf structure. Always use screws and mounting hardware that exceed the expected load requirements.
Hidden Wiring and Pipes
When drilling into walls to install a floating shelf, there’s a risk of hitting electrical wiring or plumbing pipes, which can be dangerous and costly to repair.
Solution: Before drilling, use an electronic stud finder that also detects wires and pipes. Scan the entire area where you plan to install the floating shelf. If you detect wiring or pipes, you may need to reconsider the shelf placement or consult with a professional.
Achieving a Seamless Look
Many homeowners prefer a floating shelf because it offers a clean, minimalistic look without visible brackets or supports. Achieving this seamless appearance can be challenging, especially if the shelf isn’t perfectly level or if the hardware is visible.
Solution: After ensuring the shelf is level, use caulk or paintable filler to cover any gaps between the wall and the shelf. Choose color-matched paint to blend the shelf and the wall seamlessly. If visible screws are an issue, use screw caps that match the shelf’s finish.
By understanding and preparing for these common challenges, you can ensure that your floating shelf installation is successful and your shelf functions both beautifully and efficiently.
Safety Tips for Installing a Floating Shelf
Installing a floating shelf isn’t just about making your space look good; it’s also about doing it safely to avoid any mishaps. Here’s what you should keep in mind to ensure a secure and accident-free installation.
Wear the Right Protective Gear
When you’re setting up your floating shelf, protecting yourself is crucial. Don’t forget to wear safety goggles to shield your eyes from any particles that might fly up while you’re sawing or drilling. Gloves are also a good idea to prevent cuts from rough edges. And if you’re using noisy power tools, ear protection is a must.
Make Sure Your Tools Are Up to Snuff
Before you dive into assembling your floating shelf, take a moment to check over your tools. Make sure everything is in top shape and working as it should. Dull tools not only make your job harder but they can be dangerous, too. So, replace any worn-out blades or bits before you start.
Keep Your Workspace Clean and Safe
It’s easy to get so focused on what you’re building that you forget about where you’re building it. Keep your workspace tidy and free of clutter to prevent any trips or falls. Especially if kids or pets are around, you’ll want to keep tools and materials well out of reach. Also, ensure the area is well-ventilated if you’re working with any chemicals or producing a lot of dust.
Lift Smart
Floating shelves can be heavy, and handling hefty materials can strain your back if you’re not careful. Remember to lift with your legs, not your back. And if something feels too heavy, get some help to move it. No shelf is worth hurting yourself over. If you need to reach high places, use a sturdy ladder or step stool to get there safely.
Double-Check the Wall’s Strength
The last thing you want is for your beautiful new floating shelf to come crashing down because the wall couldn’t hold it. Use a stud finder to locate the studs in your wall to ensure you’re drilling into something solid. If the wall seems weak or you’re unsure, it might be wise to consult with a professional before you start drilling. Sometimes, it’s better to pick a different spot or reinforce the wall than to take a risk.
Taking these precautions will help make sure that installing your floating shelf goes smoothly and safely.
Conclusion
Constructing a floating shelf with concealed storage is an enjoyable do-it-yourself project that improves the room’s appearance and usefulness. You may design an attractive storage solution that keeps your necessities neatly out of sight with the correct equipment and careful planning. As you add your own touch to your living space, this project not only increases the worth of your house but also gives you a sense of achievement.
We have more creative shelf ideas. Check out our biplane wall shelf project next!


