Chickens require balanced diets. Minerals and vitamins allow them to perform necessary body functions, lay strong eggs, and fight off infection. Fats and carbohydrates supply their bodies body with energy while proteins give them a steady supply of amino acids.
If you want to add some more protein to your chickens’ diet, mealworms are an excellent option. However, they can cost you over time. But why buy mealworms when you can easily grow them yourself?
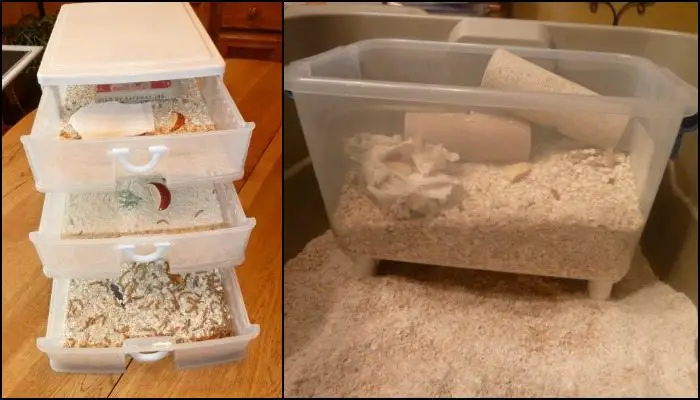
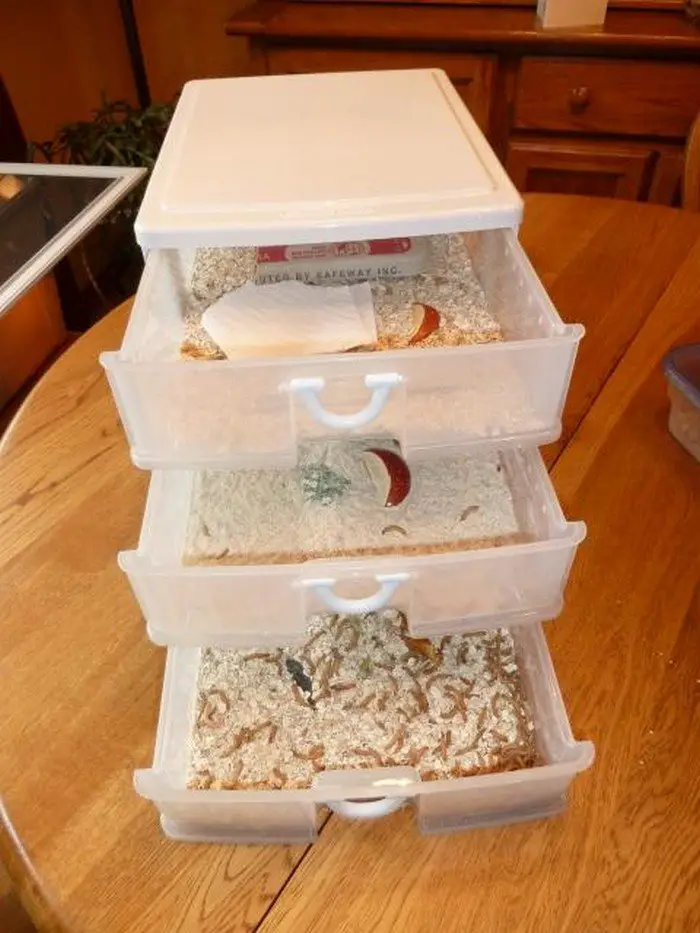
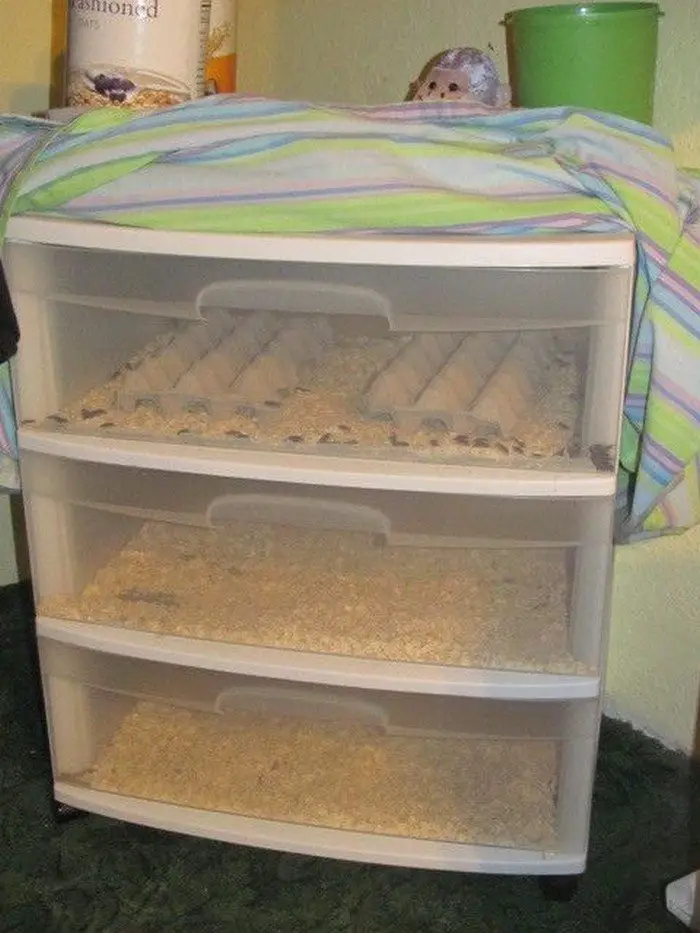
Knowing how to raise mealworms is easier than you think. With something as small as a mini 3-compartment drawer from the dollar store, you can have your own mealworms to feed to your chooks. Of course, the amount of mealworms you need to produce determines the size of the drawers to grow them in. You can also use plastic bins if you already have some in your storage.
Learn everything you need to know and be inspired to have your own mealie farm by reading this great tutorial we’ve found for you – see link below! It is very informative and addresses the most common problem encountered when you raise mealworms – moisture!
BTW, this is also a project that kids can have fun with. So if you have little ones at home, why not involve them and learn how to grow your own mealworms together!
Do you want to start growing your own mealworms for the chooks?
Contents
How to Raise Mealworms
Materials
- Plastic 3-Compartment Drawer
- Plastic Bin
- Screening Material
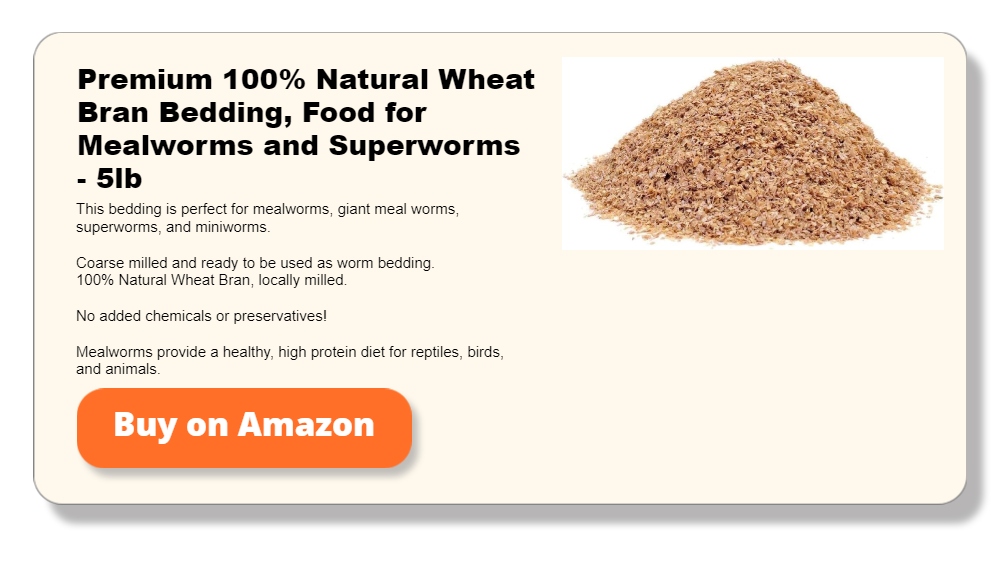
- Wheat Bran (substrate)
- Cardboard, Egg Carton, Toilet Paper Tube, or Layers of Newspaper (where worms like to hide)
Tools
- Cutter
- Drill
- Hot Glue Gun
Instructions
Step 1: Prepare the Housing
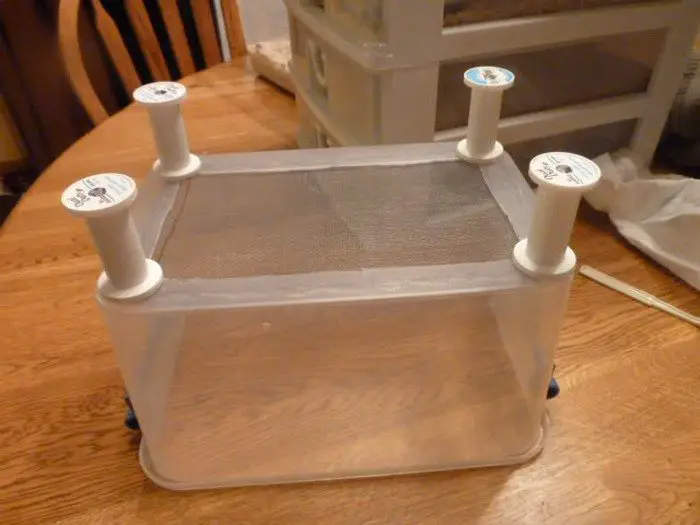
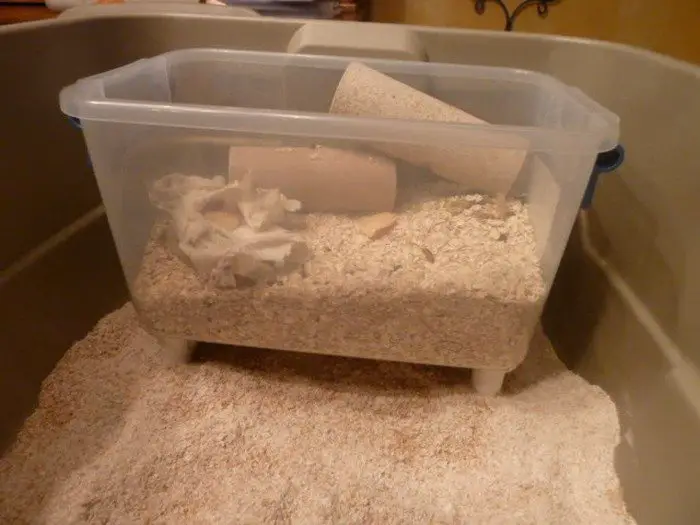
Choose either a plastic 3-compartment drawer or a larger plastic bin based on the scale of your mealworm farm. Clean the container thoroughly with warm, soapy water to ensure it’s free from contaminants. Rinse well and dry.
Step 2: Modify for Ventilation
Use the drill to create small ventilation holes in the top and sides of your chosen container. Make sure the holes are small enough to prevent mealworms from escaping. Space the holes evenly to ensure good air circulation.
Step 3: Add Screening
Cut a piece of screening material using the cutter to fit the top of the container. Attach the screening securely over the ventilation holes using the hot glue gun. This will allow air in but keep pests out.
Step 4: Prepare the Substrate
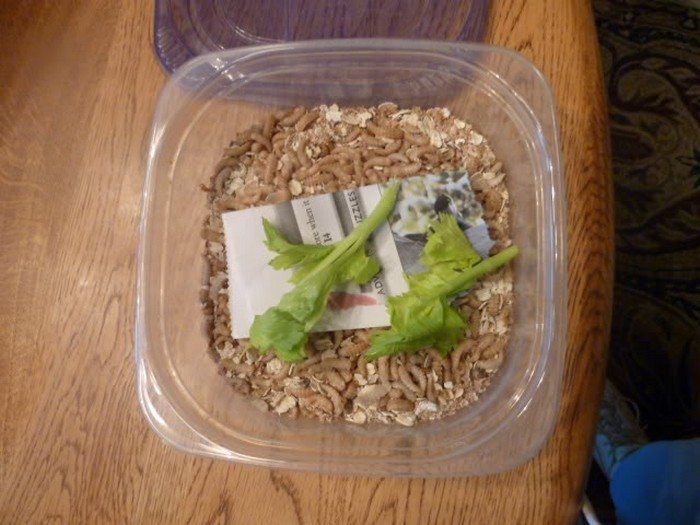
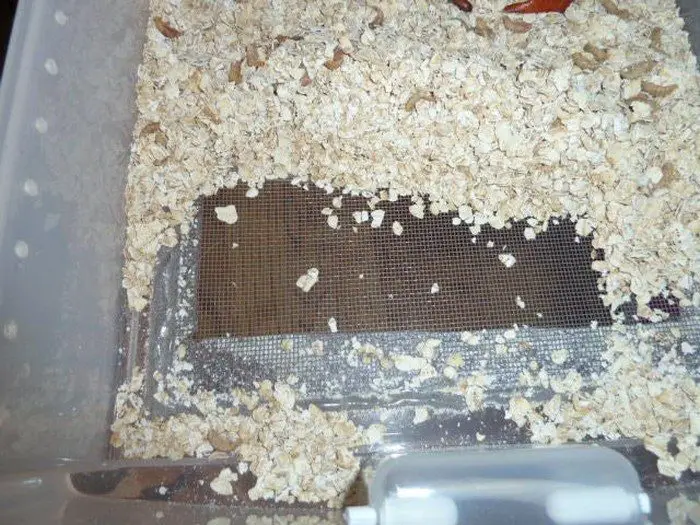
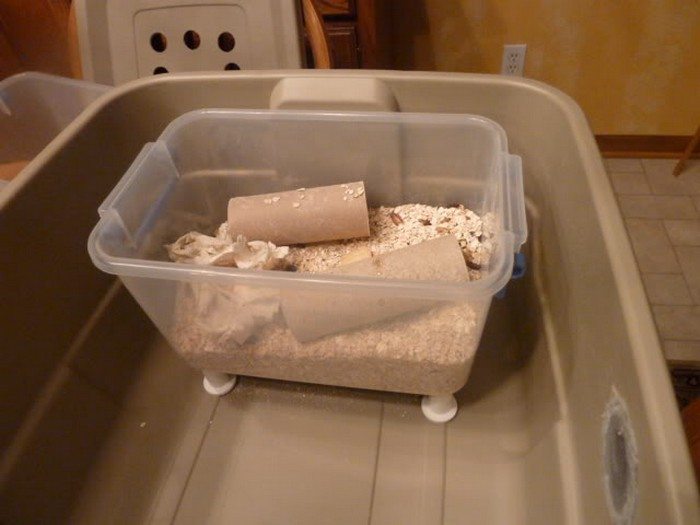
Fill the bottom of the container with a generous layer of wheat bran, about 2-3 inches deep. This will serve as both bedding and food for the mealworms.
Step 5: Create Hiding Places
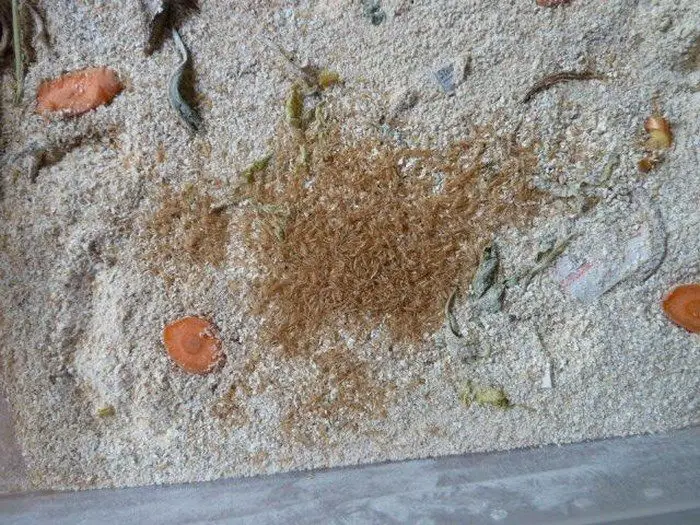
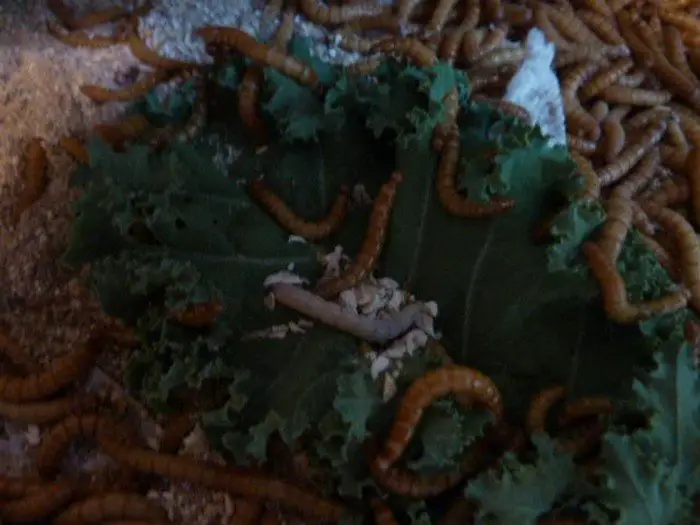
Place pieces of cardboard, segments from an egg carton, toilet paper tubes, or layers of newspaper inside the container. These structures provide hiding spots for the mealworms and help mimic a natural environment.
Step 6: Introduce Mealworms
Add your mealworms to the container. Start with a couple of hundred mealworms if you’re using a smaller drawer or more if you’re utilizing a larger bin.
Step 7: Maintenance
Stow the container somewhere cool, dry away from direct sunlight. Check often to make sure the substrate stays from overly moist since extra moisture can cause mite and mold problems.
Step 8: Harvesting
Once your mealworms develop into beetles, they will procreate and produce fresh larvae. After a few months, you can start gathering mealworms by sifting the bran and returning any beetles or larvae to the container to carry on the cycle.
Step 9: Ongoing Care
To keep wheat bran fresh and clean, replace it every few months or as needed. To avoid colony health problems, routinely remove dead mealworms and beetles.
Click on any image to start lightbox display. Use your Esc key to close the lightbox. ![]()
You can get a step-by-step tutorial from Trish Brown over at Backyard Chickens!
Nutritional Benefits of Mealworms for Chickens
An outstanding source of protein, mealworms can greatly improve chicken diets. They not only offer vital nutrients but also are low-cost, simple things to grow at home. Learning how to raise mealworms will help your chicken be stronger, healthier, and produce more eggs, so benefiting their health. Mealworms should be included into your chickens’ diet for their following nutritional advantages in great detail here.
High Protein Content
Because mealworms are so high in protein, they are perfect for chickens, especially for growing chicks and laying hens. Development of muscles, feather creation, and general growth all depend on protein. Choosing to raise mealworms gives you a consistent supply of premium protein that can boost chicken health and help to increase egg output.
Essential Fats and Energy
Knowing how to raise mealworms at home ensures a supply of good fats that chickens’ energy demands depend on. These fats not only provide energy but also assist in the absorption of fat-soluble vitamins, which are absolutely vital for the welfare of your birds.Especially in colder months, regularly including mealworms in their diet guarantees that chickens have the energy required for daily activities and preserving body temperature.
Vitamins and Minerals
Important vitamins including B12, which is vital for the nervous system and the red blood cell synthesis in chickens, are found in mealworms. Among the minerals they offer are iron, potassium, copper, zinc, and selenium.
From enzyme generation to bone health, these minerals are absolutely vital for many different kinds of body operations. When your raise mealworms for chickens, you guarantee they receive these vital nutrients naturally.
Amino Acids
Mealworms’ protein contains every one of the amino acids chickens need. The building blocks of protein required for both health and productivity in poultry are amino acids. They help with important tasks including immune system performance and tissue healing. Choosing to raise mealworms helps you to improve the diet of your chickens by adding these essential elements, so enhancing their general condition.
Digestibility
For chickens, mealworms are quite digestible, thus they can readily absorb and use the nutrients they offer. Mealworms are a great addition to extra feeding because of their great digestibility. The act to raise mealworms at home guarantees that your chickens get nutrient-dense meals that support their health and helps lower feed costs.
Sustainable and Cost-Effective
Besides their nutritional benefits, mealworms are sustainable to produce and can be raised in large quantities without substantial inputs of food or space. They can be grown on organic waste materials, making them an environmentally friendly feed option. Additionally, when you raise mealworms yourself, you cut down on the costs associated with purchasing commercial chicken feed supplements.
Easy to Integrate
Including mealworms into your chickens’ diet is easy. They can be presented fresh or dried, or as a mix-in with other foods. Mealworms’ adaptability qualifies them as a sensible choice for many chicken growers.
Including mealworms into your chickens’ diet provides a lot of advantages beyond only basic nutrition. Choosing to raise mealworms not only gives your chickens a better food source but also lets you practice environmental sustainability that might save money and boost your self-sufficiency.
Troubleshooting Common Issues
Troubleshooting common issues in mealworm farming is essential for maintaining a healthy and productive colony. When you raise mealworms, you may encounter a few challenges that can impact the growth and health of your mealworms.
Understanding how to identify and address these problems effectively can enhance your ability to raise mealworms successfully. Here’s a comprehensive guide to troubleshooting the most common issues faced by mealworm farmers.
Issue 1: Moisture Control
Moisture is one of the primary concerns when you raise mealworms. Excessive moisture can lead to mold growth and attract pests like mites. To manage moisture levels, ensure your mealworms’ habitat has adequate ventilation. If the substrate feels damp, add dry wheat bran or oatmeal to absorb the excess moisture. Regular checks and adjustments are crucial to prevent moisture-related issues.
Issue 2: Temperature Fluctuations
Mealworms require a consistent temperature range, typically between 70 to 80 degrees Fahrenheit, to thrive. When you raise mealworms, use a thermometer to monitor the temperature of their environment.
Fluctuations can slow down growth or even kill your mealworms. If temperatures drop, consider using a gentle heat source like a heat mat. Conversely, if the area is too warm, relocate the mealworm farm to a cooler location or increase air circulation.
Issue 3: Overcrowding
Overcrowding can severely impact the health of your mealworm colony. It can lead to insufficient food supply, stunted growth, and higher risk of disease. To avoid this, divide your mealworms into additional containers as they grow or as their numbers increase. When you raise mealworms, giving them enough space is crucial for their development and overall health.
Issue 4: Pests and Predators
Pests, particularly mites, and predators like rodents, can pose significant threats to mealworm colonies. To protect your mealworms, maintain a clean and controlled environment. Use covered containers with fine mesh to prevent entry. If you notice pests, isolate the affected mealworms and clean the habitat thoroughly. Regular maintenance is vital when you raise mealworms to keep these threats at bay.
Issue 5: Poor Nutrition
The diet of your mealworms directly affects their growth and the nutrition they provide to your chickens. When you raise mealworms, feed them high-quality grains like wheat bran or oatmeal. You can also supplement their diet with slices of vegetables for moisture and additional nutrients. Avoid moldy or spoiled food, as it can cause health issues within the colony.
Regular Health Checks
Conducting regular health checks is essential to ensure your mealworms are growing as expected and are free from diseases or pests. Observing their behavior and condition during routine maintenance can help you catch and address potential issues early. This practice enhances your ability to raise mealworms successfully and sustainably.
Understanding and addressing these common issues can significantly improve your success rate and efficiency in mealworm farming. Regular monitoring, adequate space, proper diet, and environmental control are crucial when you raise mealworms. These practices ensure a healthy mealworm colony, providing a valuable protein source for your chickens and reducing feed costs.
Conclusion
Raising mealworms offers a sustainable and cost-effective way to supplement your chickens’ diet with high-quality protein. This practice not only enhances the overall health and productivity of your poultry but also reduces reliance on commercial feeds. Additionally, engaging in mealworm farming promotes environmentally friendly practices by utilizing organic waste as feed.
FAQ: How to Raise Mealworms
- How should you manage the substrate in a mealworm colony?
- Managing the substrate in your mealworm colony effectively is key to maintaining a healthy environment. Use bran or oats as the base, providing both a habitat and a food source, with a depth of one to two inches to support burrowing and growth.
- Regularly sift out frass to keep the substrate clean while avoiding disruption to eggs or larvae, and periodically replace the substrate to prevent moisture and bacteria buildup. Replenish fresh bran or oats to maintain depth and nutritional resources, ensuring a productive and healthy colony.
- What are mealworms used for in pet diets?
- Mealworms are a versatile and protein-rich food source for many exotic pets, including reptiles, amphibians, sugar gliders, hedgehogs, and chickens. They offer significant nutritional benefits, particularly when well-fed before consumption, and are available in various sizes to suit different animals’ needs.
- Their convenience makes them popular among pet owners, as they are easy to source from most pet stores. To ensure balanced nutrition, mealworms should be paired with other food sources to meet the specific dietary requirements of each pet.
- Are there different sizes of mealworms available, and how can size be manipulated?
- Mealworms are a versatile and protein-rich food source for many exotic pets, including reptiles, amphibians, sugar gliders, hedgehogs, and chickens. They offer significant nutritional benefits, particularly when well-fed before being consumed, and are available in various sizes to suit different animals’ needs.
- Their convenience makes them a popular choice among pet owners, as they are easy to source from most pet stores. To ensure balanced nutrition, mealworms should be paired with other food sources to meet the specific dietary requirements of each pet.
- What is the life cycle of a mealworm?
- The mealworm life cycle includes distinct stages, each essential for colony sustainability. It begins with the larval stage, where mealworms remain for about three weeks before transitioning into pupae, a two-week inactive phase resembling small beige cocoons.
- Adult beetles emerge after pupation and quickly lay tiny eggs in the substrate, which hatch into new larvae, renewing the cycle. This two-month process allows colonies to self-sustain and provide a reliable food source if left undisturbed.
- What should you feed your mealworm colony to increase their nutritional value?
- Feed mealworms high-quality grains like wheat bran or oatmeal and supplement their diet with fresh vegetables for moisture and nutrients. Adding produce like carrots, orange slices, and leafy greens boosts their nutritional value and balances the calcium to phosphorus ratio, making them healthier for your pets.
- Avoid feeding moldy or spoiled food, and promptly remove uneaten items to prevent mold or rot that could harm the colony. Maintaining a clean and nutritious environment ensures a thriving mealworm colony and optimal nutrition for your pets.
- What is the purpose of gut-loading?
- Gut-loading serves to enrich the mealworms with essential nutrients, ensuring they provide a more balanced diet for the pets that consume them.
- What precautions should you take when feeding mealworms these foods?
- It’s important to remove any uneaten food promptly to prevent mold or rot, which can be harmful to the mealworm colony and may lead to the loss of your stock.
- How can you increase the nutritional value of mealworms?
- Feeding mealworms a varied diet that includes nutritious fruits and vegetables can boost their nutritional value, enhancing their overall quality as a pet food source.
- What specific foods can correct nutritional imbalances?
- To correct nutritional imbalances in mealworms, you can feed them a commercial gut-loading diet or offer homemade options such as carrots, orange slices, and leafy greens. These choices help balance the calcium to phosphorus ratio.
- Why might raising your own mealworms be beneficial for pet owners?
- Raising mealworms provides a sustainable and cost-effective way to supplement your chickens’ diet with high-quality protein, boosting their health and productivity while reducing reliance on commercial feeds. It also supports environmentally friendly practices by repurposing organic waste as feed for the mealworms.
- Home-raised mealworms ensure a fresh and reliable source of nutrient-dense food, making it an easy and accessible option for pet owners. Incorporating mealworm farming into your routine benefits both your pets’ nutrition and a sustainable lifestyle.
- How can you control the development of your mealworm colony if you have too many mealworms?
- Overcrowding can harm your mealworm colony, leading to food shortages, stunted growth, and increased disease risk. To prevent this, divide the mealworms into additional containers as their numbers grow, ensuring they have enough space to thrive.
- If the colony becomes too large, refrigerating the container can temporarily halt its development, effectively managing its reproduction rate. Rewarming the container to room temperature resumes their growth, keeping the colony healthy and manageable.
- How long does it take before you can start feeding homegrown mealworms to your pet?
- Mealworm beetles will lay eggs that hatch into fresh larvae, continuing the colony’s life cycle. After placing store-bought mealworms in their new enclosure, the complete cycle takes about two months, with larvae pupating in three weeks and beetles emerging two weeks later.
- Hidden in the substrate, the eggs hatch into small larvae that grow while the beetles eventually die off. In a few months, you can sift the bran to harvest mealworms, returning beetles or larvae to the container to sustain the cycle and maintain a consistent food supply.


