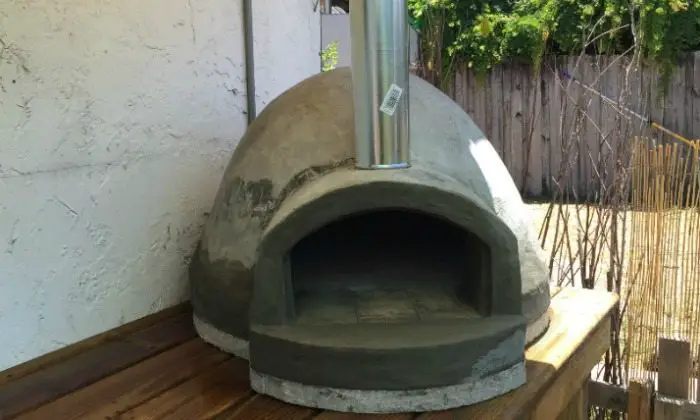
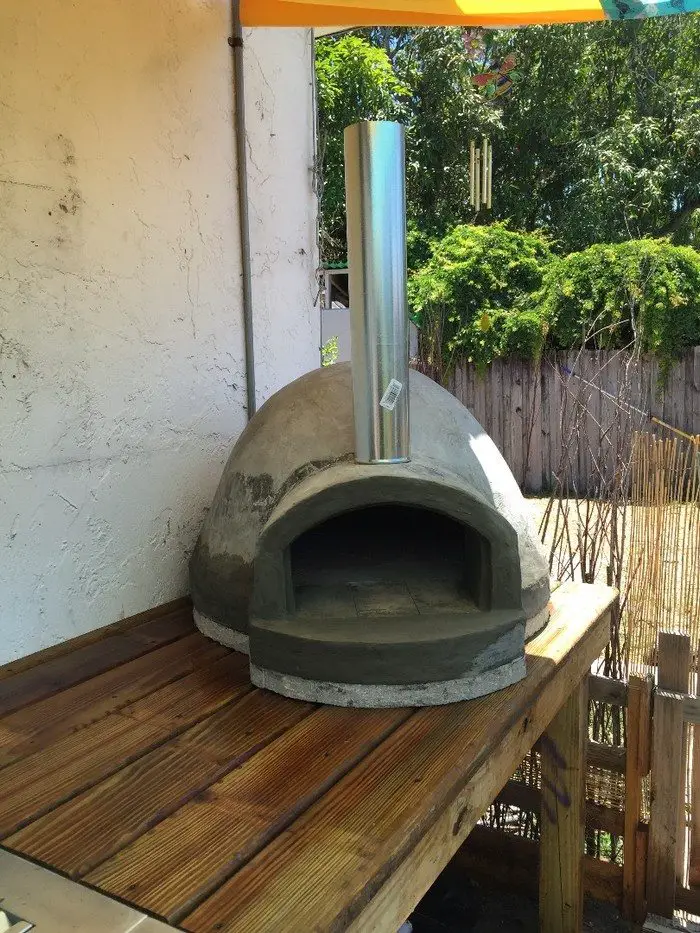
Want to know another way to build your own wood fired pizza oven? Then have a look at this DIY pizza oven which made use of an exercise ball to create its dome!
Yes, you can use an exercise ball as the mould for your DIY wood fired pizza oven. It’s a convenient way for those who already have one at home, and it’s less messy than other pizza oven projects!
The comprehensive step-by-step tutorial provided below contains all the essential information and instructions you need to make your own wood fired pizza oven. Begin by collecting your tools and materials, and embark on this project with confidence!
Is this the kind of DIY wood fired pizza oven you would like to build?
Click on any image to start lightbox display. Use your Esc key to close the lightbox. 8-)


How to Make a Wood Fired Pizza Oven With an Exercise Ball
This unique and innovative guide will take you on a journey of craftsmanship and culinary delight as you explore the art of building a homemade wood fired pizza oven with an exercise ball as the foundation.
Get ready to unleash your creativity, experiment with materials, and master the art of wood-fired pizza making! Now, gather the necessary materials and tools to get your hands working on this exciting project.
Materials
- Exercise Ball
- Perlite
- Portland Cement
- Stainless Steel Needles
- Formica
- Water
- Fire Bricks
- 3 x5 x 1/2″ Cement Backer Board Durarock/Fireboard
- Pavers
- Chimney 4″ x 2′
- Plywood
- Duct Tape
- Plastic Wrap
Tools
- Measuring Tape
- Ruler
- Marker
- Trowel
- Wheelbarrow/Bucket
- Standard Hoe
- Cordless Drill
- Stape Gun
- Screwdriver
Steps
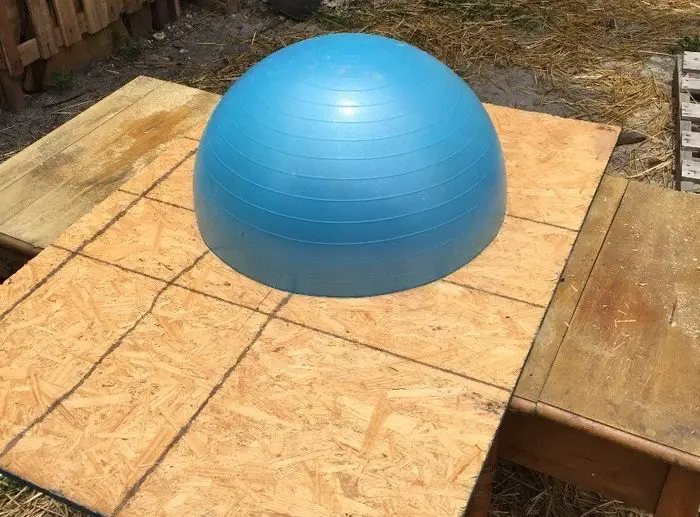
1. Top dome mould build: So after inflating my wife’s exercise ball, I measured the circumference to figure out the diameter for the circle cut out. After a high school flashback, you take your CIR measurement divided by pi 3.14, and it gives you the diameter. I cut out my circle, inserted the ball and boom – an inside dome was created.
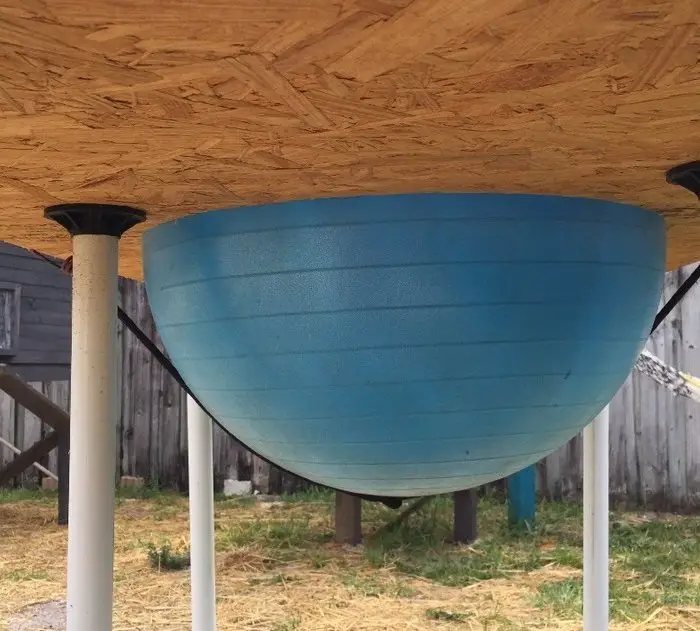
FYI – There is an image that shows a bungee cord around the bottom of the ball. I had a fear of laying concrete on the top and the ball slipping through. I never used the bungee cord and I just simply inflated the ball slightly more, essentially wedging it.
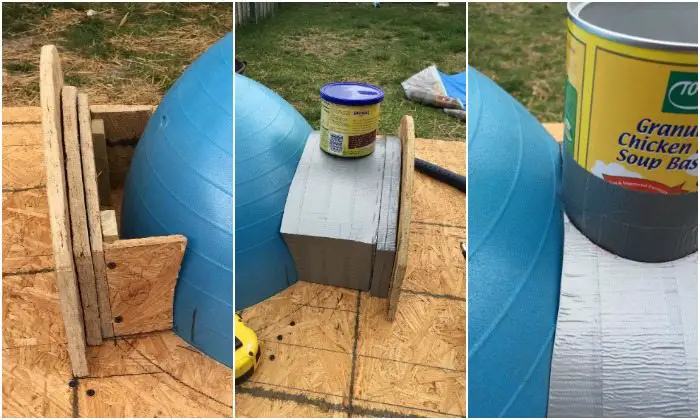
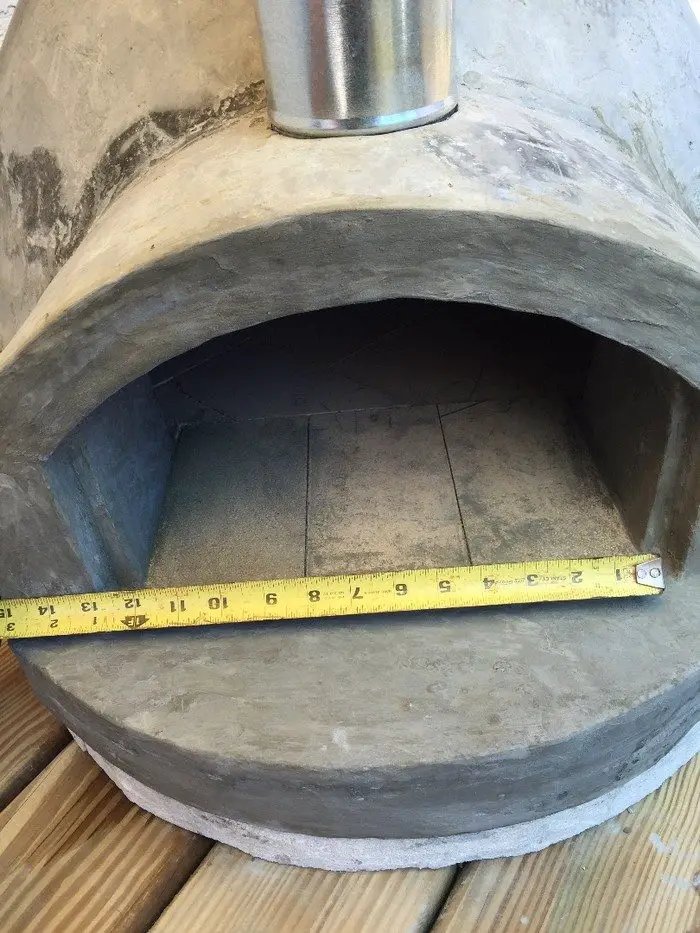
Then it was onto the door mouth entrance. So with my dome height of 12.5 inches, I went with a door height of 7.875 high, remember the ancients, trying to aim for a 63% ratio. I wanted to be able to pull the ball or deflate the ball from underneath so I wanted to pull out the door mold as well.
So here is the set-up on that. One thing I can say is, take your time when making your wood fired pizza oven. Just like a lot of things that you create that translate to many stages later in a project, the devil is in the details. Take your time to make those things fit better.
I had some trial and error on some things, like the white legs you see under the platform, they sucked and fell apart. I got them from my neighbours’ trash. Also, I never thought it through until I was about to put concrete on the form, supporting the plywood/mould.
When you’re messing with it, pretty much anything can hold it while you play with it. Then it dawns on you, about the weight and awkward shape you have to support from underneath.
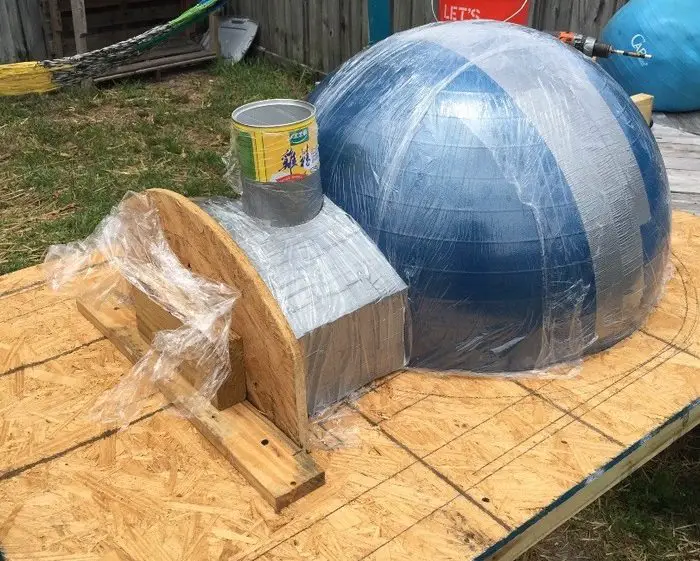
Once the mould was ready or when you think it is, it’s time to just say go for it and mix up the concrete.
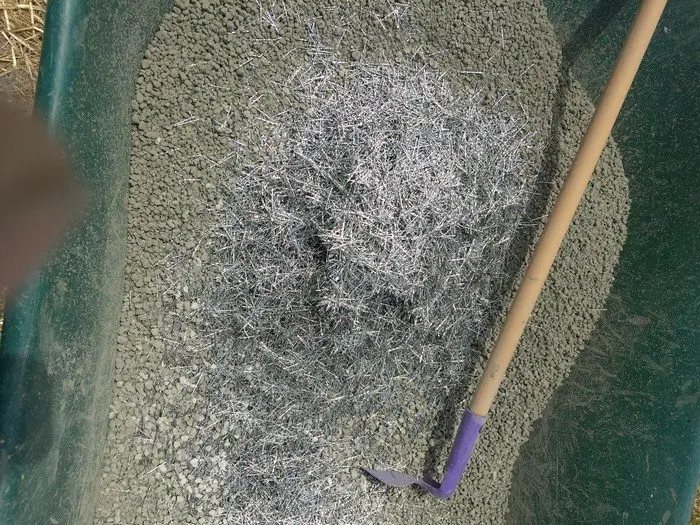
2. Concrete mix and moulding to the top dome: So the mix I went with was Perlite/Portland Cement. I also added stainless steel needles for (fibre) strength.
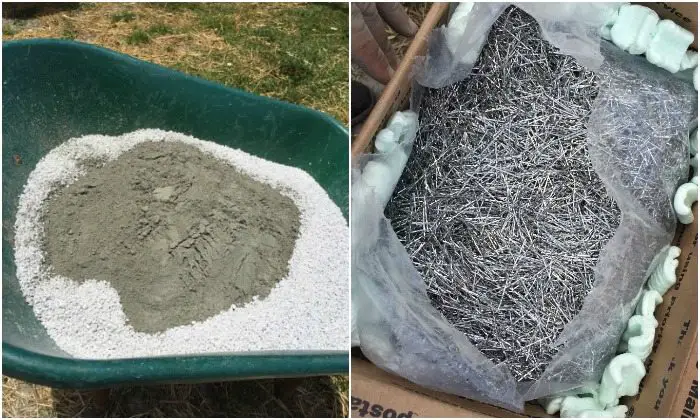
I used a wheel barrow and your standard hoe with a chop-chop action. I started with 2.5 buckets of perlite and a half bucket of Portland Cement. Mixed together well. Then I added the SS needles, I saw online that someone said about 5% SS was needed. I purchased 10 lbs so I figured about 4 lbs should be plenty. I hope that overuse is not overkill that’s going to be an issue later.
Once it was mixed well, I added about a half bucket of water and kept the hose close to sprinkle additional water as needed. Don’t forget that once you have water in your mix, add very little water carefully a little goes a long way. If you add too much water you can always throw some additional dry into it.
If I were to do it again, I say this now, but at the time it seemed like a lot of extra work, I would have NOT used the ball as a mould for the wood fired pizza oven. Yes, it did work. Yes, it does look great.
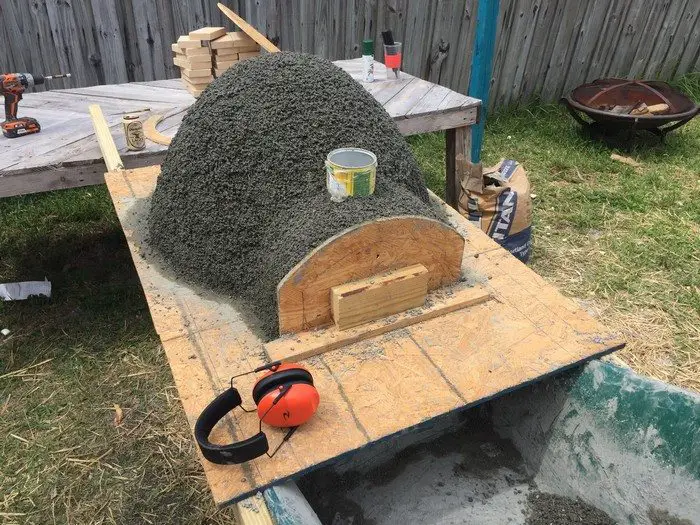
The thing I didn’t like is that I had planned everything out including the dome thickness and wanted to keep it at 2 inches. I even made a gauge to ensure proper thickness. But once I started to carefully add the material it just could not support itself going up the sides of the form.
The top held, and the bottom/ sides up about 4 inches, any higher it would just slide down and thicken the bottom. Also, the material feels very odd if you have worked with concrete before, the perlite makes it extremely light, and airy and you feel the need to try to “compact” to the wall and the BALL gives and moves.
So if you apply too much pressure the rest of the ball bulges and you see material moving. So with that being said, I might have put a plaster on the ball, made a positive mould, and then transferred to a negative version of it.
I didn’t take any photos of the “during” process for a few reasons: sweating my butt off, frustration trying to keep it from sliding all over, South Florida 90-degree weather, and did I mention sweating my butt off?
In the end, the bottom walls are about 3 inches thick and the sides about two.
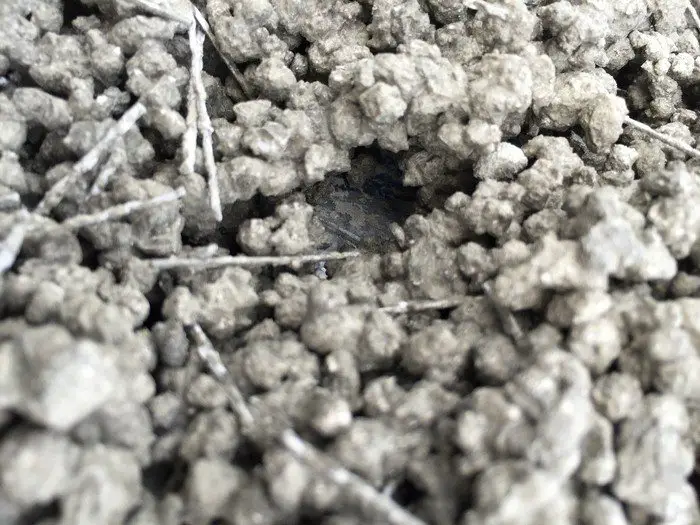
3. Finish detail on dome top: So after I had explained that you couldn’t really push or compact the mix too aggressively or the ball would just give and bounce. After a day of curing, I noticed one spot the size of an eraser head that I could see the ball through the wall.
So I decided to skim-coat the outside and inside. I skimmed the outside and after a day of curing, I removed the moulds.
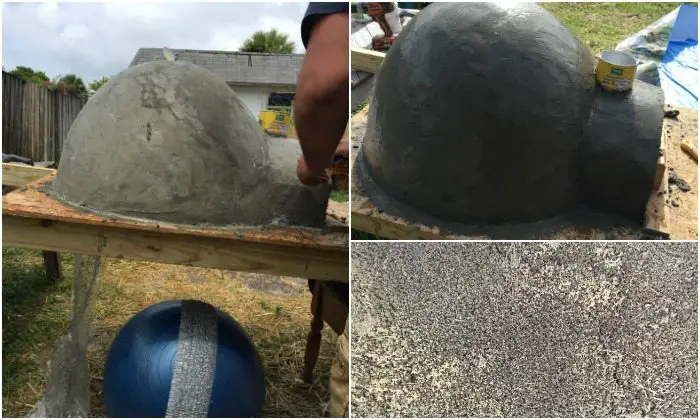
I had been trying to figure out the best look for the outside of the wood fired pizza oven and after I saw the results of the mix I decided to use some of the Portland cement and some SS needles to skim the inside and outside. It came out looking pretty good.
Just remember, water is the enemy. Use sparingly. Obviously, you want the proper amounts to create the cement to the optimal mix but try not to use too much water in smoothing and whatnot.
You’ll find that water might make it easier to smooth out the surface of the wood fired pizza oven, but the right timing on the concrete (about 5 minutes after applying) and some elbow grease will do the same thing.
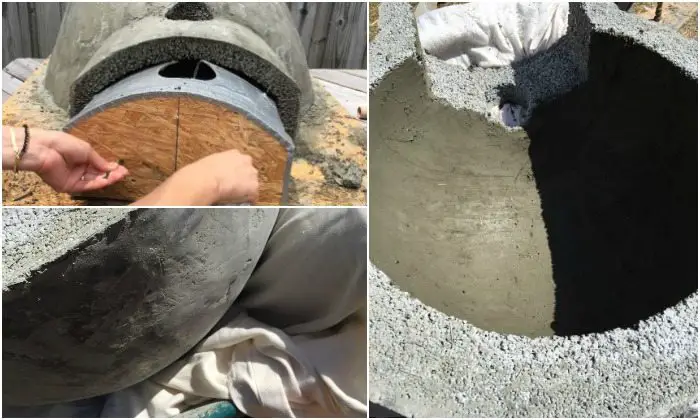
So for the inside and outside of the wood fired pizza oven I just applied a light thin coat of the Portland and SS needles and made sure I took advantage of the stiffness and worked the mix into any holes.
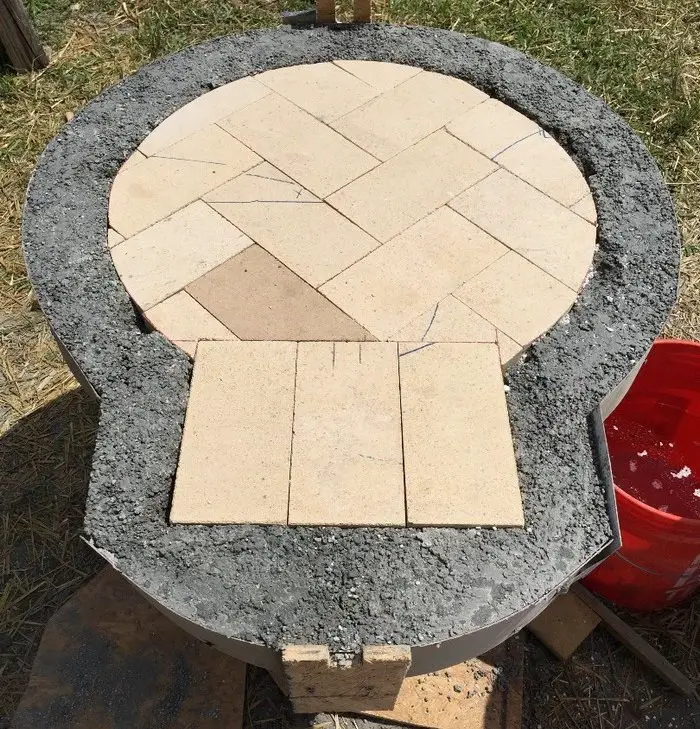
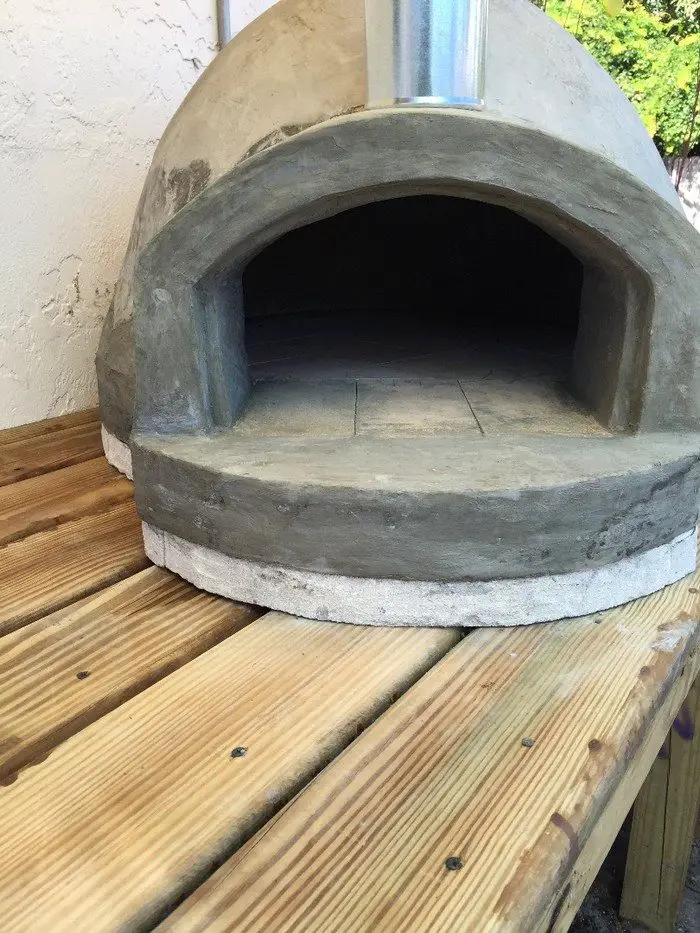
4. Bottom floor mould: So the top is done. Now it is time to work on the bottom. Almost all the wood fired pizza oven I saw used either a large terracotta tile or a pizza stone on smaller ovens.
I wanted fire brick. I wanted it to look nice, serve a function and be replaceable if they crack over time so they could not be “concreted in” like you might see on some larger ovens.
Also, it is important to lay your brick floor in a herringbone pattern. The reason is if you lay your bricks parallel to the door of the wood fired pizza oven, when you slide your peel in you run the risk of catching or chipping a front brick edge.
Not good and doesn’t taste good either. Besides herringbone screams quality.
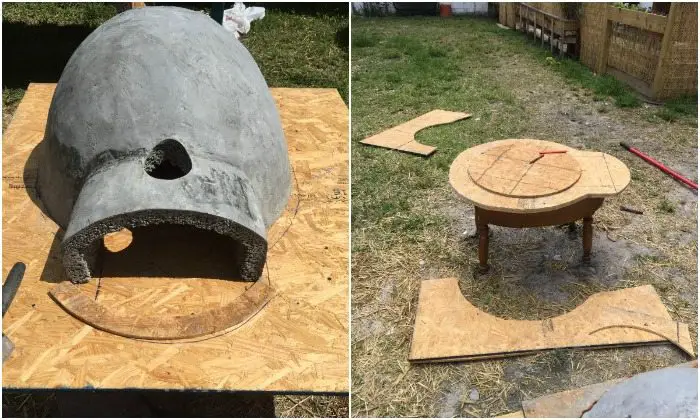
So I slid the top dome onto a piece of plywood, traced it out, then took my original circle cut out that I made for the exercise ball (giving me the inside circle of the dome) and had my two templates.
Continued Page 2…


