Do you need an extra source of heat for your home during the winter? How does a free heating system that comes with rich soil for your garden sound? :)
Create a heating system while composting!
This compost heating system method is known as “Jean Pain Composting” or “Jean Pain Method” as it was invented by a French farmer named Jean Pain in the 1970’s. He developed this system using compost materials such as saplings, branches, and underbrush to generate all his energy needs! He was able to produce hot water and heating using the temperature from the compost, plus power an electric generator, his cooking equipment, and his truck by distilling methane from it.
Though some expressed doubts as to the quantity of methane Pain was able to get, his system has proven to be an effective way to create heat for the cold seasons.
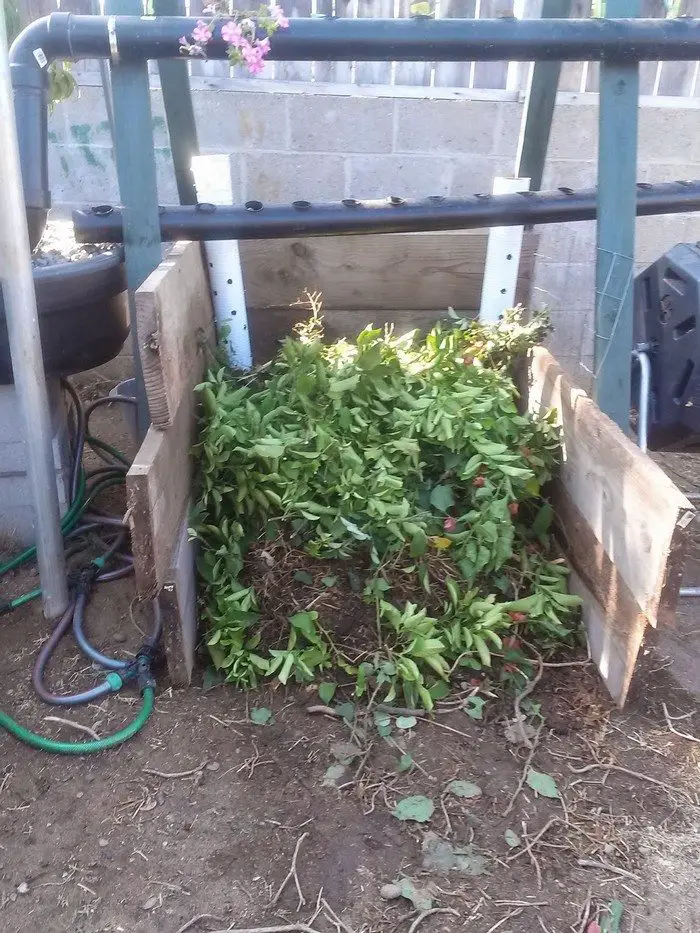
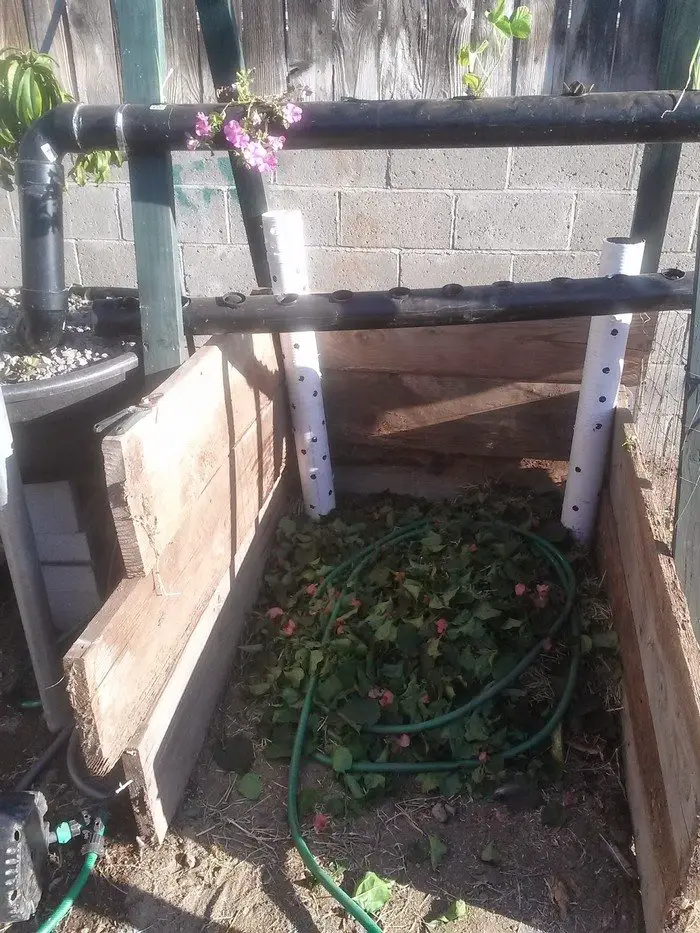
It is built with woodchips and sawdust, together with other compost materials and animal manure insulated with hay bales. As it starts to decompose, it will also produce heat which you can use through a hydroponic setup.
This system usually lasts up to 18 months before the entire compost pile breaks down. You can then use the compost to enrich your garden soil and to keep your free heating system going, build another one!
This compost heating system is definitely a great idea if you want hot water to use during the winter or if you need to heat your greenhouse or home!
Just some things to keep in mind: Setting it up as near as possible to where you need the compost heating system to be is important so as not to lose the desired temperature. However, a mound of compost can also catch fire so be sure not to build it too close to your home. The maximum height allowed for a compost pile is usually 8 ft., but of course, you will have to limit your compost pile height depending on the amount of space you have in your yard!
The 5 Benefits of Building a Compost Heating System
In an era marked by growing environmental concerns and the urgent need for sustainable solutions, the concept of harnessing nature’s heat through compost heating systems has gained significant traction. These innovative systems offer a multifaceted approach to addressing energy needs while simultaneously managing organic waste and promoting soil health.
In this comprehensive guide, we’ll delve into the myriad benefits of building a compost heating system, exploring how this eco-friendly technology can revolutionize the way we heat our homes and businesses.
1. Renewable Energy Source
At the heart of compost heating systems lies the principle of harnessing the natural heat generated during the decomposition of organic matter. By composting organic waste materials such as kitchen scraps, yard trimmings, and agricultural residues, heat is produced as a byproduct of microbial activity.
This renewable energy source offers a sustainable alternative to fossil fuels, reducing reliance on non-renewable resources and lowering greenhouse gas emissions associated with conventional heating methods.
2. Cost Savings
Building a compost heating system can result in significant cost savings over time, particularly for individuals and businesses currently reliant on conventional heating fuels such as natural gas, oil, or electricity.
Once the initial investment in infrastructure is made, the ongoing operational costs associated with compost heating systems are minimal, primarily consisting of periodic maintenance and the replenishment of composting materials. Additionally, by diverting organic waste from landfills and reducing waste disposal fees, compost heating systems can provide additional financial benefits to municipalities and waste management facilities.
3. Waste Management
One of the most compelling benefits of compost heating systems is their ability to effectively manage organic waste streams, transforming what would otherwise be considered “waste” into a valuable resource. By composting organic materials on-site, whether at a residential, commercial, or agricultural scale, compost heating systems help divert organic waste from landfills, reducing methane emissions and alleviating pressure on waste management infrastructure.
This closed-loop approach to waste management not only reduces environmental impact but also promotes a circular economy by returning nutrients to the soil and supporting sustainable agriculture practices.
4. Soil Health and Fertility
In addition to producing heat for space heating and hot water generation, compost generated in the heating process can be used to enrich soil health and fertility. Compost is a nutrient-rich organic amendment that improves soil structure, enhances water retention, and promotes microbial activity.
By incorporating compost into garden beds, agricultural fields, and landscaping projects, gardeners and farmers can boost crop yields, reduce reliance on synthetic fertilizers, and support biodiversity. This synergistic relationship between compost heating systems and soil health underscores their potential to promote sustainable land stewardship and mitigate the impacts of climate change.
5. Environmental Benefits
Compost heating systems offer a range of environmental benefits that extend beyond energy efficiency and waste reduction. By utilizing renewable energy sources and promoting carbon sequestration through composting, these systems contribute to mitigating climate change and reducing overall environmental footprint.
By diverting organic waste from landfills, compost heating systems help reduce methane emissions, a potent greenhouse gas with a significantly higher global warming potential than carbon dioxide. Additionally, by promoting soil health and fertility, composting enhances ecosystem resilience, conserves water resources, and supports biodiversity, contributing to the overall health and vitality of our planet.
The benefits of building a compost heating system are vast and far-reaching, encompassing renewable energy production, cost savings, waste management, soil health, and environmental sustainability. By harnessing the natural heat generated during the composting process, these innovative systems offer a holistic solution to energy needs while simultaneously addressing pressing environmental challenges.
As we strive to build a more sustainable future, compost heating systems stand as a shining example of the transformative power of nature-based solutions in mitigating climate change, promoting resource efficiency, and fostering resilient communities.
Want to learn how to build it? Follow the step-by-step tutorial below!
Materials:
- Hay Bales
- Fallen Trees and Branches
- Sawdust
- Animal Manure
- 15′ of Perforated 4″ Tubing
- 1/2″ Plastic Pipe (to be connected to a water source)
- Cinder Blocks
Tools:
- Woodchipper
- Measuring Tape
- Shovel
- Temperature Sensor (Hobo Data Logger)
Click on any image to start the lightbox display. Use your Esc key to close the lightbox.![]()
Steps: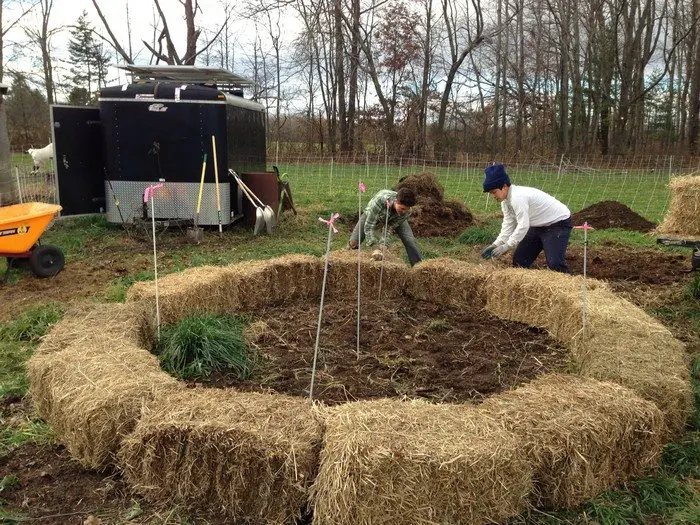
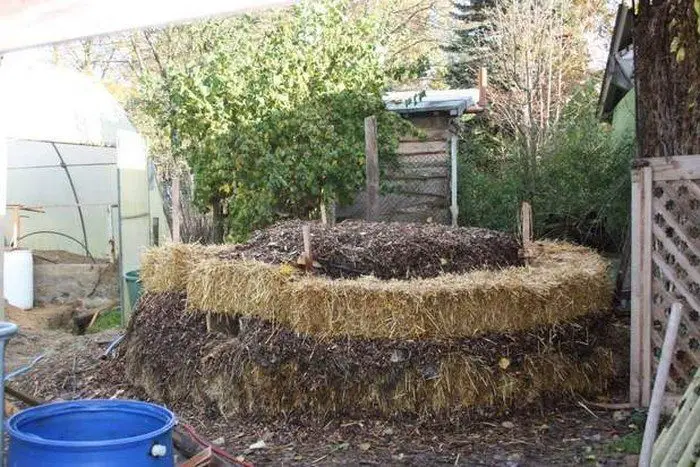
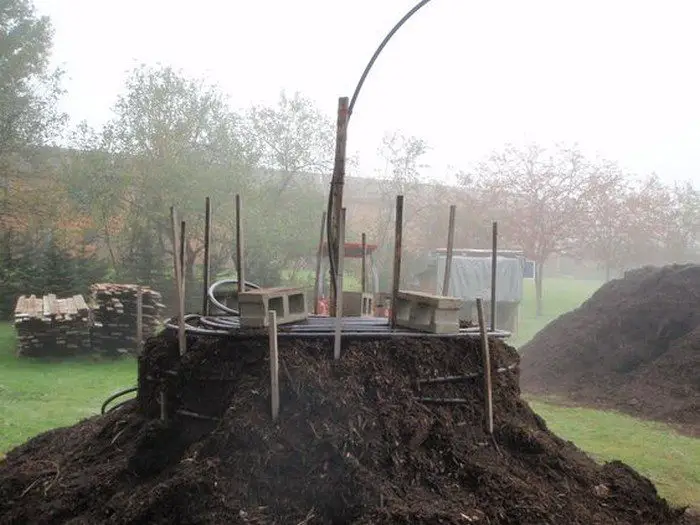
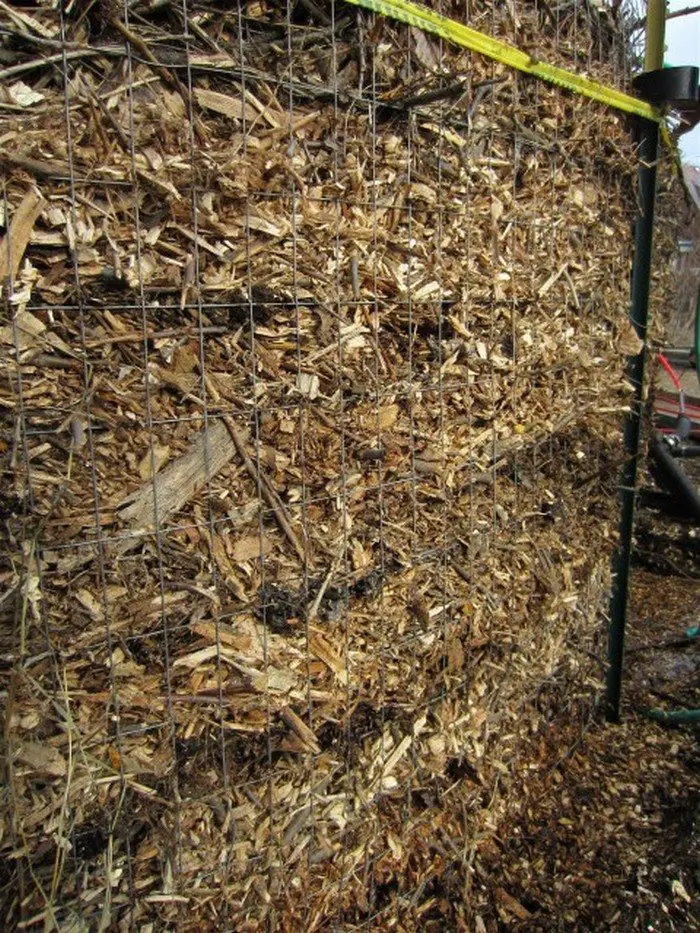
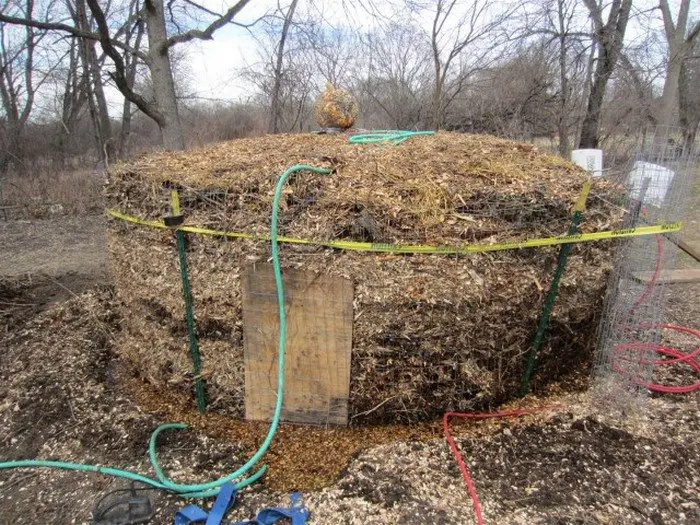
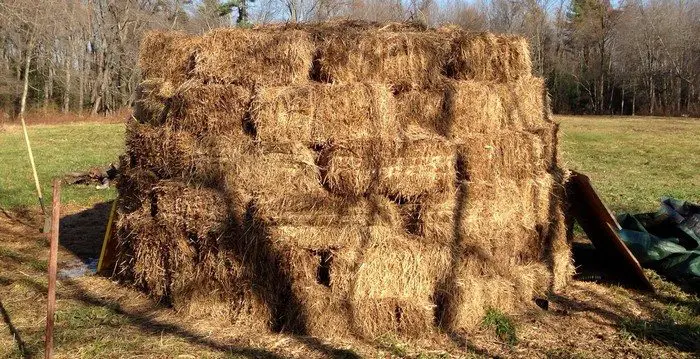
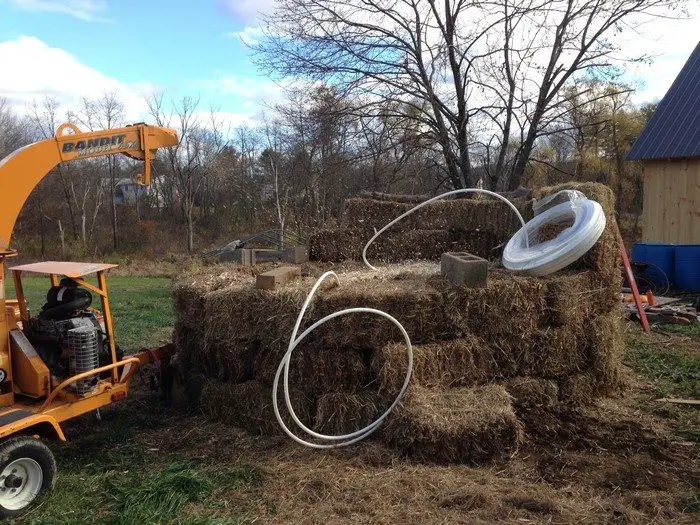
Stake out a circle approximately 12 feet in diameter. Purchase hay bales from a local farm, collect fallen trees and branches and rent a chipper. A load of sawdust can usually be procured from a local sawmill: they will often deliver for a nominal fee.
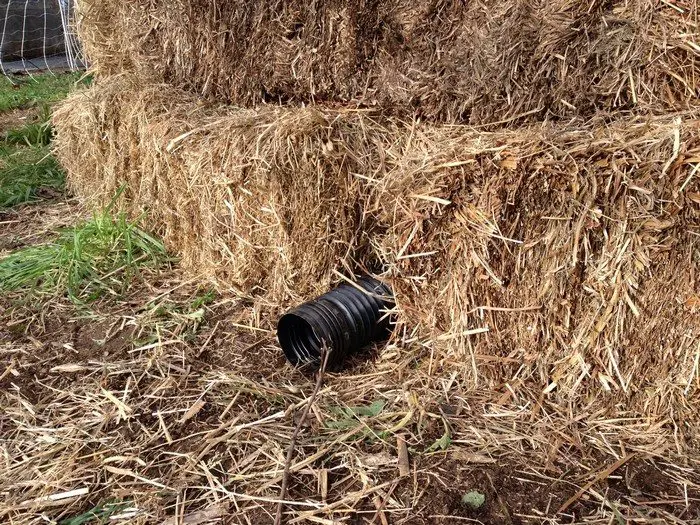
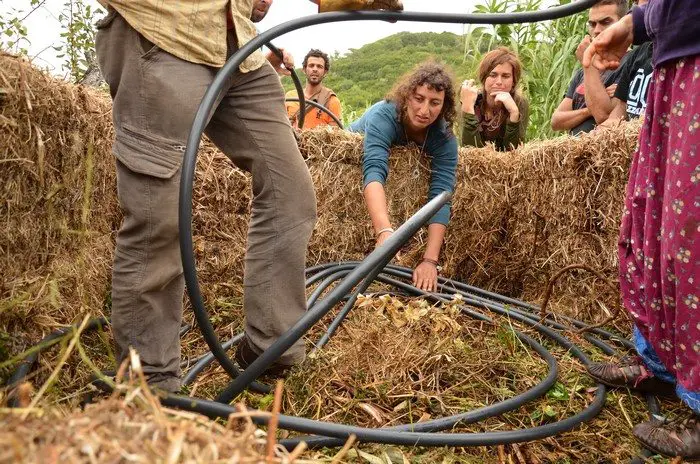
Lay about 15′ of perforated 4″ tubing at the bottom of the mound, with each end protruding out of the perimeter.
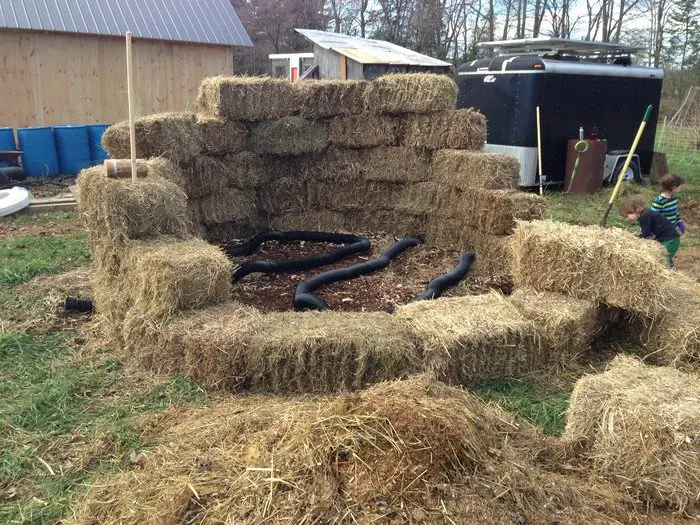
Create a “backstop” of hay bales to catch the woodchips as they are thrown from the chipper into the mound. Chip a layer of woodchips approximately 1′ high into the mound on top of the aeration pipe.
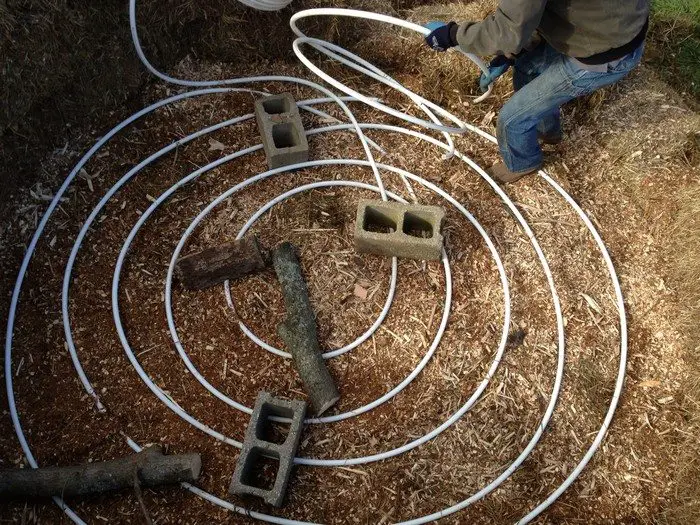
Coil 1/2″ plastic pipe at the bottom of the mound and hold it down temporarily with cinder blocks. Run the end of the pipe outside of the ring of hay bales, to be connected to your water source.
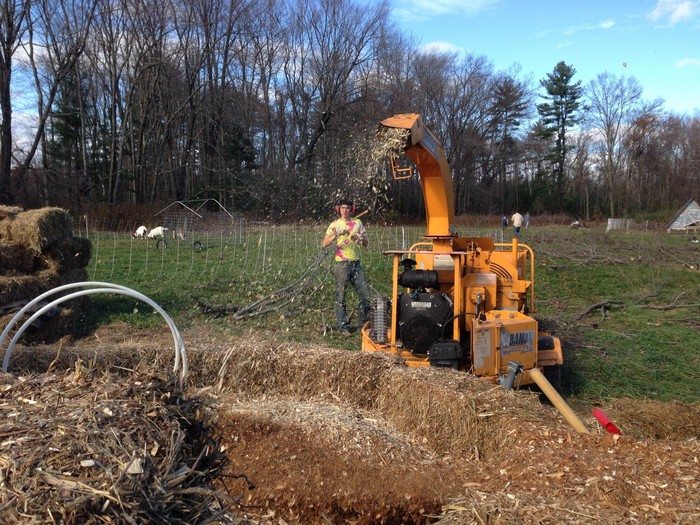
Chip wood into the pile, intermittently stopping to throw shovelfuls of sawdust in.
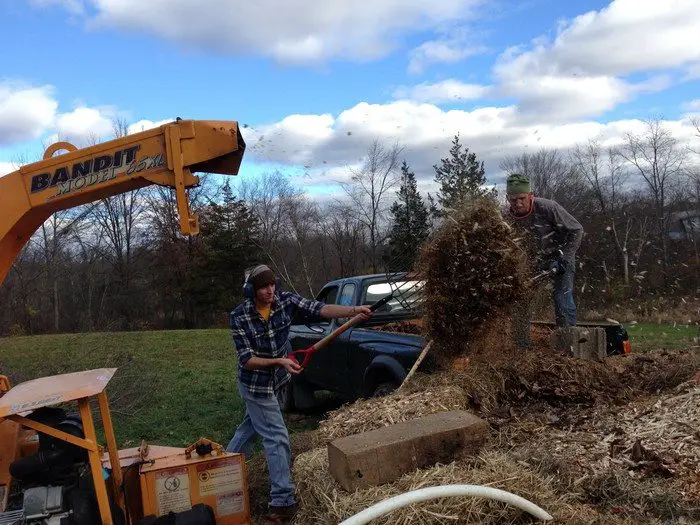
The high carbon content of both materials creates a lot of heat when decomposing.
Once you get started, this project should take 1-2 days of labor. Keep looping in the water pipe and building up the hay perimeter as you add woodchips and sawdust.
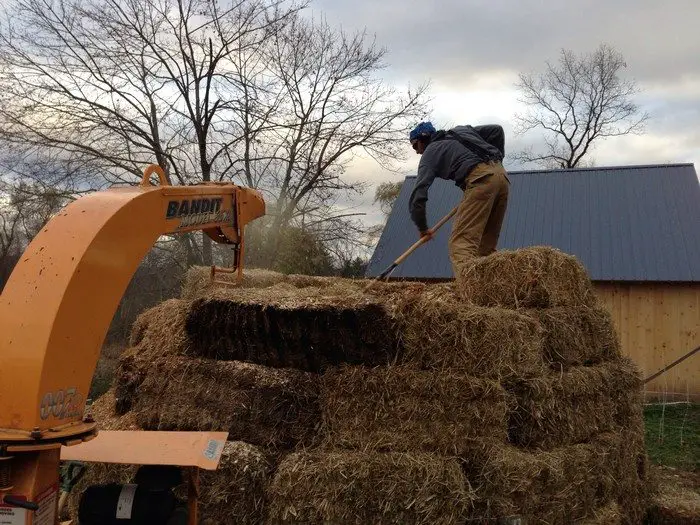
Throw in some manure – any animal will work – if you have any.
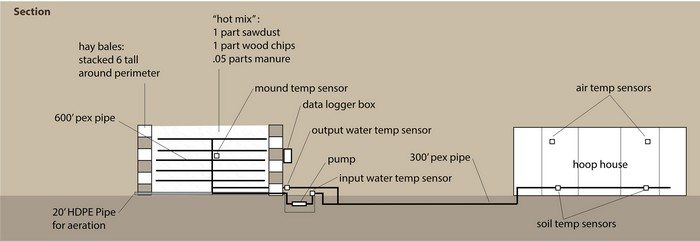
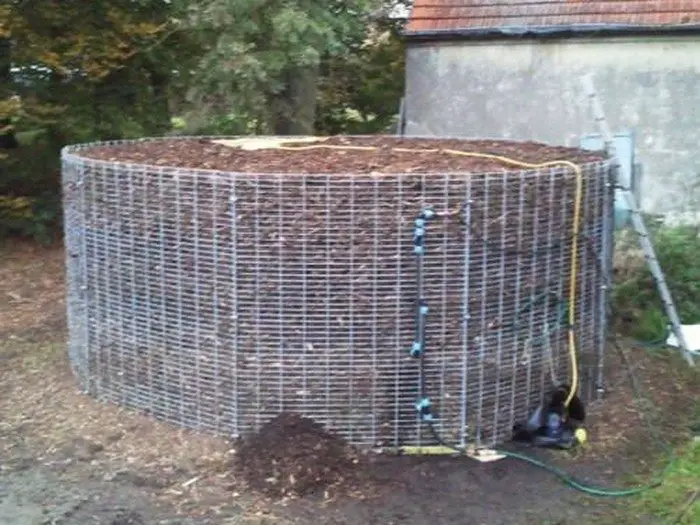
In the diagram shown here, we hooked up a Pain mound to a greenhouse. We buried the water lines so that we would not lose additional heat to the outdoor air.
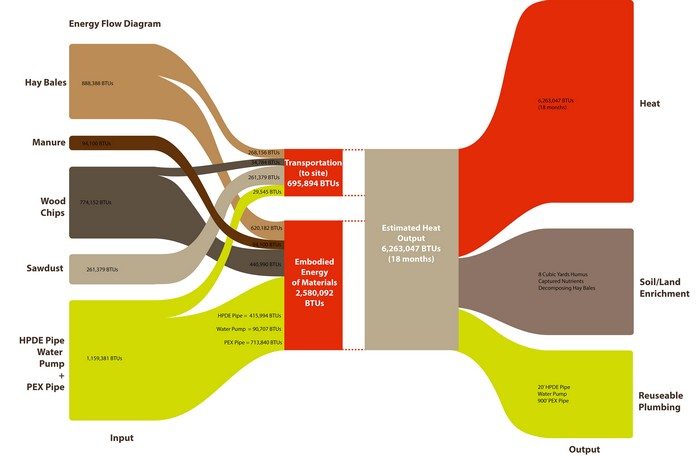
If possible, consider including a series of temperature sensors with your water pipes, so that you can track the BTU output along the way. Our mound produced more than 6 million BTUs over a period of 12 months, including a freezing New England winter.
Thanks to katrinaspade for this great project!
Here’s a quick video…
Wrapping It Up
In exploring the benefits of compost heating systems, it becomes evident that these innovative technologies offer a multitude of advantages that extend far beyond traditional heating methods. By harnessing the natural heat generated during the composting process, these systems provide a sustainable and cost-effective solution to energy needs while simultaneously addressing environmental concerns and promoting resource efficiency.
Compost heating systems represent a paradigm shift in energy production, offering a renewable and environmentally friendly alternative to fossil fuels. By utilizing organic waste materials to generate heat, these systems reduce reliance on non-renewable resources and mitigate greenhouse gas emissions, contributing to climate change mitigation efforts and fostering a more sustainable future.
Moreover, compost heating systems offer significant cost savings over time, particularly for individuals and businesses currently reliant on conventional heating fuels. By minimizing operational costs and reducing waste disposal fees, these systems provide a compelling economic incentive for adoption, offering a win-win solution for both the environment and the bottom line.
In addition to their economic and environmental benefits, compost heating systems play a crucial role in waste management, diverting organic waste from landfills and transforming it into a valuable resource. This closed-loop approach to waste management not only reduces landfill pressure but also promotes soil health and fertility, supporting sustainable agriculture practices and enhancing ecosystem resilience.
Compost heating systems offer a range of environmental benefits, including carbon sequestration, methane emission reduction, and biodiversity conservation. By promoting soil health, conserving water resources, and supporting ecosystem services, these systems contribute to overall environmental sustainability and help build resilient communities.
Frequently Asked Questions
1. How does a compost heating system work?
A compost heating system utilizes the heat generated during the composting process to provide space heating and hot water. Organic waste materials are composted in an insulated container, generating heat as a byproduct of microbial activity. This heat is then transferred to a building or water heating system through a heat exchanger, providing renewable energy for heating purposes.
2. What types of organic waste can be used in a compost heating system?
A wide range of organic waste materials can be used in a compost heating system, including kitchen scraps, yard trimmings, agricultural residues, and animal manure. However, it’s essential to avoid materials that may contain toxins or pathogens, such as treated wood, plastics, or pet waste.
3. Are compost heating systems suitable for residential use?
Yes, compost heating systems can be adapted for residential use, depending on the size of the property and heating requirements. Small-scale compost heating systems can be installed in backyard gardens or community composting facilities, providing renewable energy for space heating and hot water in residential buildings.


