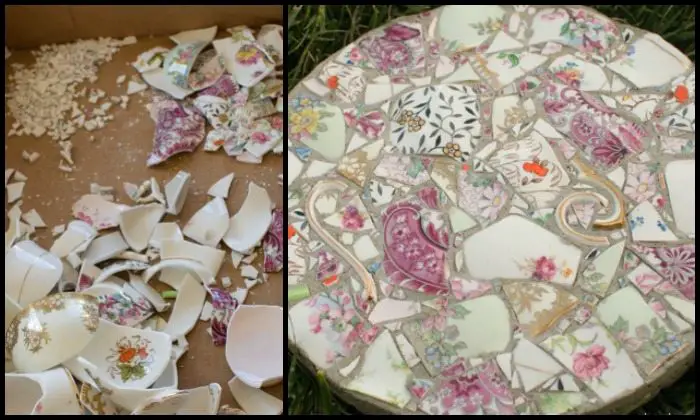
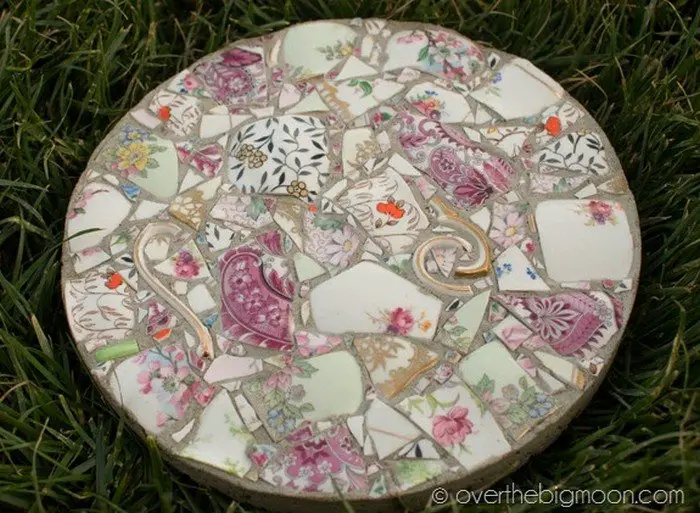
Have you broken a piece of your favorite china? Here’s one way you can still ‘keep’ those precious teacups and saucers – make gorgeous stepping stones!
It’s an easy cement project even the big kids can help you with.
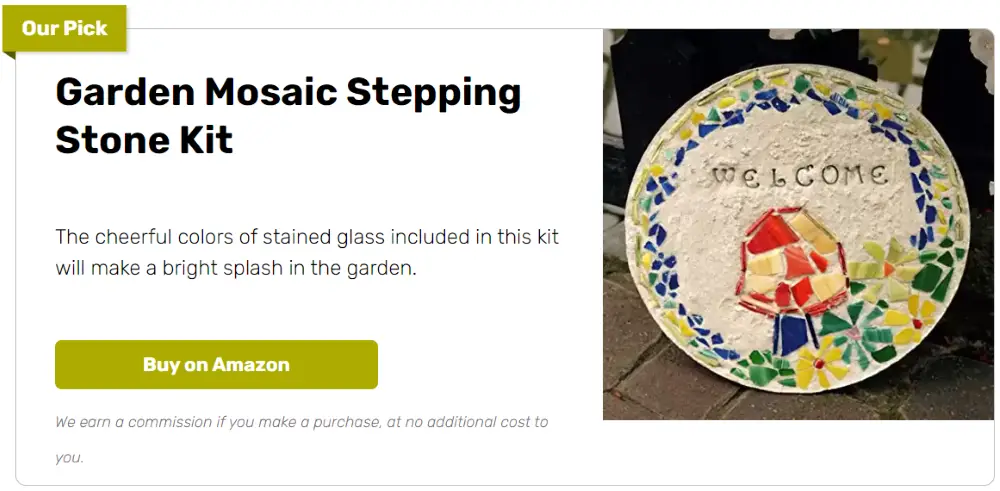
You can get stepping stone kits from your local hardware store or you can simply use Quikrete (if you already have some) and repurpose an old cake pan for the mold. If you have some kind of inexpensive thin plastic tray, you can use that too!
Now to make this project really safe for use as an actual stepping stone, you can seal it with acrylic/resin similar to what is done with custom tables like this DIY bottle cap table. This will prevent injury from the sharp edges of the broken china pieces. And while the resin is still tacky, sprinkle a good and even amount of sand over it so that it doesn’t get slippery when wet!
Want stepping stones like this but don’t have any broken china? Go to a thrift store or garage sales where you can often buy good but cheap pieces of china! :)
Contents
Making Stepping Stones
Materials
- Garden Stone Cement
- Molding Tray
- Broken China Pieces
- Towel
- Paper Towel
- Tub (for mixing cement)
Tools
- Hammer
- Trowel
Instructions
Step 1: Prepare Your Work Area
- Lay Out Your Materials and Tools: Gather all your materials and tools in a clean, organized workspace. Ensure you have enough space to work comfortably.
- Protect Your Surface: Cover your work area with a towel or protective sheet to catch any cement spills or china fragments.
Step 2: Break the China
- Wrap the China: Wrap your china pieces in a towel. This helps contain the shards and prevents them from scattering.
- Break the China: Gently tap the china with a hammer to break it into smaller pieces. Aim for a variety of sizes but avoid making pieces too small or sharp.
- Check the Pieces: Carefully unwrap the towel and examine the pieces. Remove any sharp or unsuitable pieces for your design.
Step 3: Prepare the Cement
- Mix the Cement: In a large tub, mix the garden stone cement according to the package instructions. Use a trowel to stir until you achieve a smooth, thick consistency.
- Fill the Molding Tray: Pour the mixed cement into your molding tray. Fill it to the desired thickness, typically about 1-2 inches, to ensure durability.
- Smooth the Surface: Use the trowel to smooth the top of the cement, creating an even surface for placing the china pieces.
Step 4: Arrange the China Piece
- Plan Your Design: Lay out your broken china pieces on the smooth cement surface without pressing them in.This allows you to adjust the arrangement until you are satisfied with the design.
- Press the Pieces into the Cement: Once your design is set, gently press each piece into the cement. Ensure each piece is slightly embedded to secure it in place. Be mindful of spacing to avoid overlapping.
- Clean the Edges: Use a paper towel to clean any cement off the tops of the china pieces before it sets, keeping your design crisp and clear.
Step 5: Cure the Cemen
- Let It Set: Allow the cement to set undisturbed. The drying time will depend on the cement type and thickness but usually takes 24-48 hours.
- Remove from the Mold: After the cement has fully cured, gently remove the stepping stone from the molding tray. If it’s stuck, lightly tap the sides of the tray to loosen it.
Step 6: Finish and Protect Your Stepping Stone
- Seal the Stone: For added durability and safety, apply a clear acrylic or resin sealant over the top. This will protect the china pieces and smooth out any rough edges.
- Add Texture: If desired, sprinkle sand over the resin while it’s still tacky to add a non-slip texture to the surface.
- Allow to Dry: Let the sealant dry completely as per the manufacturer’s instructions before placing the stepping stone in your garden.
Step 7: Place Your Stepping Stones
- Choose a Location: Select a spot in your garden path where you want to place the stepping stones. Ensure the ground is level to keep the stones stable.
- Set the Stones: Lay the stepping stones on the ground and press them firmly into the soil. Check for stability and adjust if necessary.
- Enjoy Your Creation: Step back and admire your handmade stepping stones, adding a personal and unique touch to your garden.
Click on any image to start the lightbox display. Use your Esc key to close the lightbox.![]()
You can get more step-by-step instructions here…
Different Design Patterns for Stepping Stones
Creating stepping stones from broken china offers a wonderful opportunity to personalize your garden pathways with unique designs. By experimenting with different patterns, you can craft beautiful and functional art pieces that reflect your style. Below are various design patterns you can consider when making your garden stones.
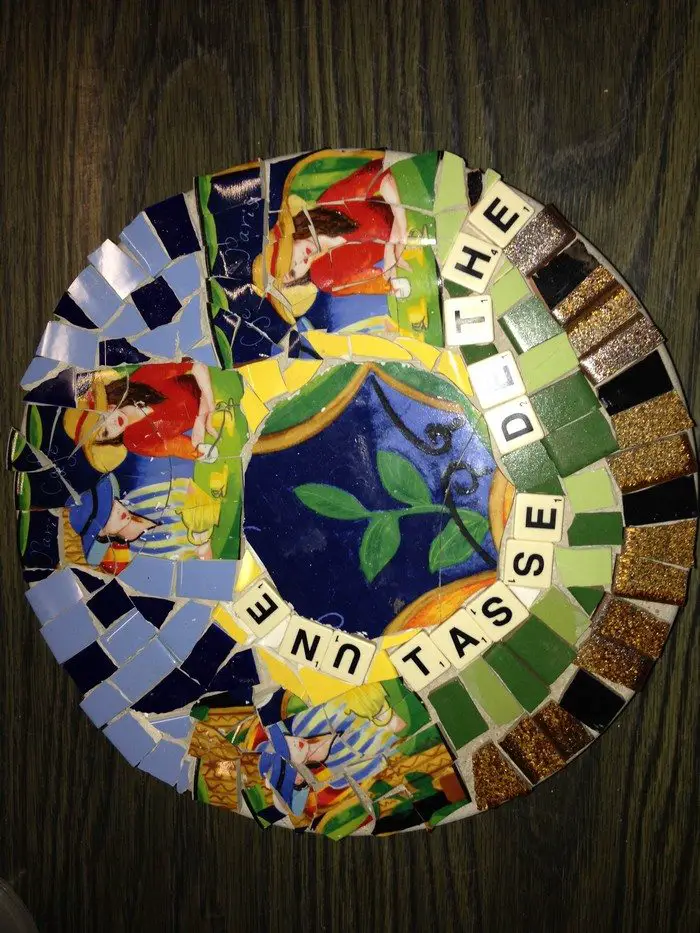
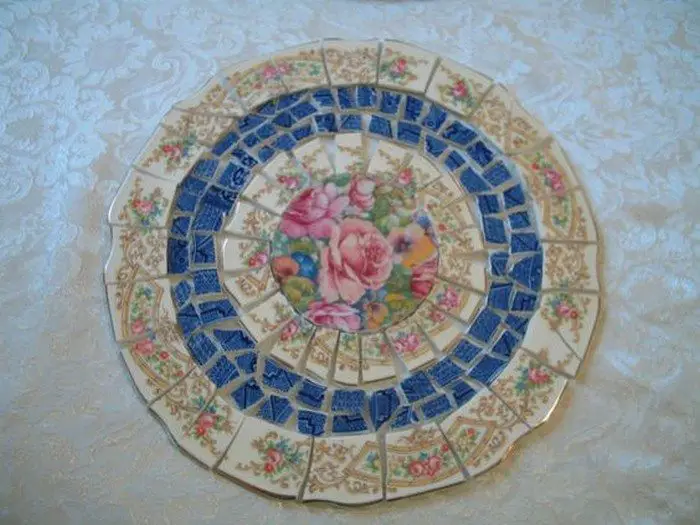
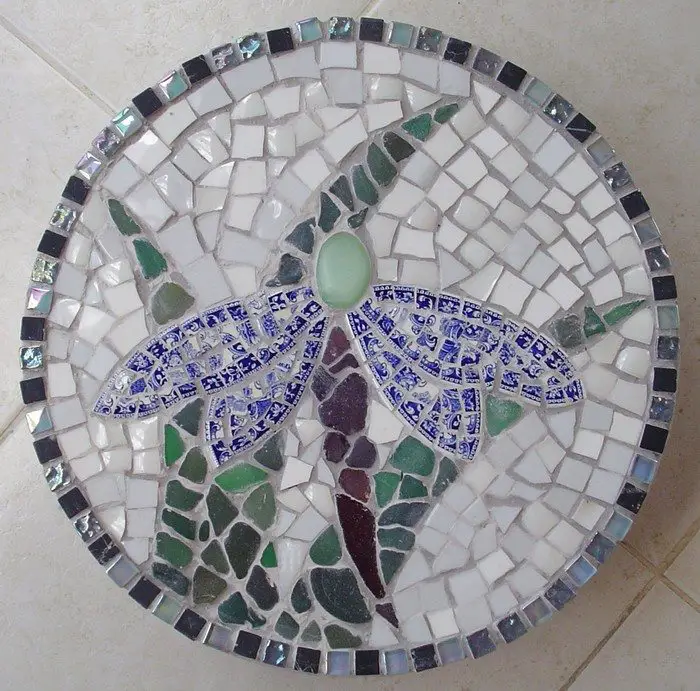
1. Mosaic Patterns
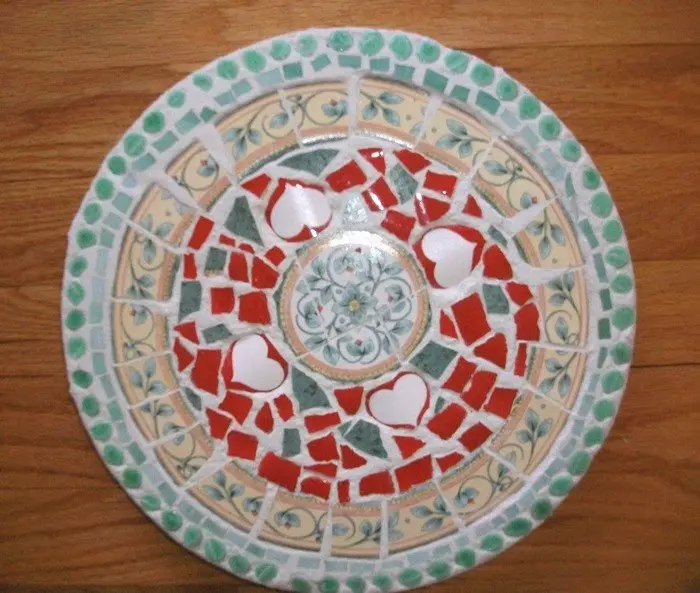
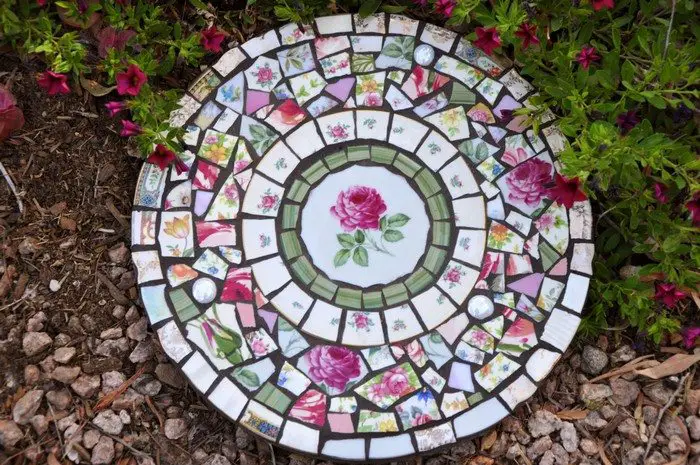
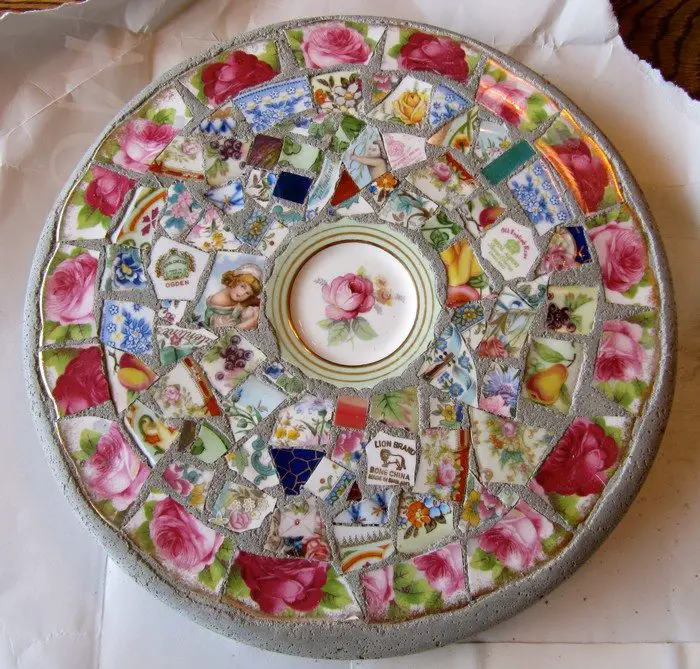
Mosaic patterns are a classic choice that allows for creative freedom. Use broken china pieces to form intricate designs or simple geometric shapes. You can arrange the pieces in concentric circles, radiating outwards from the center, or create abstract forms. Mosaics can be colorful or monochromatic, depending on the look you want to achieve.
Tips for Creating Mosaic Patterns:
- Plan your design on paper before placing the pieces.
- Use a mix of large and small pieces for added texture.
- Experiment with different grout colors to complement or contrast the china pieces.
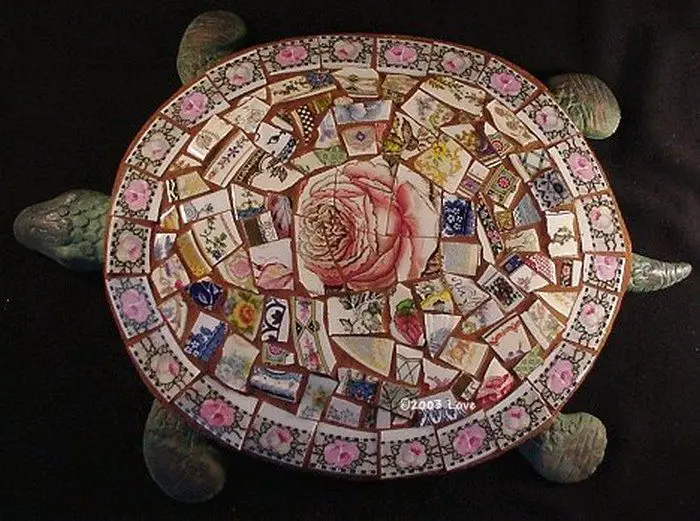
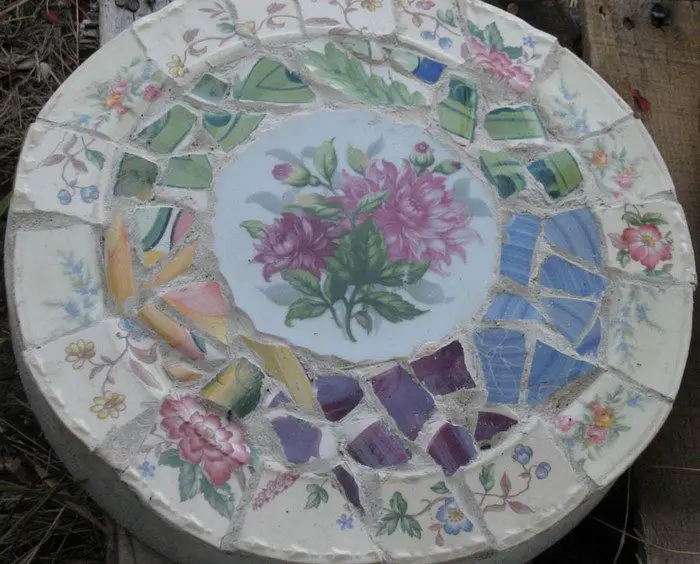
2. Nature-Inspired Themes
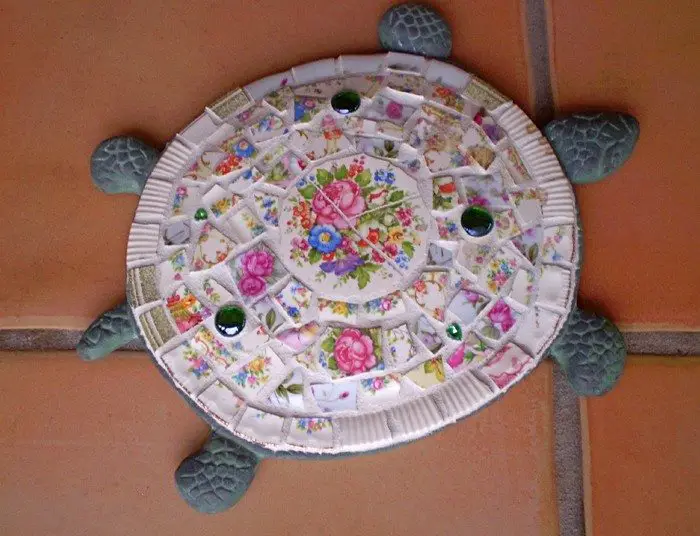
Nature-themed patterns can bring an organic feel to your garden stones. Consider arranging your china pieces to mimic the shapes of leaves, flowers, or even animals. You can create a floral motif with petals radiating from a center, or design a leaf with vein-like patterns using the broken pieces.
Ideas for Nature-Inspired Designs:
- Use green and brown tones for leaves and stems.
- Choose floral china pieces to enhance the natural theme.
- Combine different shapes and colors to create detailed animal designs.
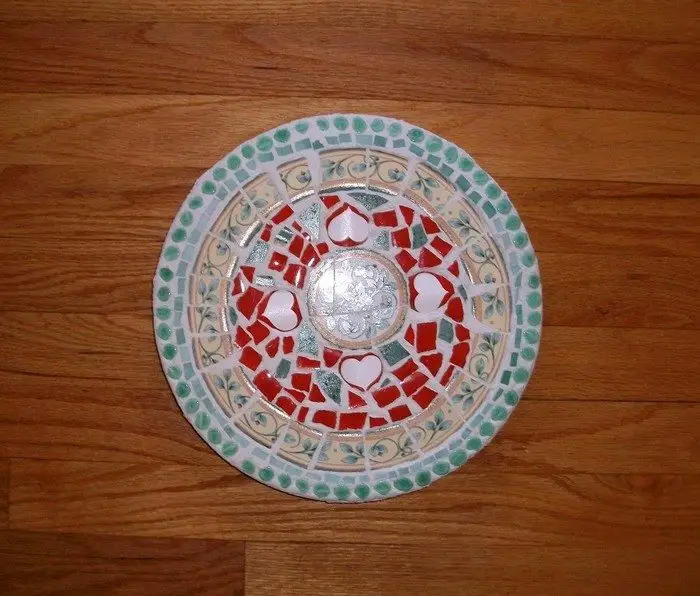
3. Seasonal and Festive Designs
Celebrate different seasons or holidays by creating themed stones. For instance, use red and green pieces for a Christmas-themed stone or pastel colors for Easter. You can also design stones with specific holiday motifs like pumpkins for Halloween or hearts for Valentine’s Day.
Creating Seasonal Patterns:
- Collect china in seasonal colors throughout the year.
- Plan ahead for upcoming holidays and create stones as decorations.
- Use thematic shapes and symbols to highlight the festive spirit.
4. Geometric Shapes
Geometric designs offer a modern and organized look. Arrange your china pieces in shapes like triangles, squares, or hexagons. This style is perfect if you prefer clean lines and symmetrical patterns. Geometric patterns can also be easily adapted to fit the available space within your molding tray.
How to Achieve Geometric Patterns:
- Use a ruler or template to outline your shapes before placing the pieces.
- Keep the edges sharp and well-defined for a crisp look.
- Experiment with alternating colors or patterns within each shape for added interest.
5. Abstract and Freeform Designs
For those who enjoy a more relaxed approach, abstract patterns are ideal. Instead of following a specific design, place your broken china pieces randomly or in a way that feels intuitive. This style allows for spontaneous creativity and can result in unique and unexpected designs.
Tips for Abstract Patterns:
- Don’t overthink the placement; let your creativity flow.
- Use a variety of colors and shapes to add vibrancy.
- Allow some negative space for a balanced composition.
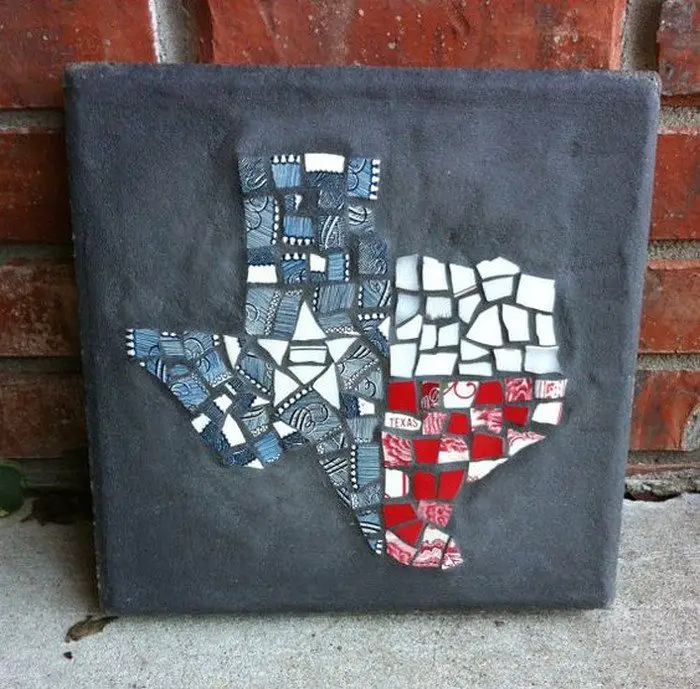
6. Text and Symbols
Incorporate meaningful text or symbols into your designs. Spell out words, initials, or dates using small china pieces. This can be a beautiful way to commemorate special occasions or personalize your stones with family names or inspirational quotes.
Incorporating Text and Symbols:
- Use contrasting colors to make the text stand out.
- Arrange pieces carefully to ensure legibility.
- Add symbols that have personal significance, such as hearts, stars, or religious icons.
These design ideas offer various ways to craft stepping stones that can enhance the beauty of your garden. Whether you prefer the structured look of geometric shapes or the whimsical feel of nature-inspired themes, there’s a pattern that will suit your style. Explore these ideas to create something truly unique and special for your outdoor space.
Maintenance and Care for Stepping Stones
Stepping stones add charm and functionality to garden paths, but they require regular care to stay beautiful and safe. Proper maintenance can ensure your stones last for years and remain a delightful feature of your outdoor space. Here are some tips on how to keep your stepping stones in top condition.
Regular Cleaning
Dirt, moss, and algae can accumulate on stepping stones, making them slippery and dull. Clean your stones regularly to maintain their appearance and safety. Use a stiff brush to scrub off dirt and debris. For more stubborn stains, mix a mild detergent with water and scrub the surface. Rinse thoroughly with a garden hose to remove any soap residue. Avoid using high-pressure washers as they can damage the surface of the stones and the embedded china pieces.
Sealing and Protecting
To protect your stepping stones from the elements, apply a sealant every one to two years. Sealing helps prevent water penetration, which can cause cracking and fading. Choose a sealant designed for outdoor use and suitable for concrete or stone surfaces. Clean the stones thoroughly before applying the sealant, and follow the manufacturer’s instructions for the best results. This step is crucial, especially for stones made with broken china, as it helps keep the pieces securely in place and protects them from chipping.
Repairing Chips and Cracks
Even with regular maintenance, stepping stones can develop chips or cracks over time. Small chips can be repaired by applying a concrete patch mix to the affected area. For cracks, use a concrete filler that matches the color of your stones. Clean the damaged area thoroughly before applying the filler to ensure good adhesion. Allow the repair to cure completely before using the stepping stone again. For significant damage, consider replacing the stone to maintain the path’s safety and aesthetic appeal.
Preventing Weed Growth
Weeds can grow in the gaps around your stepping stones, detracting from their appearance and stability. To prevent this, apply a weed barrier or landscape fabric under the stones when first placing them. Regularly remove any weeds that do appear and consider using a gentle herbicide if necessary. Adding a layer of gravel or sand around the stones can also help suppress weed growth and improve drainage.
Checking for Stability
Over time, soil movement or heavy foot traffic can cause stepping stones to shift and become uneven. Periodically check the stones to ensure they are stable and level. If a stone has become wobbly, lift it carefully, add or remove soil underneath as needed, and reposition it securely. Keeping your stones level not only improves the appearance of your path but also prevents trips and falls.
Seasonal Maintenance
Different seasons bring varying challenges to stepping stone care. In the fall, remove fallen leaves promptly to prevent staining and moisture buildup. During winter, avoid using harsh chemicals or salts for de-icing, as these can damage the stones and the surrounding area. Instead, use sand or kitty litter for traction. In the spring, inspect your stones for any winter damage and address any repairs early to keep your garden path in good shape.
By following these maintenance and care tips, you can ensure that your stepping stones remain a beautiful and enduring feature of your garden. Regular upkeep will keep them looking great and functioning well, providing a safe and attractive path for years to come.
Conclusion
Creating stepping stones from broken china is a delightful way to recycle cherished pieces and add a unique touch to your garden. This DIY project combines creativity with functionality, offering endless design possibilities. Enjoy the process and the beautiful, personalized pathway that results from your efforts.


