Before you drag mismatched chairs, old bookshelves, or worn-out sofas to the curb, remember that creative repurposing can give outdated furnishings a second life as useful, even stylish items.
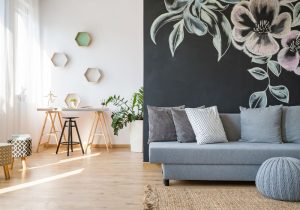
The seating furniture you see here is just one of the many beautiful furniture transformations you can achieve through clever repurposing.
This nice and simple tutorial will surely inspire you to do this kind of DIY project!
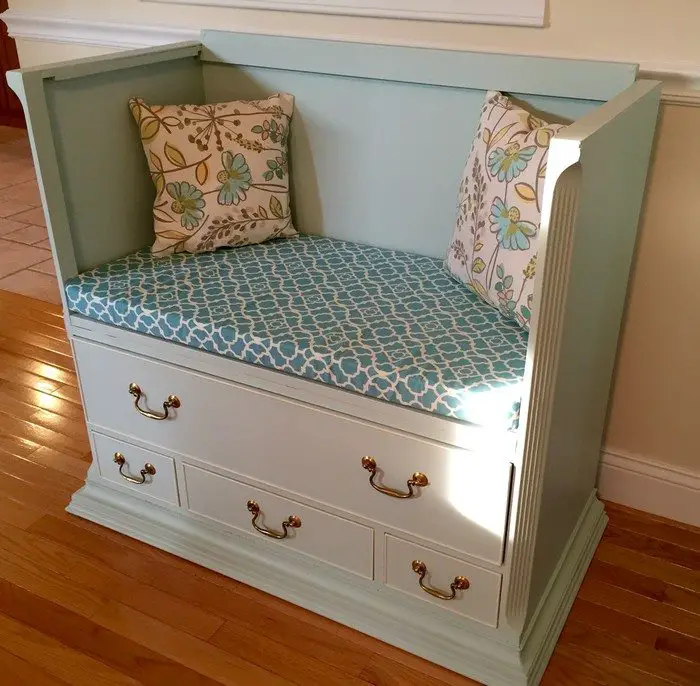
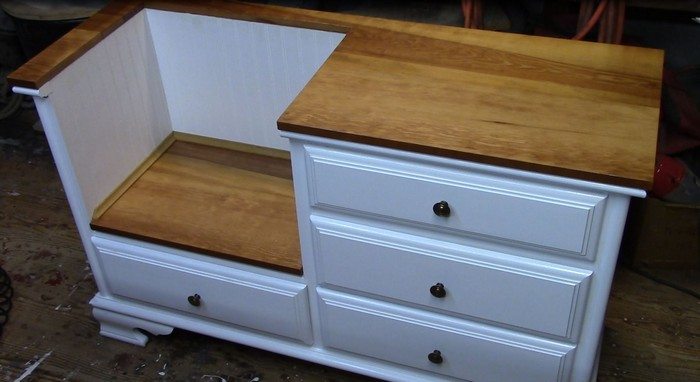
Old dressers make great seating furniture that can be used for different purposes. For instance, you can use this featured old dresser seat as a telephone table or a piece of seating furniture at the foot of your bed. You can also replace its bottom drawers with a shoe rack to use it as a ‘boot bench’.
There are many other modifications you can do with this old dresser seat that will suit your needs and wants. The possibilities are endless!
So read this simple but great tutorial to learn how you can turn an old dresser into a piece of seating furniture, and imagine what other purposes this DIY bench can serve.
Don’t forget to share your ideas through the comments box below ;)
Click on any image to start the lightbox display. Use your Esc key to close the lightbox. ?
Contents
Upcycling an Old Shelf into Seating Furniture
Materials for building seating furniture:
- Pine Boards (for the benchtop and seat)
- Bead Board
- Wood Glue
- Molding Wood Trim
- Carpenter’s Tape
- Paint
- Wood Stain and Seal
Tools:
- Ruler
- Screwdriver
- Cordless Drill
- Cutter
- Measuring Tape
- Jigsaw
- Wood Clamps
- Brad Nailer
Instruction
Step 1: Plan Your Design
- Measure the bookshelf to determine the size of the benchtop and seat. Decide if you want the seat to cover the entire top or just a portion.
- Sketch your design, including any additional features like storage under the seat or along the sides.
Step 2: Prepare the Bookshelf
- Empty and clean the bookshelf thoroughly.
- Remove any adjustable shelves or hardware that won’t be part of the final design.
- Repair any damages using wood glue and let it dry completely.
Step 3: Cut the Pine Boards and Bead Board
- Measure and mark the pine boards for the benchtop and seat, using the ruler and measuring tape.
- Cut the pine boards to size with the jigsaw, ensuring smooth, straight edges.
- Measure and cut the bead board to fit the back or sides of the bookshelf if you’re adding new backing or decorative elements.
Step 4: Attach the Benchtop and Seat
- Apply wood glue to the top of the bookshelf where the benchtop and seat will sit.
- Place the pine boards on the glue, using wood clamps to hold them in place while the glue dries.
- Secure the boards with the cordless drill and screws for added stability.
Step 5: Install Bead Board and Molding
- Glue the bead board in place if you’re using it as backing or decoration. Clamp and let it dry.
- Measure, cut, and attach molding wood trim around the edges of the benchtop and seat for a finished look, using the brad nailer.
Step 6: Sand and Finish
- Sand the entire piece smoothly, including all new wood additions.
- Wipe down the bookshelf and newly installed parts to remove dust.
- Apply paint or wood stain and seal to the entire piece. Let the first coat dry, then apply a second coat if necessary.
Step 7: Final Touches
- Add cushions for comfort on the seat, securing them with velcro strips if desired.
- Install any additional features, like storage baskets under the seat.
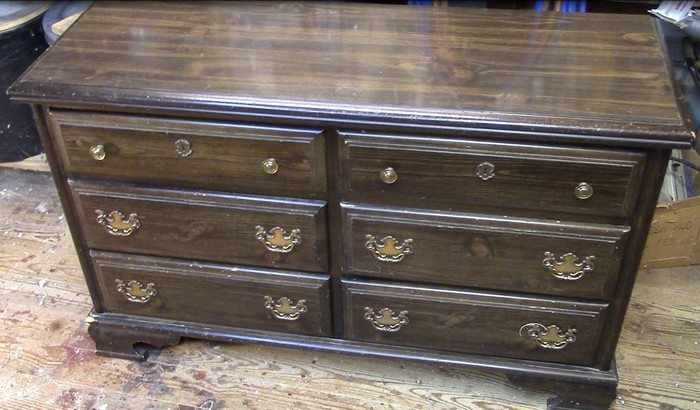
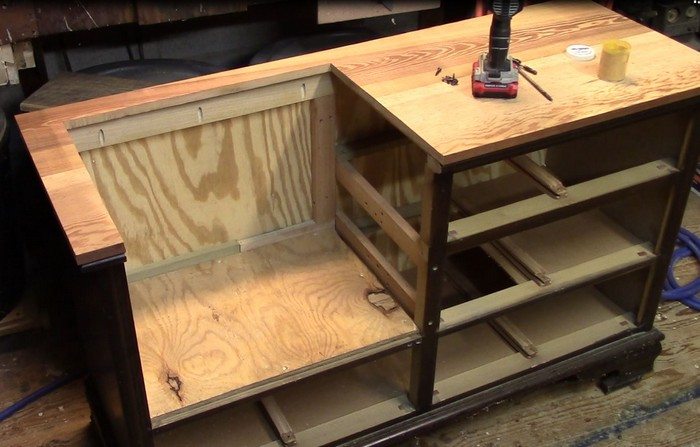
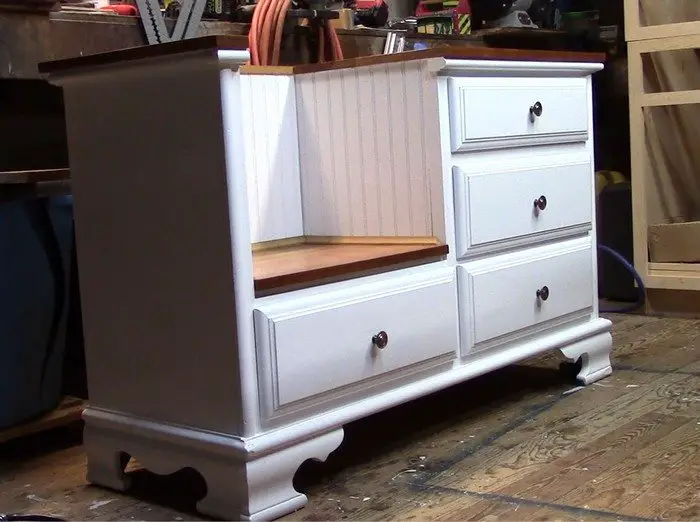
This is what I begin with. It is a youth dresser that my neighbor gave me. His mother wanted me to make it into one of those benches she saw on Pinterest. So here goes…
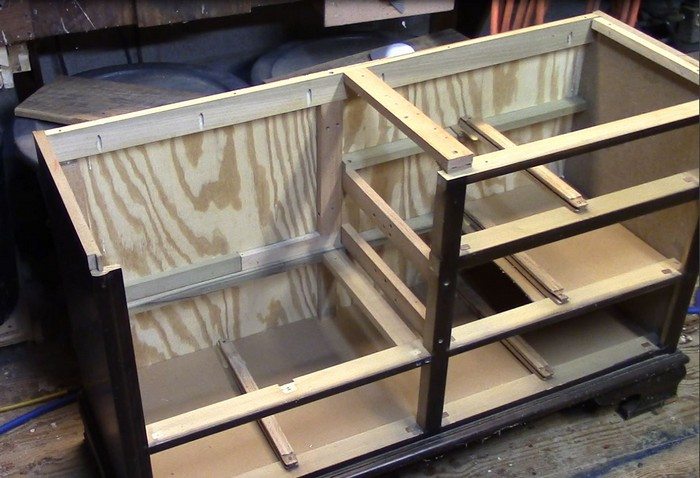
Reinforcements: Here is where I tore it apart and added all the needed supports for the seat part, and the reinforcements for the top, back, and sides.
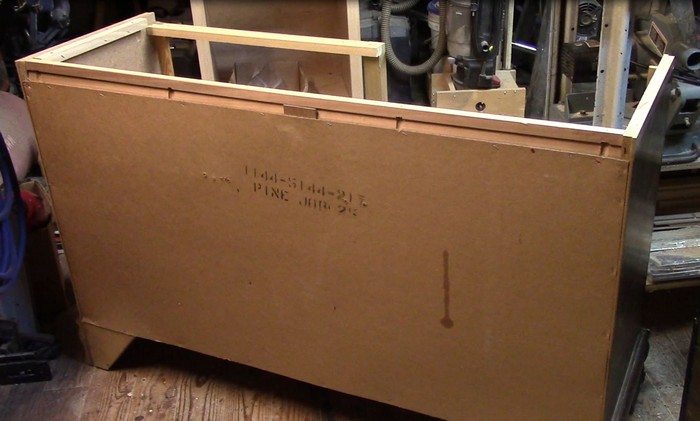
Remove the ugly: I torn the paper backing off to make room for some better-looking beadboard.
Beadboard: This is the beadboard that covers the back, which will get painted later. The back of this thing will be seen because it is going at the foot of a bed.
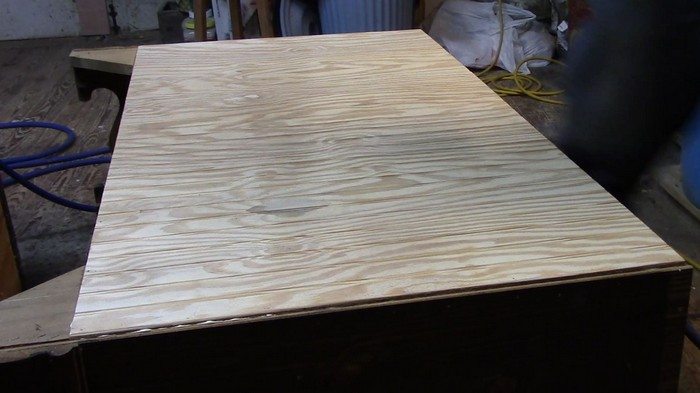
This is a test fitting because I just cut the top to fit the seating area. Also so I could see if I needed to stain the top or leave it natural.
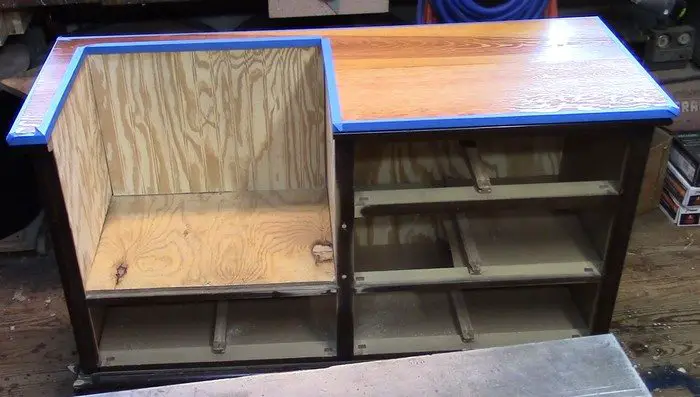
Here I decided that it would look good just with poly on it (well the boss… I mean wife told me to leave it natural) so I taped it off and ready for paint. I got lucky and she let me paint it. Ha!
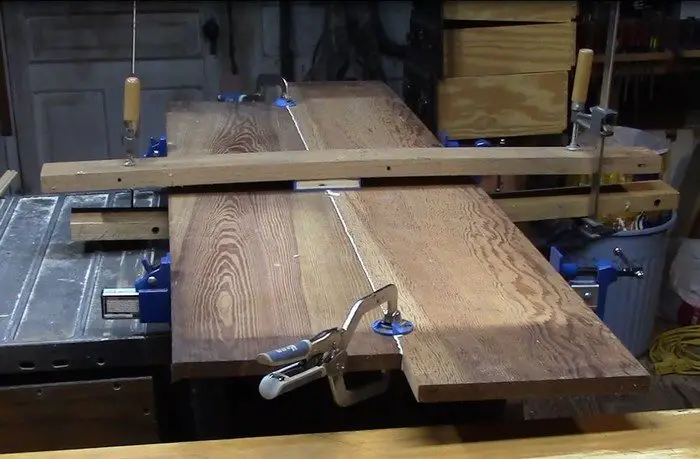
I almost forgot to show these old pine boards that made the top of the furniture. I found them laying on the rafters of my shop. Best looking pine I’ve seen in a long time. But hey, they were laying in that shop before I was born!
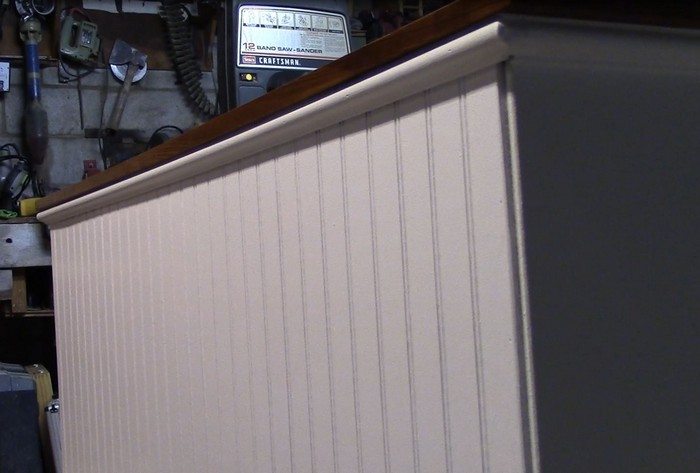
This is the painted beadboard on the back of the furniture and a piece of molding that I made to trim the top.
And this is the finished seat. The drawer pulls are from the drawer that wasn’t used and I think they look a lot better than the handles it had.
Design Tips for Repurposed Furniture
Repurposing furniture is a creative and eco-friendly way to refresh your home decor. It allows you to transform unused pieces into functional and stylish seating furniture. Here are some design tips to help you turn old furniture into eye-catching pieces.
Choose the Right Piece
Finding the right piece of furniture for repurposing into seating furniture is crucial for the success of your DIY project. Begin by assessing the durability and structure of potential pieces. Solid wood items are often ideal because they offer strength and longevity. Avoid furniture with significant damage or weak joints, as these will not provide the stable foundation needed for seating.
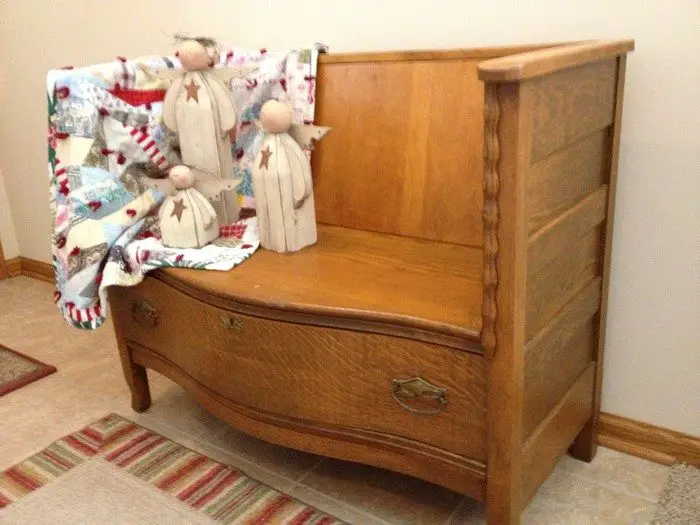
The adaptability of the furniture piece is also important. Think about how easily you can transform it into seating. For example, a dresser or console can be converted into a bench with storage beneath, while an old bed frame might become a unique garden bench.
Size and shape play a significant role in determining where your new seating furniture will go. Measure the space where you plan to place the finished product. This ensures the repurposed piece fits perfectly without overcrowding the area. For small spaces, consider compact items that can serve dual purposes, such as seating with built-in storage.
Select a Color Scheme
Selecting a color scheme for your repurposed furniture is a key step in integrating it seamlessly into your home. The colors you choose should enhance the overall aesthetic of your space and reflect your personal style.
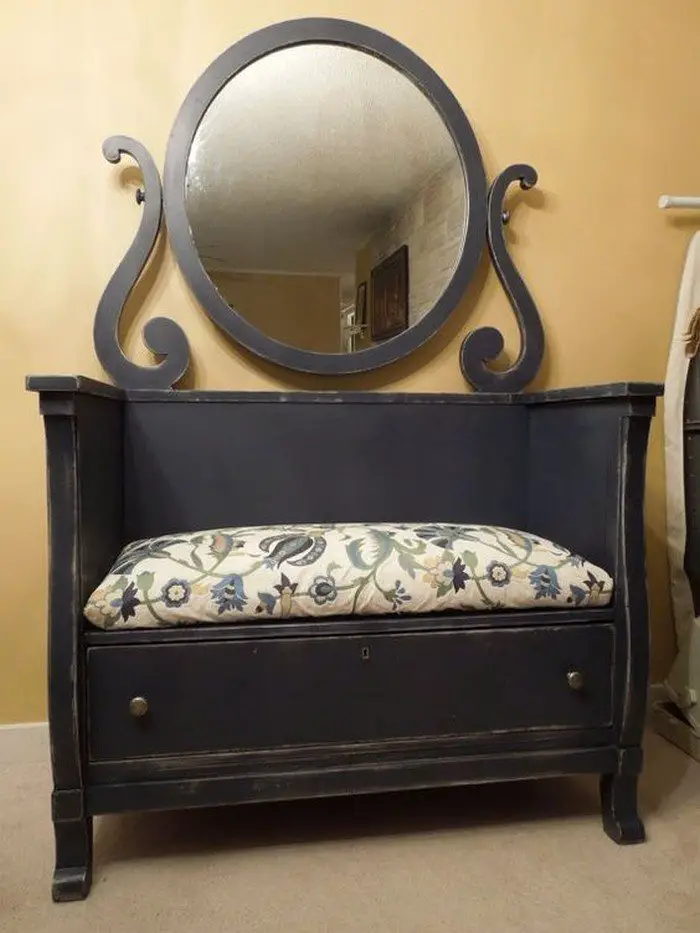
If your home features a minimalist design, neutral colors like whites, beiges, and grays can maintain a clean and serene atmosphere. These shades are versatile and can easily blend with various decor styles, making your seating furniture a timeless addition.
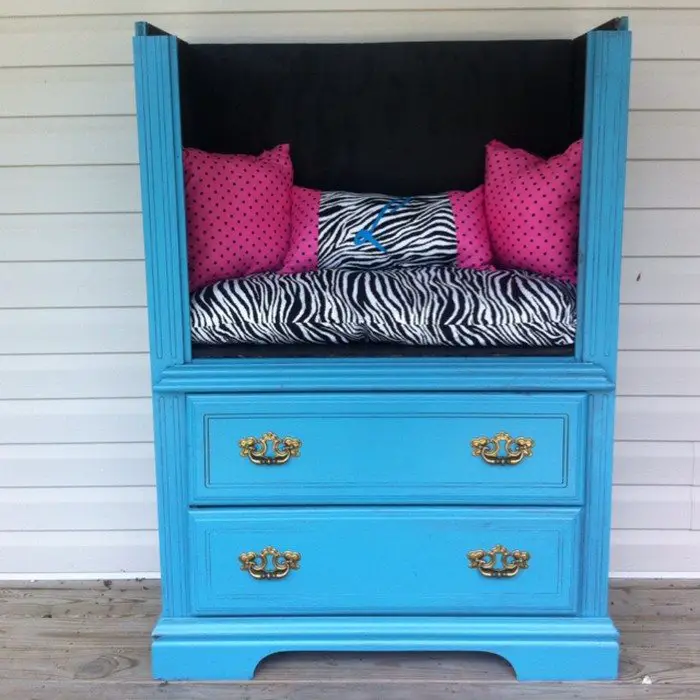
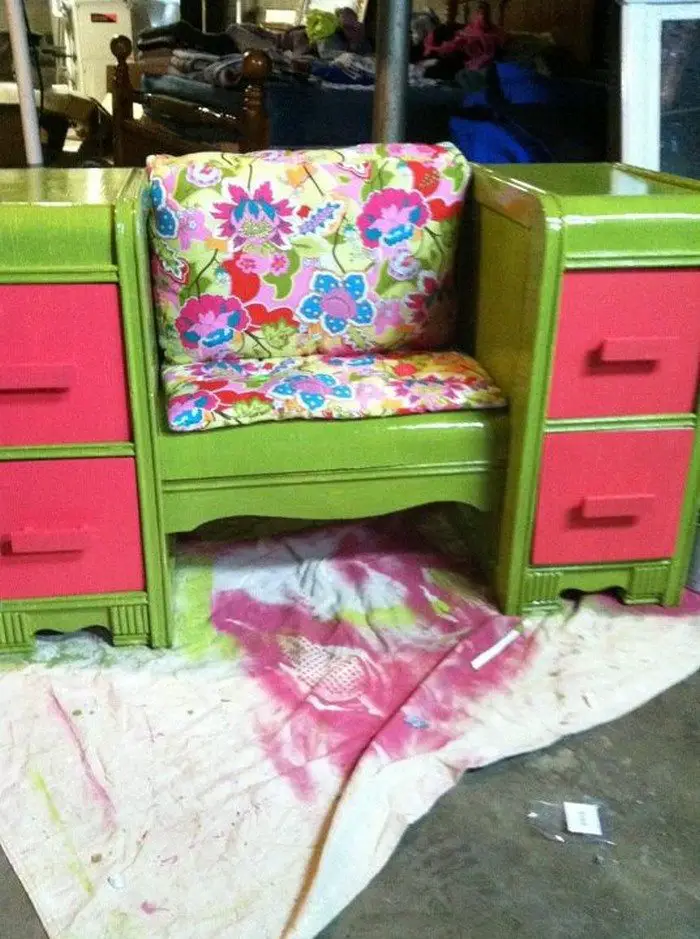
For those looking to add a pop of personality to their rooms, bold and vibrant colors can transform a simple piece of furniture into a standout feature. Think about using deep blues, rich greens, bright yellows or reds. These colors can create a focal point and add warmth and energy to your space.
When choosing paint or stain, consider the material of your furniture and the desired finish. Paint can cover imperfections and offer a wide range of color options, while stain can enhance the natural beauty of wood, giving it a refreshed yet authentic look.
Experiment with samples on a small furniture area to ensure you’re happy with the color and finish before completing the project. This approach lets you achieve a fresh look that complements your existing decor and brings new life to your repurposed seating furniture.
Add Comfort with Cushions
Adding comfort to your repurposed seating furniture is essential for ensuring it’s visually appealing and practical for everyday use. Cushions or padded seats can transform a hard wooden bench or chair into a cozy relaxing spot. When selecting cushions, consider both style and function.
The fabric should complement the color scheme of your furniture and room, creating a cohesive look. Whether you’re aiming for a vibrant pattern to add visual interest or a soft, muted tone for a more understated elegance, the fabric is critical in achieving the desired effect.
Durability is also crucial, especially in high-traffic areas or homes with children and pets. Look for high-quality, resilient fabrics that can withstand regular use. Materials such as canvas, leather, or heavy-duty cotton blends are excellent choices for seating furniture, offering both comfort and longevity. Additionally, consider whether the fabric is easy to clean or has any special care requirements to keep your seating furniture looking its best over time.
For an extra layer of comfort, think about the filling of your cushions. Foam inserts offer a firm support tailored to the desired thickness, while down or fiberfill options provide a softer, more plush seating experience. Whichever option you choose, ensure that it enhances the comfort level of your furniture, inviting you and your guests to sit back and relax.
These tips can help you repurpose old furniture into stylish, functional seating options. With a little creativity, you can give new life to forgotten pieces and enhance your home decor.
DIY Upholstery for Seating Furniture
DIY upholstery for seating furniture is a fantastic way to breathe new life into old pieces. Whether you’re updating a bench, chair, or sofa, reupholstering allows you to customize your seating furniture to match your decor and style preferences. Here’s how to tackle a DIY upholstery project for your seating furniture.
Choose Your Fabric
Choosing the right fabric is crucial in reupholstering seating furniture, as it affects the appearance, longevity, and comfort of the piece. Start by evaluating the room where the seating furniture will be placed. Look at the colors, patterns, and textures dominating the space to ensure your chosen fabric will blend harmoniously.
- Microfiber: Soft feel, resistant to stains and wear. Microfiber is ideal for high-traffic seating furniture.
- Canvas: Known for its durability and ease of maintenance, suitable for seating furniture in frequent use areas.
- Leather: Offers unmatched durability, adds character over time, and is perfect for enhancing seating furniture with a luxurious touch.
- Velvet: Deep color and rich texture make seating furniture feel opulent and inviting, best for adding luxury.
- Linen: Provides a light and airy feel, ideal for a casual, elegant look in seating furniture.
When selecting fabric, consider its practical aspects, such as ease of cleaning and resistance to fading. Some fabrics come with a protective coating to repel stains and liquids, which can be beneficial for seating furniture used by children or pets. Additionally, think about the fabric’s weave and weight; tighter weaves and heavier weights generally offer greater durability.
Gather Your Tools
Gathering the right tools before you begin your upholstery project is essential for ensuring a smooth workflow and achieving a professional finish on your seating furniture. Here’s a detailed breakdown of the tools you might need and their uses:
- Staple Gun: A staple gun is indispensable for attaching fabric to the frame of your seating furniture. Choose a heavy-duty staple gun that can handle the upholstery fabric’s thickness and the furniture frame’s hardness. Electric or pneumatic staple guns offer ease of use and efficiency for larger projects.
- Scissors: A sharp pair of scissors is crucial for cutting fabric and trim. Fabric scissors are specifically designed to cut through various textiles cleanly and precisely, preventing fraying and ensuring clean edges.
- Upholstery Needles: These needles come in various sizes and shapes, including straight, curved, and round. They are stronger than regular sewing needles and are essential for hand-stitching thick fabrics or areas where a sewing machine can’t reach.
- Thread: Use a heavy-duty thread that matches the weight and durability of your upholstery fabric. Nylon or polyester threads are excellent choices for their strength and flexibility.
- Sewing Machine: For projects that involve sewing fabric pieces together, such as making cushion covers or adding piping, a sewing machine can save time and ensure even, durable stitches. Ensure your machine can handle the thickness of your upholstery fabric by using the appropriate needle and settings.
- Seam Ripper: A seam ripper is handy for correcting mistakes or removing old upholstery fabric without damaging the furniture. It allows for precise removal of stitches and staples.
- Upholstery Tacks or Nails: These are used for attaching fabric to furniture frames and for decorative finishes. They come in various styles and finishes, allowing you to add a decorative touch to your seating furniture while securing the fabric in place.
For a successful upholstery project, it’s also helpful to have additional items like measuring tape for accurate fabric measurements, a hammer or mallet for securing tacks or nails, and possibly pliers for removing old staples or nails.
Having all the necessary tools at the ready streamlines the process and ensures that you can confidently tackle any aspect of the upholstery project, leading to a beautifully finished piece of seating furniture.
Remove Old Fabric
Removing the old fabric from your seating furniture is a critical step in reupholstery. It’s not just about tearing away the worn-out material but understanding the construction of your furniture and preparing it for a new lease on life. Approach this task with patience and attention to detail to ensure the best outcome for your project.
- Document the Process: As you remove the old fabric, note how each piece is attached to the furniture frame. Consider taking pictures or making sketches, especially if the furniture has complex patterns or multiple fabric layers. This documentation will be invaluable when you’re ready to attach the new fabric, helping you replicate the original upholstery techniques.
- Use the Right Tools: Employ a staple remover or a pair of needle-nose pliers to remove staples that secure the fabric to the frame. A flathead screwdriver can also be useful for prying out stubborn staples or tacks. Be gentle to avoid damaging the wood underneath.
- Inspect and Repair the Frame: Closely inspect the furniture’s frame with the fabric removed. Look for signs of wear or damage, such as cracked wood or loose joints. Now is the time to make repairs, as a sturdy frame is essential for the longevity and comfort of your seating furniture.
- Evaluate and Replace Padding: The comfort of your seating furniture largely depends on the quality of its padding. Examine the existing foam, batting, or springs. If the foam is compressed or the batting has clumped, replace it with new materials to restore comfort and shape. If your furniture has springs, check for any that may be broken or have come loose and repair as necessary.
- Clean the Frame: Before adding new padding or fabric, clean the frame to remove dust, old glue, or any debris. A clean frame will ensure better adhesion for new materials and contribute to the overall finish of your project.
By carefully removing the old fabric and preparing the furniture frame, you create a solid foundation for your new upholstery. This attention to detail will improve the appearance of your seating furniture and its comfort and durability.
Cut and Attach New Fabric
Cutting and attaching new fabric to your seating furniture is a transformative step in reupholstery. This phase requires precision and patience to ensure the fabric aligns correctly and looks professional once completed. Here’s how to approach this task effectively.
- Measure Twice, Cut Once: Begin by accurately measuring the areas of the furniture you will cover with fabric. Add a few inches to each measurement to allow for seams, folds, and any adjustments necessary during the fitting process. It’s better to have excess fabric that can be trimmed later than to cut a piece too small and waste material.
- Mark and Cut Your Fabric: Lay your fabric out on a clean, flat surface, and use your measurements to mark cutting lines with tailor’s chalk or a fabric marker. Ensure the fabric is properly aligned, especially if it has a pattern that must match up on different furniture parts. Carefully cut the fabric along your marked lines, using sharp fabric scissors for a clean edge.
- Attach Fabric to the Frame: Starting with the largest piece of fabric, align it on the furniture frame, ensuring patterns are straight and centered. Begin attaching the fabric at the center of each side, pulling it taut to avoid wrinkles or sagging. Use a staple gun to secure the fabric for wooden frames, placing staples about every 2 inches. You might need to use upholstery tacks or adhesives designed for metal or plastic frames.
- Work Around Corners and Curves: Handling corners and curves can be tricky. Fold and tuck the fabric neatly, making pleats if necessary, to maintain a smooth appearance. Secure these areas with additional staples or tacks, ensuring the fabric is tight and evenly distributed across the furniture’s contours.
- Sew Removable Covers: For chairs with removable cushions, creating new covers might be the best approach. Use the old covers as templates to cut your new fabric, leaving extra for seam allowances. Sew the pieces together, inside out, leaving an opening for the cushion to be inserted. Once the cover is sewn, turn it right side out, insert the cushion, and close the opening. Consider adding a zipper or Velcro for ease of removal and cleaning.
These steps ensure your new fabric is cut accurately and attached securely, giving your seating furniture a fresh look and a professional finish. This careful attention to detail will make your reupholstered piece a proud addition to your home decor.
Finishing Touches
Adding finishing touches to your reupholstered seating furniture is an important step that can significantly enhance its appearance and give it a unique, professional look. Here’s how you can incorporate these details into your project.
- Add Piping for Definition: Piping is a great way to define the edges of your seating furniture and add a polished touch. It can highlight the furniture’s shape and contrast or complement the main fabric. Choose a piping fabric that matches or contrasts your upholstery fabric for a cohesive look. You can make your own piping using cord and fabric strips or purchase pre-made piping. Attach it along the seams where the fabric panels meet, using a zipper foot on your sewing machine for precision.
- Attach Buttons for Style and Texture: Buttons can add style and texture to your seating furniture, creating a tufted, classic and elegant effect. Choose buttons that complement your fabric in terms of color and style. You can use a special needle and strong thread to attach the buttons, pulling them tight to create depth in the cushioning. This technique is particularly effective on seat backs and cushions, adding visual interest and enhancing comfort through the added padding.
- Use Decorative Tacks for a Classic Finish: Decorative tacks or nailhead trim can add a timeless or modern edge to your seating furniture, depending on your chosen style. They are perfect for outlining the furniture’s arms, back, or base, providing a neat, finished look. Space the tacks evenly and gently insert them into the frame using a rubber mallet to avoid damaging the fabric or the furniture itself.
- Consider Slipcovers for Versatility: For seating furniture that might need frequent cleaning or for those who like to change their decor seasonally, slipcovers are an excellent finishing touch. They allow you to easily update the look of your furniture without permanent changes. Choose durable, washable fabrics that are easy to remove and clean. Slipcovers can be custom-made to fit your furniture precisely, ensuring a sleek, fitted look that can be as formal or casual as you prefer.
These considerations enhance the aesthetic appeal of your seating furniture and add personal touches that reflect your style. Whether you opt for piping, buttons, decorative tacks, or slipcovers, these details can transform your seating furniture into a standout piece that complements your home’s decor and showcases your upholstery skills.
Reupholstering seating furniture is a rewarding DIY project that can transform the look and feel of your space. With the right materials, tools, and a bit of patience, you can create beautiful, custom seating furniture that reflects your style and meets your comfort needs.
Conclusion
Upcycling an old bookshelf into seating furniture is a sustainable way to repurpose unused items and an opportunity to add a unique and personal touch to your home decor. Following these steps, you can transform a simple bookshelf into a functional and stylish piece of furniture. This project showcases the power of DIY in creating something beautiful and practical, encouraging creativity and customization.
For more fun recycling projects for your old furniture, check out our Play Kitchen guide next!