Batteries! It seems that half the things in the average home need a battery! Remotes, flashlights, cameras, smoke alarms and the mouse in your hand right now :) How do you store your batteries? If you answered ‘in a drawer’, then this DIY storage project might interest you!
There are many battery organizers available in stores and online, but this homemade battery dispenser is another great option that you can make using a few timber off-cuts!
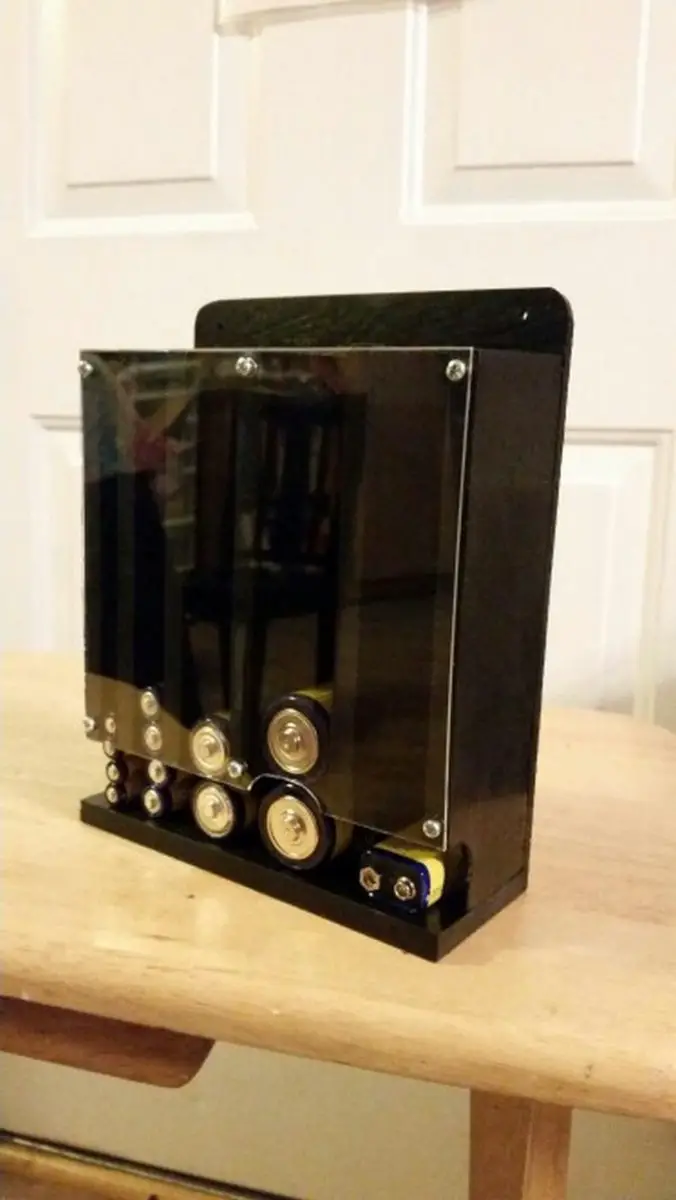
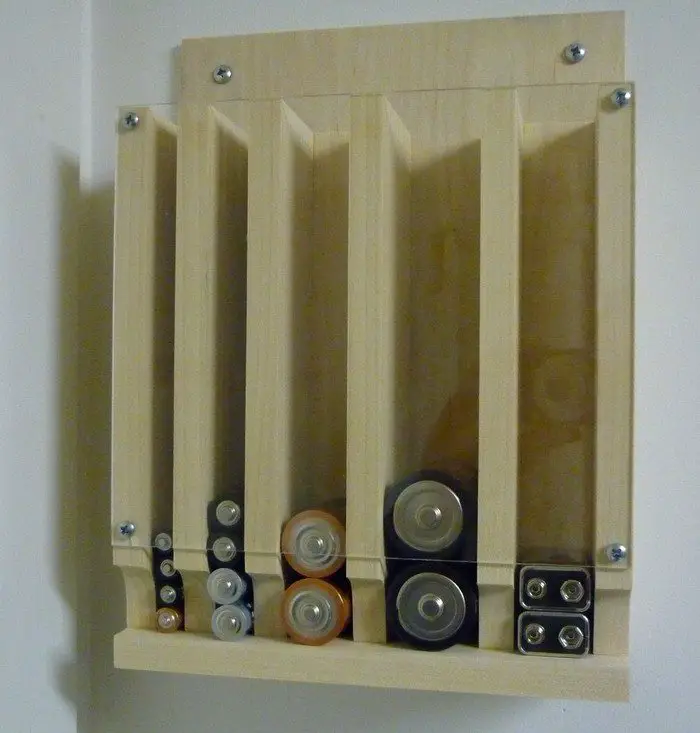
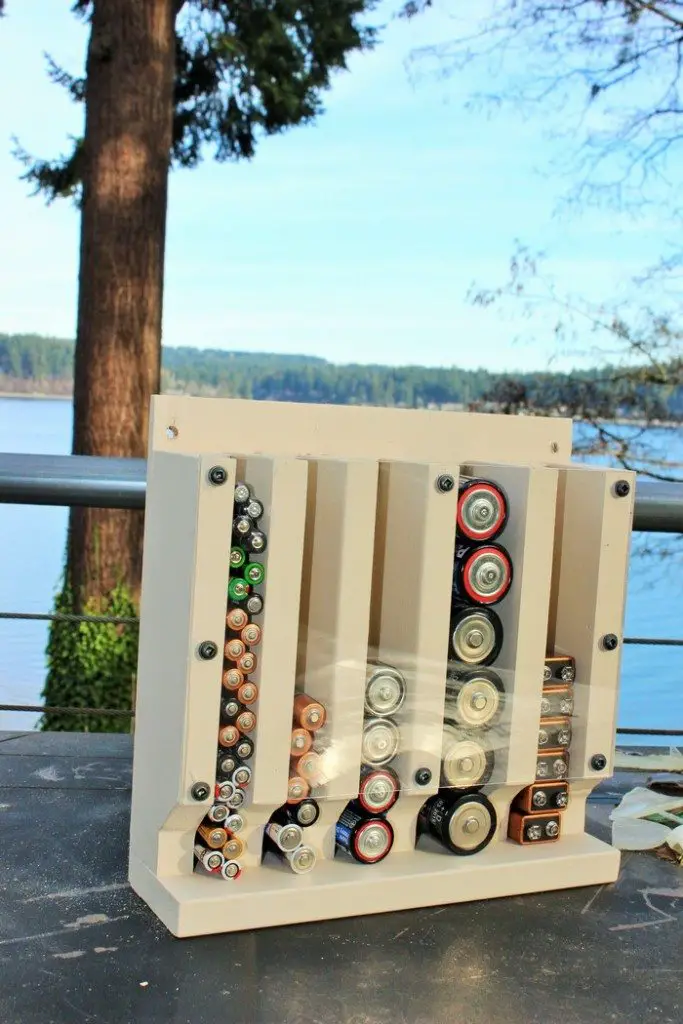
This drop down battery dispenser is one of the better ways of organizing your supply as it uses the first in first out method. With this system you can make sure you get the oldest, unused battery (the ones nearing expiry) in your stock first without rummaging. Plus, you can easily see which type of batteries need replenishing. It’s certainly a lot simpler and more efficient than batteries all jumbled together in a drawer.
Depending on how much batteries you need to keep at home, you can make your own battery dispenser a little taller or shorter than what is indicated in the plan provided below.
This DIY drop down battery organizer can really come in handy for people who frequently use battery-operated tools and equipment like DIY-ers or photographers!
Do you know anyone who needs this battery dispenser? Why not make one as a gift for them? :)
Learn how by following our guide or watching the video below!
Contents
Building a Drop Down Battery Dispenser
Materials
- 1/2″ thick Wood
- 1/4″ thick Hardboard / Plywood
- Clear Acrylic Sheet
- Wood Screw
- Wood Glue
Tools
- Table Saw
- Wood Clamps
- Hole Saw
- Drill
- Ruler and Marker
Instructions
Step 1: Design and Planning
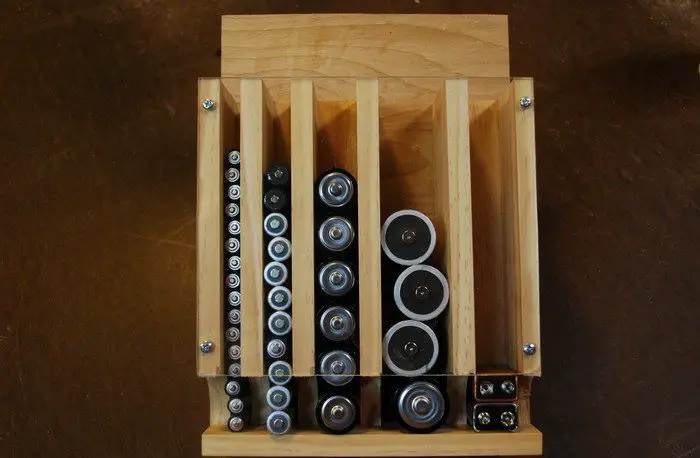
- Measure and plan the size of your battery dispenser based on the types and quantities of batteries you need to store. For example, you might design compartments for AA, AAA, C, and D batteries.
- Sketch out the design on paper, including dimensions for each part.
Step 2: Cutting the Wood
- Using the table saw, cut the 1/2″ thick wood to create the sides, top, and bottom of the dispenser. Ensure that all pieces are cut to the precise measurements from your design.
- Cut the 1/4″ thick hardboard/plywood for the back panel of the dispenser.
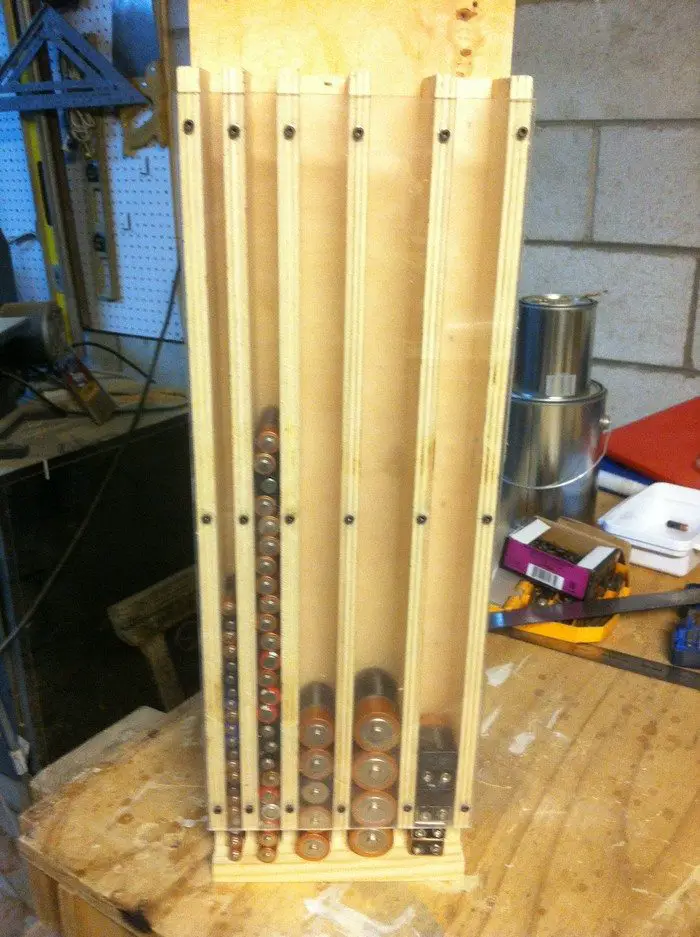
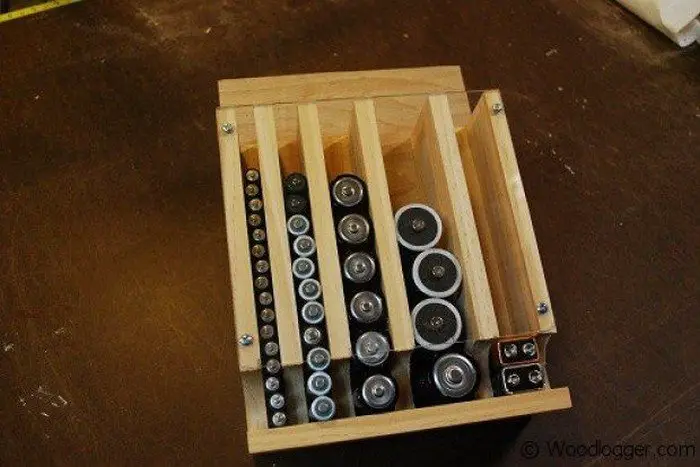
Step 3: Preparing the Dispensing Slots
- Decide on the size and placement of the dispensing slots. Consider each battery type. Mark these on the front piece of wood using the ruler and marker.
- Using the hole saw attached to the drill, create an entry point for each slot. Then, use the table saw or a jigsaw to cut out the rest of each slot.
Step 4: Assembling the Frame
- Apply wood glue to the edges of the sides, top, and bottom pieces. Assemble these parts to form the outer frame of the dispenser.
- Clamp the frame together using wood clamps and allow the glue to dry according to the glue package instructions.
Step 5: Attaching the Back Panel
- Once the frame is dry, apply wood glue to the edges of the cut hardboard/plywood back panel.
- Attach it to the frame, ensuring it is flush and secure. Screw in wood screws for additional stability.
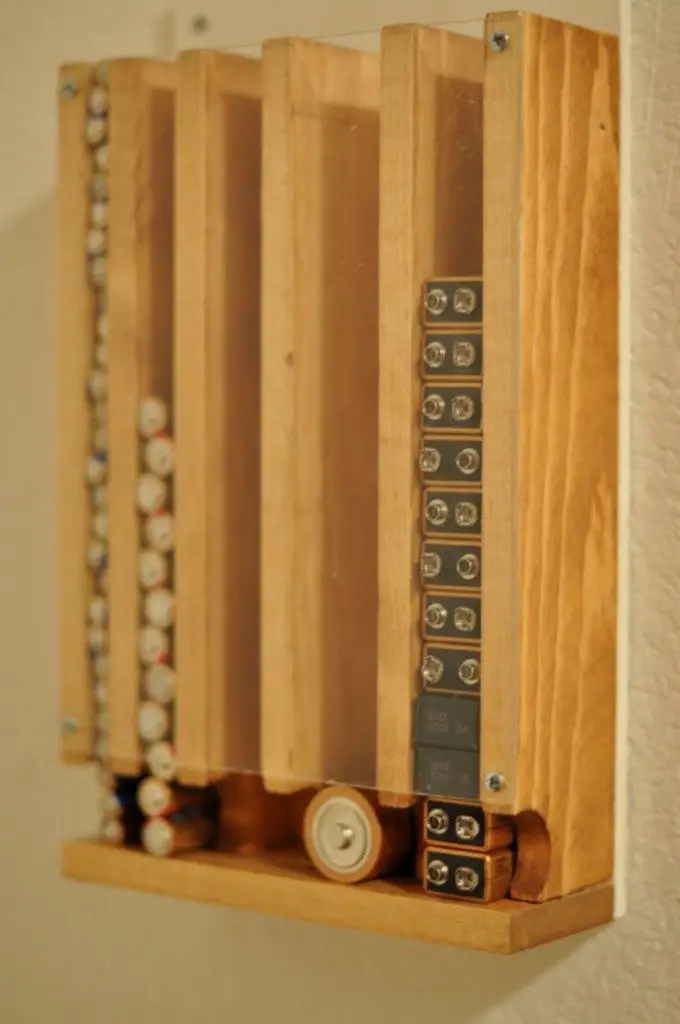
Step 6: Adding the Clear Acrylic Front
- Cut the clear acrylic sheet to fit the front opening of your dispenser. This allows you to see the batteries and easily monitor when stocks are low.
- Attach the acrylic sheet using small wood screws placed at the corners. Pre-drill holes to prevent cracking the acrylic.
Step 7: Sanding and Finishing
- Sand all external surfaces of the wood to smooth out any rough edges and improve the appearance. Pay particular attention to the edges around the dispensing slots.
- You can finish the wood with a sealant, paint, or stain. Allow it to dry completely.
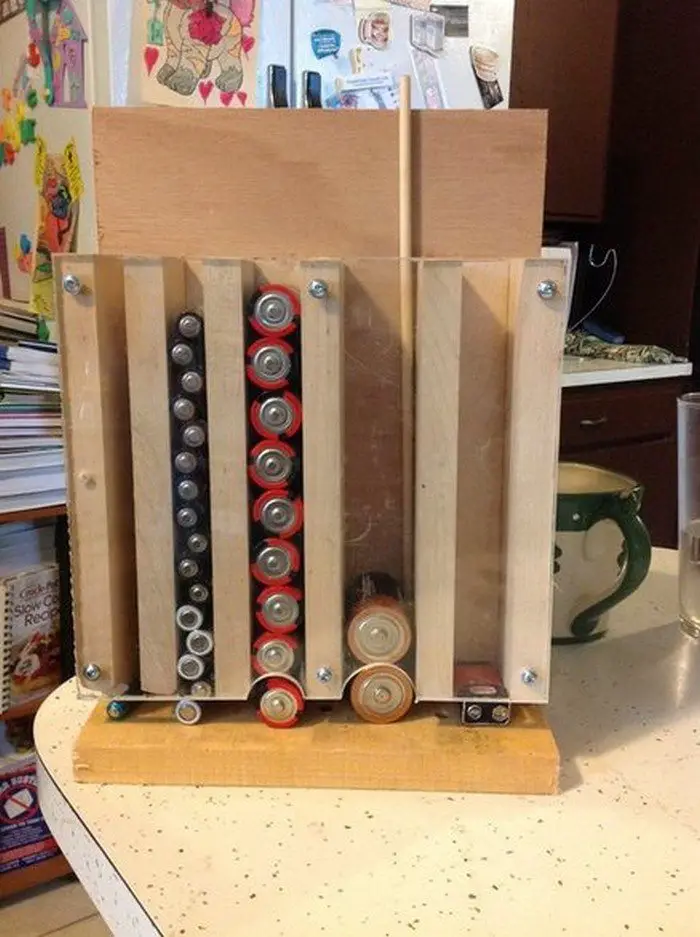
Step 8: Testing and Adjustments
- Test the dispenser by loading batteries into each slot. Make sure they dispense correctly and make any necessary adjustments to the slots or acrylic front.
Click on any image to start lightbox display. Use your Esc key to close the lightbox.![]()

You can watch the step-by-step tutorial from Fun With Woodworking here for a visual guide:
Alternative Materials and Design Variations
When crafting a drop down battery dispenser, the choice of materials and design can significantly affect both functionality and aesthetics. Whether you’re looking for a more eco-friendly option, aiming for a different style, or working within budget constraints, exploring alternative materials and design variations can help customize your dispenser to better suit your needs and preferences.
Alternative Materials
Recycled Materials
Using recycled materials not only supports environmental sustainability but also adds a unique touch to your drop down battery dispenser. Consider materials like reclaimed wood, old metal sheets, or upcycled plastic containers. Each of these can be repurposed to form various parts of the dispenser, giving it a rustic or industrial look.
Metal
For a more durable and sleek design, you can substitute wood with metal. Aluminum or sheet metal can be cut and assembled using similar methods as wood but may require welding or riveting instead of using wood glue and screws. A metal drop down battery dispenser is especially suitable for garage or workshop environments where it may be exposed to harsher conditions.
Acrylic
Instead of using wood for the entire structure, consider constructing the frame or certain components from clear or colored acrylic. This material can not only modernize the appearance of your drop down battery dispenser but also provide a clearer view of the batteries inside, ensuring that they are easily identifiable at a glance.
Design Variations
Modular Design
Create a modular drop down battery dispenser that can be expanded or reconfigured as your needs change. This design involves creating individual modules for different battery sizes that can be stacked or aligned side by side. It’s a flexible solution that allows you to add more sections as your battery collection grows.
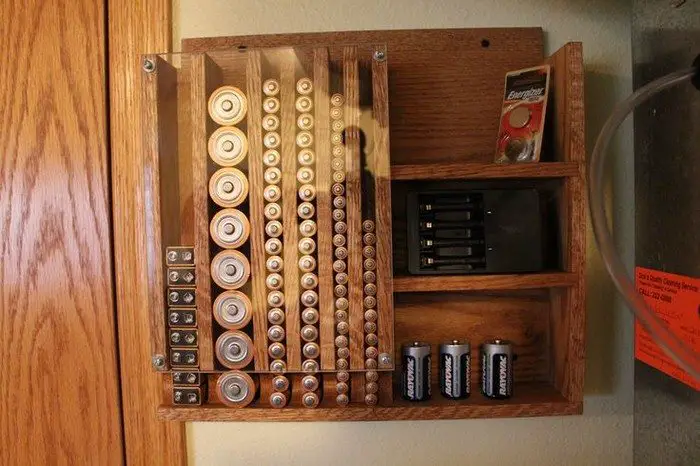
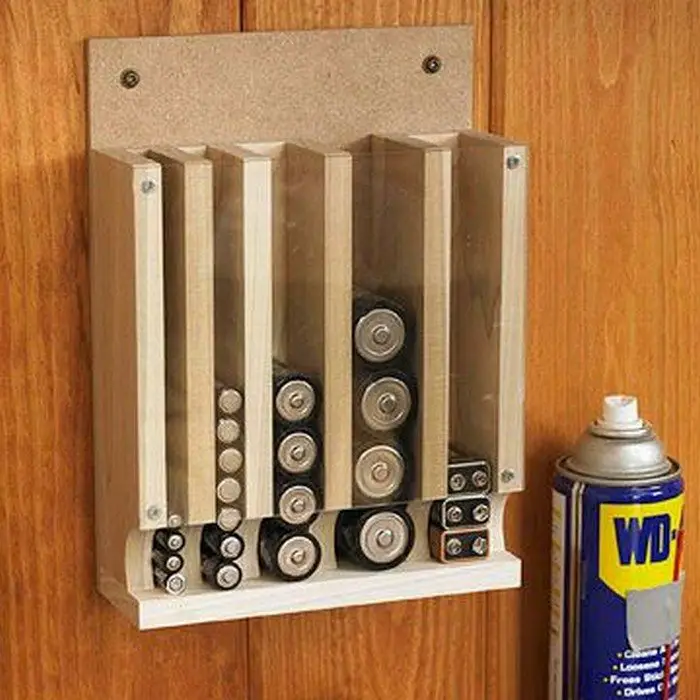
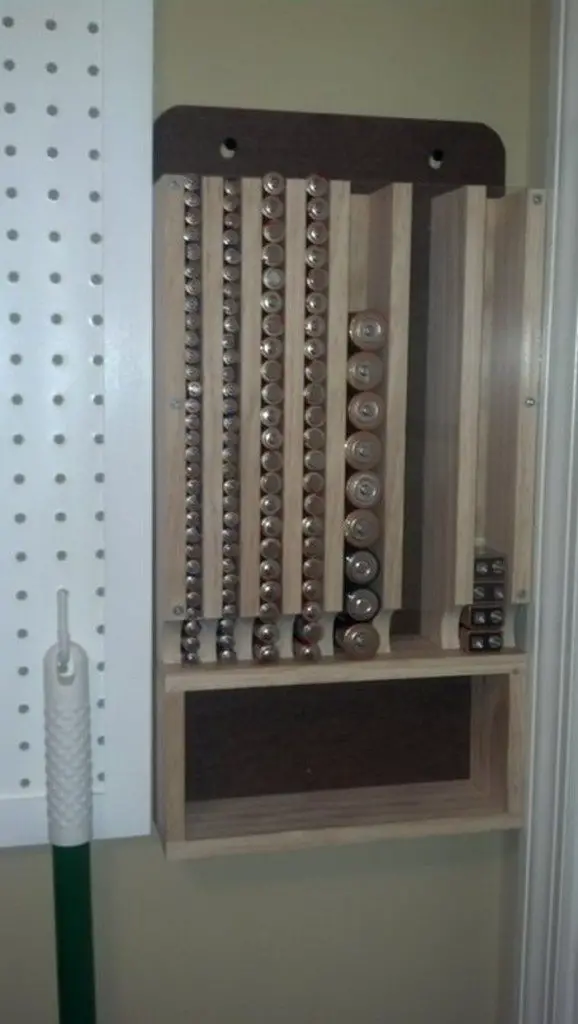
Wall-Mounted Dispenser
To save counter or drawer space, design the drop down battery dispenser to be wall-mounted. This variation can be particularly useful in small spaces or workshops. Ensure that the back panel is reinforced for secure mounting and consider adding a hinged front panel for easy refilling.
Decorative Elements
Add decorative elements to personalize the drop down battery dispenser. This could include using stained glass, intricate carvings, or colorful tiles as part of the design. These elements not only enhance the visual appeal but also make the dispenser a decorative piece in your home or office.
Compact Design
For those who require a more space-efficient solution, designing a compact drop down battery dispenser that focuses on utilizing minimal space can be ideal. This design prioritizes a smaller footprint, possibly with a taller and narrower structure, perfect for tight spaces.
Exploring these alternative materials and design variations allows you to customize your drop down battery dispenser to better match your style, functionality needs, and environmental considerations. Each option offers a way to make the practical necessity of battery storage into an enjoyable DIY project that complements your space.
Battery Safety and Storage Tips
Storing batteries safely is crucial to extend their life and prevent accidents, especially when using a DIY solution like a drop down battery dispenser. Proper storage not only ensures the longevity and performance of the batteries but also protects your home and electronic devices from potential hazards.
Here are some safety tips and best practices for storing batteries in your drop down battery dispenser.
Keep Batteries at Room Temperature
Store your batteries in the drop down battery dispenser at room temperature, away from extreme temperatures. High heat can lead to battery leakage or even explosions, while cold conditions can diminish battery performance.
Prevent Contact with Metal Objects
Ensure that the compartments within the drop down battery dispenser prevent the batteries from coming into contact with metal objects like coins, keys, or other batteries. Metal contact can cause short-circuits, leading to overheating or leakage.
Orientation Matters
Place batteries in the drop down battery dispenser with their positive and negative ends properly aligned according to the dispenser’s design. This prevents accidental discharges and short circuits.
Alkaline and Lithium Batteries
For alkaline and lithium batteries, ensure that the drop down battery dispenser keeps them separated by type and size. Mixing different types can lead to chemical interactions, resulting in leakage or rupture.
Rechargeable Batteries
Store rechargeable batteries like NiMH or Li-ion in a partially charged state in your drop down battery dispenser. It’s advisable to charge them up to about 50% if they won’t be used for an extended period. This helps maintain their health and efficiency.
Individual Compartments
Design the drop down battery dispenser with individual compartments for each battery. This isolation helps prevent the terminals from touching each other or anything that could cause a short circuit.
Clear Labeling
Clearly label each compartment of the drop down battery dispenser according to battery size and type. This not only aids in organization but also ensures that incompatible batteries are not mixed together.
Easy Access and Inspection
Ensure that the drop down battery dispenser allows for easy access and visibility so you can regularly inspect the batteries for any signs of damage or leakage. Quick identification and removal of compromised batteries are essential for safety.
Check and Replace Regularly
Regularly check the batteries in your drop down battery dispenser for signs of corrosion or swelling. Replace any batteries that show these signs immediately to avoid damaging the dispenser or other batteries.
Clean the Contacts
Occasionally clean the contacts and compartments of your drop down battery dispenser. A clean, dry cloth can wipe away any dust or debris that might affect the performance or safety of the batteries stored within.
By following these tips, you can ensure that your drop down battery dispenser not only serves as a functional organizational tool but also as a safe storage solution that protects your batteries and your home.
Conclusion
Building your own drop down battery dispenser offers a practical and customizable solution for organizing and accessing various types of batteries easily. With the right materials and tools, you can create a dispenser that not only enhances efficiency but also adds a personal touch to your space. Follow the provided safety tips and maintenance advice to ensure your dispenser remains a durable and reliable part of your home or workshop.
We have other creative dispensers. Check out our beverage dispenser project!


