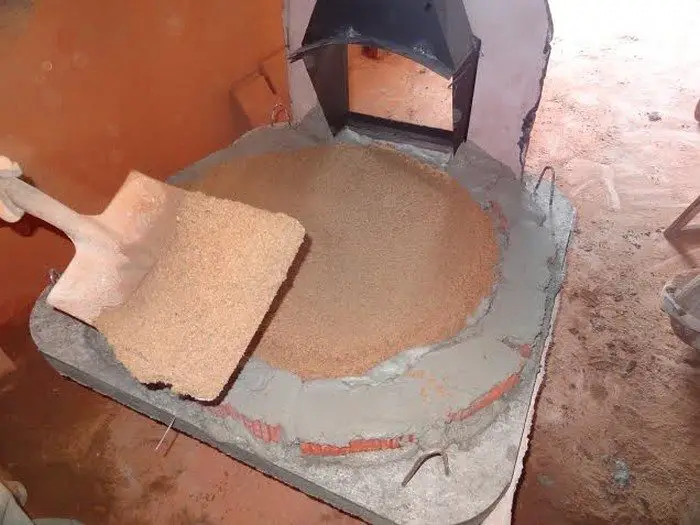
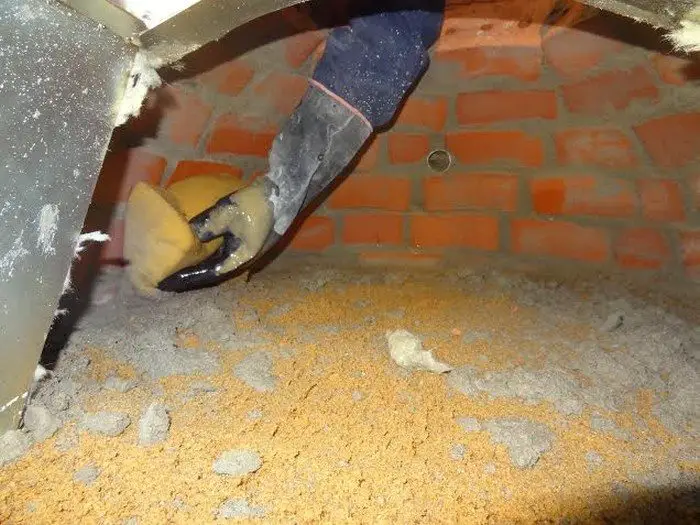
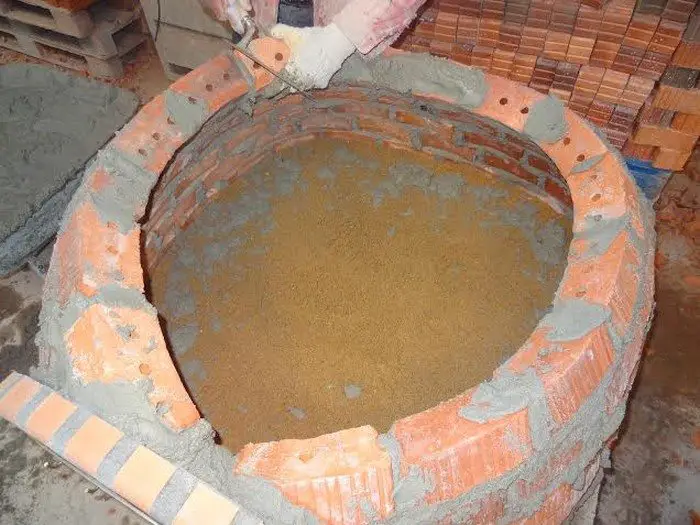
This is not yet your cooking surface! Cover the whole thing with cement. Once it hardens spray a layer of sand on top of this new raised surface. Now, the next layer will be the actual cooking floor. Here you have options. In Portugal what they use the most is terracotta tiles. In the States it’s firebrick. Firebricks are available in 12x12x1 size which would be great in this case. You will certainly need to cut the tiles or the bricks to make everything fit. If the surface is not 100% level use sand under the floor to level it out.
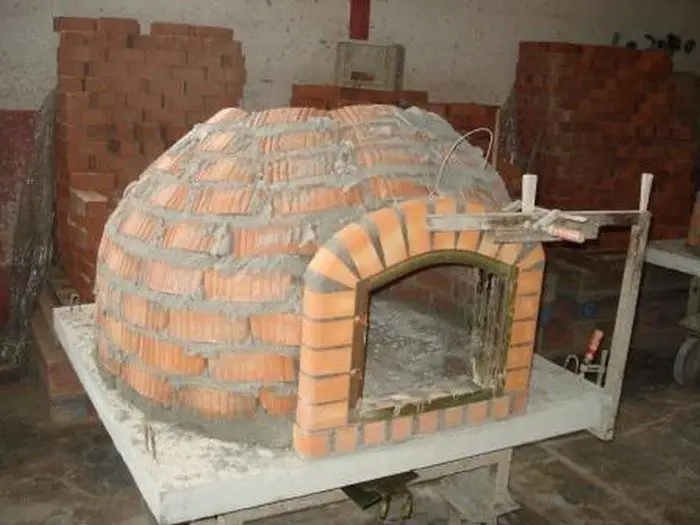
The dome: This is the main part. Making a non-fragmented perfectly spherical dome is tricky. And to make matters worse there are no common tools which allow to keep the dome spherical. This is where the rounded bricks come in – if you have access to them they will make the job easier.
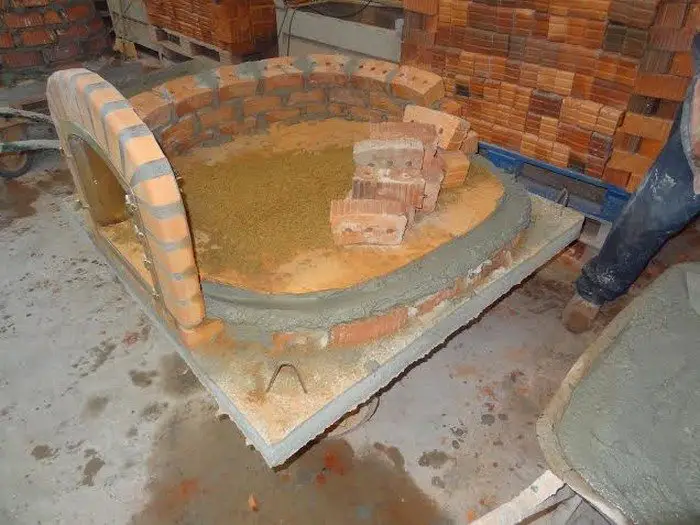
Please disregard the arch for now, we will concentrate on this in next step.
When you build the dome go clockwise. Don’t jump from one spot to another skipping a brick in between! This is the best way to ensure a uniform dome.
Now, the cement you should use here is not Portland – this should be refractory cement.
Don’t forget to wipe off extra cement all the time – especially from the inside of the oven, otherwise it will harden there and will be a lot more difficult to remove once the dome is complete.
If you have watched the video you probably saw that after each layer of the dome is completed there is a wire place on top of it. This is a great practice to reinforce the dome.
If you are using bricks with holes in the middle (as the ones in our pictures) fill up the holes with cement.
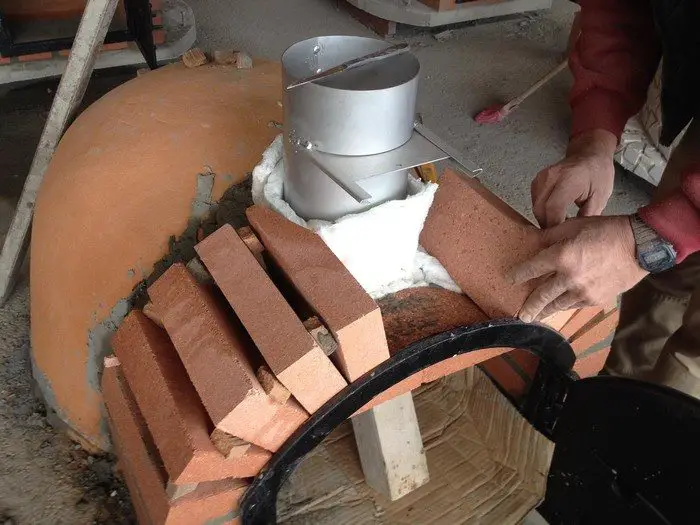
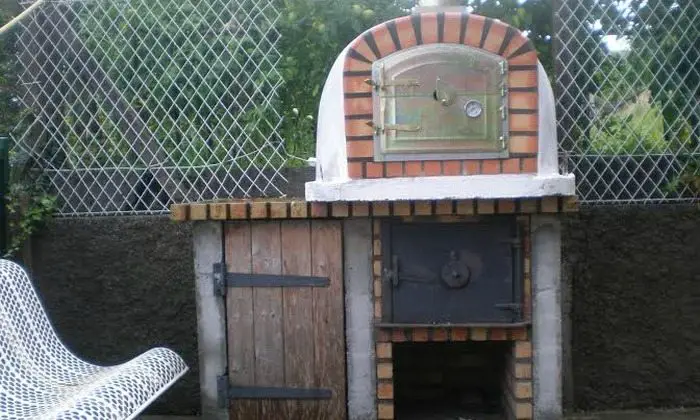
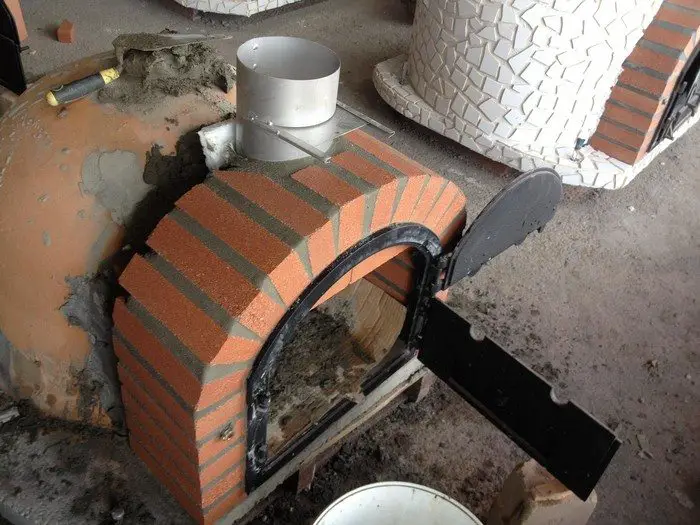
The arch: Your oven will need to have a chimney. To add the chimney you will need a structure in front of the oven – called “the landing area” – basically the arch. Pizza oven kits usually already come with one but if you are building an oven from scratch you will need to build this too. Basically this means making a brick stack in front of the door opening of the oven.
The arch is just a stack of bricks. You can build it on the floor – horizontally – and then just lift it and cement it to the oven, this is easier.
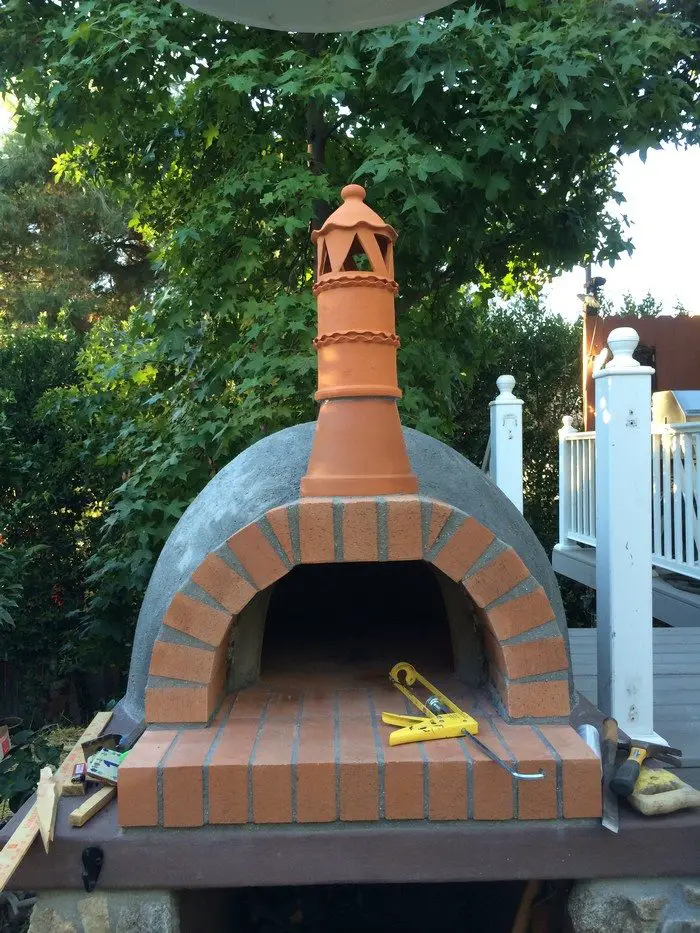
Later we will add a chimney to the top of the arch – you can leave the arch unfinished in the middle (3 bricks missing) and later use this area for the chimney.
Continued Page 3…


