Contents
Step 1: Building your oven base

As with any construction, your base (or foundation) is the most significant element. Ensure your stacks are on firm ground and that they are level or your oven will not be! The centre column of blocks is needed to ensure there is no sag in your oven floor.
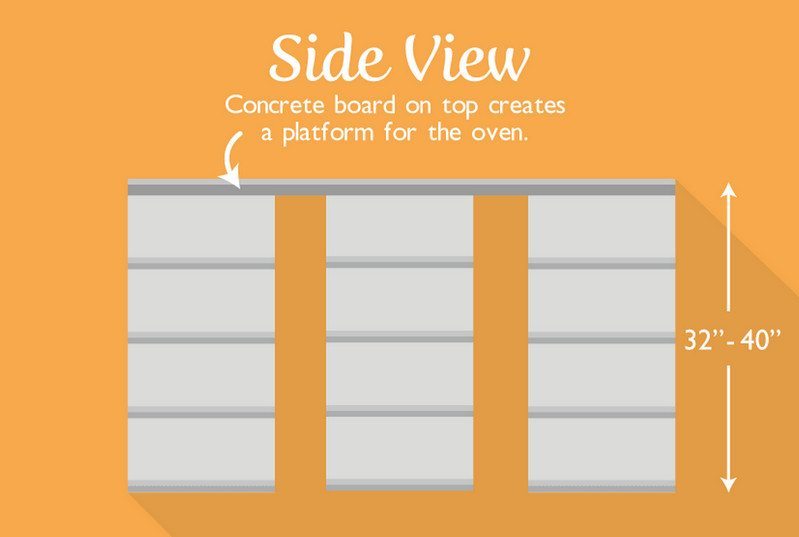
Your chosen height will be dependent on both your block size and also personal preference. Being tall, I like a working surface of 90 – 95 centimetres.
Step 2: Crafting the cooking base
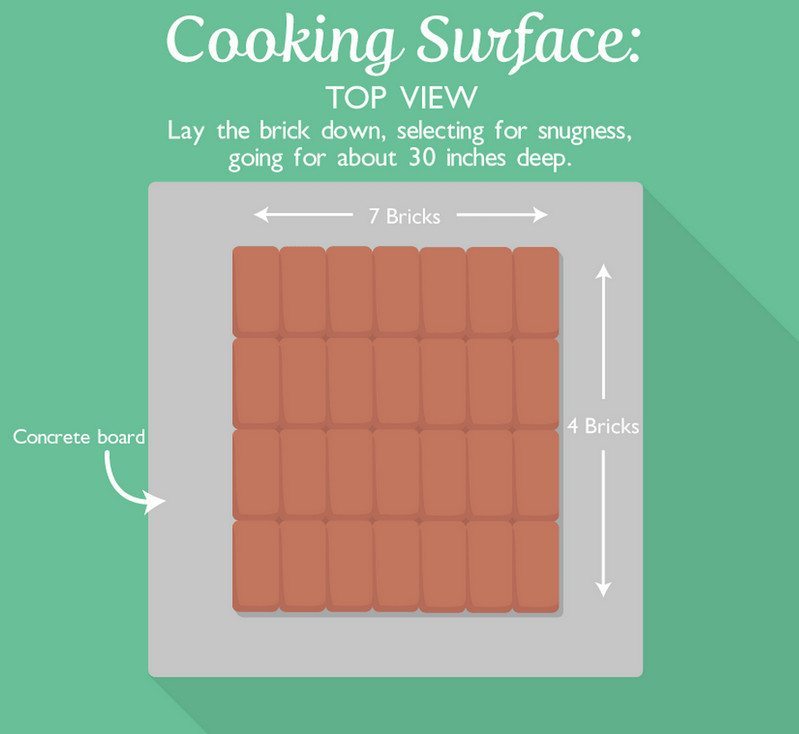
This layer of bricks allows air to circulate beneath the flames and also is essential in building and retaining the heat needed for great pizza and bread.
Step 3: Constructing the oven walls
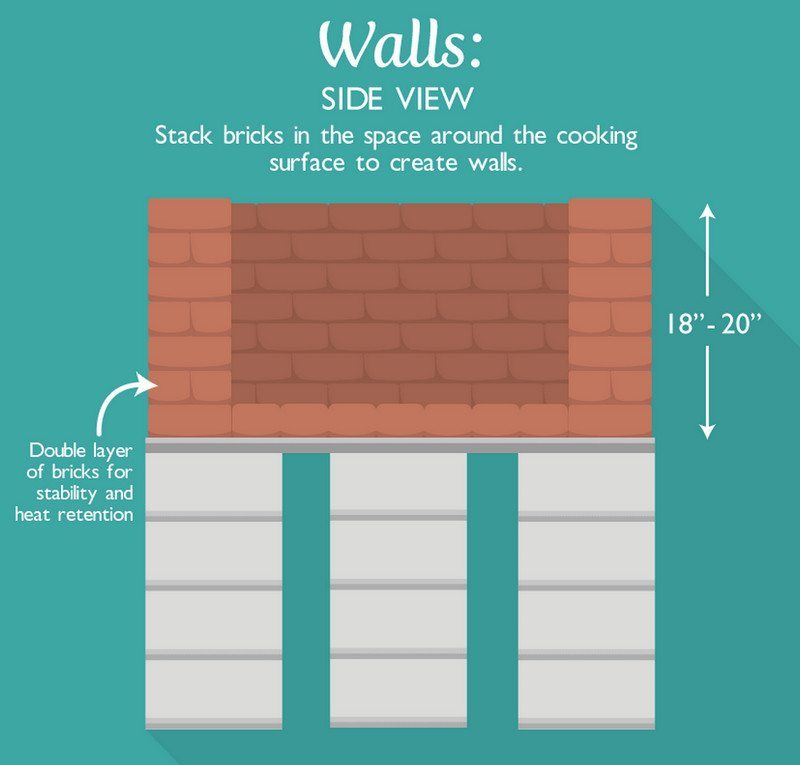
Ensure you use a running bond pattern for your bricks or your walls will lack stability. The double layer is also a stability factor as well as being a much better retainer of heat.
Step 4: Adding the dry-stacked brick roof
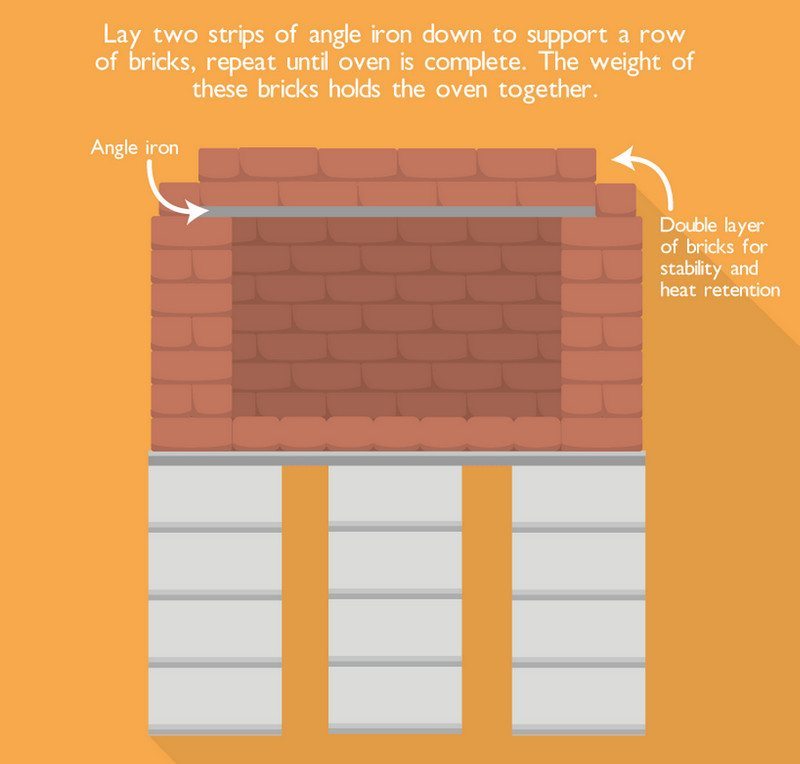
Your oven will not heat up if you can’t retain the heat. Since heat rises, you need sufficient mass above the flames to trap and keep the heat in. That mass is heavy, hence the need to use angle iron to support each layer of bricks.
Step 5: Finding your favourite pizza and bread recipes and start cooking!
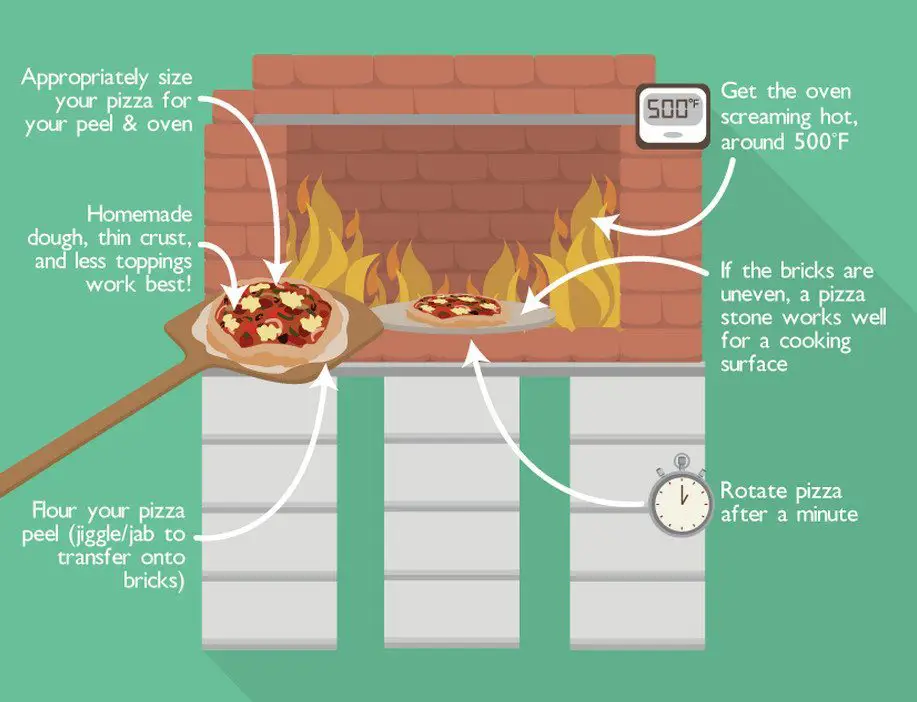
A quick search is going to find lots of great recipes you can cook in a wood-fired pizza oven. Breads and pizza are just the start. Try roasting your vegetables and meats in an oven like this and you’ll be hooked! Check out a few of the recipe ideas in our food blog called Food, glorious food!
Because there is no thermostat to regulate the heat in your new pizza oven, expect to go through an initial ‘trial and error’ period until you work out the right combination of time and heat. It won’t take long and then you have years of gastronomic enjoyment ahead of you :)
Thanks to our friends at Fix.Com for allowing us to share this great project.
Paul Corsetti is a landscape designer and design consultant. Paul holds a Bachelor’s Degree in Architectural Science, a diploma in Landscape Architecture, and years of experience in the landscape construction field. He is an avid gardener and outdoor enthusiast and believes keeping close to nature will sharpen his skills as a designer.
Extra Tips
Here are some extra tips to enhance your journey in building your own delightful wood-fired pizza oven:
1. Choose the Right Location: Be sure to carefully choose an area for your wood-fired pizza oven that is not only easily accessible but also sheltered from strong winds and rain.
Make sure there is sufficient space around the oven for ease of movement. Additionally, think about the overall ambience you want to create. Placing the wood-fired pizza oven near a cozy seating area or a dining table can enhance the overall experience, fostering a welcoming and convivial atmosphere that also encourages people to gather and enjoy each other’s company.
2. Insulate for Optimal Performance: To ensure your wood-fired pizza oven retains heat effectively and cooks pizzas to perfection, proper insulation is key. Consider using high-quality insulating materials, such as ceramic fibre blankets or perlite, to line the oven dome and base.
This will help to maintain a consistent and high cooking temperature, allowing you to bake delicious pizzas with that sought-after crispy crust. The consistency in temperature ensures even and thorough cooking, resulting in perfectly baked pizzas that dazzle the palate with their ideal balance of texture and flavour.
3. Experiment With Different Wood Types: The choice of wood for fueling your wood-fired pizza oven can significantly affect the flavours of your pizzas. While hardwoods like oak, maple, and hickory are excellent options, don’t hesitate to experiment with fruitwoods like apple or cherry for a unique smoky essence.
Each type of wood adds its distinct character to the pizzas, so have fun exploring different wood combinations.
4. Master the Art of Temperature Control: Achieving and maintaining the right temperature inside the oven is significant for successful pizza making. Consider investing in a reliable infrared thermometer to monitor the heat and familiarize yourself with various heat zones within the oven.
Learning to control the temperature will allow you to adapt your cooking techniques and craft a variety of dishes beyond pizzas, such as roasted vegetables, meats, and even desserts.
5. Use Quality Pizza Stones or Baking Surfaces: To achieve that coveted crispy crust, invest in high-quality pizza stones or baking surfaces. These materials help distribute heat evenly and absorb excess moisture, resulting in perfectly baked pizzas every time.
Pizza stones are crafted from natural materials like ceramic or cordierite, known for their exceptional ability to retain and evenly distribute heat. In addition to heat distribution, they have another vital role – moisture absorption. They quickly absorb excess moisture, leaving you with a delectably textured crust that enhances the overall pizza experience.
6. Clean and Maintain Regularly: Proper maintenance will extend the lifespan of your wood-fired pizza oven and ensure consistent cooking results. After each use, remember to clean the oven’s interior.
Regularly inspect and repair any cracks in the oven’s structure, and cover it when not in use to protect it from the elements.
With these extra tips, your wood-fired pizza oven adventure will become even more enjoyable and rewarding.
From Backyard Dreams to Wood-Fired Delights
Discover the art of creating your own delightful wood-fired pizza oven in just four simple steps! From handpicking materials for optimal performance to constructing the walls and bricks, you’ll find the process remarkably straightforward.
Also, this journey offers additional tips, such as experimenting with various wood types and mastering temperature control, which are certain to spark your passion for culinary exploration.
Embrace the joy of crafting artisanal pizzas with crispy crusts and savour the delightful flavours that only a wood-fired oven can deliver. Unleash your creativity with diverse toppings and create cherished memories around the warm glow of your backyard oasis.
Building your wood-fired pizza oven is not just about cooking, but an extraordinary experience that will leave a lasting impression on your taste buds and those of your loved ones.
Ready to embark on this delicious adventure and elevate your cooking game to a whole new level?


