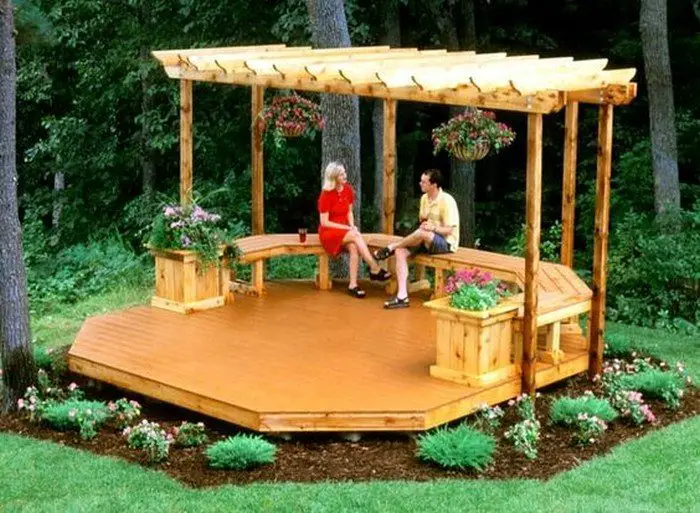
Whether you need an extra space for entertaining, or a place to relax and enjoy the outdoor, an octagonal deck is one of the best options you have.
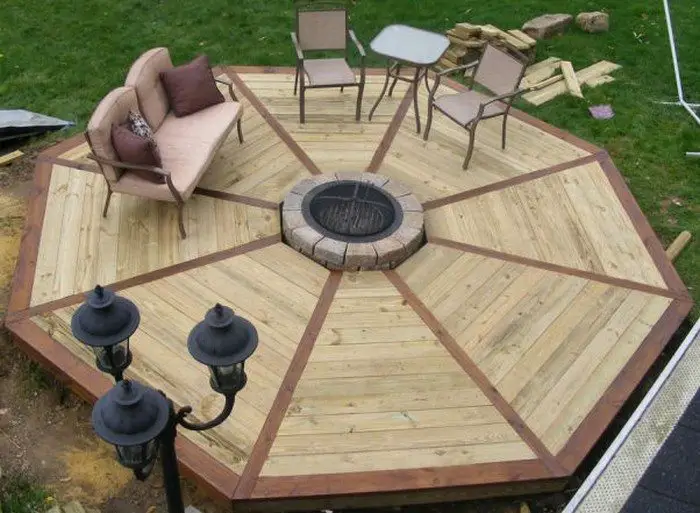
A deck is your own personal oasis. It’s a perfect place for relaxation and a space that allows you to escape from your worldly troubles. It can be the best place to host parties, entertain guests, or simply enjoy some sun or the cool breeze.
Why an Octagonal Deck is the Ultimate Outdoor Upgrade?
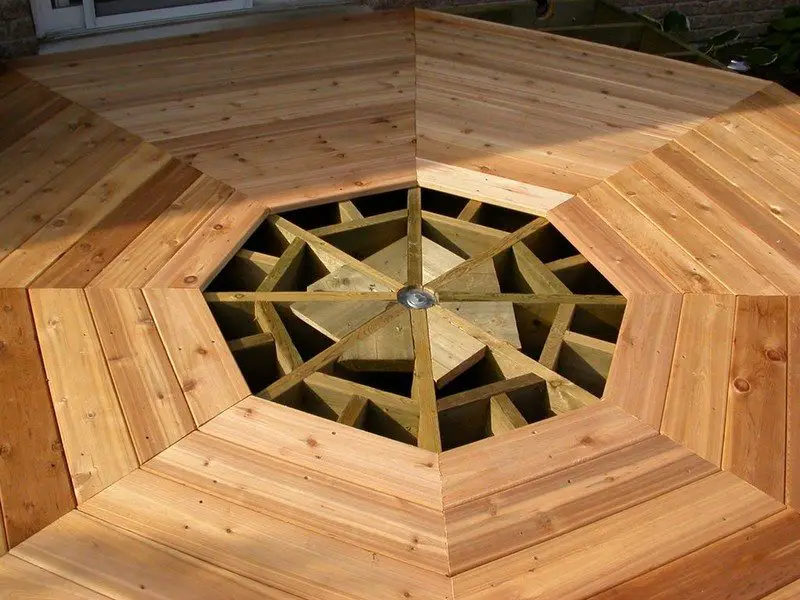
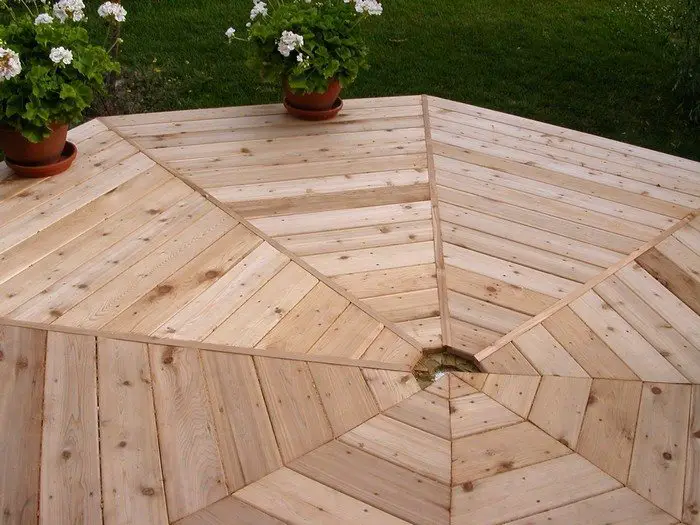
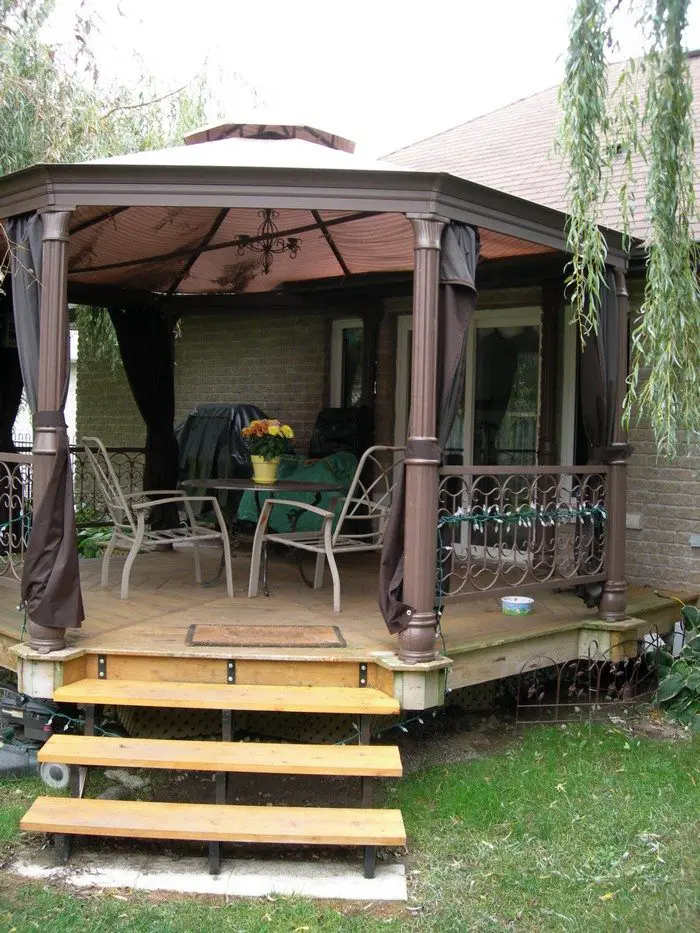
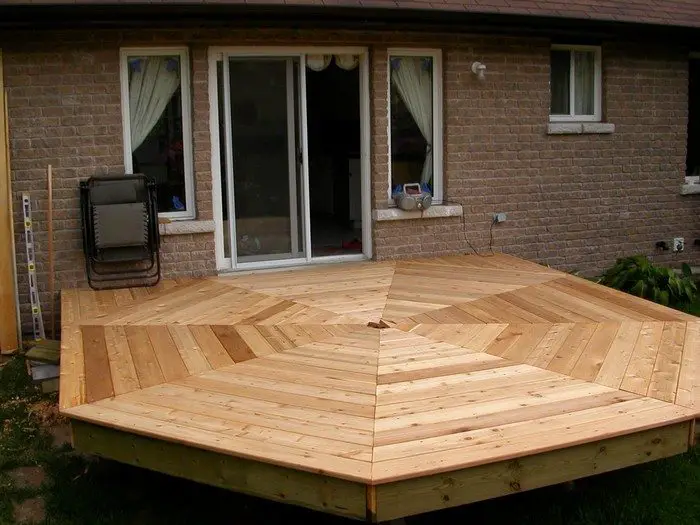
This 12-foot octagon deck design is a perfect example and its unique octagonal shape sets it apart from conventional decks. It’s owner-built and cost about $1500 Canadian, excluding tax and maintenance.
Could you use one of these in your backyard? Definitely! This is one of the best DIY projects to boost your house’ curb appeal.
Click on any image to start lightbox display. Use your Esc key to close the lightbox.

Building an Octagonal Deck
Thinking about sprucing up your backyard? An octagonal deck might just be the game-changer you’re looking for. It’s got this cool shape that stands out, plus it’s super versatile—perfect for hosting BBQs, relaxing with a book, or just soaking up the vibes.
Let’s dive into why this unique deck style could be the outdoor upgrade you didn’t know you needed!
Materials for your Octagonal Deck
- 2x8x14’ Pressure Treated Lumber
- 2x8x8’ Pressure Treated Lumber
- 4x4x8 Pressure Treated Lumber
- 1-1/4x6x8 Cedar Decking
- Cement Mix
- 10” x 8’ Sona Tube
- 6” x 4’ Sona Tube
- Sona Tube Saddles
- 4” Bolts, Nuts, Washers
- Screws
- Joist Hangers
- Wall Anchors
- Cabot Deck Coating
- Wood Glue
Tools:
- Hammer
- Clam Shell Shovel or Post Hole Auger
- Cordless Drill
- Hand Circular Saw
- Shovel
- Wheelbarrow
- Stringline
- Chalk
Steps:
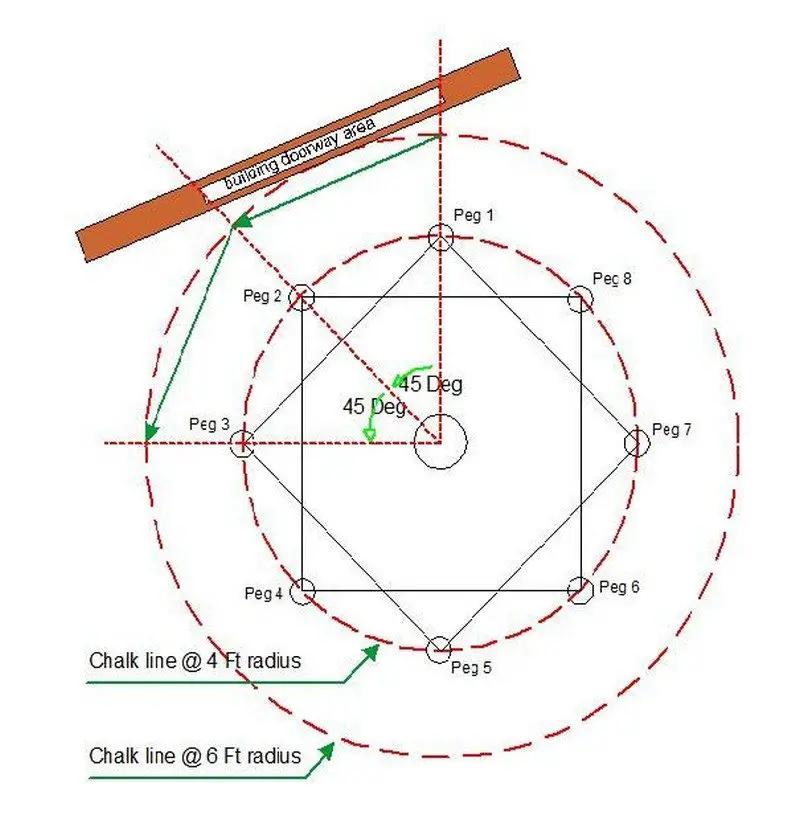
Chalk out the octagonal deck: This is a 12 ft diameter cantilevered deck, with poured concrete piers. What follows assumes you will want to attach the octagonal deck to the house.
Find a spot 6 feet from the edge of your house (plus an allowance for a ledger board) more or less centred on the house entrance. Mark this spot as the central support column of the deck. Drive a peg in it.
Attach your string to this peg and, draw a chalk circle of radius 6 feet and a second circle of 4 feet. Start marking the position of each of the 8 support post. String a line to the right edge of your door and driving a peg at the intersection of this line and the 4 foot circle.
Carefully counterclockwise rotate the string 45 degrees. Strike this second chalk line and hope the subtended angle covers the door entrance. If it does, drive a peg at the 4 foot intersect.
If it doesn’t, fiddle with these two lines so that the 45-degree arc is centred on the door frame. After these first 2 pegs are in, progress around the circle until all post holes are pegged.
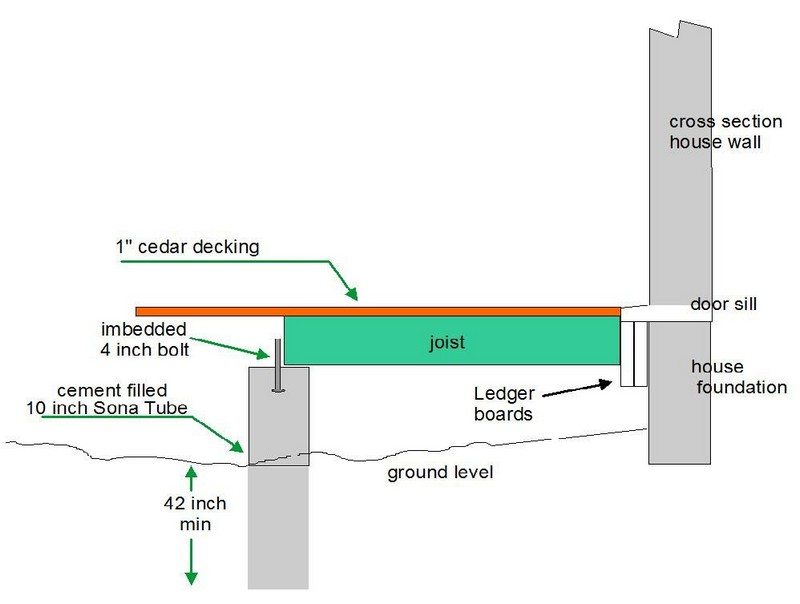
The centre post: At the centre post peg, dig a hole to below frost level. In my county that means a minimum of 42 inches. Use a length of 10 inch Sona tube in this hole.
Before pouring the concrete, mark the height of the pour by marking the periphery of the Sona tube at a point of the joist width and octagonal deck plank thickness, below the level of your house doorway.
Cut the Sona tube at this height, mix the concrete and pour to the top. Imbed a 4-inch carriage bolt in the centre. I used a 3/4 inch bolt. I didn’t use rebar, but you may want to.
Now dig a hole for each of the 8 outer posts using a 6 inch Sona tube below frost level and about 3 inches above ground.
Now don’t pour until you review the next step, when you will imbed saddles in the 8 posts.
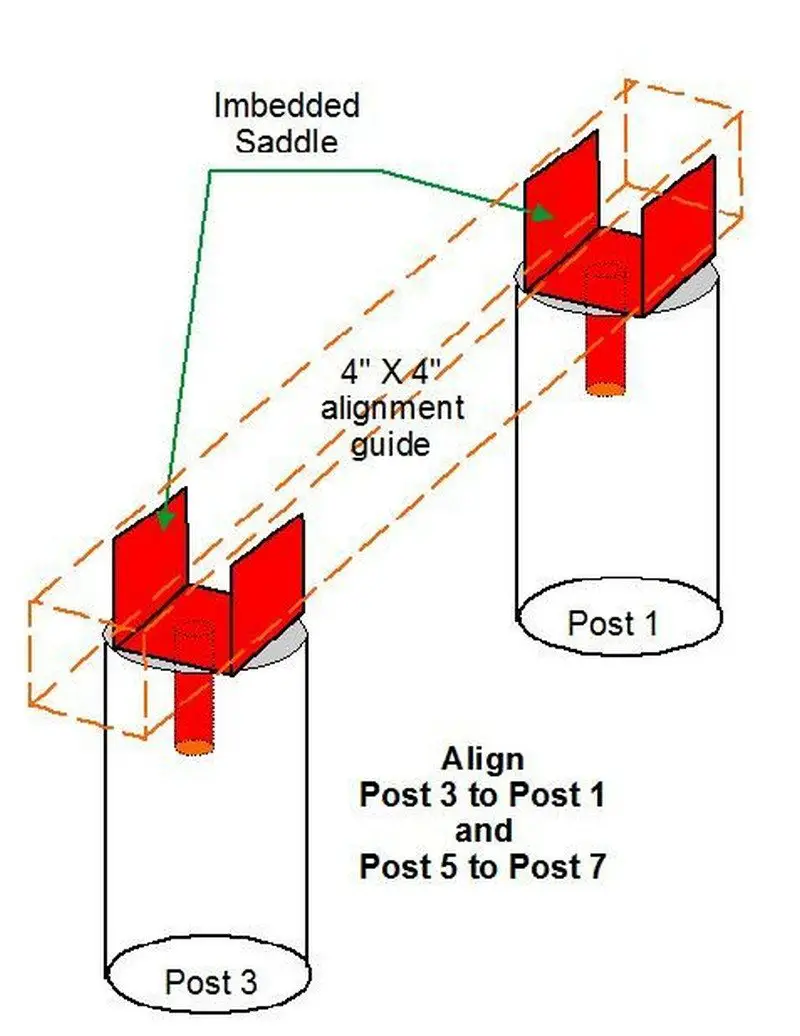
Aligning the post saddles: Refer to the first diagram. When imbedding the saddles into the outer 8 post pours, imbed the saddles in post 1 and post 3 to align with the rectangle shown in the first diagram.
Continue on to the next with post 5 and 7 following the same rectangle. I call these the ODD numbered posts. The EVEN numbered posts are poured and the saddles aligned again using the second diagram as a guide.
Align posts 2 and 8 saddles, followed by posts 4 and 6. The reason for this sequence will become clear in the next couple of steps.
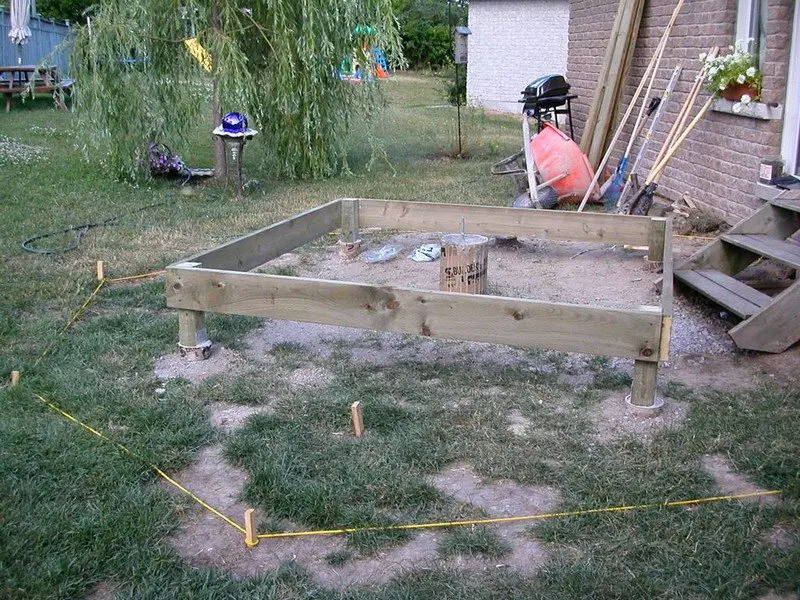
Starting octagonal deck foundation: With the concrete firm, use 3 inch octagonal deck or brass screws to fasten a pressure treated 4″x 4″ upright in each of the 8 saddles.
These uprights are marked and cut so that the top of each is level with the centre post. Screw pressure treated planks to the uprights to form a rectangle flush with the top of each upright.
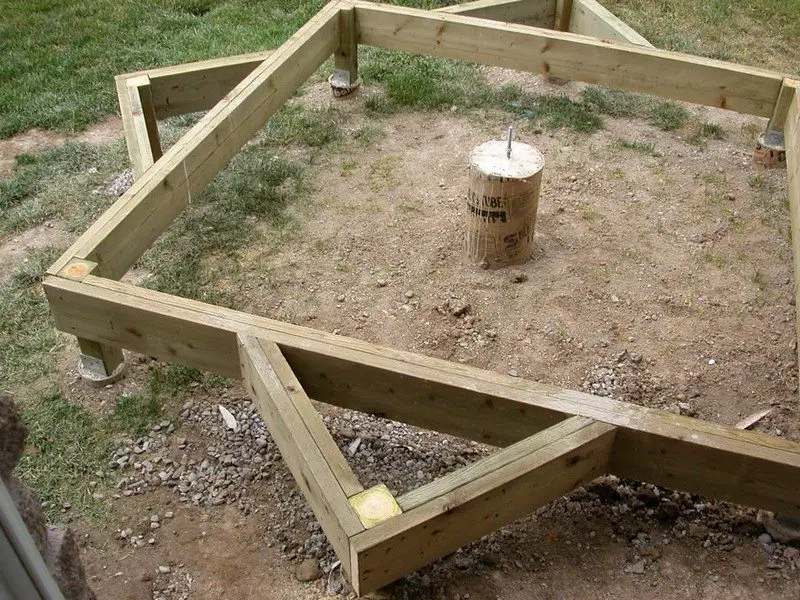
Finish octagonal deck foundation: As in previous step the ODD numbered posts are framed to create a rectangle that intersects the rectangle of the EVEN posts.
Follow the image, screw the pressure treated lumber in place and then double up the rectangles. What we have now is an 8 pointed polygon which is the deck foundation. Each Point or Vertex of the polygon will support a octagonal deck joist.
Note: (If you start the rectangle with the ODD numbered posts, it doesn’t matter, as long as you end up with the 8 pointed polygon.)
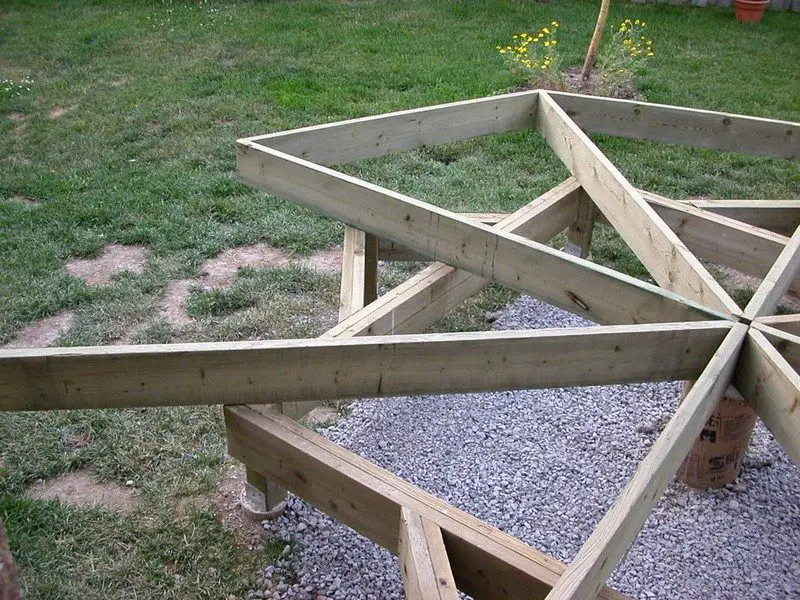
Octagonal deck joist: There are 8 main octagonal deck joists, each crossing vertices and resting on the centre post, giving us a 2 foot cantilever to the deck. Each joist is 6 feet long and sits at an angle of 45 degrees from adjacent vertices.
Note that the joists are pushed together at the centre post and as shown in the next step, four of the joists has been cut at a 45-degree angle to assure a tight fit. The joists will eventually be held down with the bolt in the centre post.
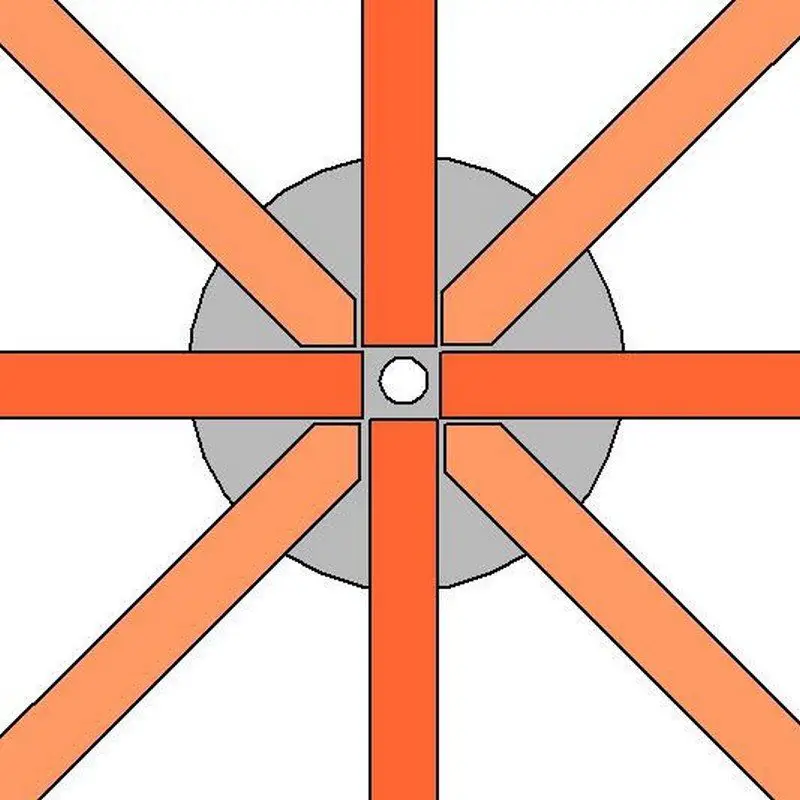
Detail of joists on centre post: This is a detail to show the joists mounted on the centre post. They should be pushed together, as we proceed.
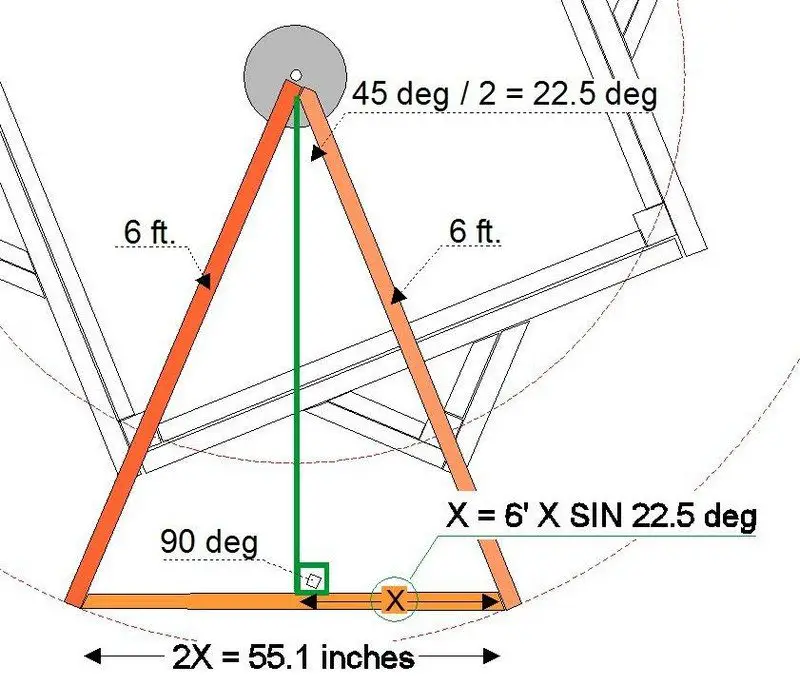
Some arithmetic: The circumference of the octagonal deck is formed by the end joists. This picture gives some detail about the calculation of the length of each end joist. Frankly, my advise is to cut one end of the end joist at 22.5 degrees; measure twice, then cut the second end at 22.5 degrees!
The real secret here is to keep the subtended angle at 45 degrees. This calculation is based on a zero width line; at the very least the results are out by the joist thickness. How many planks have you ever seen that have exactly the same thickness? Take the calculation as an approximation only.
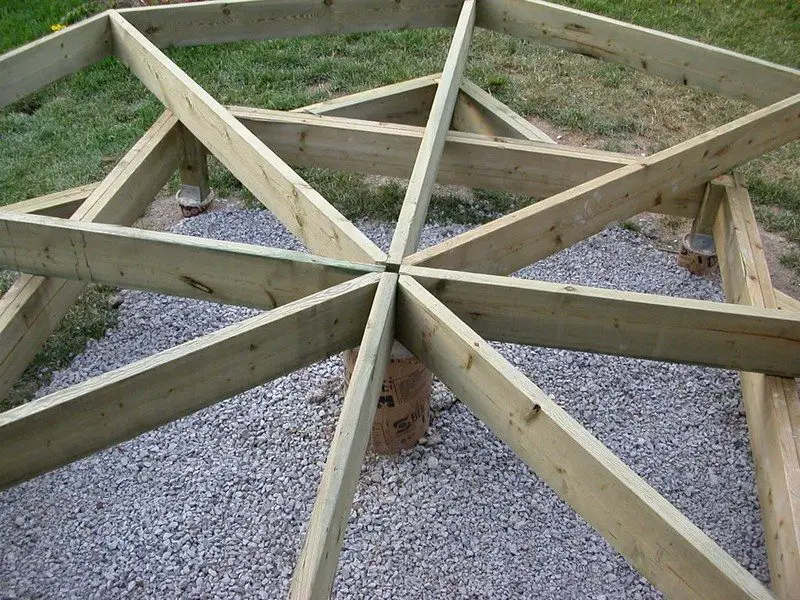
End joists all in place: This is a picture from the kitchen door, after all the end joists have been installed. Look carefully and you see the joist ends on the centre post are still floating free.
At this stage, you can rotate the octagonal deck joists to align the deck’s orientation with the house entrance. Once you’re happy with the alignment, secure each main joist to its corresponding vertex.
After that, sloped the ground beneath the deck and added a layer of gravel several inches thick for better drainage and stability.
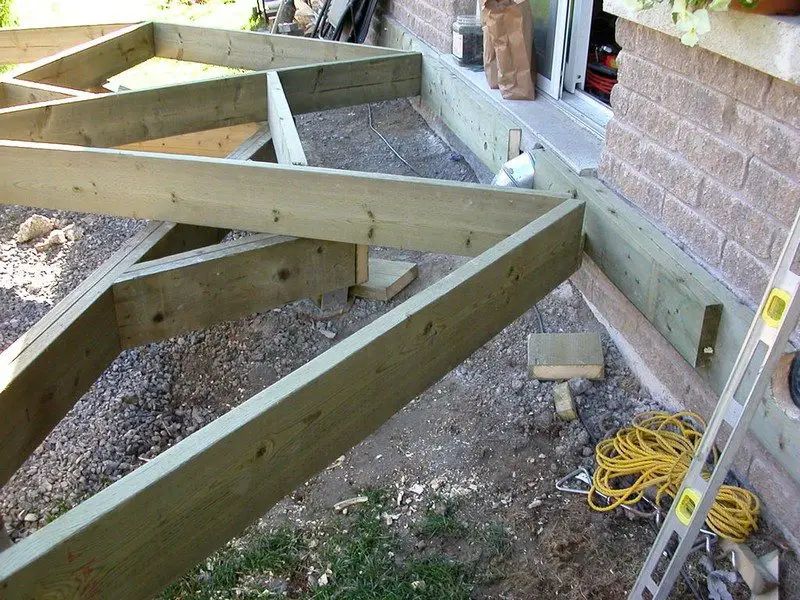
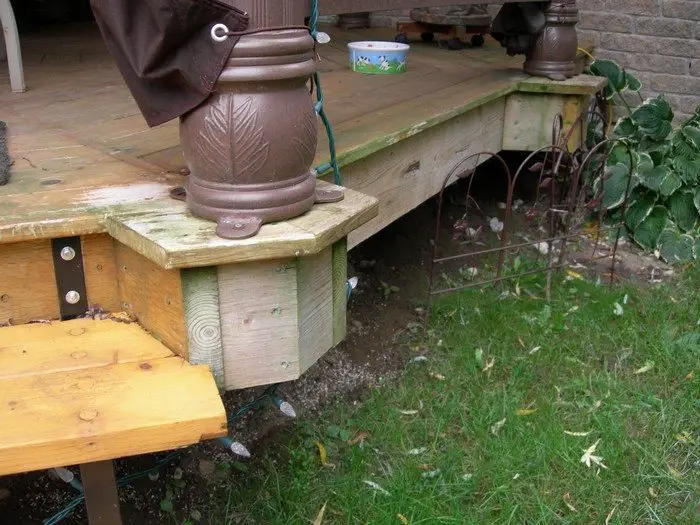
Connecting to the house: I used two ledger boards here to accommodate two vent pipes and to assure that I had an attachment surface beyond the entrance lintel.
Notice that I have installed the first couple of CROSS joisting. There is a lot to come. Last, this is a good time to bolt down the centre post end of the joists.
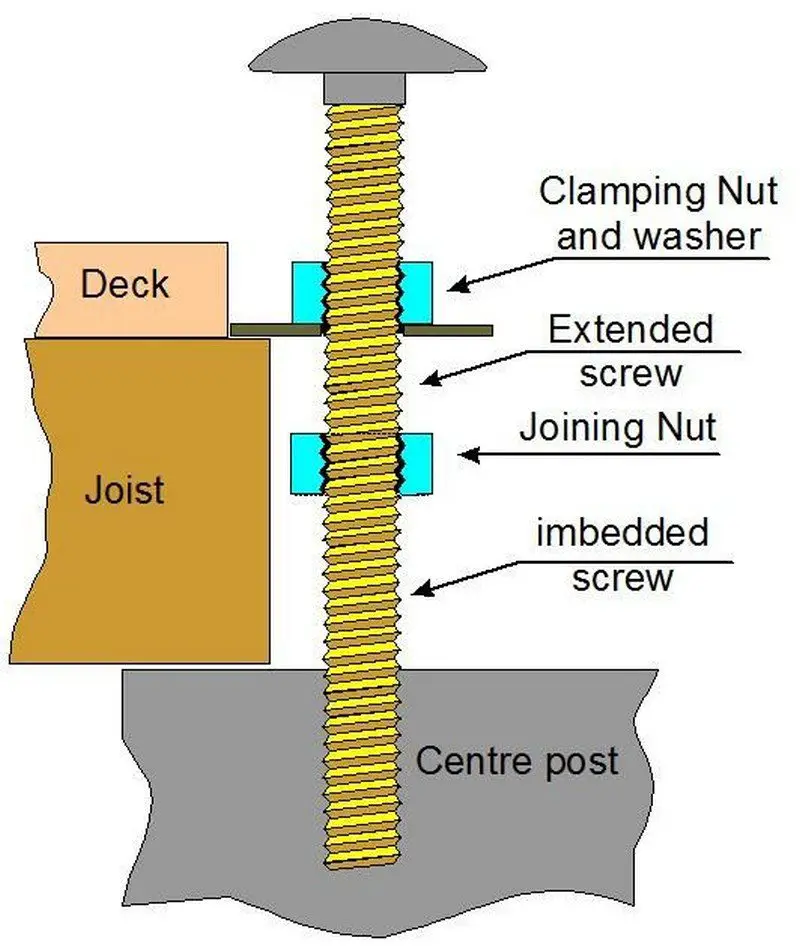
Clamping the main joists to the centre post: The 4-inch carriage bolt embedded in the centre post is clearly too short to extend to the top of the joists, so I up-ended a second bolt and connected both bolts together, giving me a way to clamp the joists down.
Of course I started by screwing a second nut and a large diameter washer to that second bolt beforehand. This is a temporary solution, which we will alter when finishing the decking.
Continued Page 2…


