This easy and inexpensive DIY waist high planter box is a great addition to your garden. One of the most obvious benefits is that your produce are not directly on the ground. This keeps your plants safe as they are away from critter’s reach.
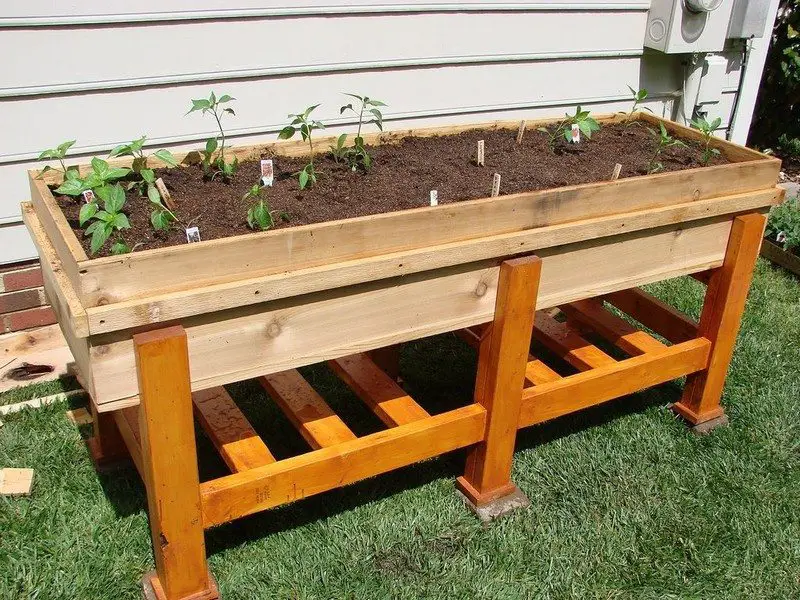
Another benefit is the ease of access. This is very important for those of you who have back problems. It’s difficult to tend to your plants when you’re hunching over. Watering and tilling can be such a painful task. Building your own planter makes it easier on your back, you can customize the height to a point that is comfortable for you.
This project doesn’t break the bank as you can use reclaimed timber from previous projects. Other hardware required are cheap, and easy to find in your local hardware store.
Need to protect your produce from critters? Does tending to your plants make it hard for your back? Then this project is for you!
Timber:
- 6 pieces 2x4x96 Kiln Dried Pine studs
- 2 pieces 1x8x12 Cedar Board
- 3 pieces 1x8x8 Cedar Board
- 1 piece 1x4x12 Cedar Board
- 1 piece 1x4x10 Cedar Board
Fasteners:
- Box (100 pieces) of 1-1/4″ Star Drive All Weather Self Tapping Screws
- 2-1/2″ Kreg All Weather Self Tapping Pocket Hole Screws
Tools:
- Table Saw
- Mitre Saw
- Power Drill
- Kreg Pocket Hole Jigs and Clamp
- Wood Glue
- Set Square
- Pencil/Pen
- A 4’ clamp and a 6″ clamp – optional, better if you have one
- Measuring Tape
- 5/8″ Forstner Bit – for drain holes
- Protective Equipment – safety glasses, dust mask, etc.
[embedit snippet=”adsense-728×15-inline-text-only-ad”]
Steps:
The first thing to do is to remove the staples form the boards. I have no idea why, but just about every board had staples in.
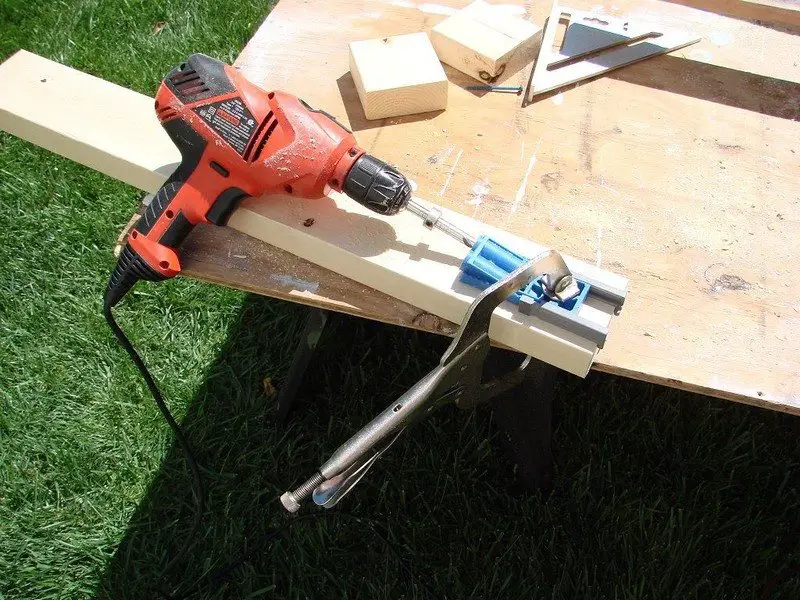
The base is built from 3 of the 8″ wide by 6ft long boards. The boards are joined together using pocket hole joinery. This is a quick way to make really strong joints. On one edge of 6ft x 8″ board, set the Kreg Jig for 3/4″ and make a pocket at 8 inch intervals.
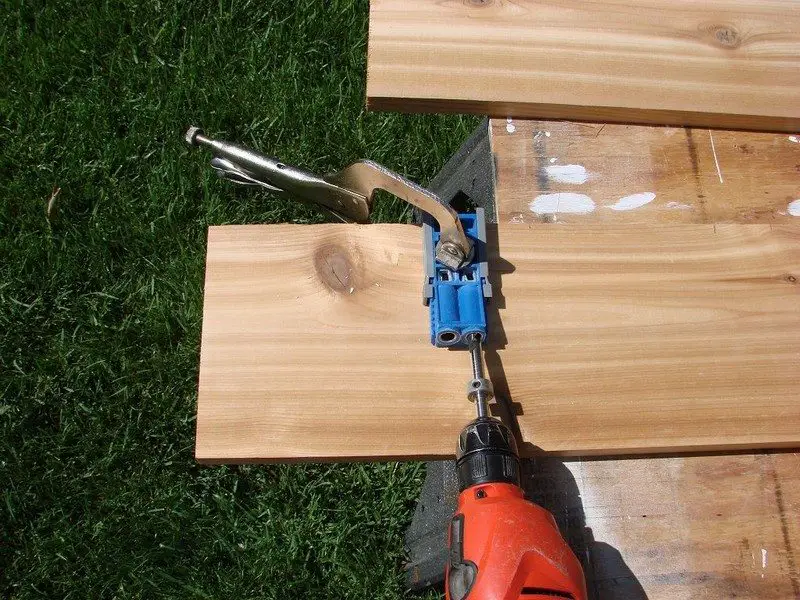
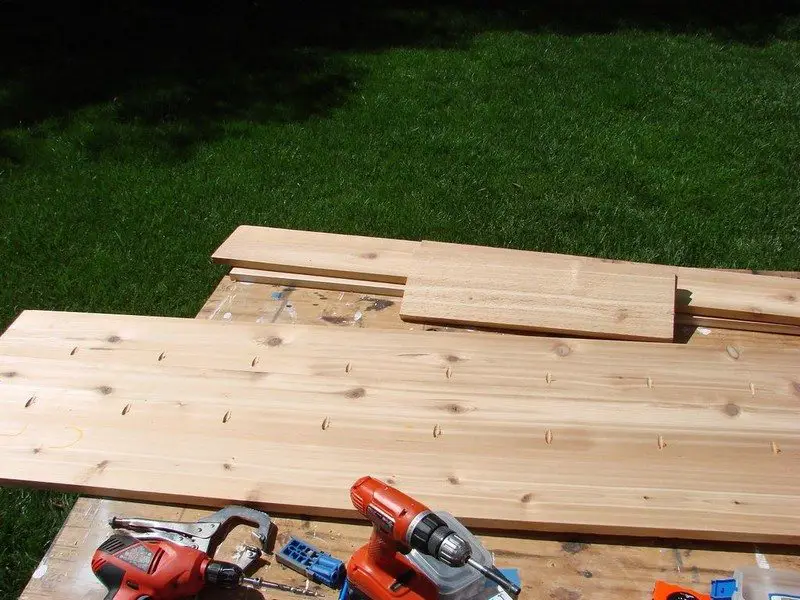
Then slide a second board next to the first and use a clamp to align the left edge and keep the boards together.
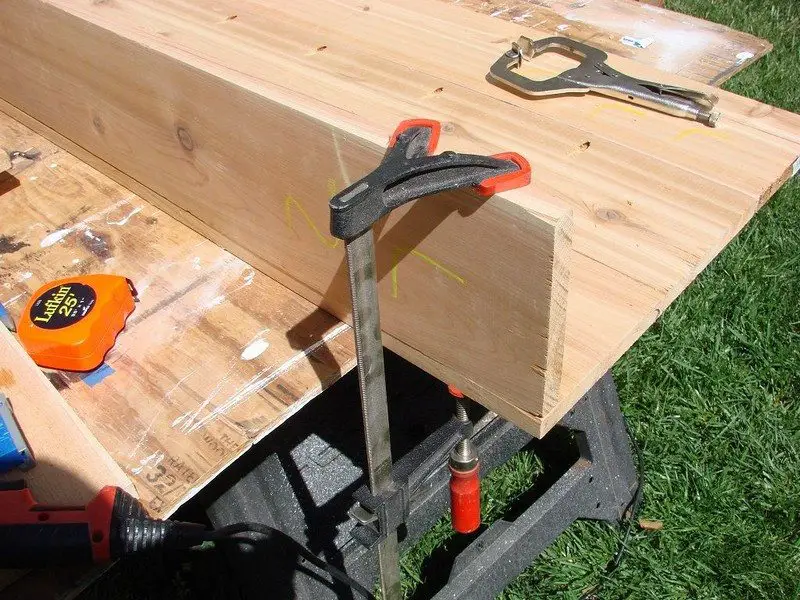
Set the torque adjustment on the screw driver to prevent stripping the screw out. You can practice on a piece of scrap to get the torque setting right. Cedar is very soft so keep the torque low. Screw in the first 1-1/4″ exterior self tapping screw. Work your way down the board until you have all the 1-1/4″ exterior self tapping screws in.
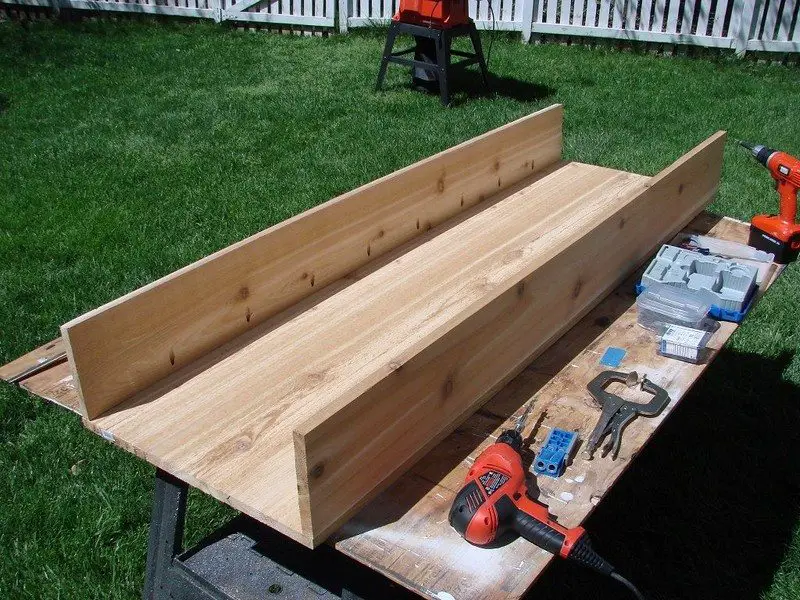
Now make pocket holes on the 3rd 6ftx8″ board and screw to the first 2 boards so that you have a base 3 boards wide by 6ft long. All the boards are aligned on the left edge. If the wood is not all exactly 6ft long, the right end will be a bit raggedy. If this is too extreme, you can use a hand held circular saw to trim the far end flush. In my case the boards were all +/- 1/8 inch so I let them be.
Now it’s time to do the long vertical sides. Make pocket holes every 8 inches along one edge of each of the two 6ft by 8″ side boards. It is useful to clamp the side board to the base panel to keep it properly aligned while you screw the side to the base. Make sure you keep the left edges aligned with the base.
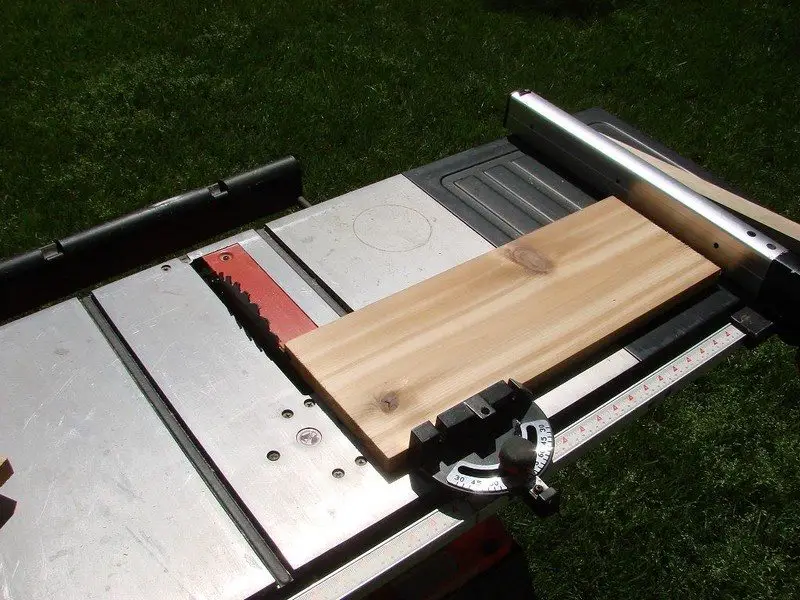
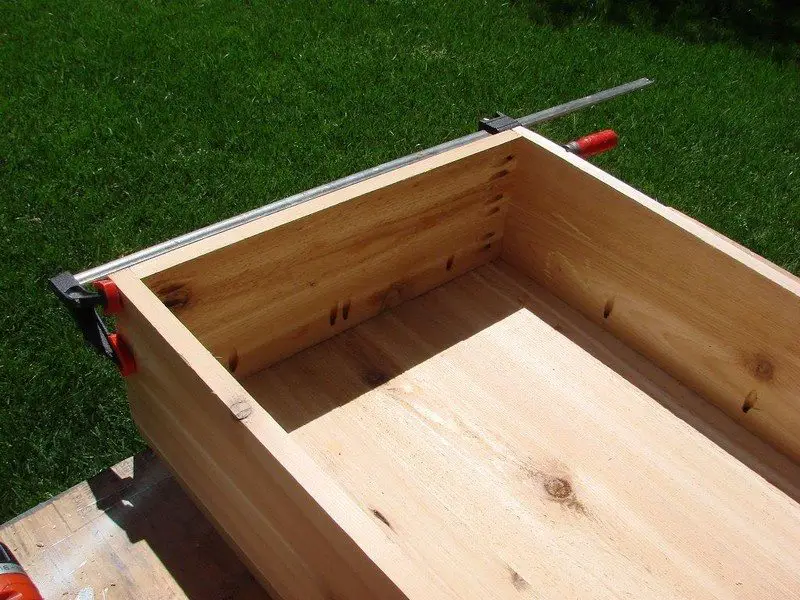
The 8″ boards are not exactly 8″ wide so use a tape measure to measure the inside distance between the 2 side boards. You should have 2 off-cuts from the original 8″ boards that you can use as the end boards. They will need to be cut down on the table saw to match your inner measurement. In my case, the end boards needed to be cut to 20″.
Do not cross cut the boards on a table saw with the fence in place. This is very dangerous. Measure the cut length using the fence and then move the fence out of the way before making the cut. Alternately, you can insert a 0.75″ thick piece of wood between the edge of the end board and the fence, measure up and then slide the 0.75″ piece of wood out of the way so that the edge of your board clears the fence. If you cross cut with the fence in place the board can get wedged leading to damage of the saw, the board and most importantly yourself.
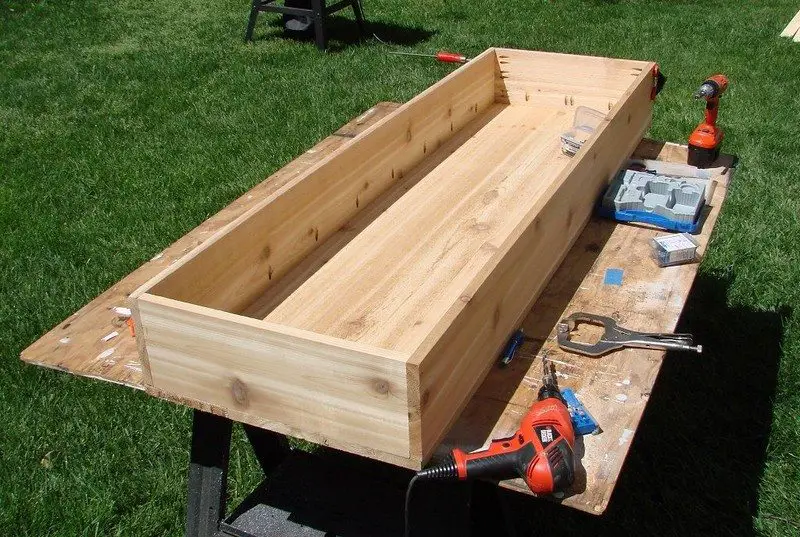
With the basic box complete, the depth is not sufficient for vegetables, so we need to extend the sides upward. This is what the 1×4 Cedar boards are for. They will give us an overall inner depth of 10 3/4″ which is plenty for the veggies.
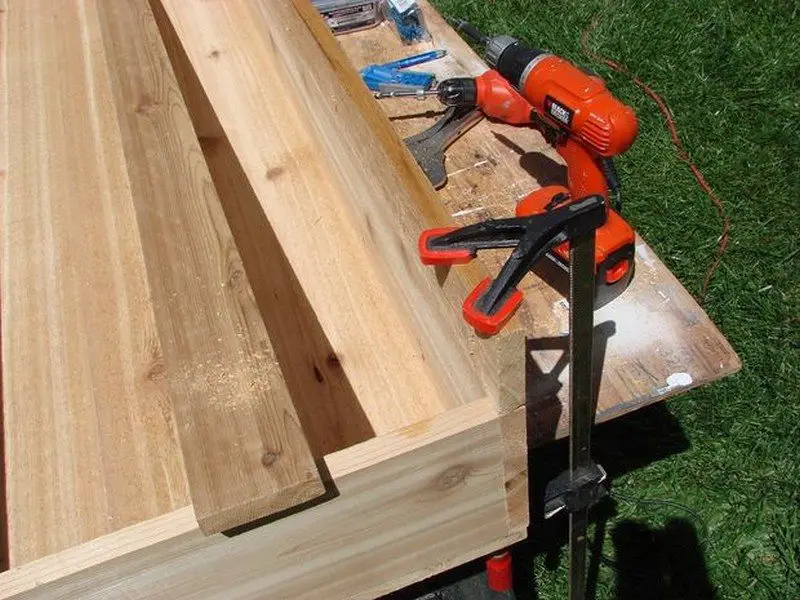
The process of attaching the 1x4x6ft extensions is the same as attaching the 8″ side panels. Make pocket holes every 8 inches. Then clamp the 1x4x6ft piece to the top edge of the 8″ side board and use the 1-1/4″ self tapping screws to attach the 4″ board to the 8″ board. Theoretically 4″+8″ = 12″ but lumber dimensions are measured before drying so when lumber gets dried, it shrinks. The final size is always smaller than stated. For example, a 2×4 is actually 1.5″ x 3.5″
The ends are attached in the same fashion. Drill pockets on the 3 sides as shown in the photo. A lot of pockets but we want the board to withstand the pressure of the soil.
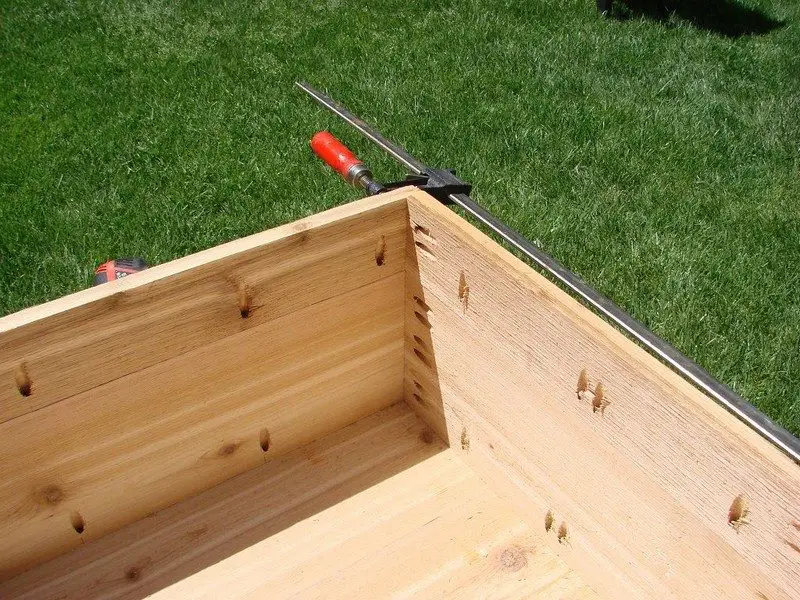
With the remaining lumber, the long 6ft piece of 1×4 was ripped down to two 1-1/4″ wide pieces and screwed to the side of the box both for decoration and to conceal the join between the 8″ and 4″ wide pieces. The Kreg pocket hole drill does a great job of drilling a counterbored hole.
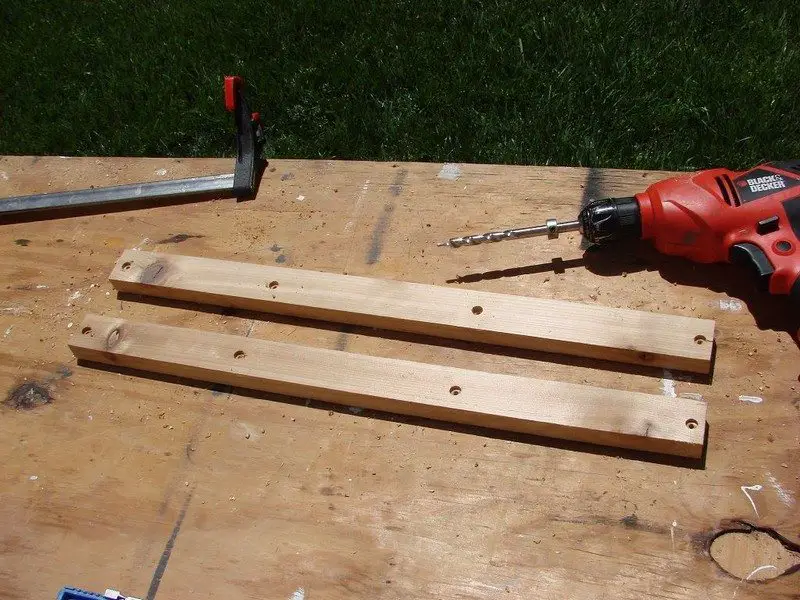
These holes were drilled every foot. The added benefit of these strips is that they will strengthen the boards and help to reduce flexing due to the weight of the soil and water. The base frame will help with this also but we will get to the frame later.
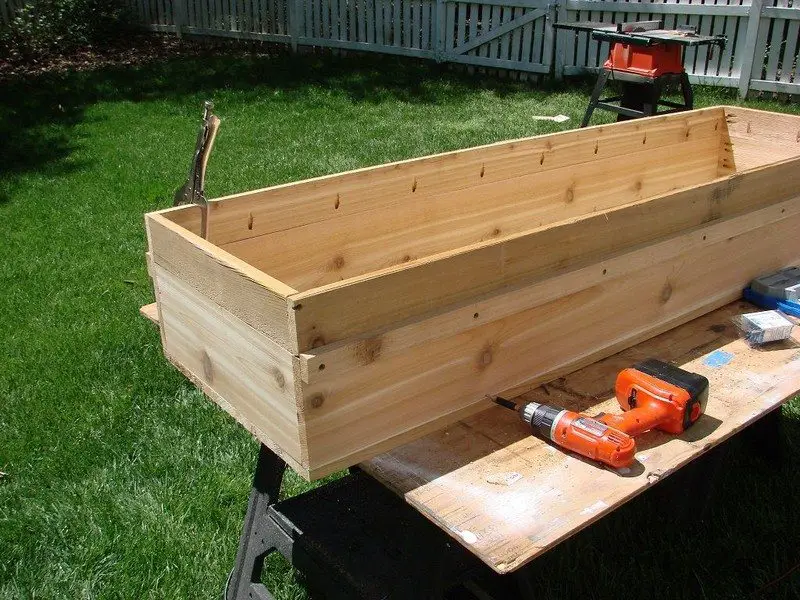
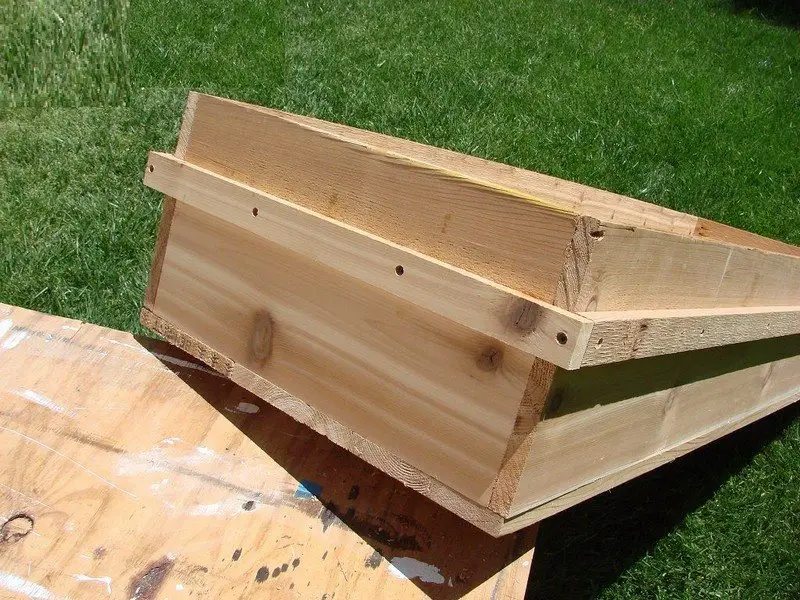
At this point the box should be complete. You can take a break if you wish. Or you can start building the base frame.
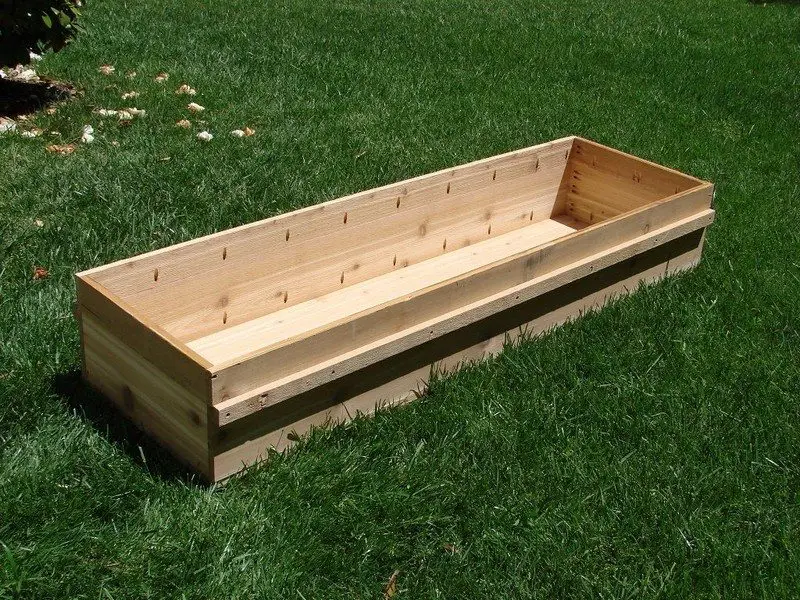
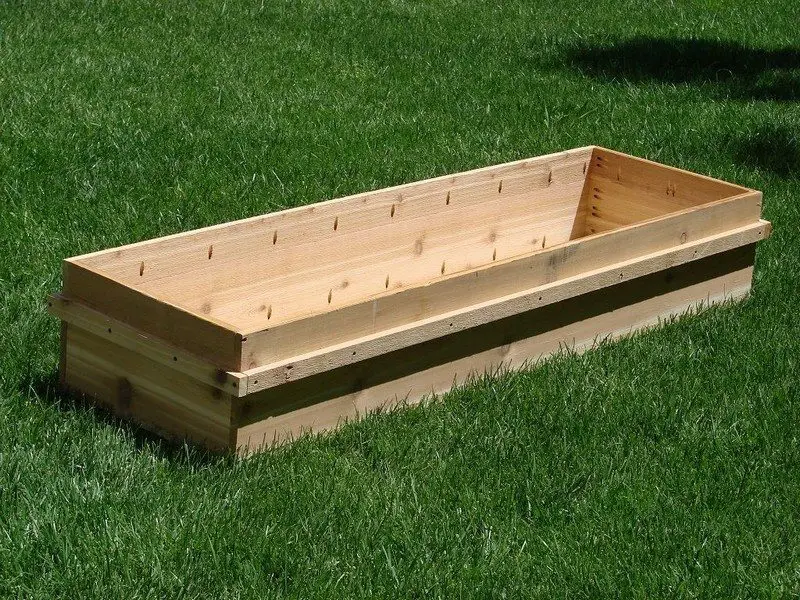
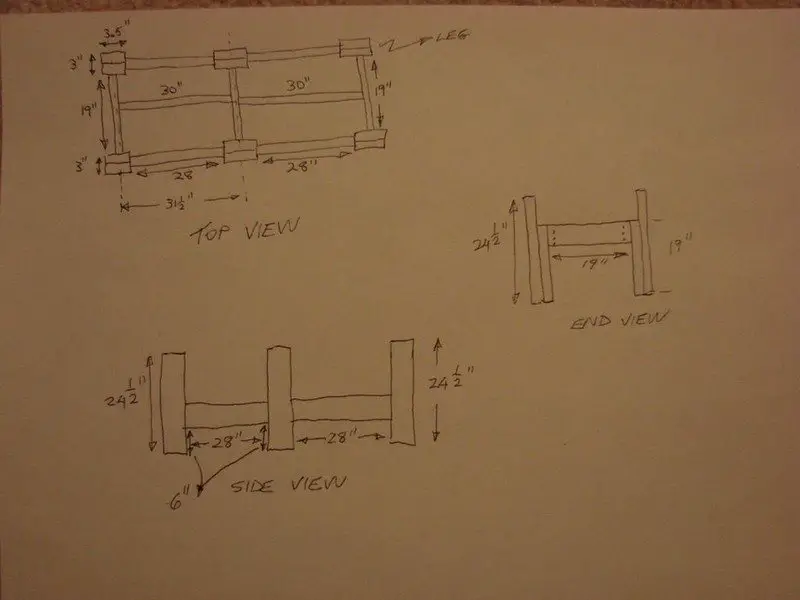
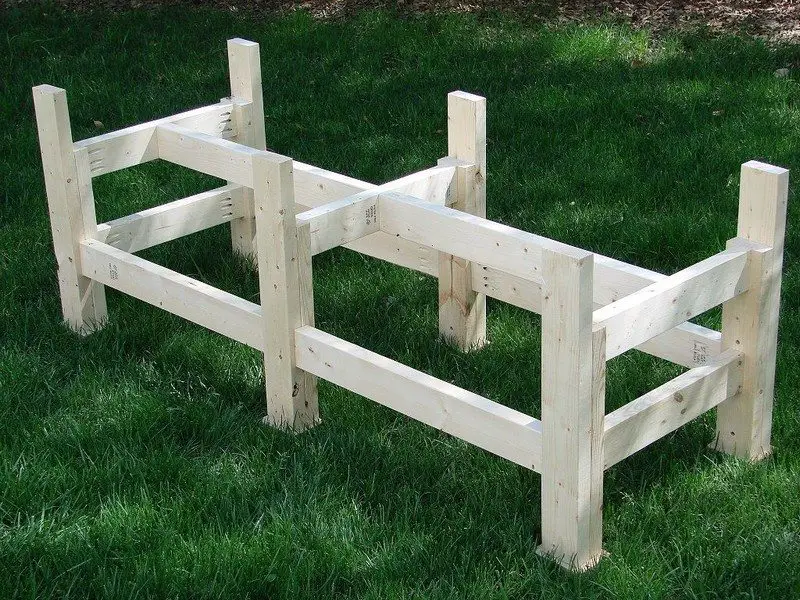
The frame legs consist of 2 different length 2×4’s: 19″ and 24-1/2″ Use a mitre saw or table saw to cut the 2×4’s to length. You will need a total of 6 legs. Each 2×4 will give you 3 x 24-1/2 pieces and 1 x 19″ pieces. So 2 x 2×4 will give you all the long leg pieces and another 2×4 will give you the remaining 19″ pieces. Keep cutting until you have 6 of each length.
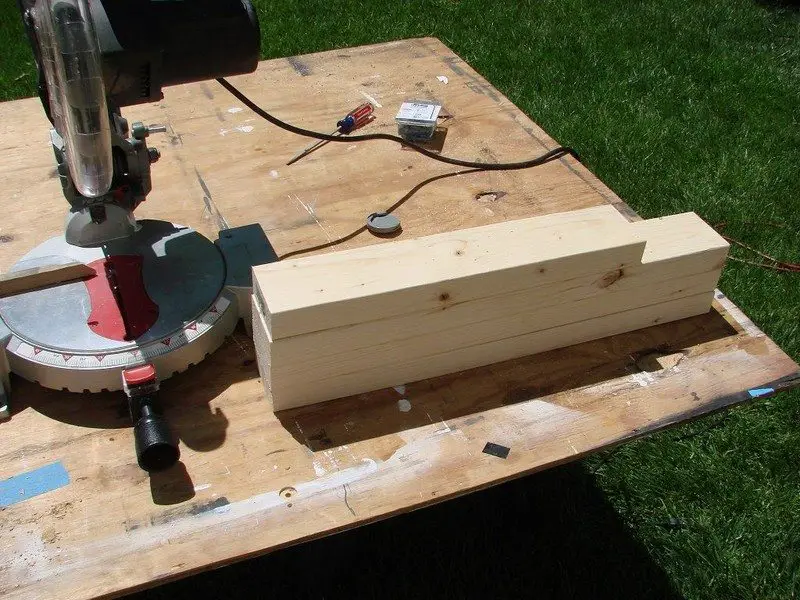
Now take a 19″ piece and 24-1/2″ piece and glue them together with wood glue.
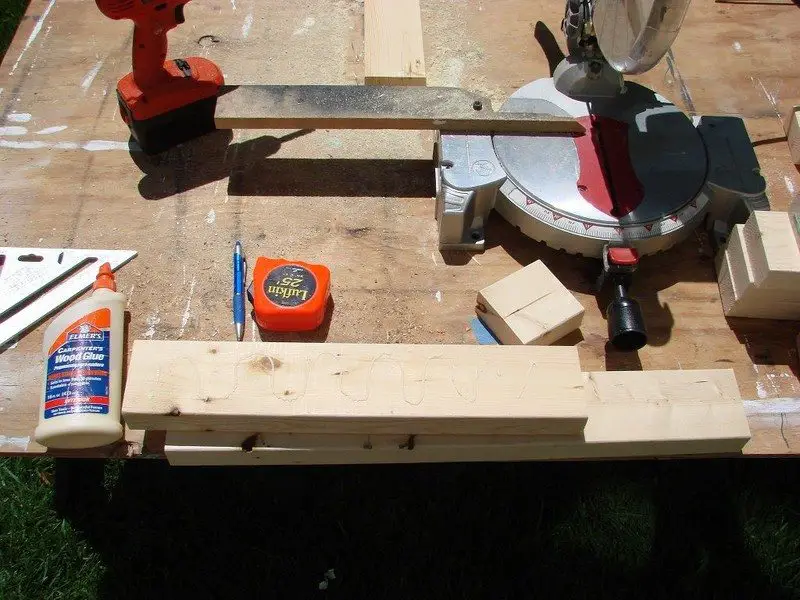
Clamp them together to prevent them from moving and counter bore holes on the 19″ side. Then use the 2-1/2″ Kreg all-weather screws to screw them together. I used 4 screws per leg for the first couple of legs and then dropped to 3. I think 3 is plenty since the faces are glued together.
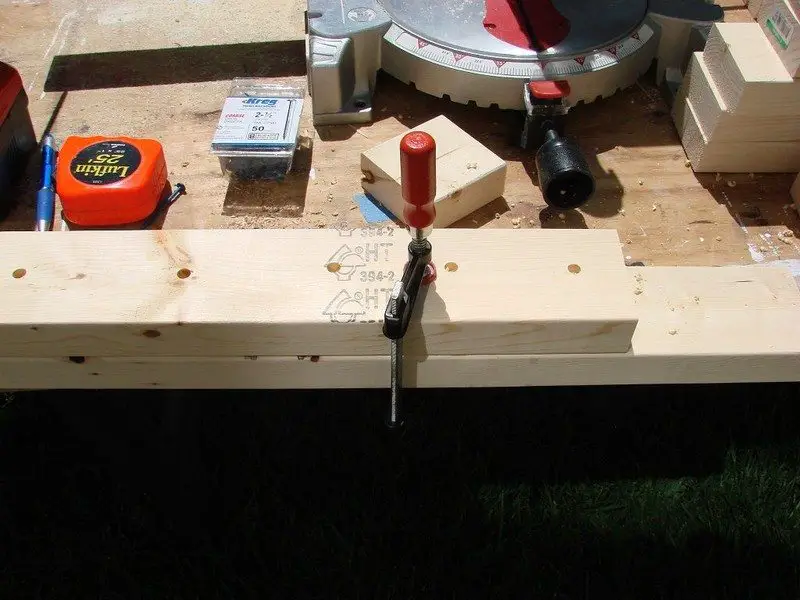
The Box will be resting on the edge of the 19″ piece which is very sturdy. The extended height of the 24-1/2 piece will provide support to the long vertical sides of the box keeping them from bowing out under the weight of soil and water. Practically the sides of the box are plenty strong but I don’t take chances and the 2×4’s are cheap insurance. Keep gluing and screwing until you have 6 legs prepared.
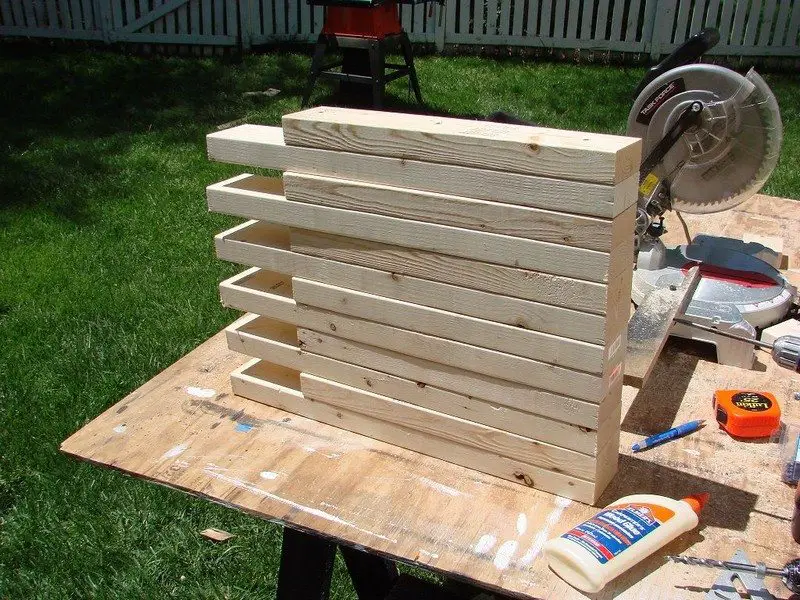
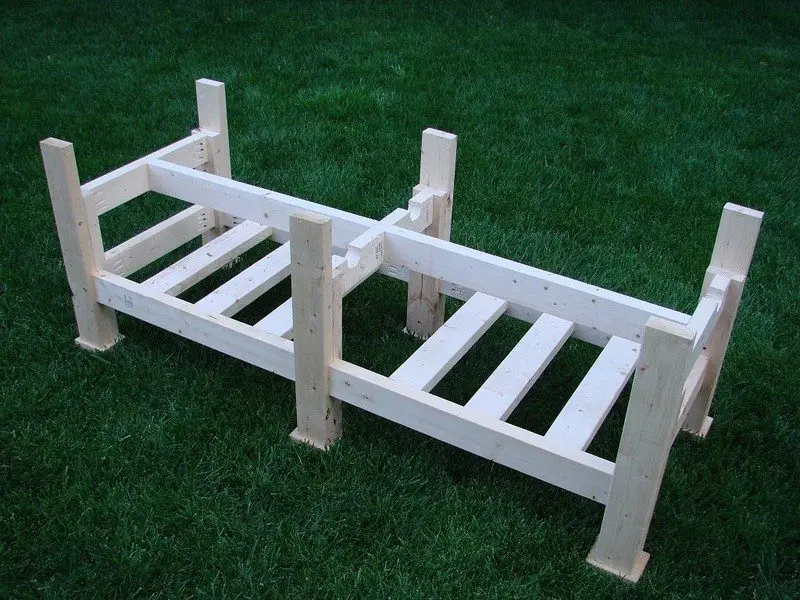
Now turn the box over so that the bottom faces skyward. We will assemble the rest of the frame in-situ.
Each set of two legs get attached with a 19″ cross piece. With the remaining 2×4’s you will need to cut as follows:
5 x 19″ long pieces for cross bracing.
4 x 28″ pieces for rails across the front and back. Don’t cut these until last. Measure your actual dimensions and cut accordingly because if you don’t get the 30″ pieces exactly right, you can compensate by adjusting the length of these pieces.
2 x 30″ pieces for the top.
Attach the legs to each other using 3 pocket holes and glue on either end.
When you are done, you will have 3 leg pairs.
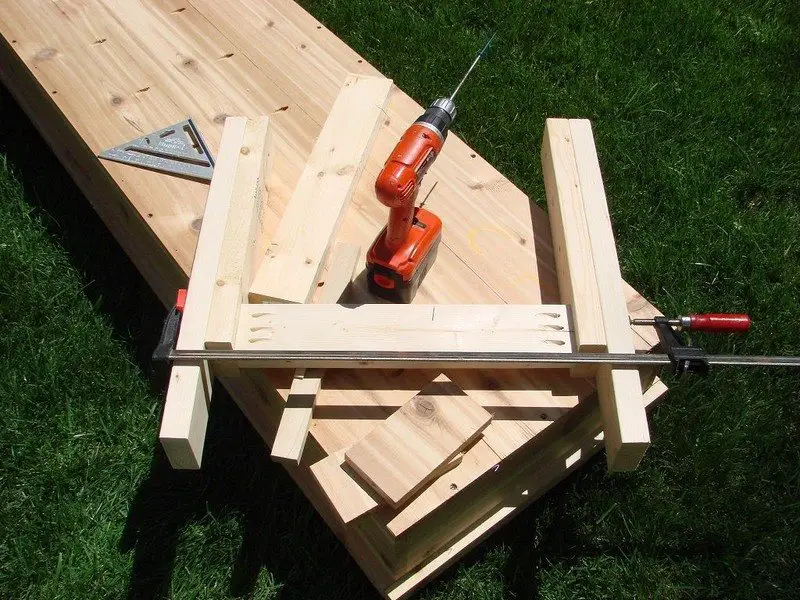
Now make 3 pockets holes on each end of the 30″ pieces and use these to join the legs together. Use glue in all joints and use the 2-1/2″ Kreg screws. A box of 50 screws will not cut it…. buy 100 screws (you get 50 per box).
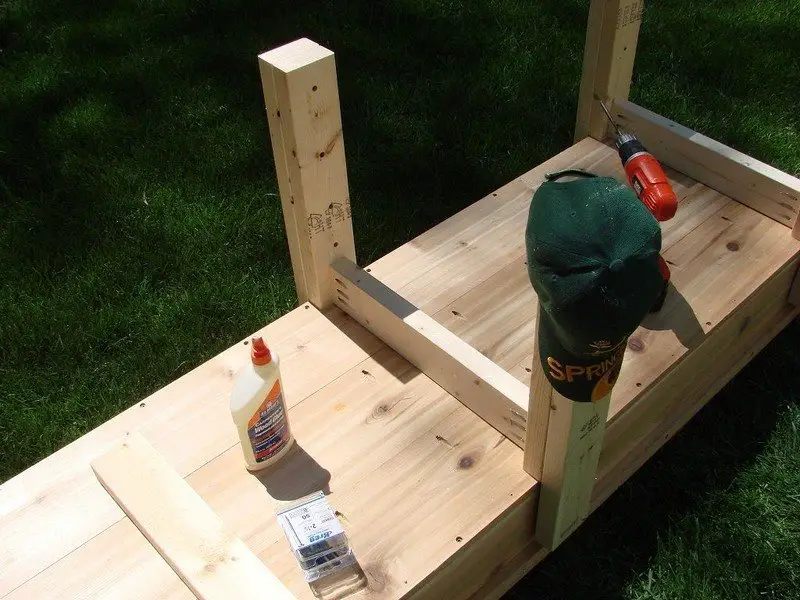
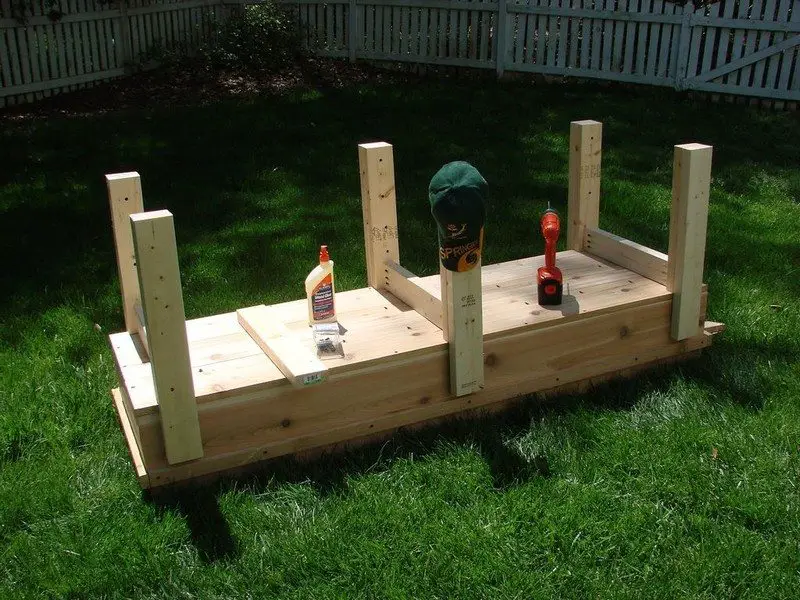
Now measure the spacing between legs and cut your final rails to match this measurement. It should be around 28″ but you may need adjustment depending on the accuracy of your 30″ cuts. These are screwed and glued in place 6 inches from the bottom ends (see drawing side view).
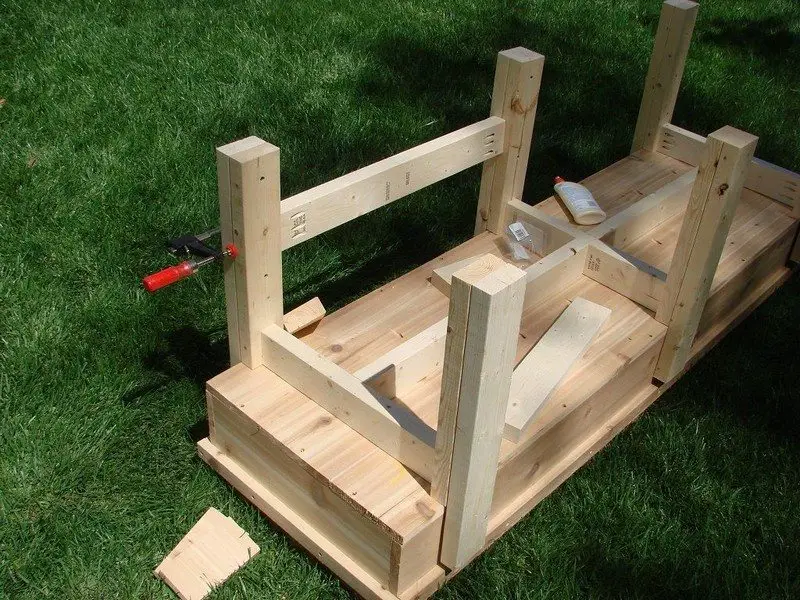
With everything screwed together, you now have a rock solid sturdy frame that will carry a ton of weight. Most of the weight is carried by the vertical 19″ 2×4 which is the secret to the strength of this design. At least I like to think so! Try breaking a short 2×4… This stuff is very strong.
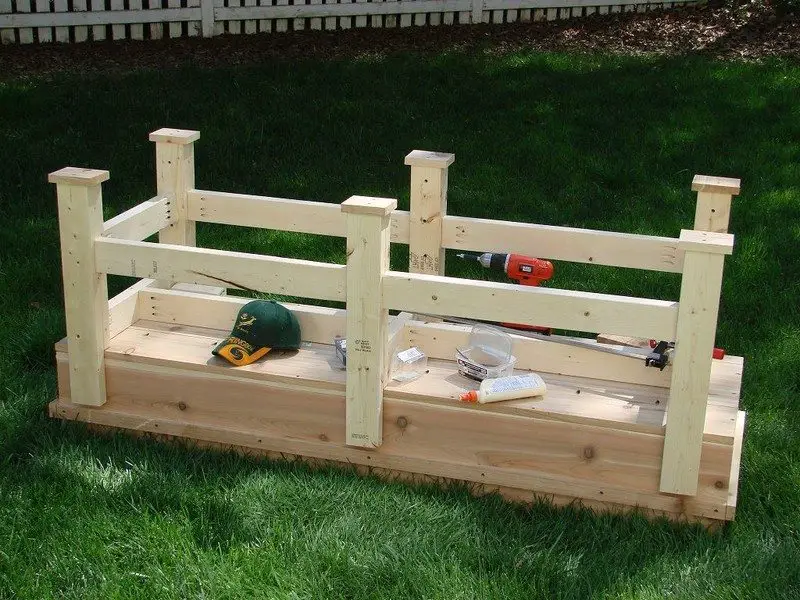
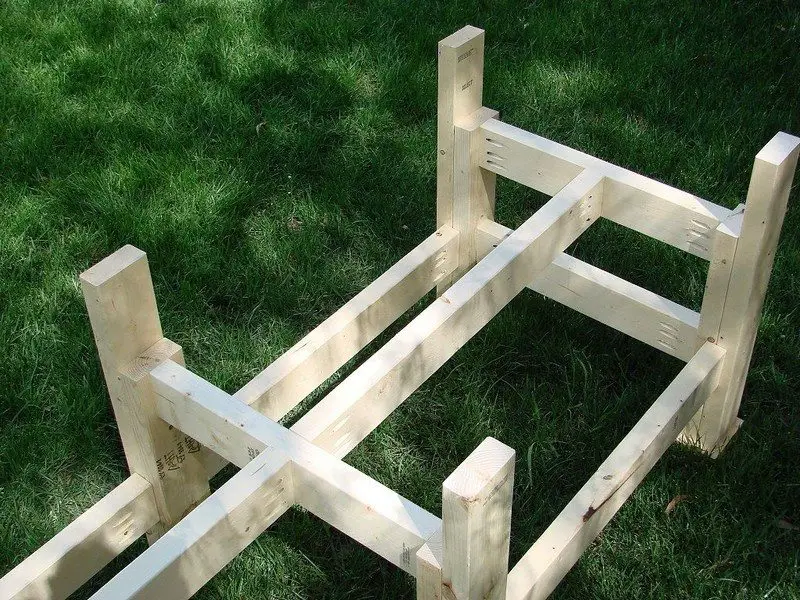
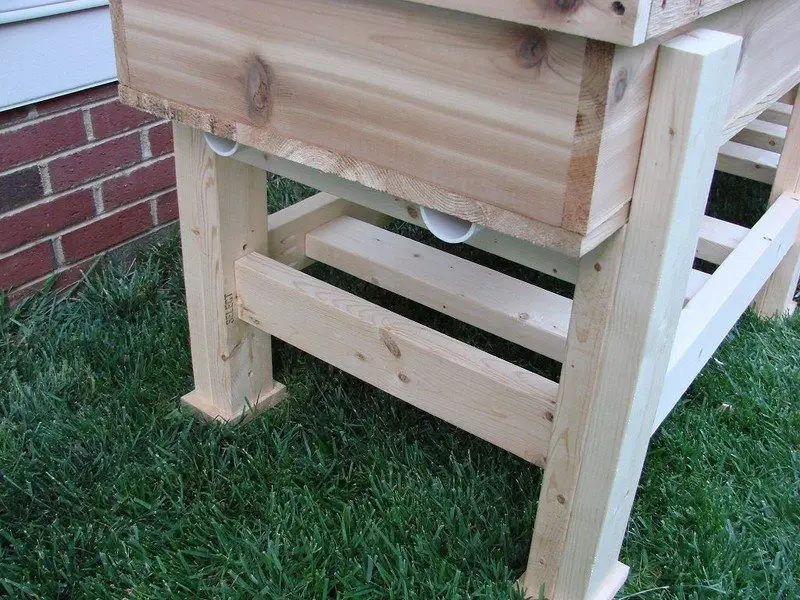
With the remaining Cedar off-cuts, I made a bunch of “feet” for the legs. This will isolate the pine from ground contact and improve the rot resistance. A 4×4 share of cedar will work fine. You do not have to be precise here.
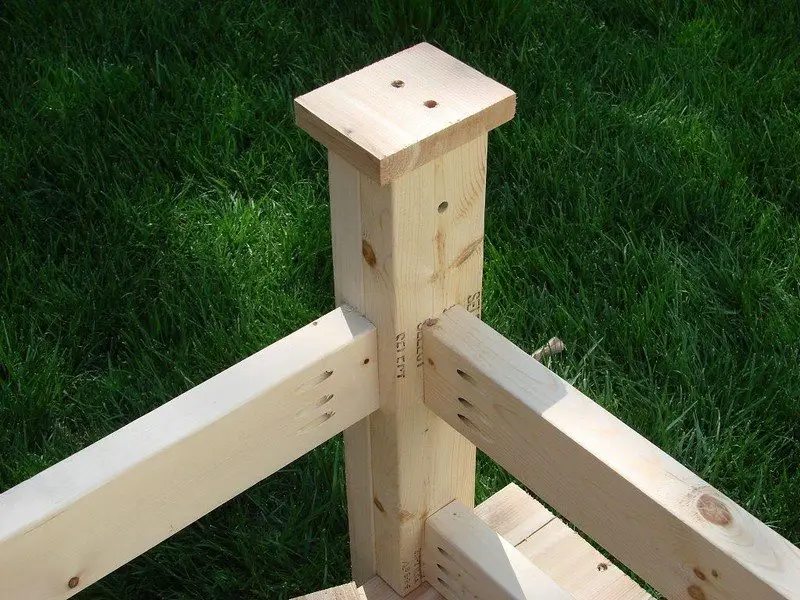
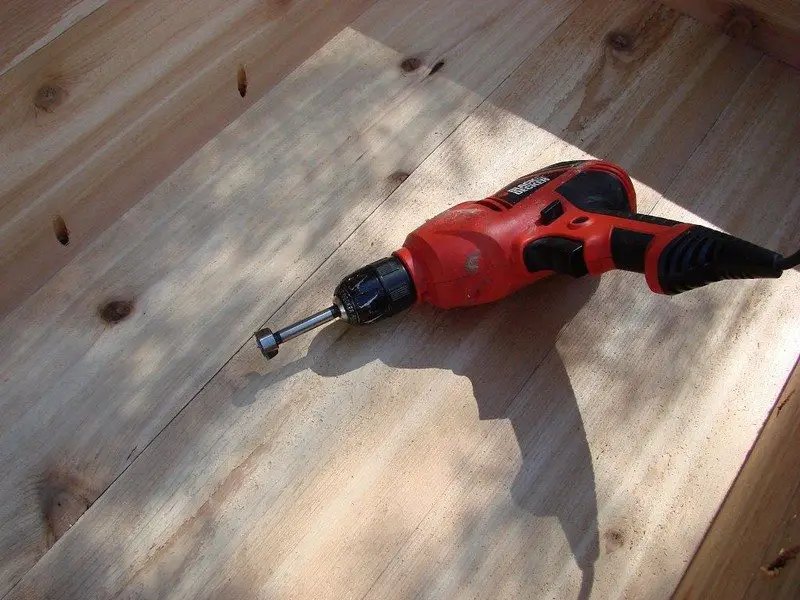
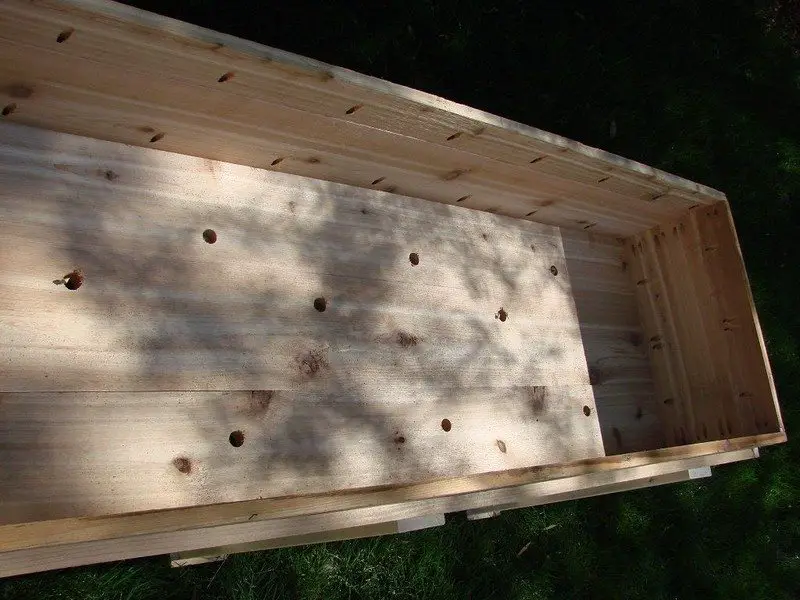
Drainage holes were cut at roughly 8″ intervals using a 5/8″ forstner bit.
I made a mistake and cut a set of holes roughly down the middle, slightly to the side of the main beam that runs lengthways across the bottom. A later decision to run gutters to catch overflow resulted in me having to plug the center holes because there wasn’t enough space to install the gutters.
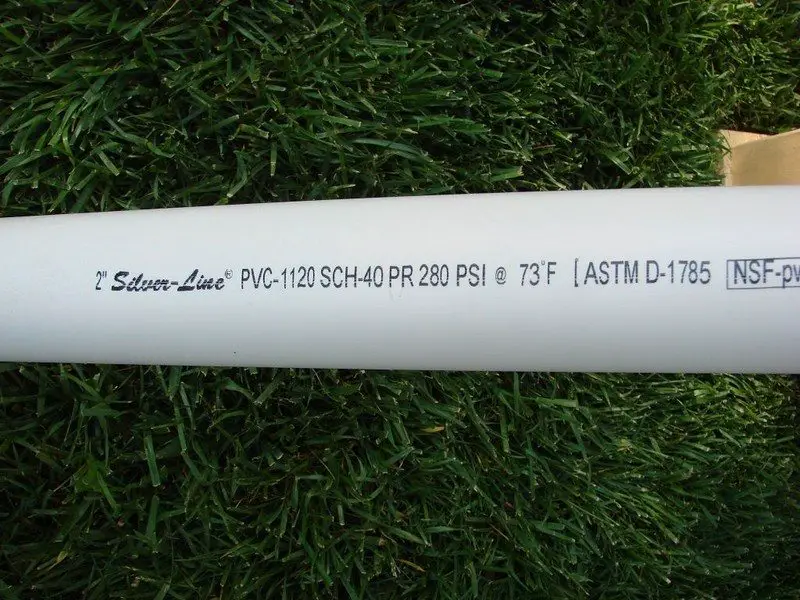
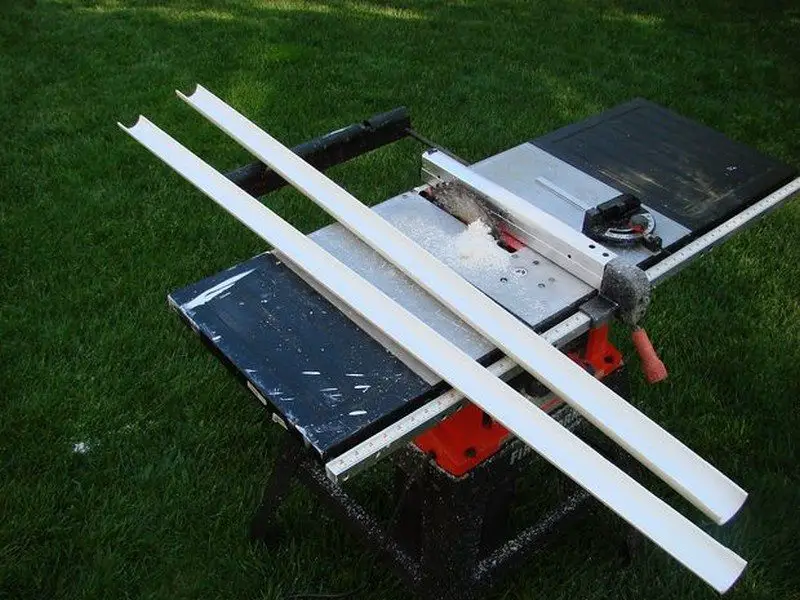
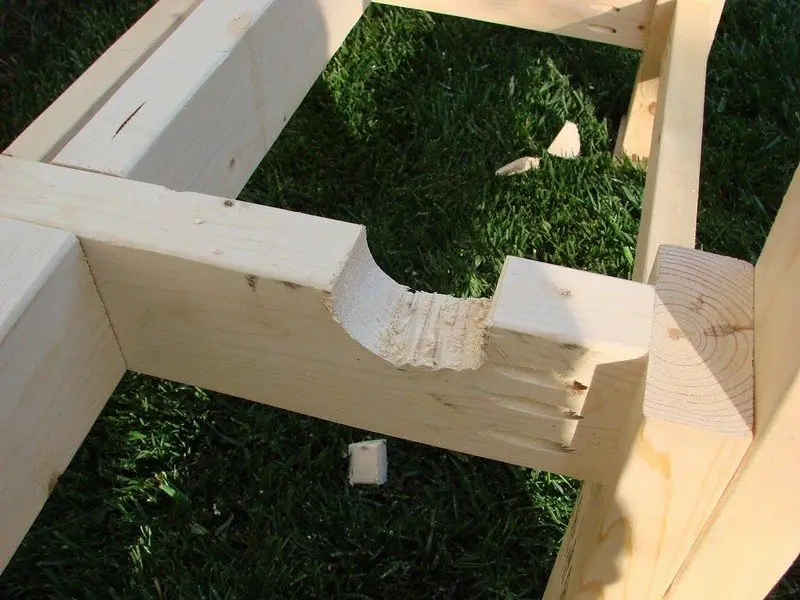
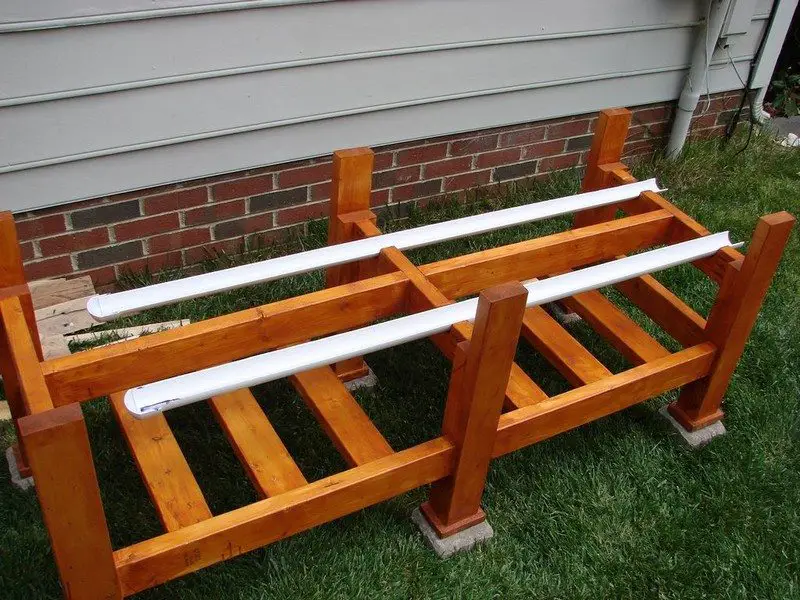
To capture the overflow from the drainage holes, the cross beams of the frame were notched to accept one half of a 2″ PVC pipe. The PVC pipe was cut using a table saw. Please be very careful doing this and use a push-stick so that your fingers are far away from the blade at all times.
A pipe cap was also slit in 2 and glued to the ends to ensure overflow always runs out of one end (within reason….. install with a slight tilt to the side you want to drain out of)
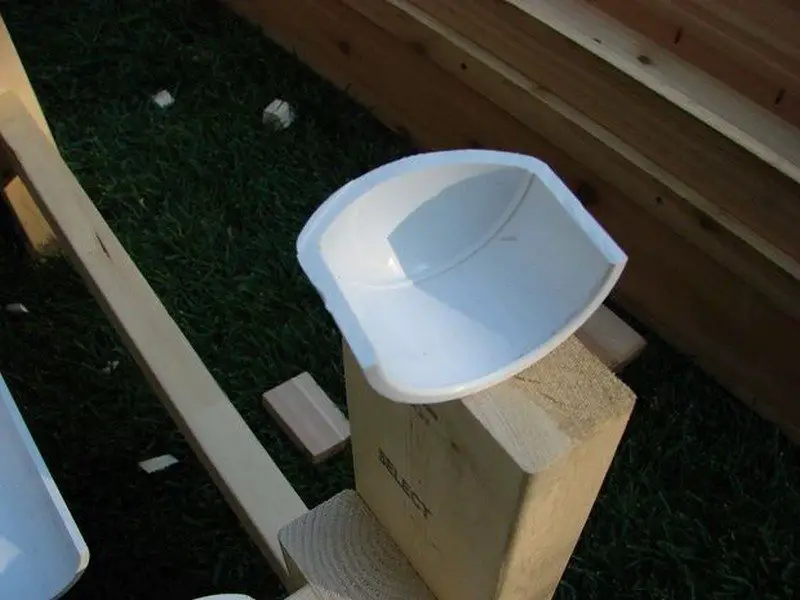
The notches were drawn onto the cross beams using the slit PVC pipe end as a template and then a jig saw was used to cut the notches. The cuts were smoothed using a rasp and then a file. The slit PVC tube sits slightly below the surface so that there is a small air gap between the bottom of the bed and the PVC tube. This should help things stay dry and prevent mold growth.
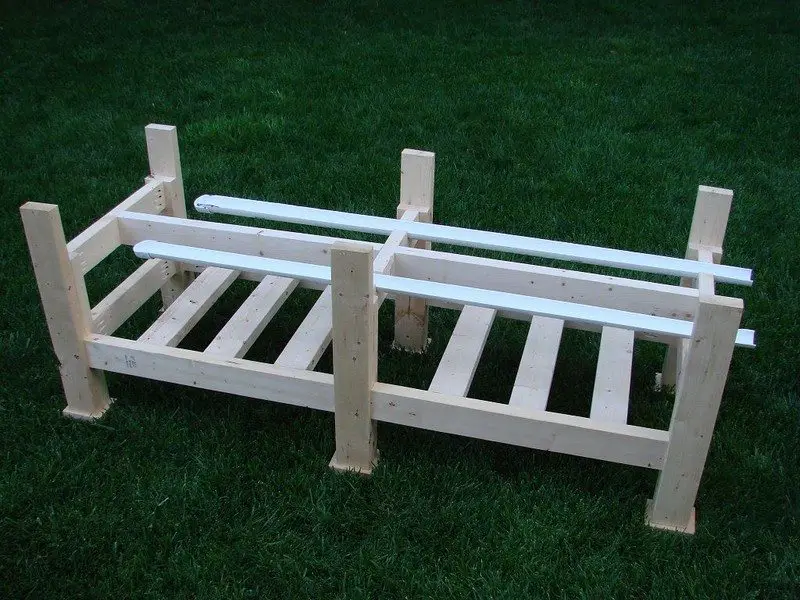
The shelf consists of 3 2×4 pieces that are screwed to the lower rails on either side. The shelf pieces are 20-1/2″ long. Your measurement may vary if your rails are not exactly centered with respect to the legs. Measure your actual length and cut accordingly. Working this way allows you to make adjustments as you go. If you cut all the wood up front, you have to be very careful to get everything exactly right. Cutting a little later, allows you to correct for inevitable imperfections – this is hand made after all.
The final staining was done using Olympic 6 year deck stain. Only the frame was stained. The bed was left natural so as not to contaminate the vegetables. A weight test was conducted – It handles 200 pounds no problem. The volume of the box is roughly 12 cubic feet. The density of potting soil wet is roughly 50 lbs / cubic foot (web sources – not sure how accurate this is ). This means the frame will be supporting 600lbs of soil. Each leg will therefore support 100lbs.
Aside from the benefits you and your plants get, this planter also makes it possible for you to easily relocate your garden in case you need to. Is it exposed to too much sunlight? Does it get ruined by kids playing around? Or maybe you need a little more extra space for your outdoor party? No problem.
This planter definitely takes away all the hassles of gardening!
Thanks to MidnightMaker for this clever project!
[embedit snippet=”media-net-inline-ad-728×90″]


