Are you constantly on the move but still need a desk for use in your temporary home? Then this project might be perfect for you.
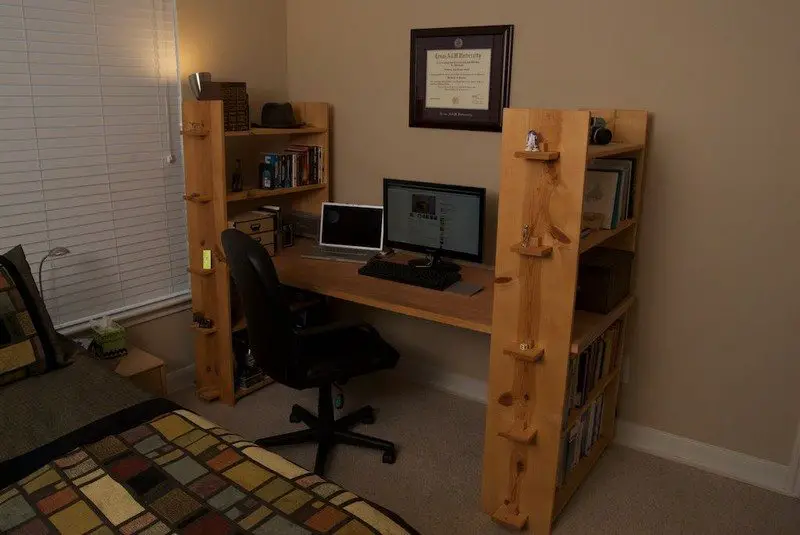
What’s special about this desk is that it’s very easy to disassemble when you’re moving to a new location. It’s the ultimate ‘flat pack’ because it’s built using mortise and tenon joints. That means that there’s no need to use screws or bolts during assembly.
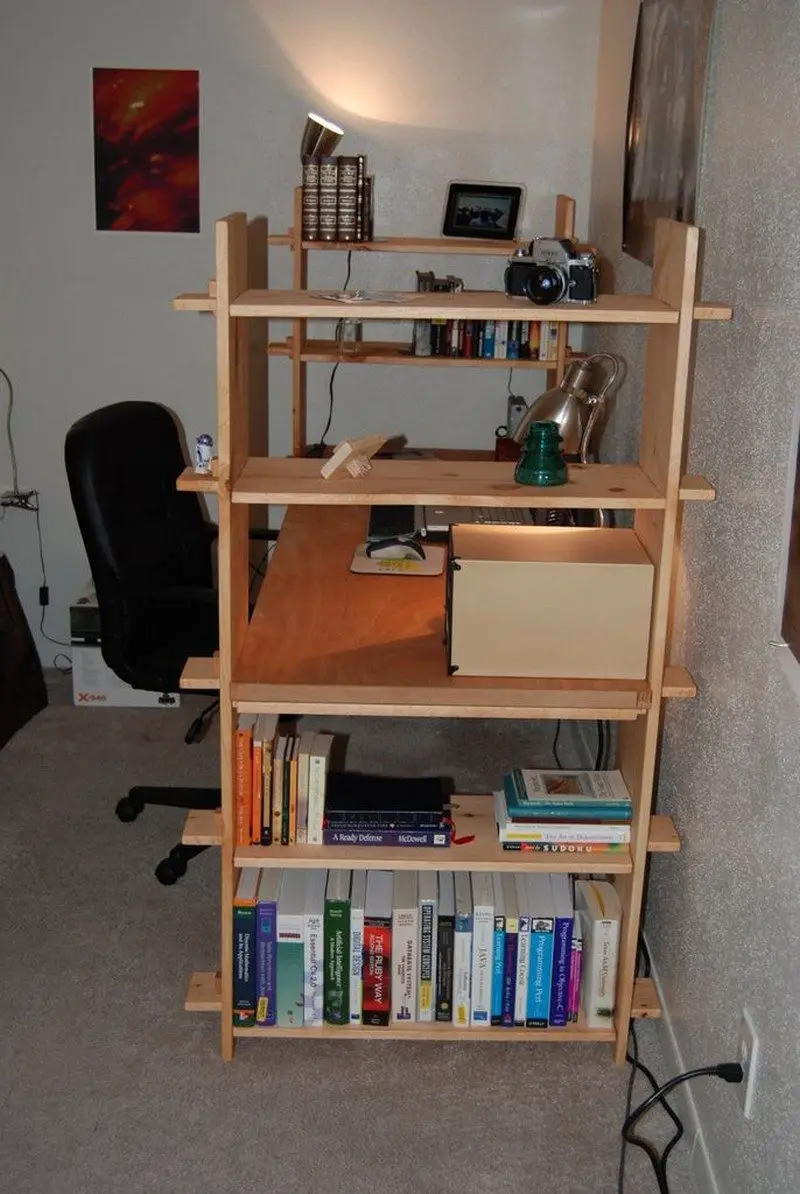
Another great advantage is that this desk integrates bookshelves. It’s perfect if you’re short on space. Instead of having separate shelves for storage, which would normally require extra space, you get both desk and bookshelf in the same floor area. The integrated bookshelving also means that everything you need is accessible without leaving your desk!
Could you use this set up in your home?
Materials:
- 1×12 Pine Boards
- 2×2 Pine Boards
- 28″ Hollow Door
- Wood Stain Finish of your choice
- 4′ Power Strip
- Inside Corner Molding
- Screws
Tools:
- Tape Measure
- Table Saw
- Jig Saw
- Carcass or Dovetail Saw
- Sander
- Paint Brush
- Drill/ScrewDriver – for installing Power Strip under Desk
[embedit snippet=”adsense-728×15-inline-text-only-ad”]
Steps:
The good thing about this project is that you can build this to suit your needs. Measurements would depend on the space you have available, the number of shelves you actually need, and the table height you desire. You can use any 3D modelling software to determine accurate dimensions for your cutting list.
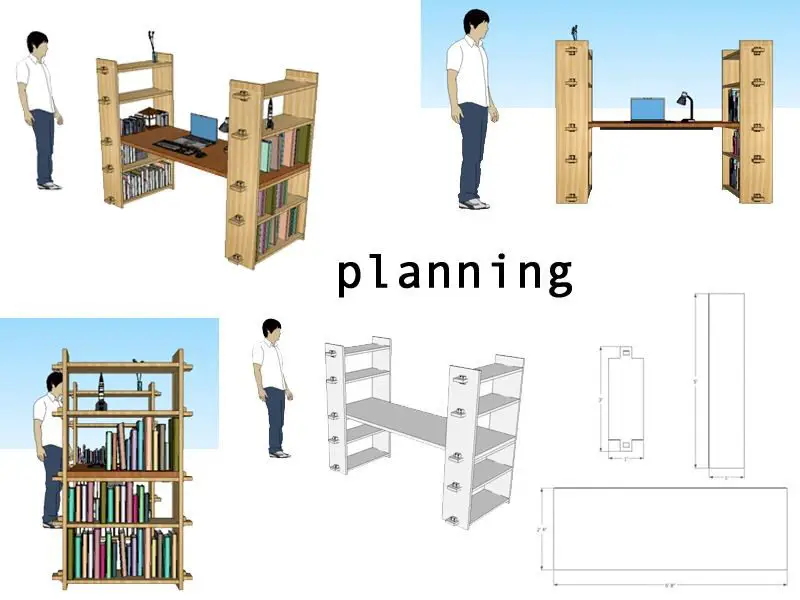
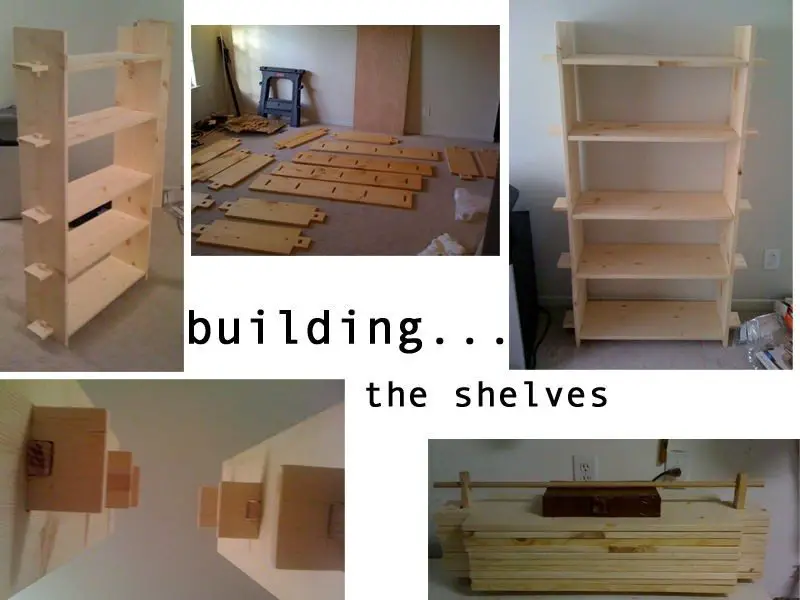
The shelves would be installed using mortise and tenon joints. The small wood blocks would serve as the fastener to keep the shelves in place. See picture.
The desk on the other hand is attached to one of the shelves that has your desired table height. There should be moldings attached to the side of the shelf piece that would serve to secure the desk in place once installed. A closer view of this detail is shown in one of the photos below.
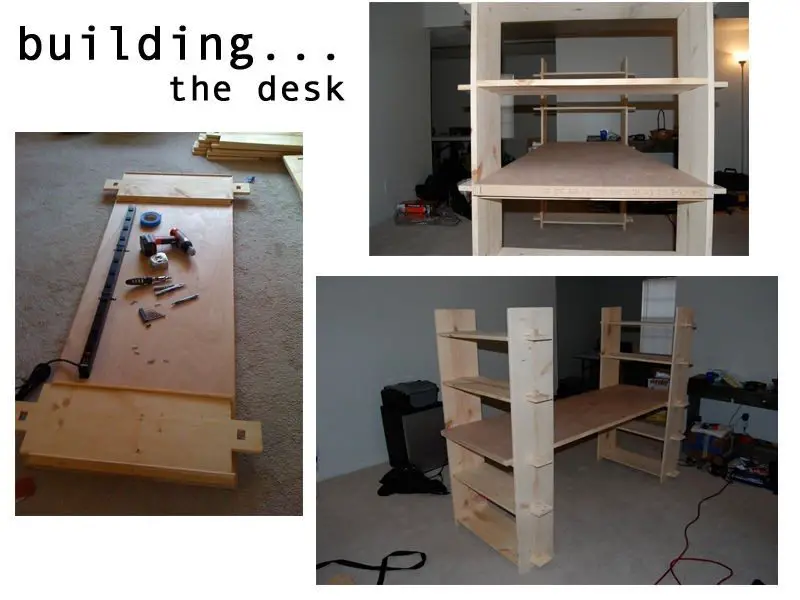
Once you have installed everything and made sure that all pieces fit together for a stable structure, you can easily disassemble them to stain to your desired finish.
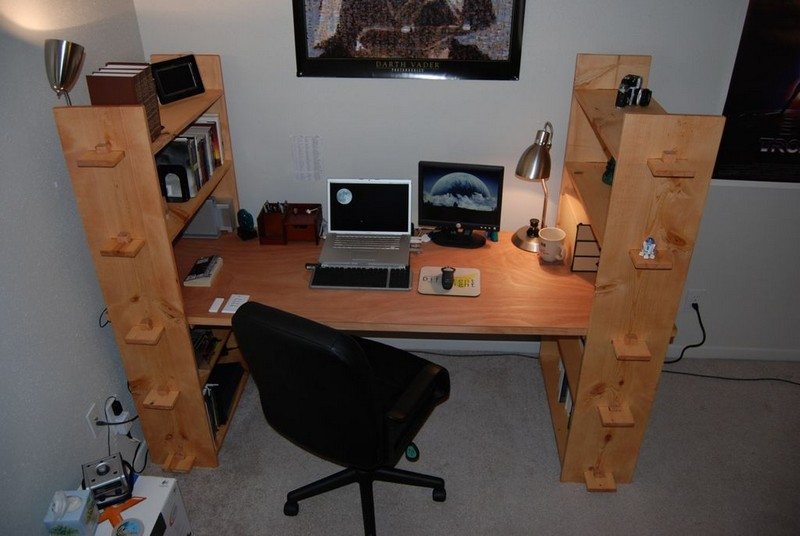
These pictures should illustrate more how the table is installed…
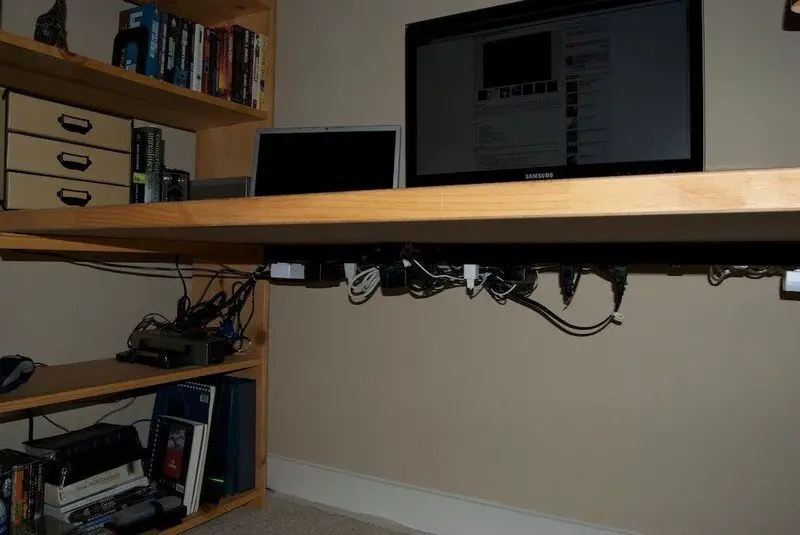
A power strip is mounted under the desk for computers and other gadgets.
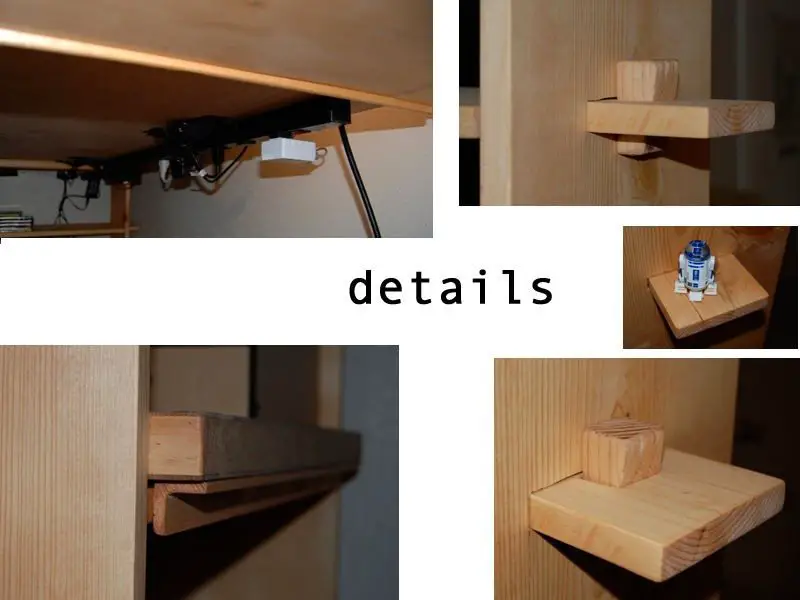
Pretty easy isn’t it? :)
Thank you WhyIsThisOpen for this well-designed desk.
[embedit snippet=”media-net-inline-ad-728×90″]


