If you’re like most drivers, your car gets new tyres every two or three years. Those old tyres typically end up as landfill. Shredded maybe, but landfill none-the-less.
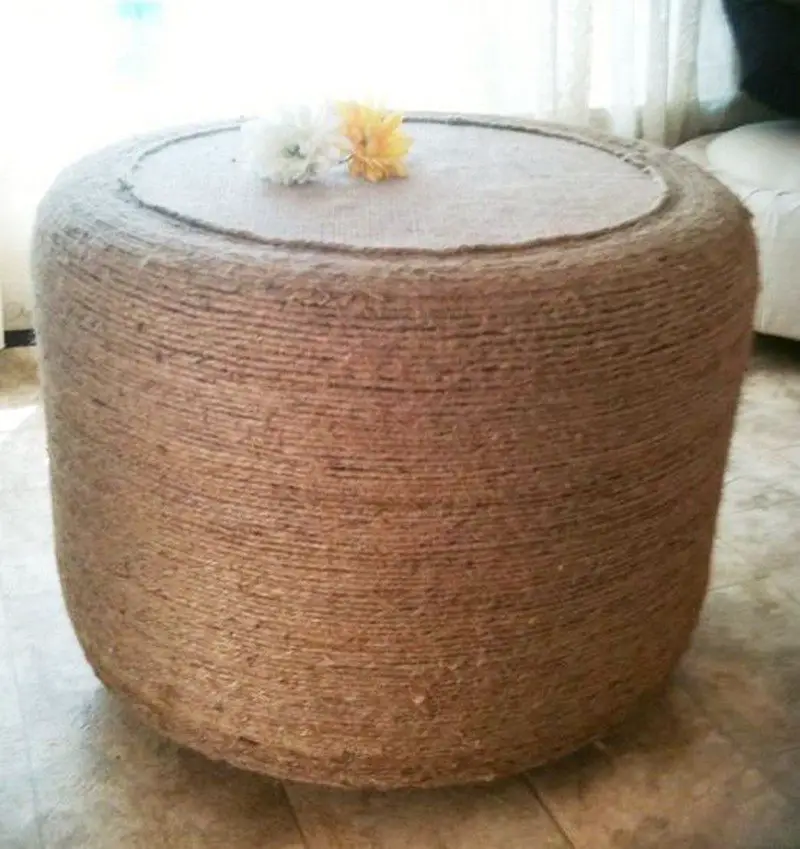
Here’s a great way to help yourself and the environment… recycle them by turning them into an ottoman or a table. You won’t even notice that these ottomans and table are made from tires. They’re perfect for both indoor and outdoor living spaces.
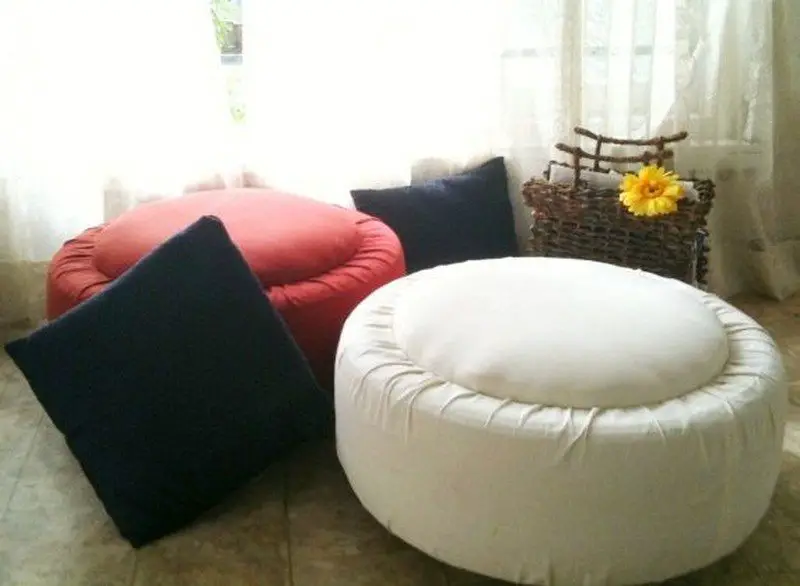
With this project, you get a beautiful and cozy ottoman and table as unique as you are. You also get the benefit of knowing you have made a contribution to our environment.
Tools & Materials:
- Tires
- Sewing Machine
- Drill
- Screws
- Nuts and bolt
- 1/2″ thick ply wood.
- Fabric (one just for securing cushion, and the other for a nice cover)
- Rope
- Sponge for the cushions
- Stapler
- Glue
- Epoxy
- Garter/cord
- Casters – 4 per ottoman/ table
[embedit snippet=”adsense-728×15-inline-text-only-ad”]
Steps:
Of course the very first step is to wash the tires well. :)
TABLE
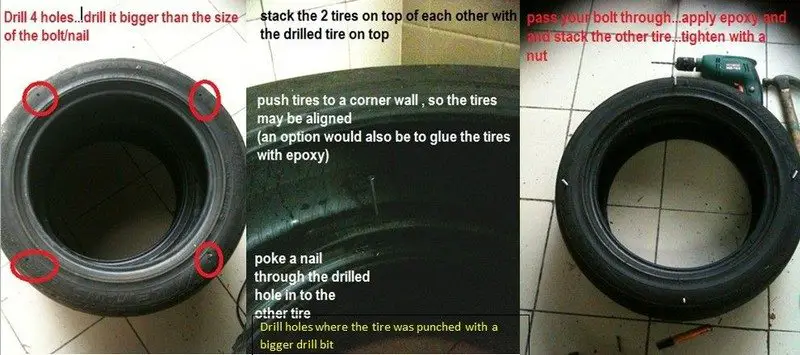
You will need two tires for this. Make four holes on each tire. Make sure they are aligned.
Drill holes on one tire first. Then to make accurate holes for the second tire, place the first tire above it facing down. Meaning the holes that you just made should be at the bottom. You might want to lean them on a corner wall to help you keep them aligned.
Mark the second tire by puncturing a nail at the center of each hole from the first tire. Remove the first tire, and drill away.
Measure the diameter of your tire where the bevel is. Cut your plywood to this size. You will need circles for the top and bottom.
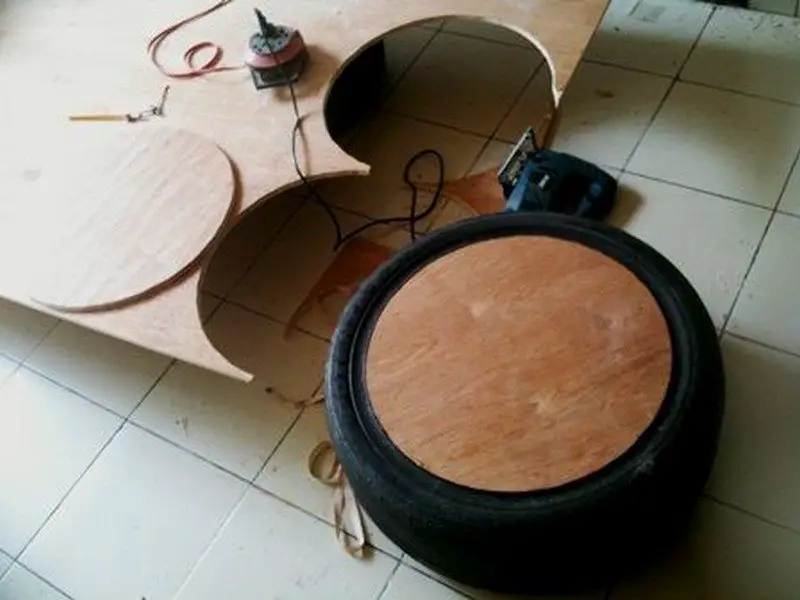
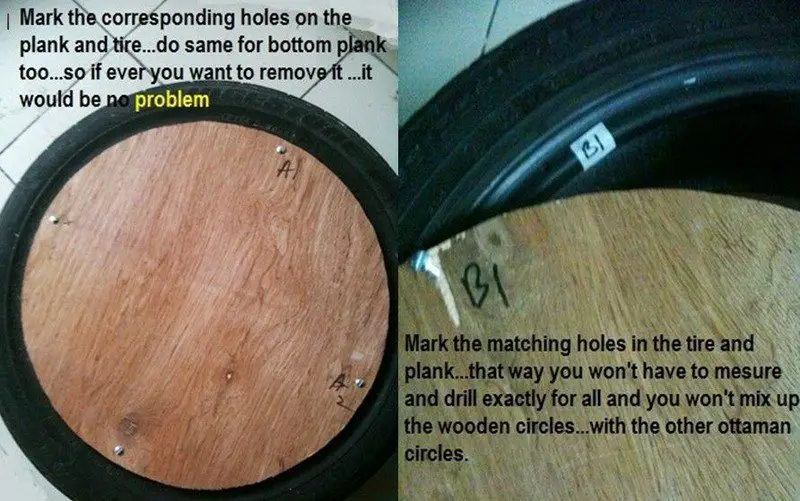
Now drill holes to the circles and the tire where they will be screwed together. Install bolts on the plywood.
If you want a cover for the plywood now is the time to do it. Lay your cover on a flat surface facing down. Place the plywood on top. Mark and cut the fabric so that you can staple it at the back of the plywood. Apply glue to the plywood. Cut slits where the bolts are.

Now you can attach the circles doing the bottom circle first. If you want your table to be mobile, this is the time to attach the casters, with one of the holes of the casters also serving as the hole where the plywood and tire is attached.
Next step would be to wrap the tires with rope using hot glue. Start with the sides of the tire, from top to bottom.
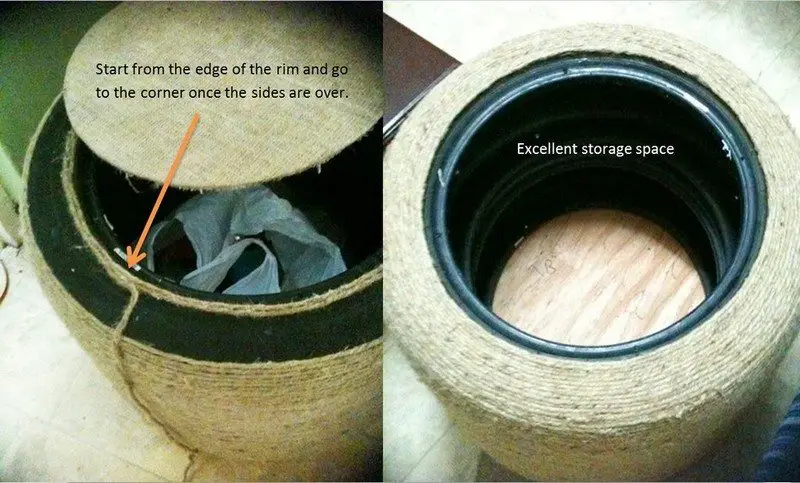
Then cover the top part of the tire starting from the rim, and around until you reach the edge. See picture below.
OTTOMAN
Some of the steps here are similar with the steps you’ve done for the table – clean the tires, measure the diameter for creating the circles, drill holes and install bolts and nuts.
Now since this is an ottoman we would need a cushion for the top circle. Use a sponge that would provide you about 2 inches of thickness. You would need two fabrics here. The first one is just for creating the cushion and the other will be your cover.
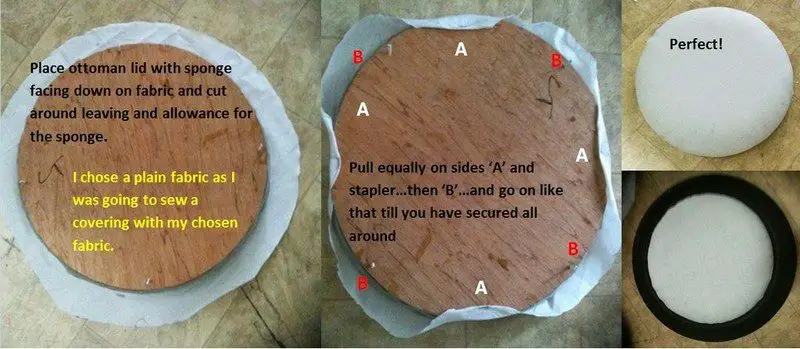
For putting a cushion, lay the first fabric on a flat surface facing down. Place your sponge in the middle, and put the plywood on top. Mark and cut the fabric so that you can staple it at the back of the plywood with the sponge in it.
Staple once on one side (12 o’ clock mark) and then pull the fabric on the opposite side where you stapled it (6 o’clock) so that the fabric will be stretched nicely, and staple it. Now staple at 9 o’clock mark, and pull and staple again at 3 o’ clock mark. Do this until you have stapled around the circle.
That is not the covering yet. Of course we want something that has a nice print or color and is washable.
Lay the cover fabric on a surface again, like you did earlier this time marking the fabric a little bigger than the first fabric because this time you will be sewing a hem.
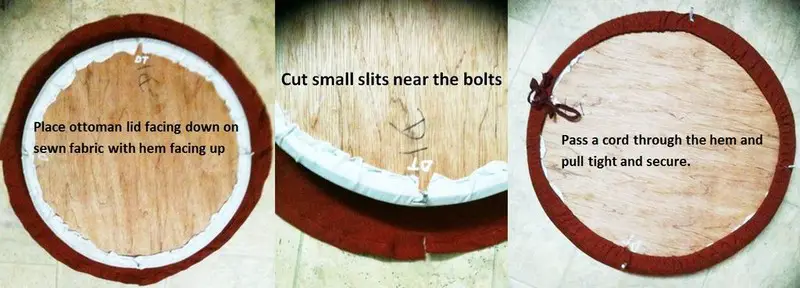
Cut your fabric and sew hem around. Lay it flat again and place the plywood on top and cut slits where the bolts are. Whip stitch where you cut the fabric to prevent from fraying.
With the cushioned plywood on top of the fabric, Insert a cord or garter through that hem, and pull it tight. Now you have the seat cover!
For covering the tire, wrap your fabric around the tire, mark and cut it. Again, allow for some hem stitching.
Sew hems on all sides of the fabric. Then insert a cord/garter through the hem on the long sides of the fabric. Wrap it around the tire again and keep that measure by pinning the fabric.
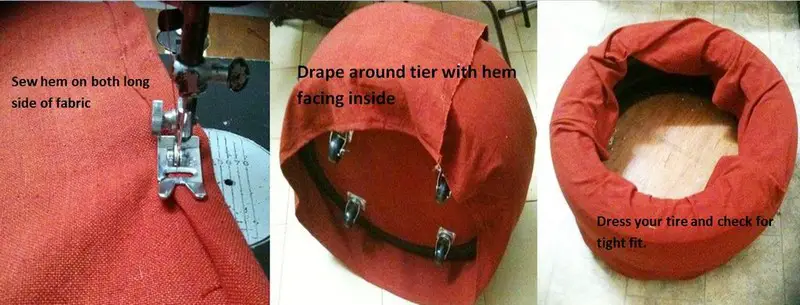
Remove it from the tire again, and permanently secure it by sewing except near the hem.
Try it on the tire again to see if it fits right. If it is nice and tight, you can now tighten the cord/garter.
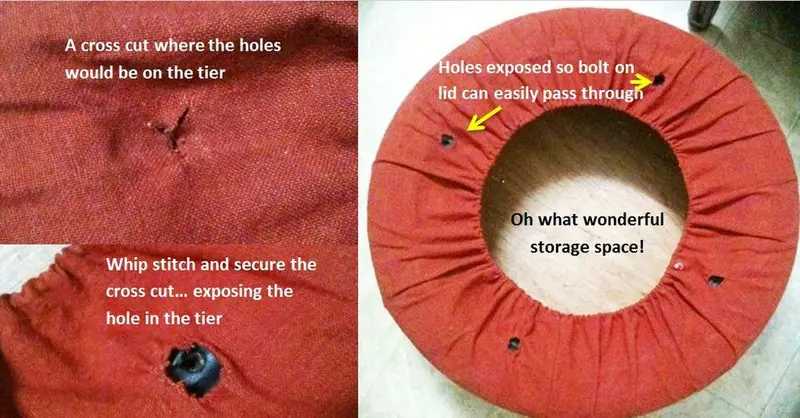
Now we have to expose the holes that we did on the tires, so mark the fabric and cut making holes. Whip stitch those holes and double check if it is aligned with the holes of the tire.
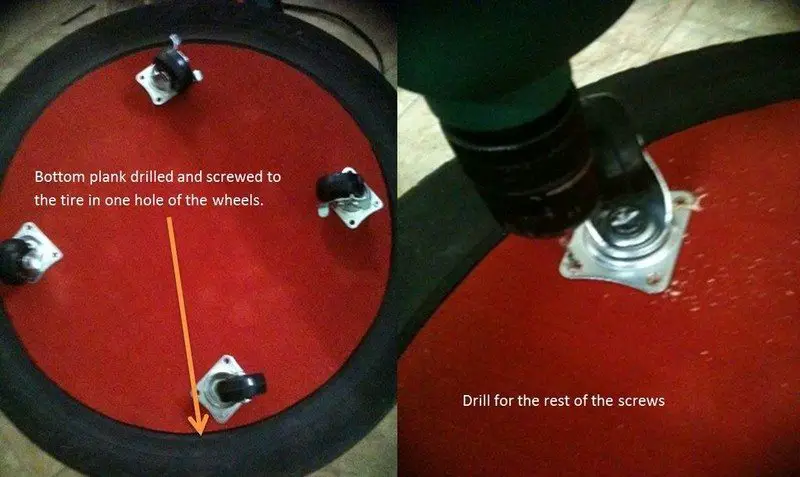
Attach the bottom plywood – like you did with the table. It would be nice to have wheels with them also.
Lastly put the cushion in place and you are done!
Thanks to shazni for the original idea!
[embedit snippet=”media-net-inline-ad-728×90″]