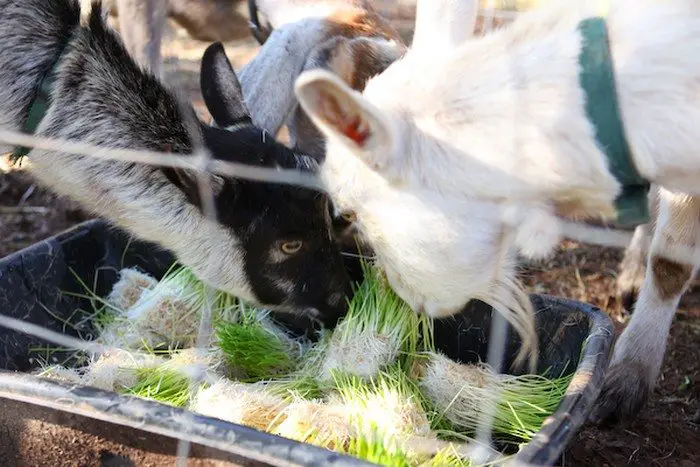
If you are raising your own livestock or looking at starting a homestead, you should also look at having your own fodder growing system. Why? Because it offers lots of benefits – for you and your livestock!
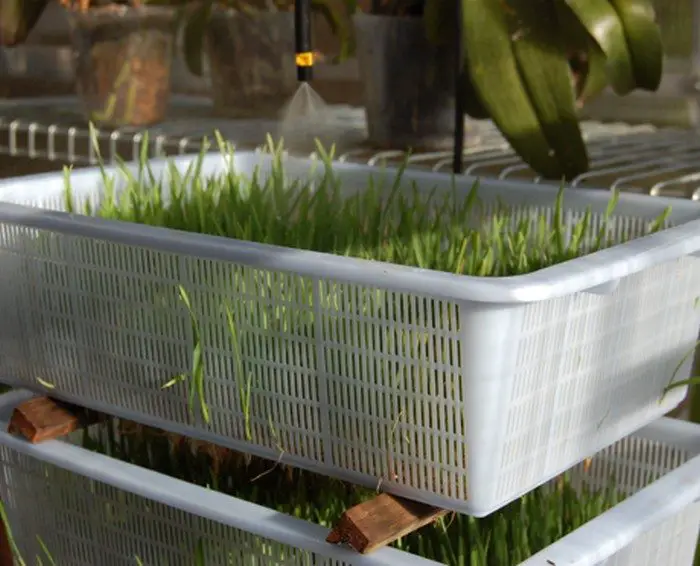
Being independent at providing food for your animals is a great way to reduce the overall expenses of raising your own livestock. You can have high quality fodder available 365 days of the year, rain, hail, snow or searing summer heat!
A home fodder growing system is definitely good as it is a low-initial cost and low-maintenance DIY project!
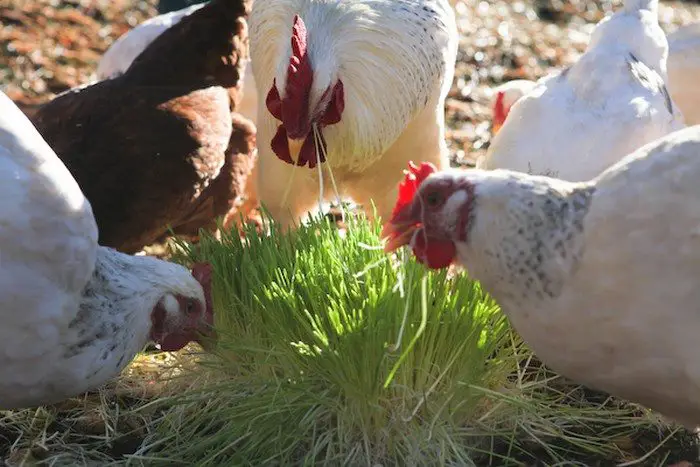
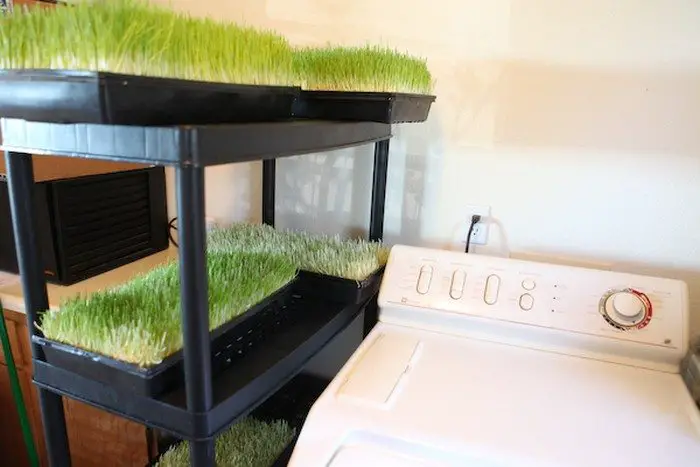
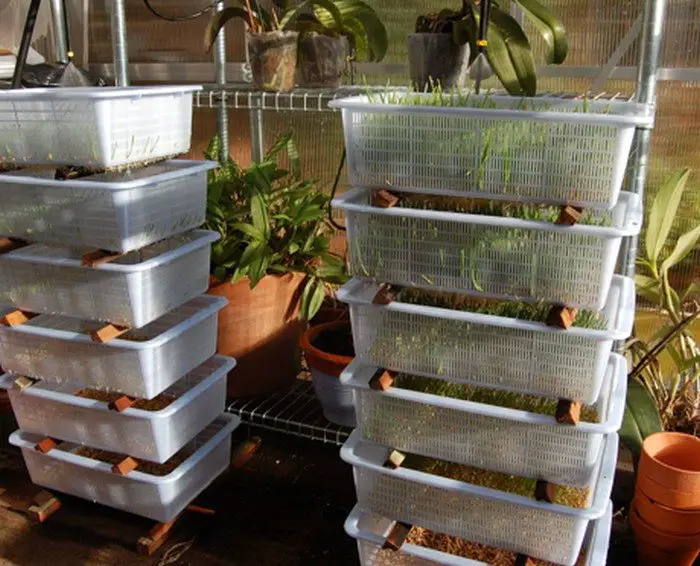
You don’t need to have a dedicated are of cultivated land or any special equipment to do it. In fact, you can achieve high yields in just a very small area. For instance, you can grow up to 15 lbs of fodder in a space as small as a laundry room. That is enough to feed 15-20 chickens or 3-4 milk goats a day!
As long as you have a well ventilated room with a decent shelving system, you can definitely DIY your ‘fodder farm’.
This fodder growing system is also easy to maintain. Just an hour during the day and another 15 minutes in the evening is enough to harvest fodder and grow/manage the sprouting seeds.
It really is practical for a small homestead, especially since the technique requires minimal water consumption. You can head over to the article linked below to learn how efficiently water is used!
By having your own fodder growing system you can also ensure that your animals are getting the right nutrition. Organically and hydroponically grown fodder contains more vitamins and minerals, bringing several health benefits such as increases in Omega 3, amino acids and natural hormones among others.
Do you want fresh and healthy green feeds for your livestock 365 days a year? Then make an inexpensive fodder growing system now! :)
Contents
Making a Fodder Growing System
Materials
- Barley Seeds
- Bleach
- 5 small Sprouting Tubs
- Plastic Cutting Board
- 5 Black Seedling Trays
- 3 High Plastic Dome Lids
- 2 Low Plastic Dome Lids
- Shelving System
Tools
- Drill
Instructions
Step 1: Prepare the Seedling Trays
- Drill Drainage Holes: Using the drill, create small drainage holes in the bottom of each black seedling tray. Space the holes evenly to ensure proper drainage.
Step 2: Sterilize Equipment
- Mix a Bleach Solution: Mix one part bleach with ten parts water in a large container. This will be used to sterilize your trays and sprouting tubs.
- Soak and Rinse: Soak the seedling trays and sprouting tubs in the bleach solution for about 20 minutes. After soaking, rinse them thoroughly with clean water to remove any bleach residue.
Step 3: Prepare the Barley Seeds
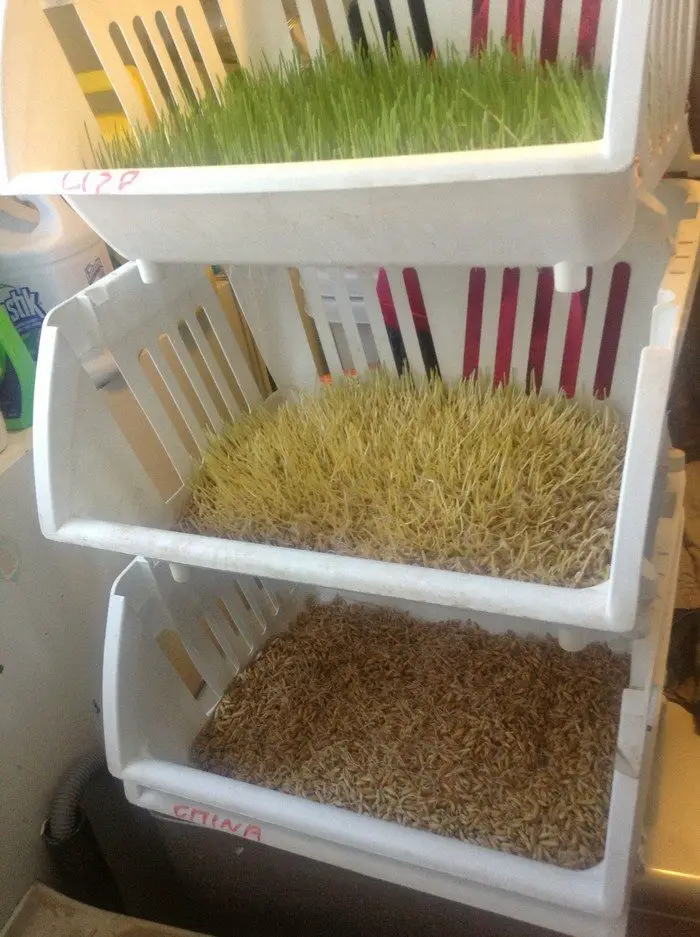
- Soak the Seeds: In the sprouting tubs, soak the barley seeds in clean water for 8-12 hours to initiate germination.
- Drain and Spread: After soaking, drain the water and spread the seeds evenly across each seedling tray. A thin layer is ideal to prevent mold and promote uniform growth.
Step 4: Set Up the Growing Area
- Install the Shelving System: Assemble the shelving system according to the manufacturer’s instructions. Make sure it’s stable and positioned in a well-ventilated area.
- Arrange the Trays: Place the seedling trays on the shelves. Utilize the space efficiently to maximize your growing area.
Step 5: Cover the Trays
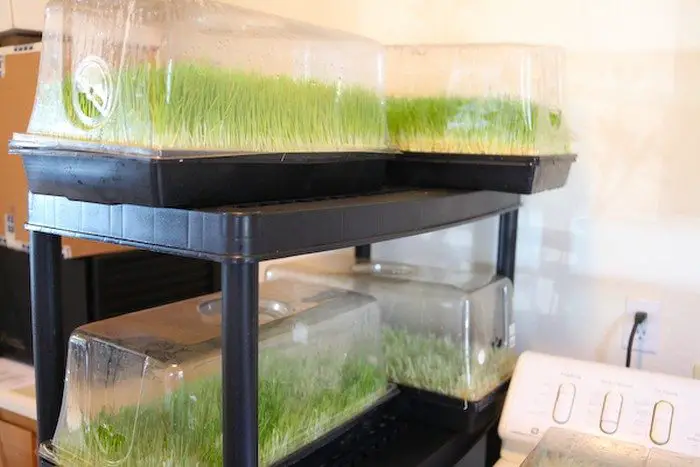
- Cover with Dome Lids: Use the high plastic dome lids for the trays where seeds are freshly sown to maintain higher humidity, which is beneficial in the initial stages of growth. Switch to the low dome lids as the fodder begins to grow taller.
Step 6: Daily Maintenance
- Watering: Water the seeds gently twice a day—once in the morning and once in the evening. Ensure the water is distributed evenly and that excess water can drain away.
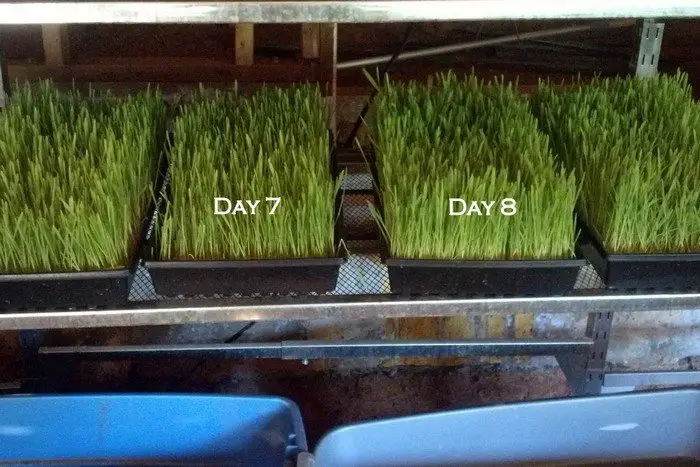
- Watch for Growth: Observe the growth daily. Barley typically begins to sprout within a few days and is ready for harvest as fodder in about 7-10 days.
Step 7: Harvesting
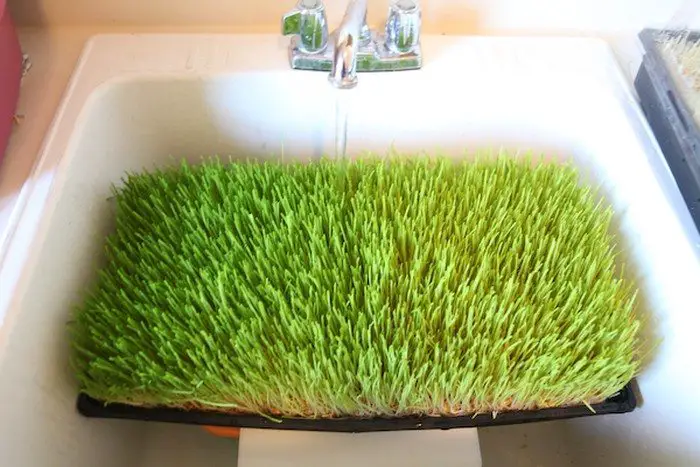
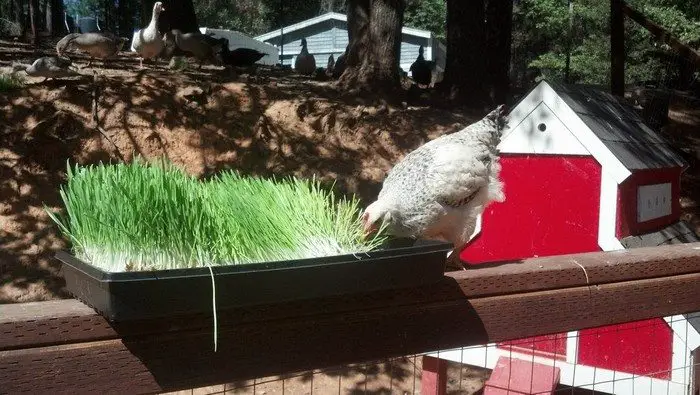
- Harvest: Once the fodder has reached about 6-8 inches tall, it’s ready to harvest. Use the plastic cutting board to cut the mats of fodder from the tray.
- Feed Your Livestock: Distribute the fresh fodder to your livestock. They will benefit from this nutritious, fresh food source.
Step 8: Clean and Repeat
- Clean the Trays: After each batch, clean the trays thoroughly with the bleach solution to prevent any disease or mold build-up. Let them dry completely before starting the next batch.
Click on any image to start lightbox display. Use your Esc key to close the lightbox.![]()
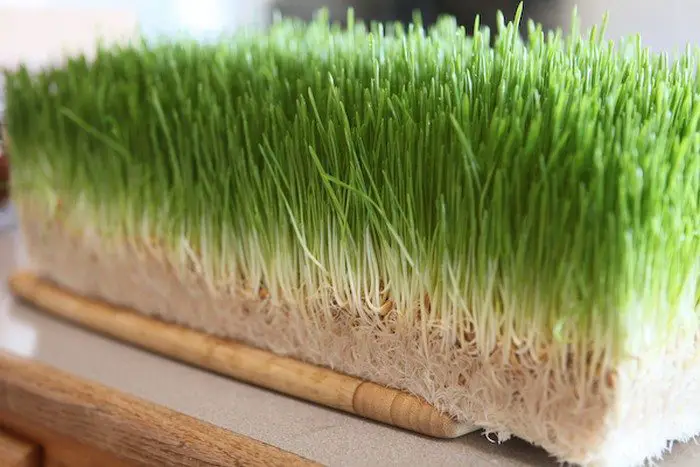
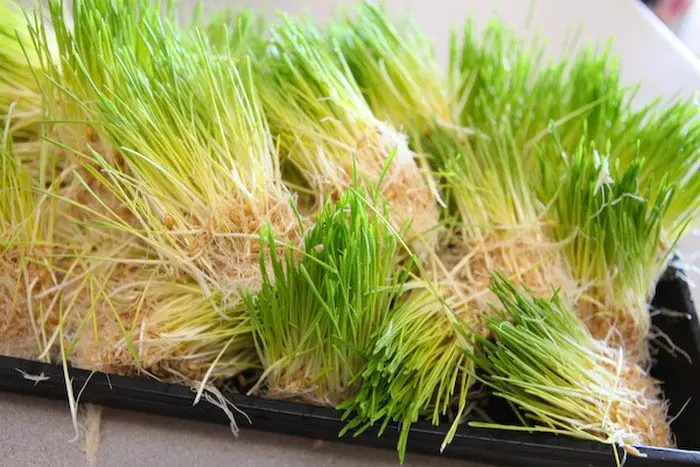

You can get more step-by-step instructions here…
Optimizing Nutritional Content in Your Fodder Growing System
Creating a fodder growing system is an excellent way to provide nutritious feed for your livestock. To maximize the benefits, it’s crucial to optimize the nutritional content of the fodder. This ensures your animals get the most from their diet, supporting better health and productivity.
Here’s how to enrich the nutrient value of the fodder you grow.
Choose the Right Seeds
The foundation of nutrient-rich fodder begins with selecting the right seeds. Barley is a popular choice due to its balanced nutrition profile, but you can also consider wheat, oats, or alfalfa. Each seed type offers different nutritional benefits, so consider the specific needs of your livestock when selecting seeds.
Perfect the Sprouting Time
The growth stage at which you harvest the fodder affects its nutrient levels. Generally, sprouting seeds for 7-10 days maximizes the availability of proteins, vitamins, and enzymes. Monitor the growth closely and harvest the fodder when it reaches its nutritional peak.
Maintain Optimal Growing Conditions
The conditions under which the fodder grows can significantly impact its nutritional quality. Ensure your fodder growing system is set up in an area with adequate ventilation and controlled humidity. This environment helps prevent mold and promotes uniform growth, preserving the fodder’s nutritional integrity.
Use a Nutrient Solution
Enhancing the water with a nutrient solution can significantly improve the nutritional content of your fodder. Adding kelp, fish emulsion, or other hydroponic solutions in moderate amounts can provide the seeds with additional vitamins and minerals, boosting the overall nutrient profile of the fodder.
Regular Testing and Adjustments
Regularly testing the fodder for nutrient content can provide insights into its quality and help you make informed adjustments. If the fodder lacks certain nutrients, consider tweaking the seed mix or adjusting the nutrient solutions used during watering.
Rotate Seed Types
Rotating different seed types in your fodder growing system can improve the variety of nutrients available to your animals. This practice not only prevents nutrient deficiencies but also encourages a well-rounded diet. Experiment with combinations like barley and peas or wheat and clover to tailor the fodder’s nutritional profile to your livestock’s needs.
Control Light Exposure
Light exposure significantly affects the growth and nutrient composition of fodder. Implementing controlled light exposure in your fodder growing system can enhance photosynthesis, leading to higher vitamin content, particularly vitamins A and E. Consider using grow lights with timers to provide consistent and optimal light exposure.
Optimize pH Levels
The water pH in your fodder growing system can influence the availability of nutrients. Most fodder seeds thrive in slightly acidic to neutral water (pH 6 to 7). Regularly testing and adjusting the pH of your water can help maximize nutrient uptake and improve the overall growth rate of the fodder.
Implement a Temperature Control Strategy
Temperature plays a critical role in the growth and nutritional quality of fodder. Maintaining a consistent temperature within the optimal range for your specific seeds can prevent nutrient degradation. For example, cooler temperatures are generally better for barley, helping to slow down metabolism and preserve essential nutrients.
Enhance Microbial Activity
Introducing beneficial microbes into your fodder growing system can promote more efficient nutrient absorption. Beneficial bacteria or mycorrhizal fungi can enhance root development and nutrient uptake, leading to richer and more nutrient-dense fodder.
Monitor Moisture Levels
Proper moisture is essential in your fodder growing system for optimal seed germination and growth. Overwatering can lead to mold and nutrient loss, while underwatering might stress plants and reduce their nutritional value. Use moisture meters to ensure consistent and appropriate water levels throughout the growing cycle.
Focusing on these key areas ensures that your fodder growing system produces high-quality, nutrient-dense feed, resulting in healthier livestock and more sustainable farming practices.
Scaling Up Your Fodder Growing System
As your farm expands or your needs increase, scaling up your fodder growing system can be a strategic move to sustainably meet the demand for livestock feed. Upgrading from a small-scale system to a more extensive setup involves careful planning and implementation to ensure efficiency and cost-effectiveness. Here are key strategies to help you successfully scale up your fodder system.
Evaluate Your Current System
Before expanding your fodder growing system, assess the current setup’s performance. Identify what works well and where improvements are needed. This evaluation should include the efficiency of seed conversion, the quality of fodder produced, and the overall ease of operation. Understanding these factors will guide you in designing a larger system that replicates successes and addresses any shortcomings.
Increase Capacity Gradually
When scaling up your fodder growing system, it’s wise to increase capacity gradually. Start by doubling or tripling the number of trays or shelving units you currently use. This allows you to manage the increased volume without overwhelming your resources and infrastructure. Gradual expansion helps mitigate risks and allows for adjustments based on practical experience.
Automate Processes
Automation becomes crucial as you scale up your fodder growing system to handle larger volumes. Automating watering, temperature control, and lighting can save significant time and reduce labor costs. Consider investing in automated conveyor systems for moving trays and automated harvesting tools to streamline operations and increase production efficiency.
Enhance System Layout
Optimizing the layout of your fodder growing system is essential as you scale up. Design the setup to maximize space efficiency and improve workflow. Vertical farming techniques can be particularly effective, allowing you to grow more fodder in a limited area. Ensure that your layout facilitates easy access for maintenance, monitoring, and harvesting.
Strengthen Supply Chain Management
As your fodder production increases, so does your need for seeds, nutrients, and other supplies. Strengthening your supply chain is critical to ensure a steady and cost-effective supply of inputs. Negotiate with suppliers for bulk purchases and seek reliable partners who can consistently meet your growing needs.
Monitor and Adapt
Continuous monitoring and adaptation are vital in a scaled-up fodder growing system. Regularly check the system’s performance, including growth rates, fodder quality, and system efficiency. Use data from these assessments to fine-tune processes and make informed decisions about further scaling or necessary improvements.
By carefully planning and implementing these strategies, you can effectively scale up your fodder growing system. This expansion not only meets the increased feed demand but also enhances operational efficiency, ultimately contributing to the sustainability and profitability of your livestock management efforts.
Conclusion
Building a fodder growing system offers a cost-effective and sustainable way to provide fresh, nutritious feed for your livestock year-round. By optimizing conditions and scaling appropriately, you can enhance the health benefits and productivity of your farm. Ultimately, this system empowers you to take control of your animal’s diet and contribute positively to their well-being and your farm’s success.
For more livestock feeding project, check out our pallet hay feeder project!


