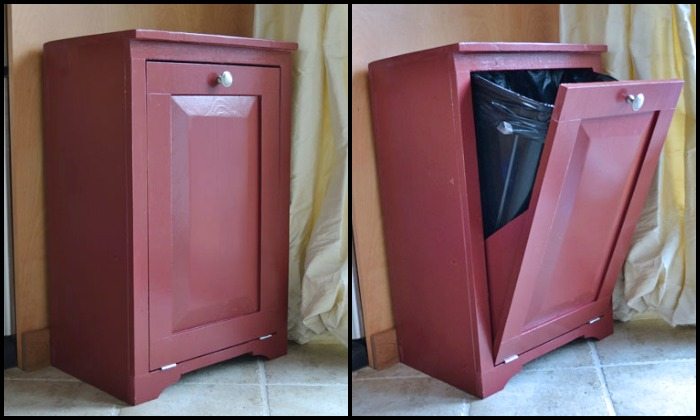
Can’t stand the unpleasant sight of your trash and recycle bins? Here’s an easy tilt-out trash bin project you might want to tackle to fix it!
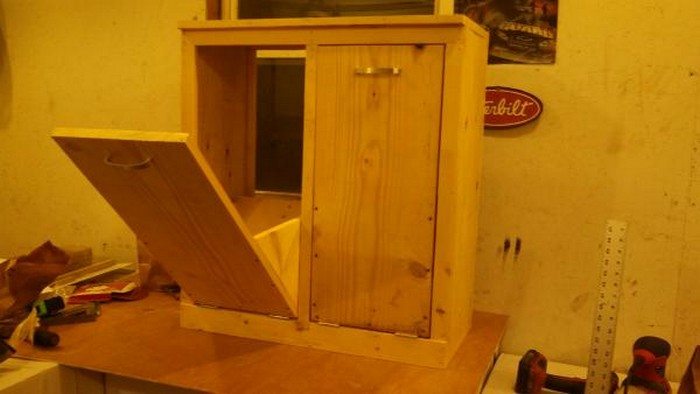
Hide your trash bin by building a tilt-out cabinet. It’s an easy and simple woodworking project even new DIY-ers can do. It’s a great project especially for the kitchen to make the area look cleaner! But of course, you can also build one for any room in your house. You can even incorporate it with a shelving unit in your home office or bedroom.
With a tilt-out trash bin, your home will look cleaner and more pleasant to the eyes!
Planning on building one or two? You can get more inspiration from our album below. :)
Contents
Building a Tilt-Out Trash Bin
Materials
- 2 – 6 ft long 1×12 Timber
- 1 – 8 ft long 1×3 Timber
- 2 – 8 ft long 1×2 Timber
- Narrow Hinges
- Knob or Pull
- 2″ Screws
- 1 1/4″ Finish Nails
- 2″ Finish Nails
- 1-1/4″ Pocket Hole Screws
- Wood Glue
- Wood Filler
- 120 grit Sandpaper
- Primer
- Wood Conditioner
- Paint
Tools
- Measuring Tape
- Speed Square
- Pencil
- Kreg Jig
- Cordless Drill
- Jigsaw
- Sander
- Brad Nailer
- Circular Saw
Instructions
Step 1: Prepare the Wood
- Cut the Wood: Using the circular saw, cut the 1×12 timber into two pieces for the sides, one top piece, and one bottom piece based on your desired cabinet dimensions. Use the 1×3 timber for the face frame and the 1×2 timber for the back support.
- Sand the Wood: Smooth all the cut pieces with a sander and 120 grit sandpaper.
Step 2: Assemble the Frame
- Drill Pocket Holes: Use the Kreg Jig to drill pocket holes in the ends of the top and bottom boards.
- Attach Sides to Top and Bottom: Apply wood glue to the joints, then connect the sides to the top and bottom boards using 1-1/4″ pocket hole screws and the cordless drill.
- Attach Back Supports: Fix the 1×2 timber as back supports using wood glue and finish nails for added stability.
Step 3: Build the Tilt-Out Door
- Construct the Door Frame: Cut the remaining 1×3 timber to form the frame of the tilt-out door. Drill pocket holes at each end of the horizontal pieces and attach them to the vertical pieces using pocket hole screws.
- Attach the Front Panel: Cut a piece of 1×12 timber to size for the door panel and attach it to the frame using wood glue and finish nails.
Step 4: Install the Hinges and Door
- Attach Hinges: Attach the narrow hinges to the door frame, then to the inside of the cabinet frame.
- Install the Door: Ensure the door swings out smoothly and make adjustments as necessary.
Step 5: Finishing Touches
- Fill Gaps: Use wood filler to fill any gaps or nail holes, then sand smooth once dry.
- Apply Wood Conditioner and Primer: Before painting, apply wood conditioner followed by primer to ensure an even and smooth finish.
- Paint: Paint the cabinet in your chosen color. Let it dry completely.
- Add Knob or Pull: Attach the knob or pull to the tilt-out door.
Step 6: Final Setup
- Position Your Trash Bin: Place your trash bin inside the cabinet.
- Adjustment and Placement: Make any necessary adjustments to ensure the cabinet and door operate smoothly. Place the cabinet in its intended location in your home.
Click on any image to start a lightbox display. Use your Esc key to close the lightbox.![]()
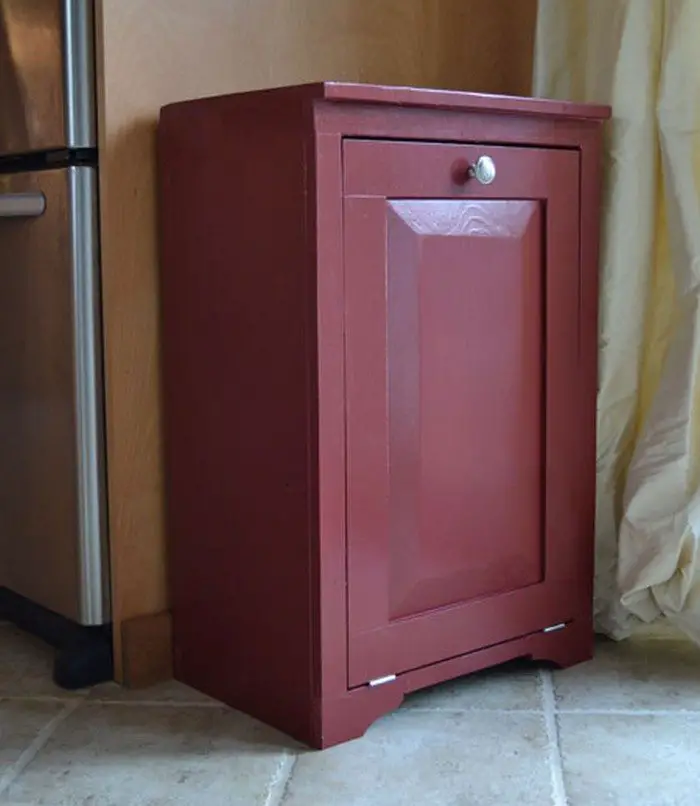
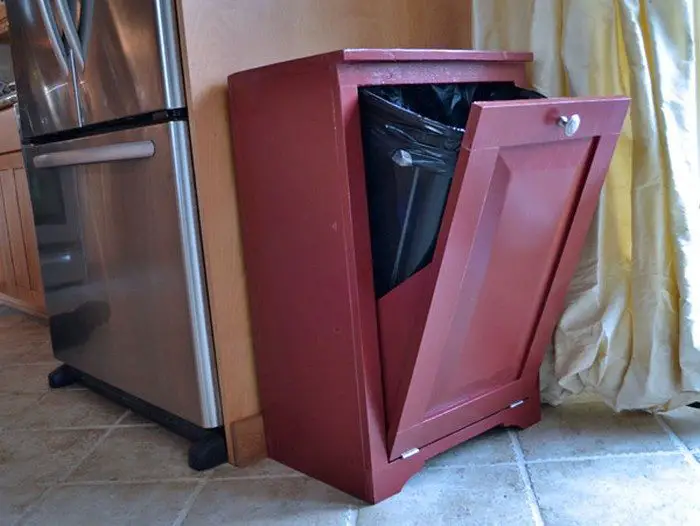
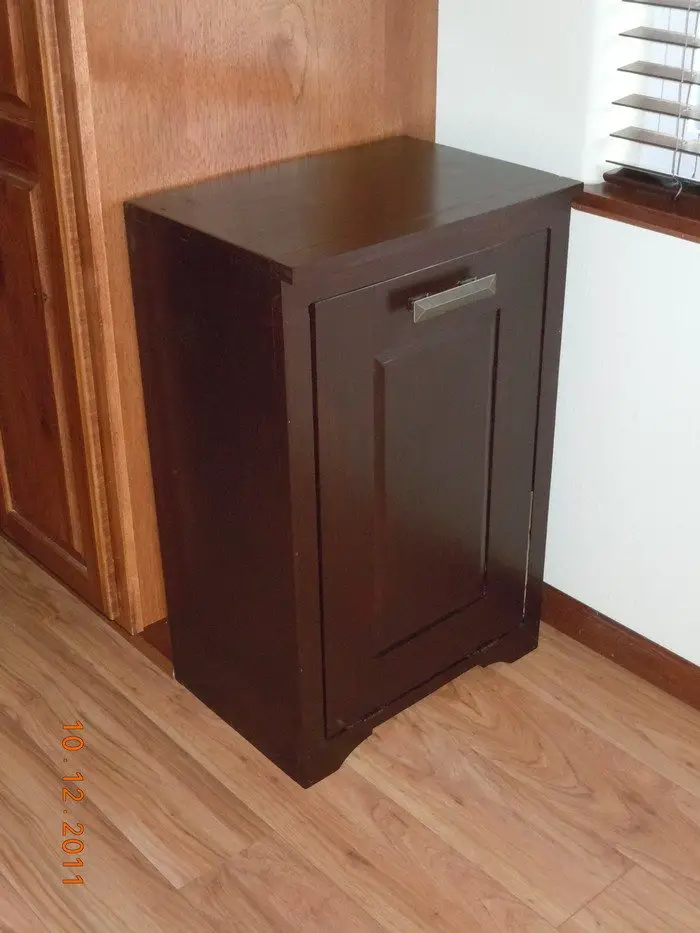
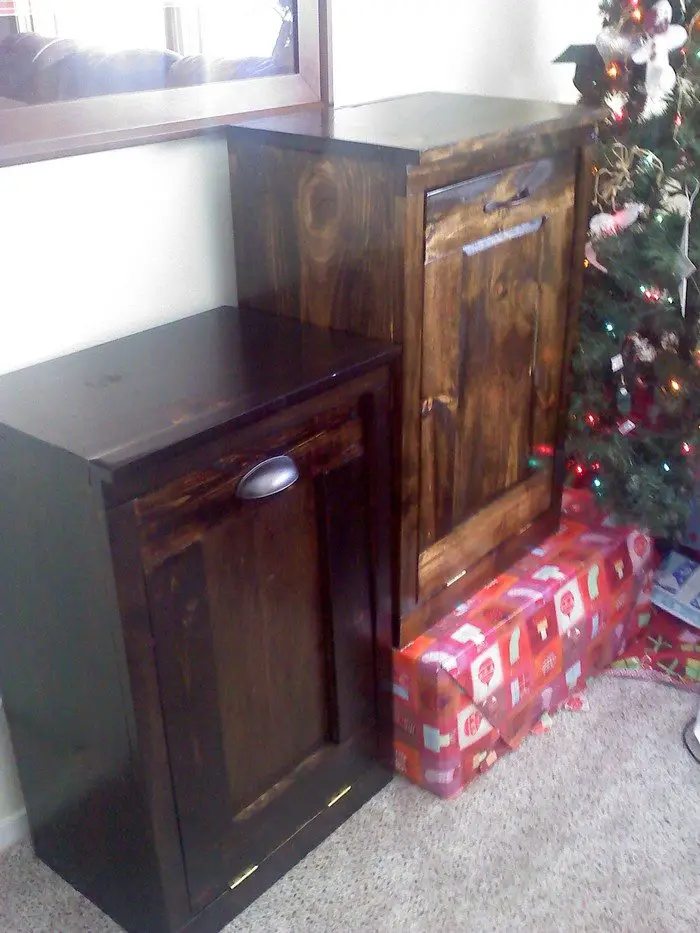
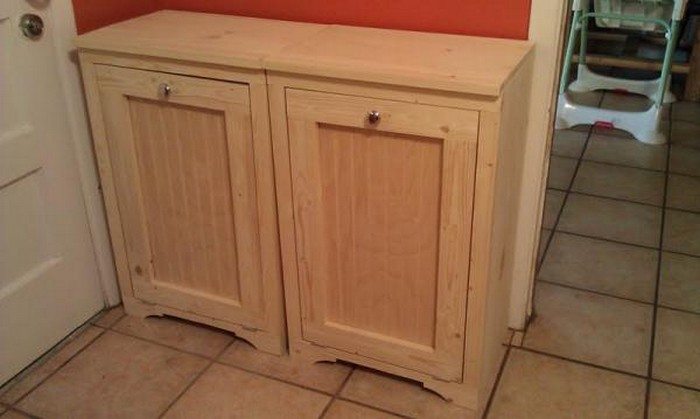
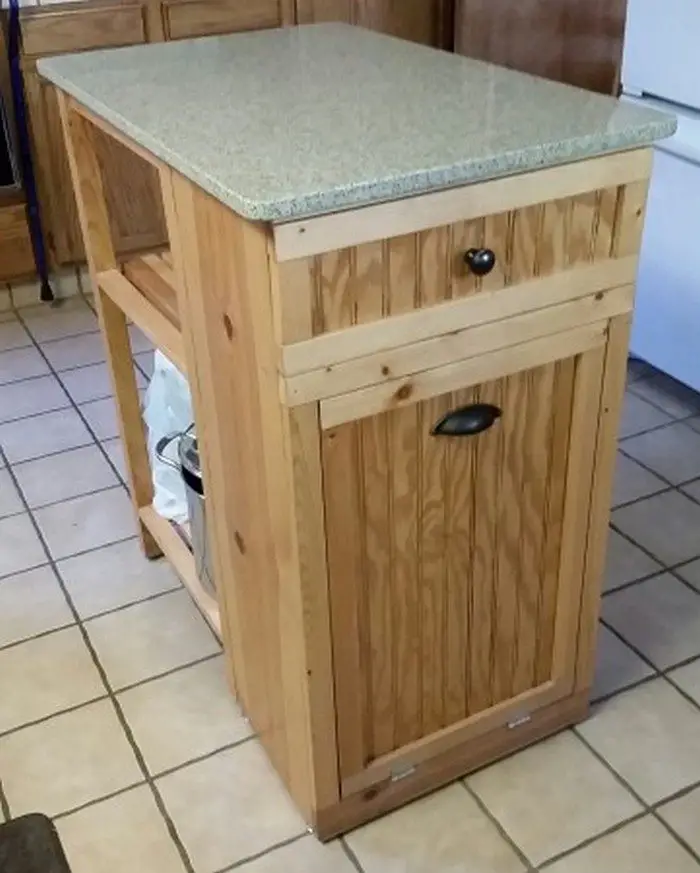
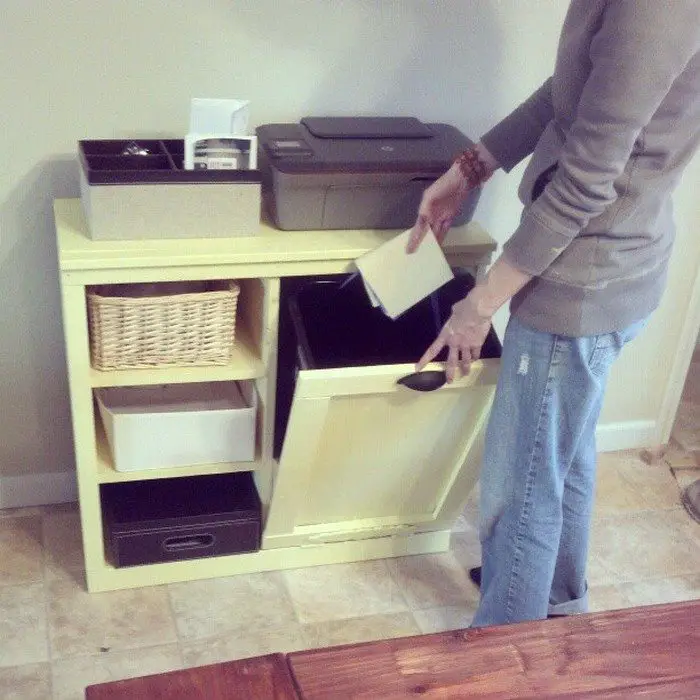
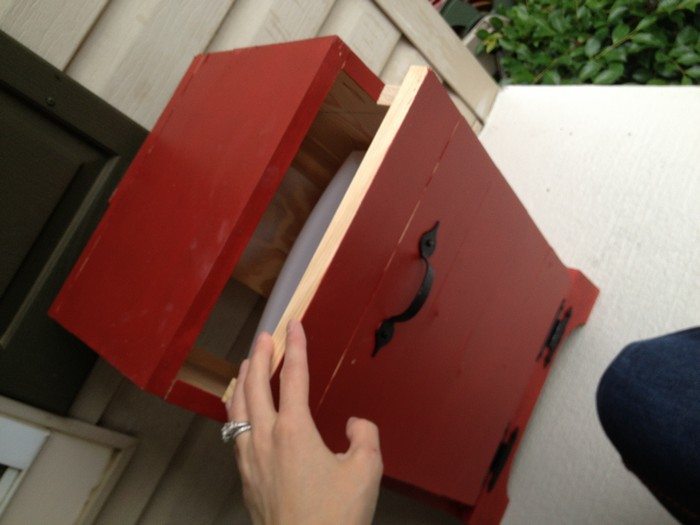
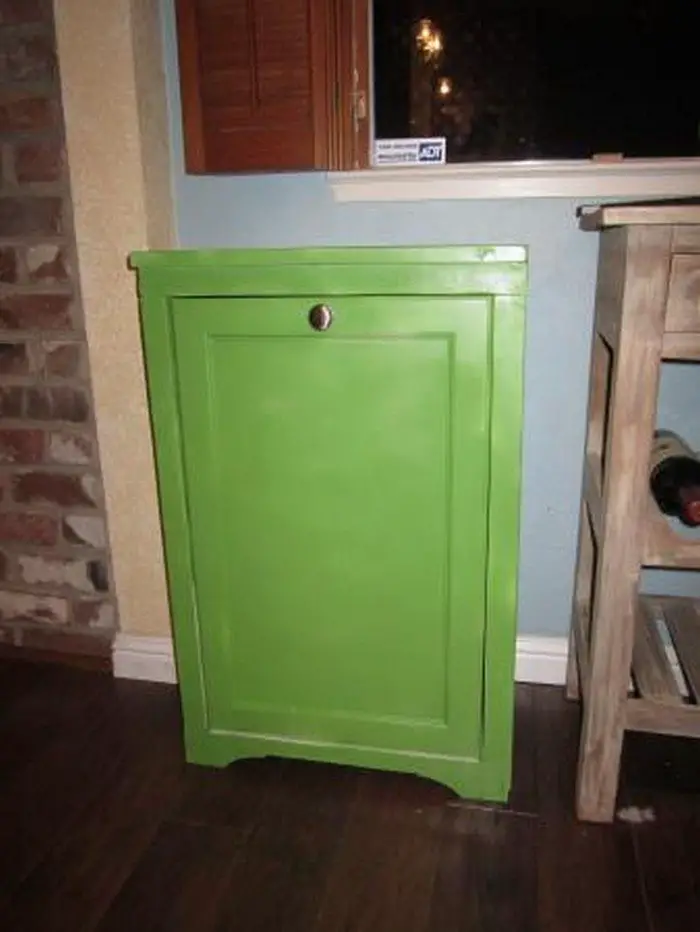


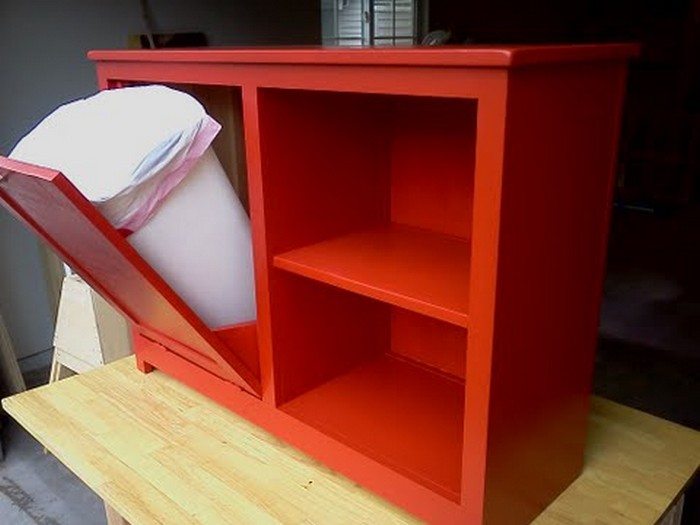
You can get more step-by-step instructions here…
Space Optimization with Tilt-Out Trash Cabinets
In modern homes where every inch of space counts, a tilt-out trash cabinet can be a game-changer. Not only does it help conceal waste bins, but it also offers a smart solution to utilize limited space effectively.
Here’s how you can maximize your area with the addition of a tilt out garbage.
Maximize Kitchen Space
The kitchen is often the heart of the home but can also be one of the most cluttered areas. A tilt-out trash cabinet in the kitchen allows you to hide unsightly trash bins while freeing up floor space. You can integrate it beneath the kitchen counter or island, ensuring it doesn’t interfere with the functional area of the kitchen. This placement makes it easy to sweep debris directly into the bin during food preparation, keeping your kitchen surfaces clean and clear.
Enhance Bathroom Functionality
Bathrooms are typically smaller and require strategic planning to make the most out of the available space. Incorporating a tilt-out trash cabinet under the sink or beside the vanity can keep your bathroom looking tidy and spacious. This setup not only hides the trash bin but also makes it accessible for everyday use, such as disposing of toiletries and used products, without taking up additional space.
Dual-Purpose Furniture
A tilt-out trash cabinet can serve multiple functions in areas like the home office or bedroom. By designing the top surface to act as a shelf or table, you can use it for decorative items or as an additional workspace. This dual-purpose approach is especially beneficial in small apartments or homes where every piece of furniture needs to be both functional and space-efficient.
Streamlined Design for Small Spaces
For truly cramped spaces, the design of your tilt-out trash cabinet should be as streamlined as possible. Consider custom solutions that fit into unusual spaces, such as narrow hallways or unused corners. The cabinet can be designed to blend with other furniture elements or to fit precisely under existing counters, ensuring that it doesn’t protrude or hinder movement around the house.
Using a tilt-out trash cabinet in these strategic ways not only optimizes your living space but also enhances the overall functionality and aesthetic of your home. It’s a practical investment that pays off by creating a cleaner, more organized environment.
Troubleshooting Common Issues with Tilt-Out Trash Cabinets
Even the most meticulously designed tilt-out trash cabinets can encounter operational issues over time. Whether it’s a sticking door or a misaligned frame, these problems can detract from the cabinet’s functionality and appearance.
Here’s a guide to identifying and resolving some of the most common issues associated with tilt-out trash cabinets.
Sticking or Jamming Door
One of the most frequent problems with a tilt-out trash cabinet is a door that sticks or jams, making it difficult to open or close smoothly.
Solution:
- Check for Swelling: Wood can swell due to humidity, which might cause the door to stick. Sanding the edges where the door makes contact with the frame can help alleviate this issue.
- Lubricate Hinges: Sometimes, the hinges may need lubrication. Apply a silicone-based lubricant to ensure smooth movement.
- Adjust Hinges: If the door is still not opening properly, check if the hinges are loose or misaligned. Tighten the screws on the hinges, or adjust their placement slightly to allow free movement of the door.
Door Misalignment
Over time, the door of the tilt-out trash bin may become misaligned, causing improper closure or gaps.
Solution:
- Tighten Hardware: First, check all screws and fasteners on the door and frame to ensure they’re tight. Loose hardware can lead to alignment issues.
- Adjust the Hinges: If tightening doesn’t resolve the issue, try adjusting the hinges. This can help realign the door with the frame.
- Install Additional Supports: If misalignment persists, installing additional supports or braces inside the cabinet can provide more stability and help maintain proper alignment.
Noisy Operation
A tilt-out trash cabinet should operate smoothly and quietly. If opening or closing the cabinet generates noise, it can be disruptive, especially in a quiet home environment.
Solution:
- Cushion the Impact: Adding small felt pads where the door makes contact with the cabinet can reduce noise significantly.
- Tighten Loose Components: Check for any loose components that may rattle or bang during operation. Secure all parts firmly.
- Lubricate Moving Parts: As with sticking doors, lubricating the hinges and any other moving parts can reduce noise during operation.
By addressing these common issues, you can ensure that your tilt-out trash cabinet remains functional, efficient, and aesthetically pleasing. Regular maintenance and timely repairs can significantly extend the life and performance of your cabinet, keeping your space organized and tidy.
Advanced Features and Enhancements for Tilt-Out Trash Cabinets
Tilt-out trash cabinets are a practical solution for waste management in any home, but incorporating advanced features can enhance their functionality and convenience even further. Here are some innovative enhancements that can be added to your tilt-out trash cabinets to make them more user-friendly and technologically advanced.
Automated Opening Systems
Installing an automated opening system can transform the user experience by making the tilt-out trash cabinets more accessible and easier to use, especially when your hands are full. Options include sensor-activated mechanisms that open the cabinet automatically when you approach or wave your hand near the sensor, and foot-pedal systems that allow the cabinet door to tilt out when pressed. These features are particularly useful in the kitchen, where hands-free operation is often necessary.
Odor Control Systems
To manage odors, which is a common concern with trash storage, advanced odor control systems can be integrated. These systems include built-in carbon filters to absorb and neutralize odors effectively and automatic air fresheners that release a burst of fragrance at regular intervals or each time the cabinet is opened. Such features keep your kitchen or bathroom smelling fresh, despite the presence of waste inside the cabinet.
Customizable Storage Solutions
Enhancing the utility of your tilt-out trash cabinets can also involve incorporating customizable storage features. Adjustable dividers can be added inside the cabinet to create separate compartments for different types of recyclables—such as plastics, metals, and paper—making recycling more organized and efficient. Additionally, designing a compartment or a pull-out drawer within the cabinet to store cleaning supplies like garbage bags, cleaning sprays, and gloves can provide convenient access.
Enhanced Aesthetic Options
While functionality is critical, the aesthetic aspect of tilt-out trash cabinets should not be overlooked. Enhancing the visual appeal can seamlessly integrate these cabinets into your home décor. Options for customization include panels that match existing cabinetry in the home, whether it’s wood grain, painted, or glass fronts, and installing LED lighting that automatically turns on when the cabinet opens, providing both a functional and a high-end touch to the cabinetry.
By integrating these advanced features into your tilt-out trash cabinets, you can significantly boost their functionality, making them a seamless and indispensable part of your home’s infrastructure. These enhancements not only add convenience but also contribute to a more organized and pleasant living environment.
Conclusion
Building a tilt-out trash cabinet is an excellent way to enhance the functionality and aesthetics of any room. This project not only provides a discreet solution for waste management but also offers the opportunity for customization to match your home decor. With practical benefits and a boost to your space’s organization, a tilt-out trash cabinet is a worthwhile addition to your DIY repertoire.
FAQ: Tilt Out Trash Bin
- What finish and color options are offered for these wooden trash cans?
- These wooden trash cans are available in a range of colors to suit your home decor. You can choose from a classic walnut stain for a rich, timeless look or explore several other color options to seamlessly integrate into your space. Additionally, an old distressed finish is also available for those who prefer a more rustic or vintage aesthetic.
- What size and style options are available for wood tilt out trash cans?
- Wood tilt-out trash cans are available in various sizes, including small and large, to suit different spaces and storage needs. They come in single or double bin configurations, providing flexibility for your requirements. Style options include finishes like classic walnut, distressed for a rustic charm, or a range of colors to match your decor. These choices make it easy to find a wood tilt-out trash can that balances functionality and style.
- What are the features of single and double tilt out wood trash cans?
- Tilt-out wood trash cans, available in single and double configurations, enhance kitchen functionality and design. The single tilt-out model, made from durable pine hardwood, offers a sturdy build and a multipurpose top surface for storage or food prep. The double tilt-out can adds more storage with a larger design and an optional upper shelf for essentials like trash bags or dry goods. Both options combine style and practicality, keeping your kitchen organized and efficient.
- What additional storage features are available in larger double tilt out trash cans?
- Larger double tilt-out trash cans offer enhanced functionality with an integrated shelf above the main compartments. This shelf provides convenient extra storage for household items like trash bags, dry goods, or paper products, keeping essentials within reach. It maximizes kitchen space by reducing countertop clutter and providing an organized storage solution. This design combines practicality with efficiency, ensuring your kitchen or utility area stays tidy and functional.
- What types of wooden kitchen tilt out trash cans and recycle bins are available?
- Our wooden kitchen tilt-out trash cans and recycle bins combine functionality with style to suit any space. Available in small or large sizes, you can choose between single or double compartments for waste and recycling needs. Finish options include classic walnut for a traditional look, versatile color variations to match your decor, or a distressed finish for a rustic touch. These designs help keep your kitchen organized while enhancing its aesthetic appeal.
- Can the top surface accommodate kitchen canisters or similar items?
- Yes, it can hold a set of kitchen canisters, perfect for organizing essentials like flour, sugar, or coffee, ensuring they’re always accessible when needed.
- How can the top surface be used for storage?
- It provides a convenient spot for keeping frequently used kitchen items within easy reach, reducing clutter in the main cooking area.
- How can the top surface be used for food preparation?
- The surface can be utilized as an extra countertop space for chopping, slicing, or assembling ingredients, making it a handy addition for busy kitchen tasks.
For more ways to save space in your kitchen, check out our kitchen island with a trash storage guide!

