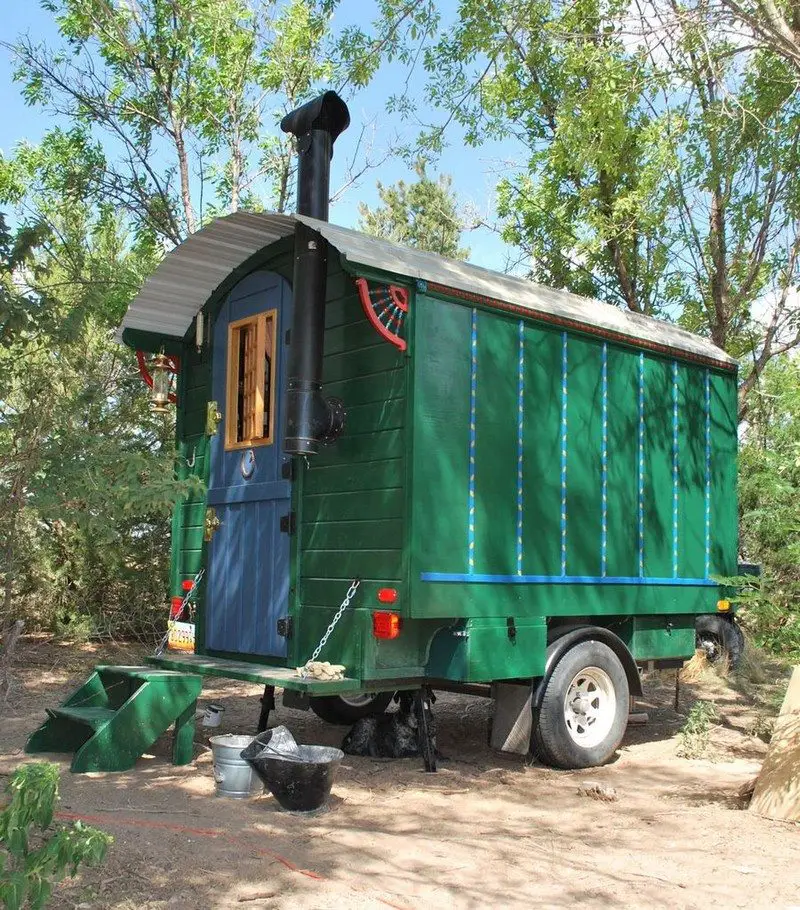
Are you the kind of homeowner who’s always on the go? Then a gypsy wagon is a good option. They’re very unique, affordable, and can be easily relocated whenever you wish to move.
And if you’re after great savings, you can also build it yourself.
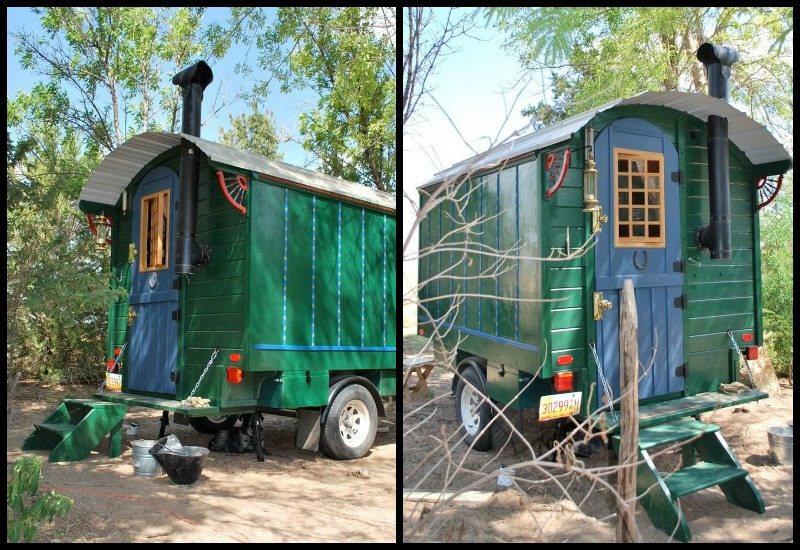
Step into Adventure: How to Build a Gypsy Wagon Tutorial
Ever dreamed of a cozy, mobile retreat that’s full of charm and adventure? A gypsy wagon, with its timeless allure and whimsical design, might be just what you’re looking for!
Whether you’re planning a unique DIY project, craving a personal escape on wheels, or simply embracing the wanderlust lifestyle, building your own gypsy wagon is an unforgettable journey.
In this guide, we’ll walk you through the steps to create a magical space that’s as functional as it is enchanting. Let’s dive into the adventure! Could you live in a gypsy wagon?
Materials You’ll Need
- Base Structure (Trailer):
- A flatbed utility trailer (6×10 ft or larger) with a weight capacity suited for the final structure.
- Steel or aluminum frame for durability.
- Framework for the Wagon:
- Wooden beams (e.g., 2x4s for the base structure and walls).
- Plywood sheets for walls, floors, and roof supports.
- Curved wooden ribs (laminated wood or flexible plywood) for the arched roof.
- Insulation and Weatherproofing:
- Foam board or spray foam insulation for walls and roof.
- Weather-resistant adhesive and sealants.
- Waterproof membrane or heavy-duty tarpaulin for the roof.
- Exterior Materials:
- Cedar, pine, or other durable wood siding for the exterior.
- Exterior paint or wood stain for protection and aesthetics.
- Interior Materials:
- Lightweight wood for paneling.
- Flooring options (vinyl, laminate, or lightweight hardwood).
- Curtains, cushions, and other decor items.
- Doors and Windows:
- Pre-made RV windows or recycled glass windows.
- A solid wood or metal door with hinges and a lock.
- Fasteners and Hardware:
- Screws, nails, and brackets for assembly.
- Hinges for doors and cabinets.
- Handles, knobs, and other fittings.
- Additional Components:
- Electrical wiring and fixtures (if planning for lighting).
- Plumbing materials (optional, for sink or water systems).
- A wood-burning stove or small heater (for colder climates).
Tools You’ll Need
- Measuring Tools: Tape measure, level, and carpenter’s square.
- Cutting Tools: Circular saw, jigsaw, and hand saw.
- Drilling Tools: Power drill with various drill bits.
- Assembly Tools: Screwdrivers, hammer, and clamps.
- Sanding and Finishing Tools: Sandpaper, orbital sander, and paintbrushes.
- Specialty Tools: Staple gun (for insulation and upholstery) and router (optional for decorative edges).
With the right tools and materials in hand, you’re ready to step into adventure! This guide will break down each phase of the build, making the process approachable and exciting. Let’s turn your dream of a gypsy wagon into a reality, one step at a time.
Step 1: Visualize and Plan
Sketch and Refine:
Start with brainstorming and sketching your ideas on paper.
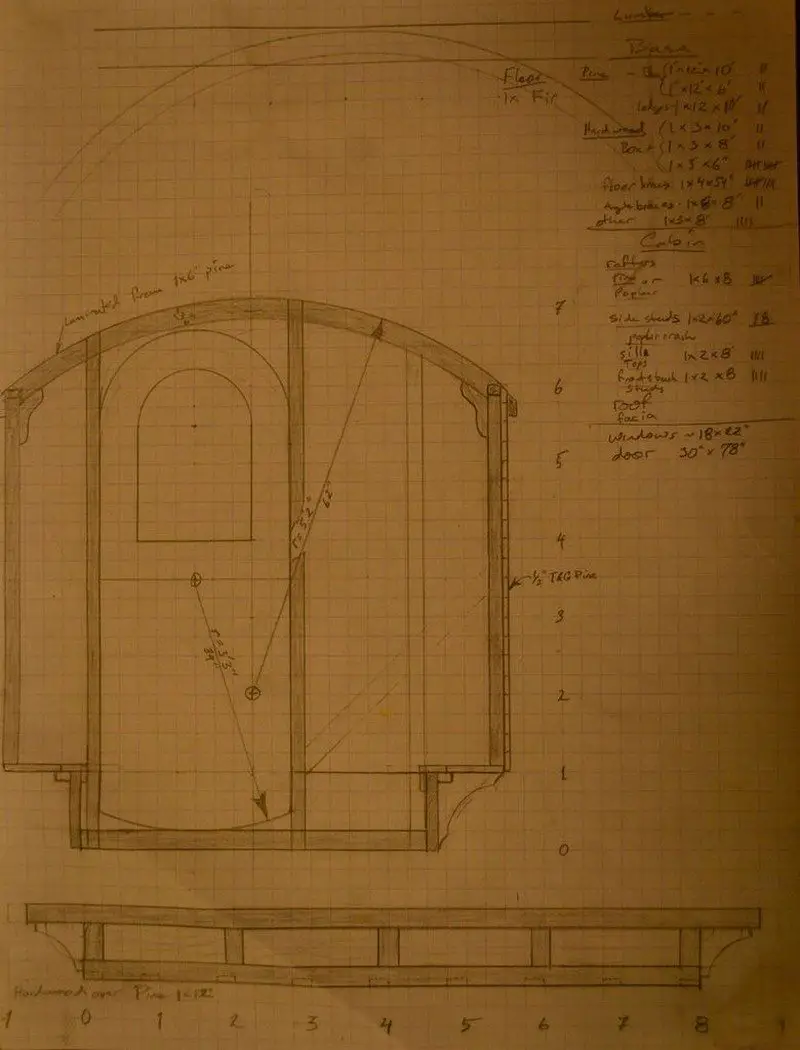
Use graph paper to draw to scale and adjust the dimensions for practical usability.
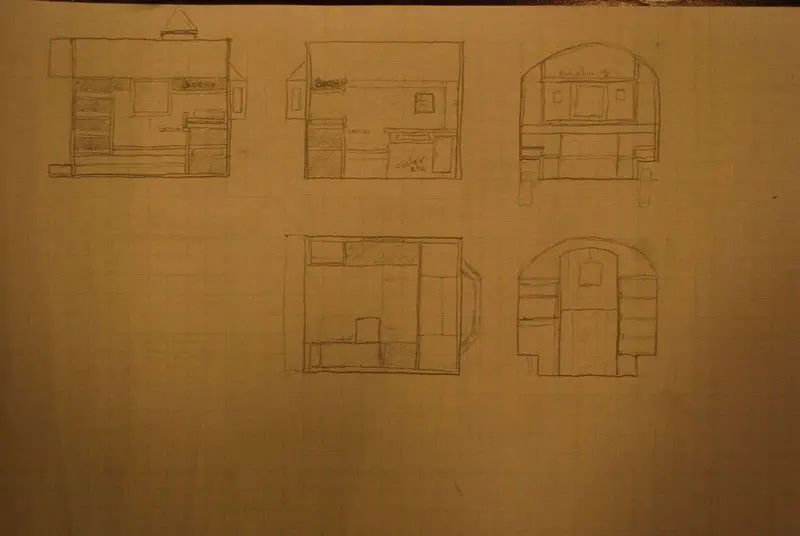
In my case, after about fifty sketches and lots of graph paper renderings, I decided I needed to visualize this in three dimensions.
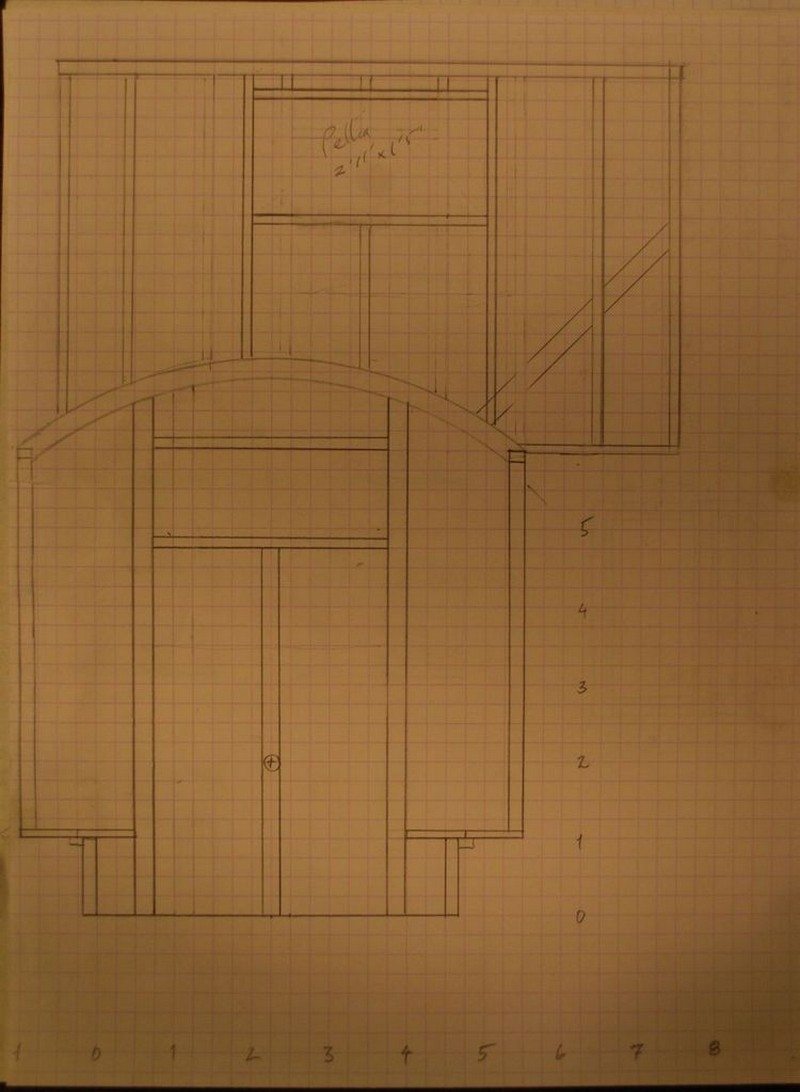
Create a Mock-Up:
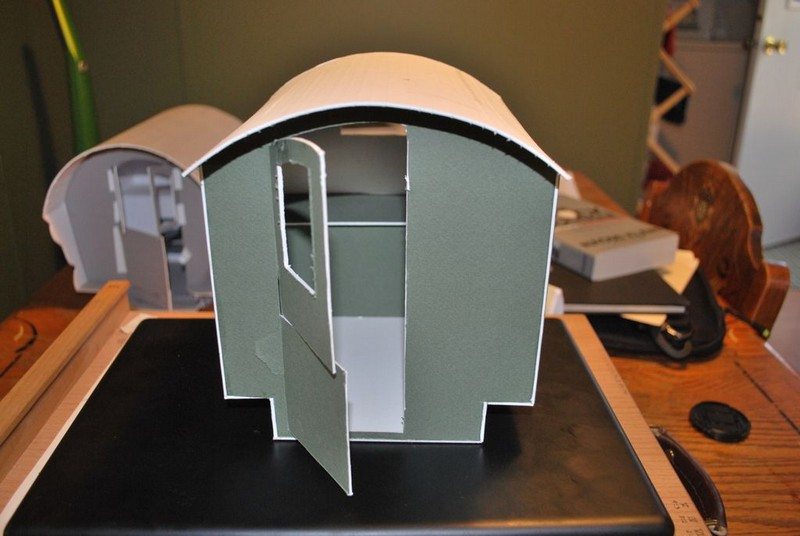
Build a small-scale model using cardboard to visualize your design in three dimensions. Make adjustments based on the mock-up to finalize your design.
Here is my cardboard mock-up of the final design.
Step 2: Prepare the Trailer Base
Select a Trailer: Find a sturdy cargo trailer with a heavy-duty frame and tongue. Ensure it has the right size and weight capacity for your project.
I found a sturdy little cargo trailer with a heavy-duty frame and tongue. The first step was to cut off the box with a reciprocating saw and grinder.
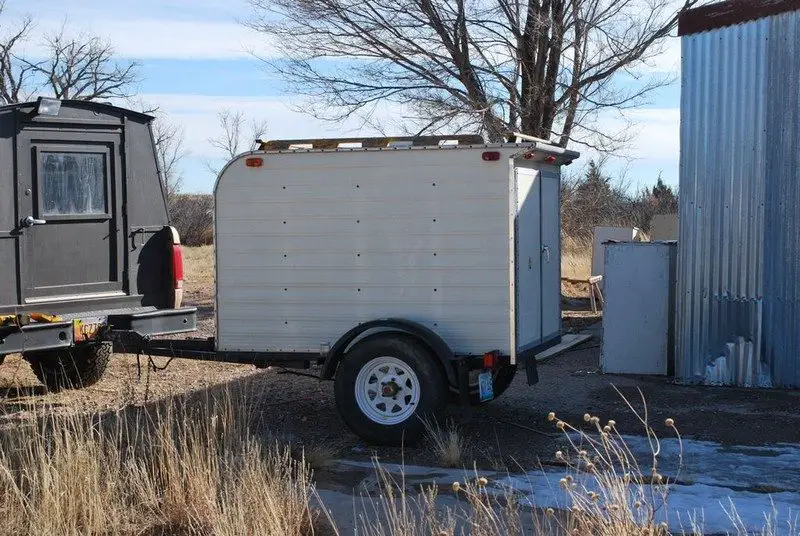
Remove the Old Box: Use a reciprocating saw and grinder to cut off the old cargo box. Safely remove and discard any outdated wiring and lights.
I intended to save the wiring harness and lights but they proved to be outdated and fairly ratty.
Paint the Frame: Sand the trailer frame to remove rust. Apply a coat of rust-resistant paint to protect it from wear and tear.
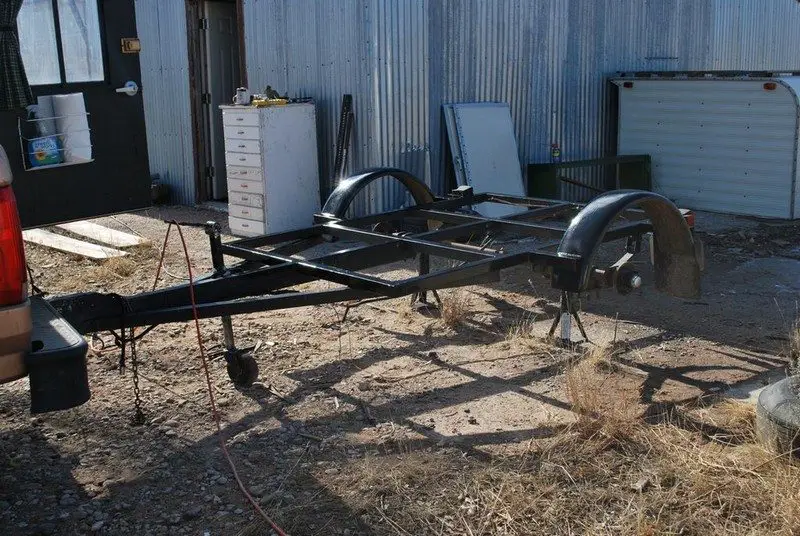
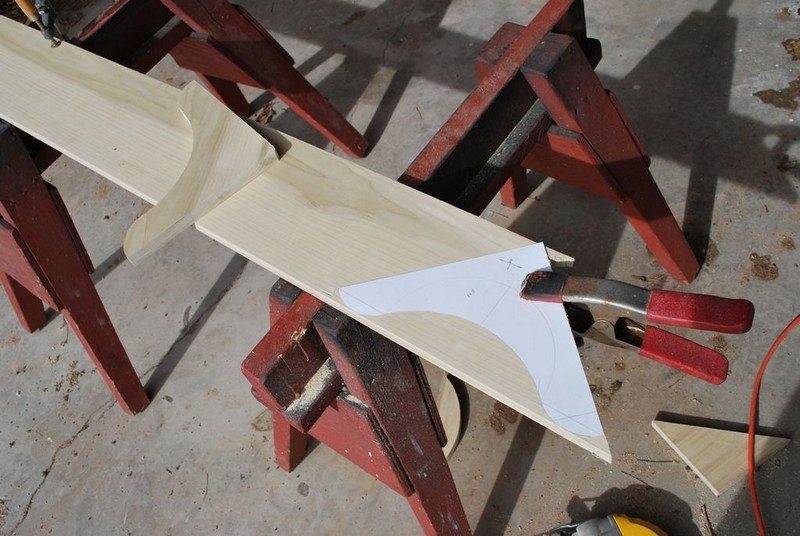
There was a huge sense of relief when I made the first cuts to create the brackets. After years of pondering, waiting, and changing plans, I felt committed. It was like I was starting an avalanche.
No turning back now. I plunged into long evenings and weekends, cutting, fitting, and sawing. The base came together quickly after work one evening.
Step 3: Build the Base
Assemble the Base: Use salvaged plywood (1″ thick) for the subfloor. Securely bolt the base to the painted frame using through bolts for strength and safety.
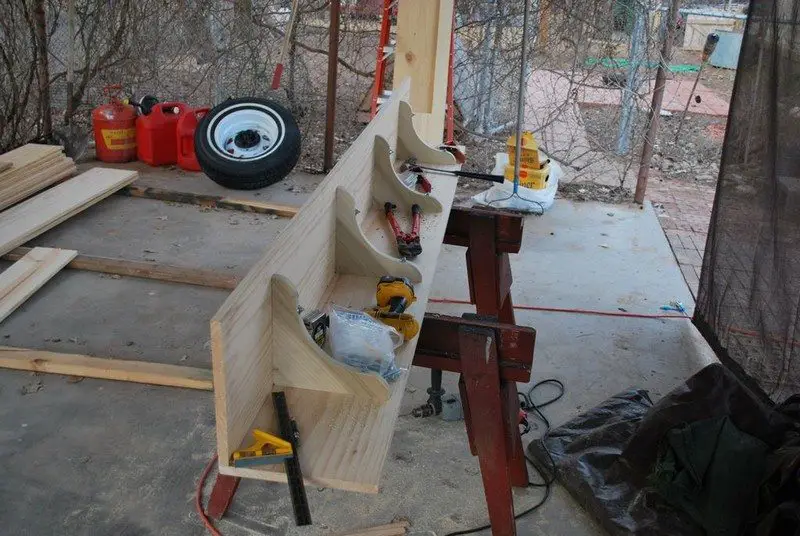
Seal and Insulate the Base: Apply a waterproof membrane under the subfloor for moisture protection. Add foam board insulation if desired for temperature control.
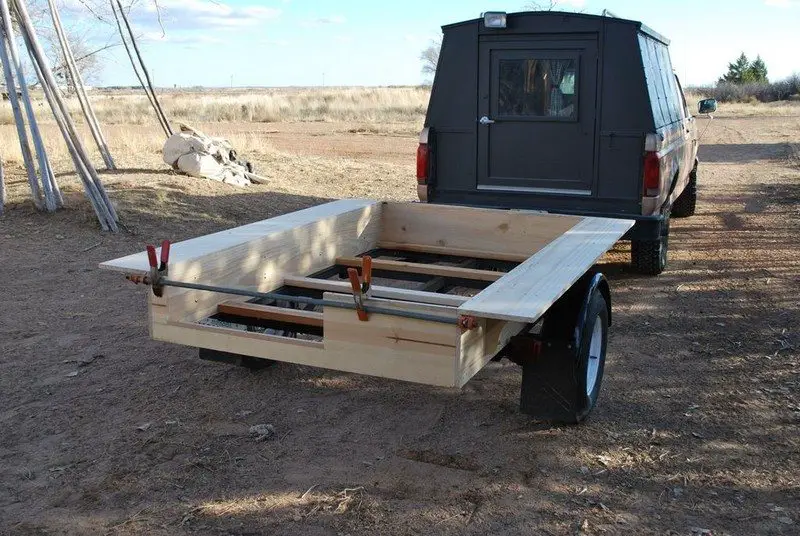
Finally, the base was set on the newly painted frame and through-bolted for strength and safety.
Step 4: Construct the Walls
Build the Wall Panels: Use tongue-and-groove pine for the walls:
- Front and Rear Walls: ¾” thick.
- Side Walls: ¼” thick with vertical hardwood battens (1″ thick) for added strength.
Strengthen the corners using oak posts and braces.
Install the Walls: Securely attach the walls to the base using screws and brackets. Reinforce the walls with the bed structure to improve stability.
Add Insulation (Optional): If building for extreme temperatures, consider adding a second layer of wood with insulation sandwiched in between.
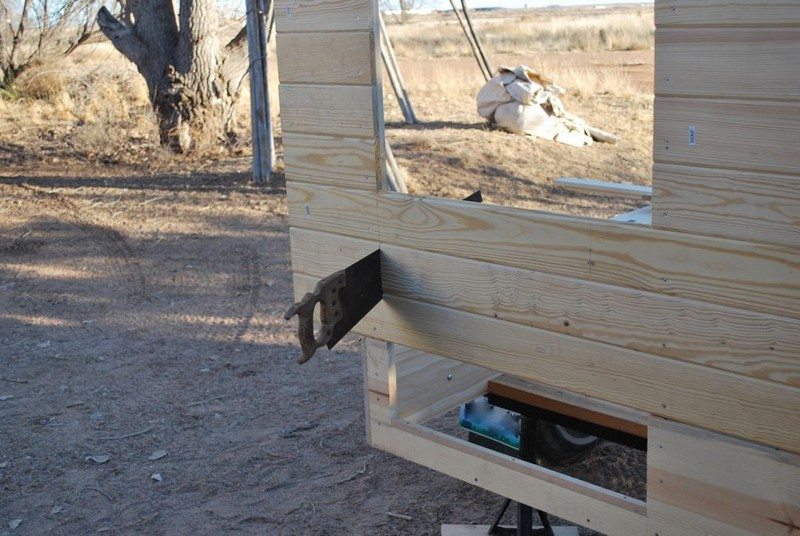
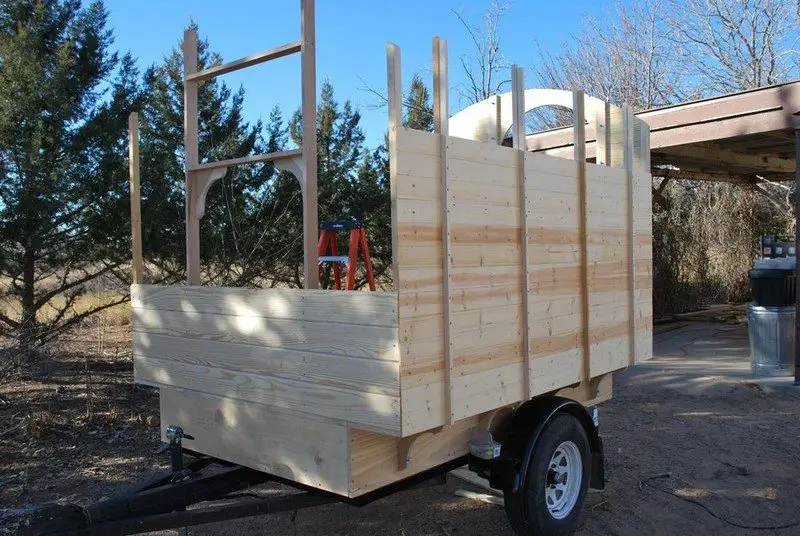
In my case, the walls are built like a box, not like modern stick framing. All are tongue and groove pine, the front and rear being 3/4″ thick, the sides 1/4″. This is why the sides have hardwood strengthening battens (1″) run vertically inside and out on 1′ centers.
Corner posts are made from 1 1/4″ pine stock. Outside corners are oak. Upright bracing around the door inside and out from poplar. Upright bracing on front wall is oak. Sub-floor is 1″ salvaged plywood.
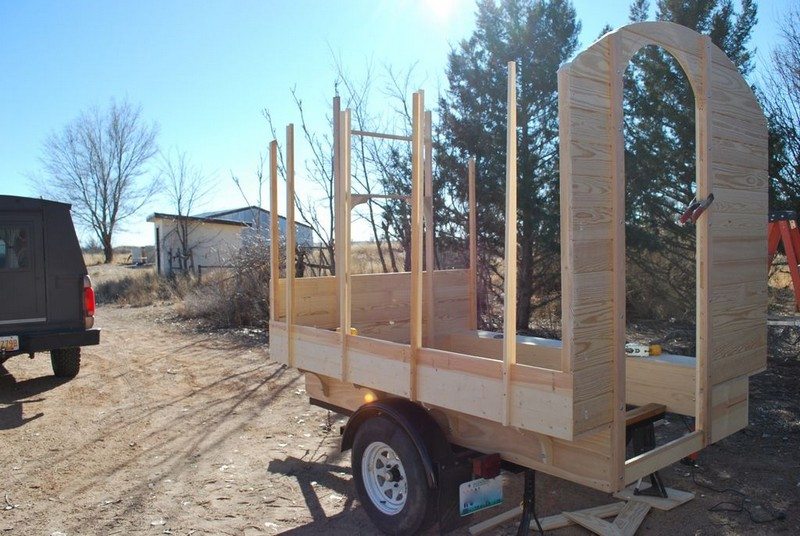
Footnote: I have since put a second layer of wood over the outside side-walls. This added some strength (and at least 40 pounds) but was primarily to add insulation for heat transfer.
The walls get incredibly hot in the southwestern sun and transferred much of the heat inside. I didn’t really notice a problem in the cold as the wagon is quite snug.
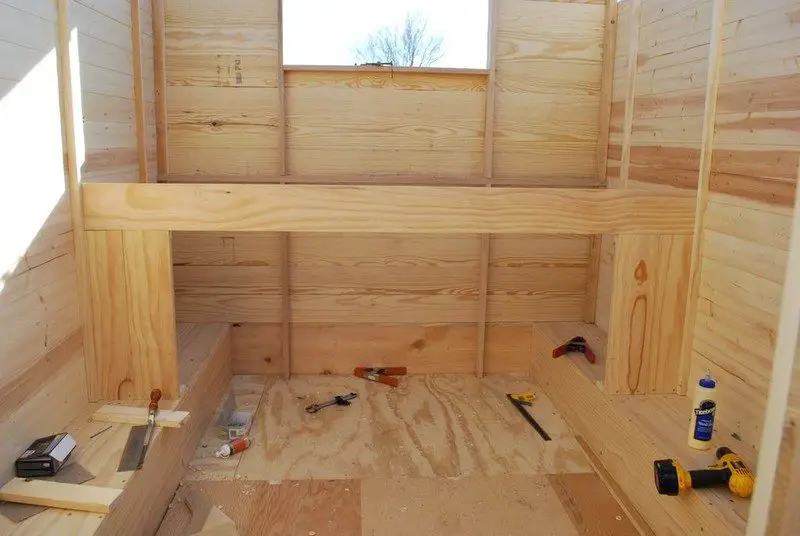
The bed structure ties the walls together and stiffens the entire structure. Without this, I would have to find some other way to strengthen the walls.
Step 5: Construct the Roof
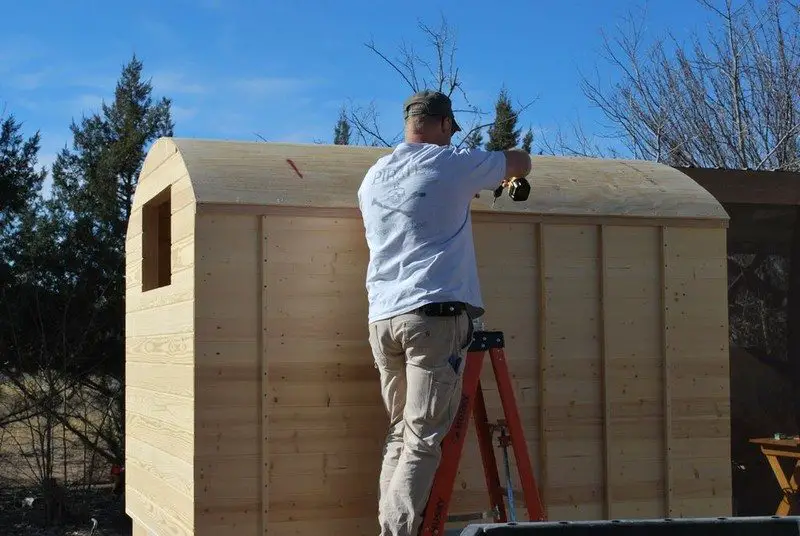
Create the Roof Frame: Use poplar purlins as the roof supports, spaced evenly for stability. Screw plywood sheets onto the purlins for the roof structure.
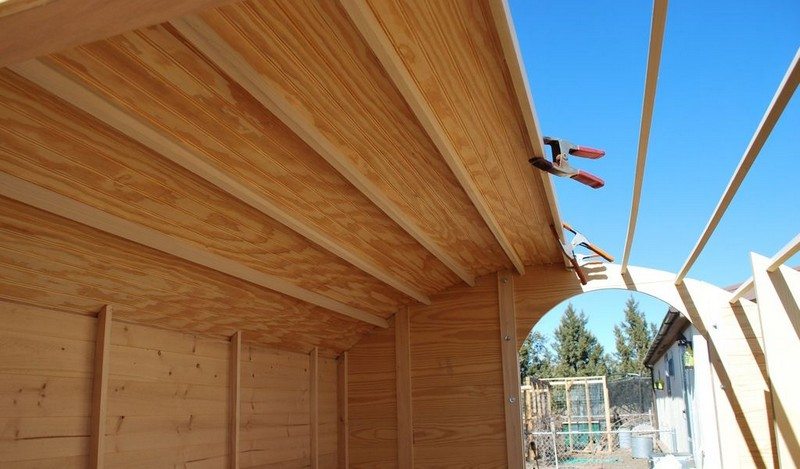
Cover the Roof: Install a low-profile steel roof, pre-coated with epoxy to prevent rust. Use light-colored steel to reflect heat and keep the wagon cool. Secure the roof to the purlins with screws for durability.
Step 6: Add Windows and Doors
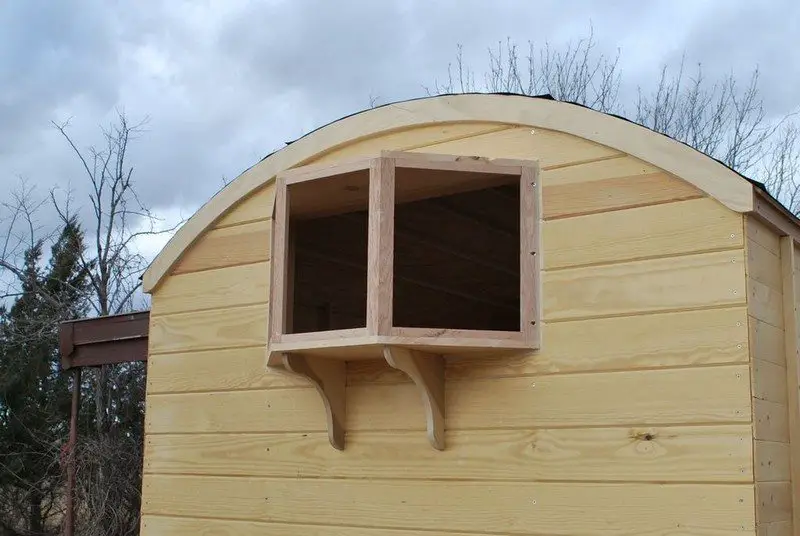
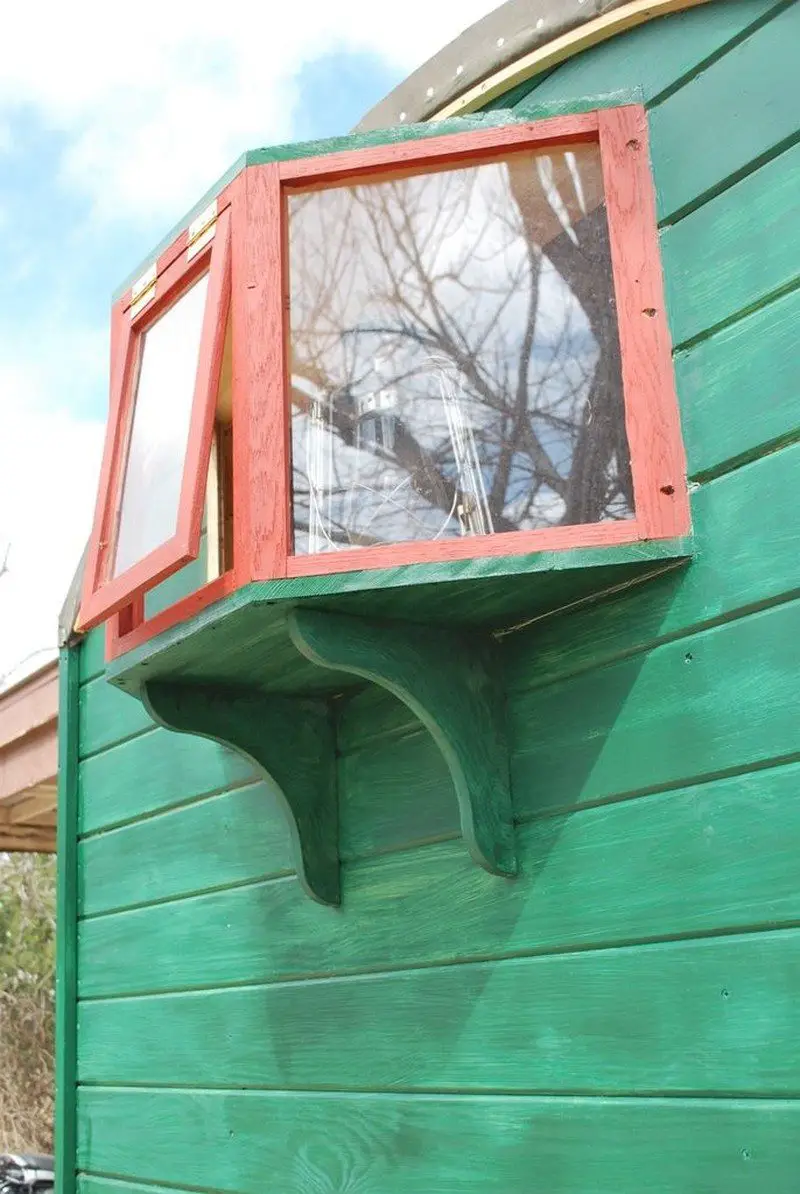
Install the Windows: Build windows separately using oak and pine. Attach the completed window units to the wagon body.
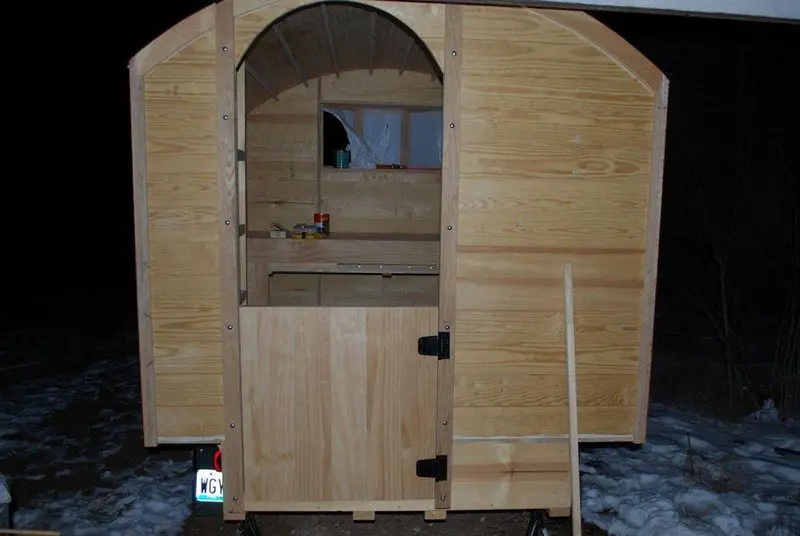
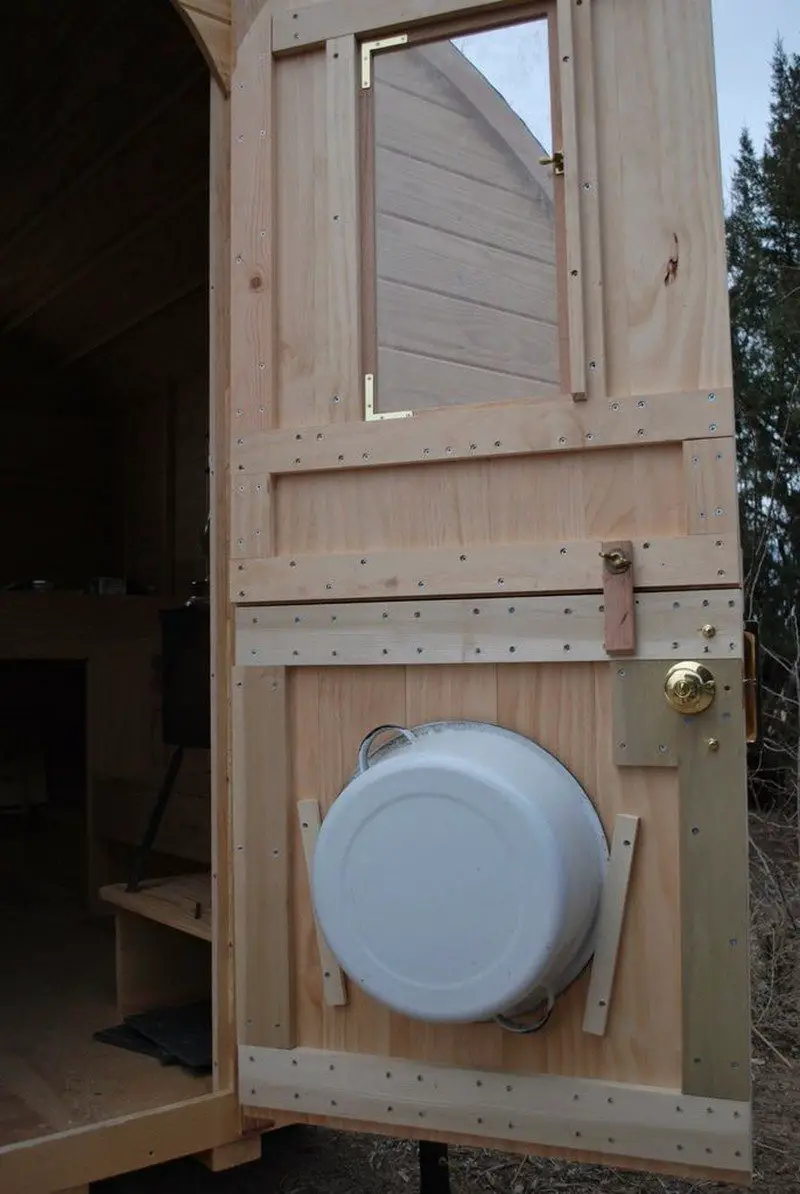
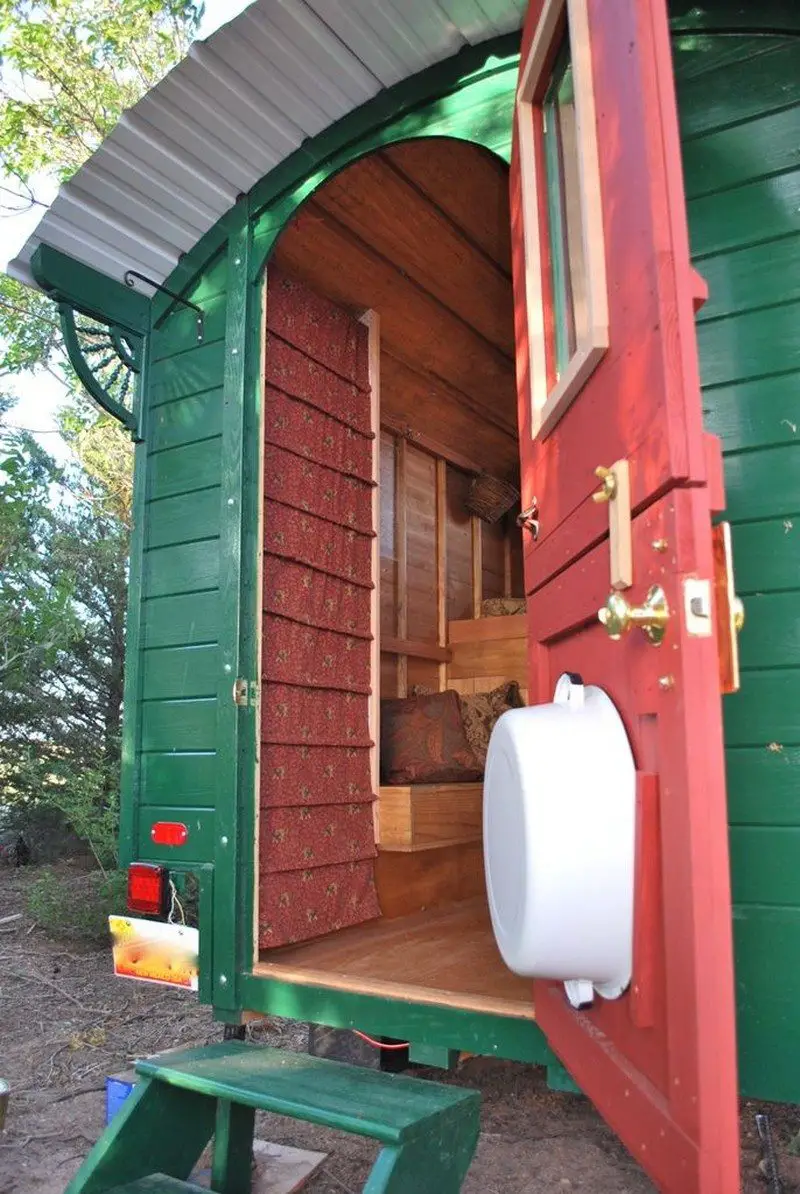
Build the Door: Model the door after sheep wagon designs, incorporating a Dutch door style with a functional window and wash pan holder.
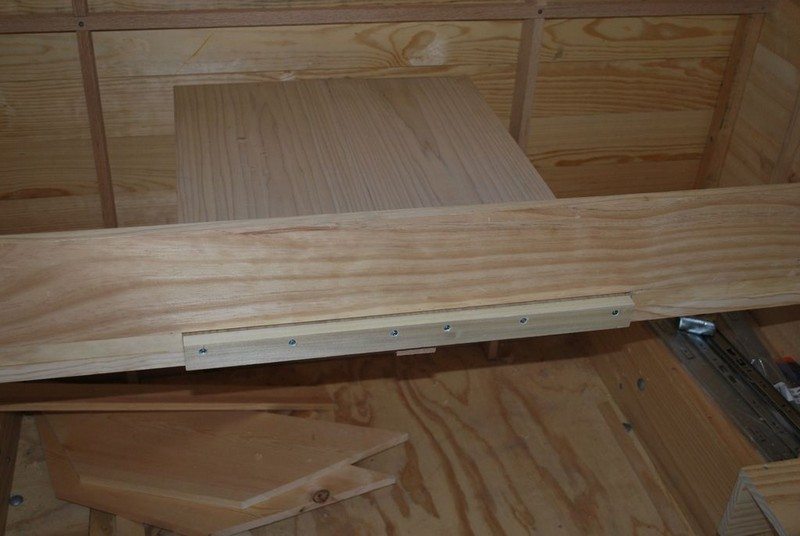
The window was made as a separate unit and then attached whole to the wagon body. It is oak and pine. The door is modeled after some sheep wagon styles from the western U.S.
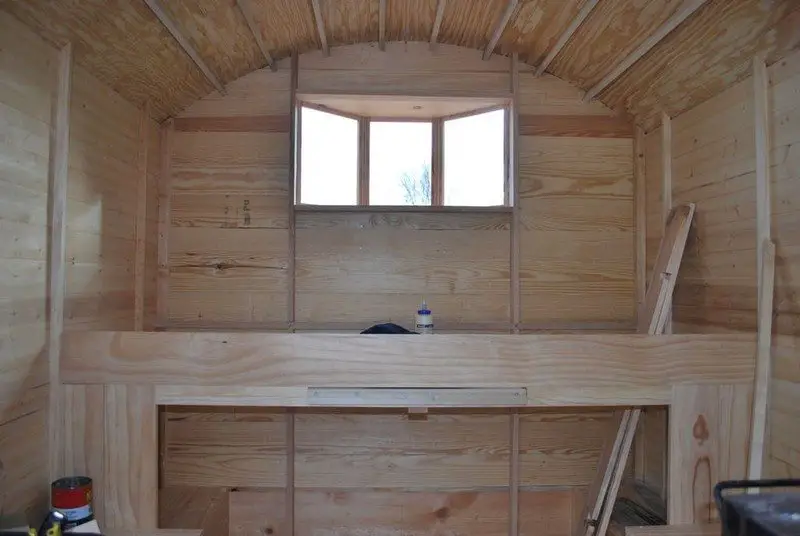
It is a “Dutch door” with a functional casement window and a wash pan holder. Not quite finished in the photo below but nearly there.
Step 7: Interior Features and Storage
Install Flooring: Use oak flooring for durability and aesthetics.
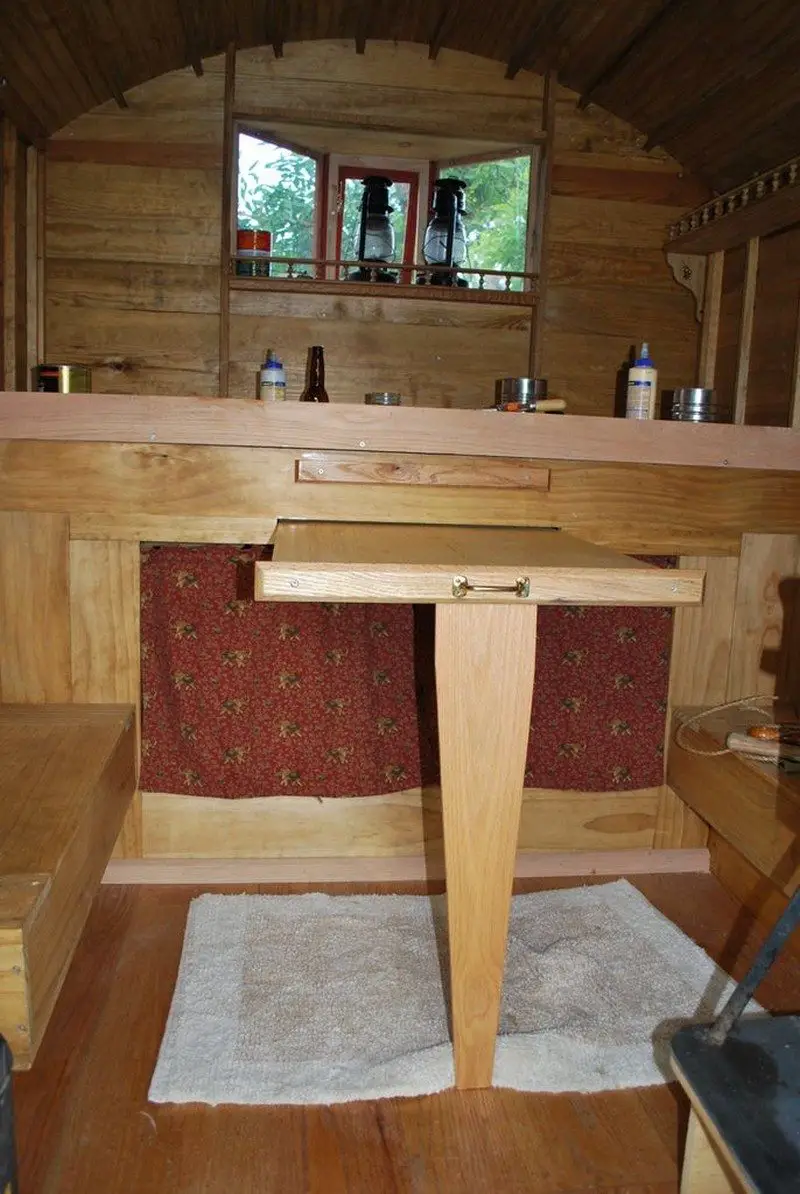
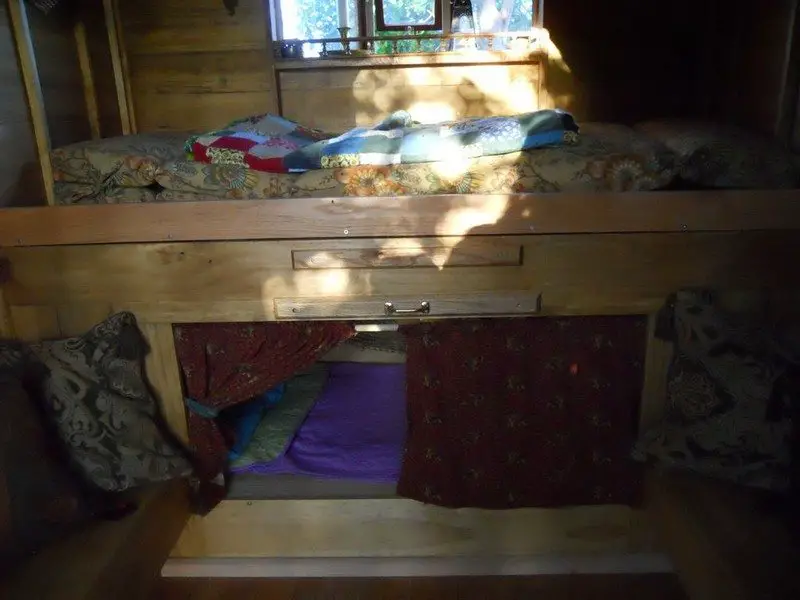
Build Furniture: Add a bed structure to tie the walls together and provide under-bed storage. Construct a table based on old British wagon designs.
Add Shelving: Install shelves for ample storage and cover them with a Roman shade if desired.
Step 8: Paint and Finishing Touches
Paint the Exterior and Interior: Apply an oil-based paint to protect the wood and give it a polished look.
Add Decorative Touches: Curtains, cushions, and other personal items to make the wagon homey and inviting.
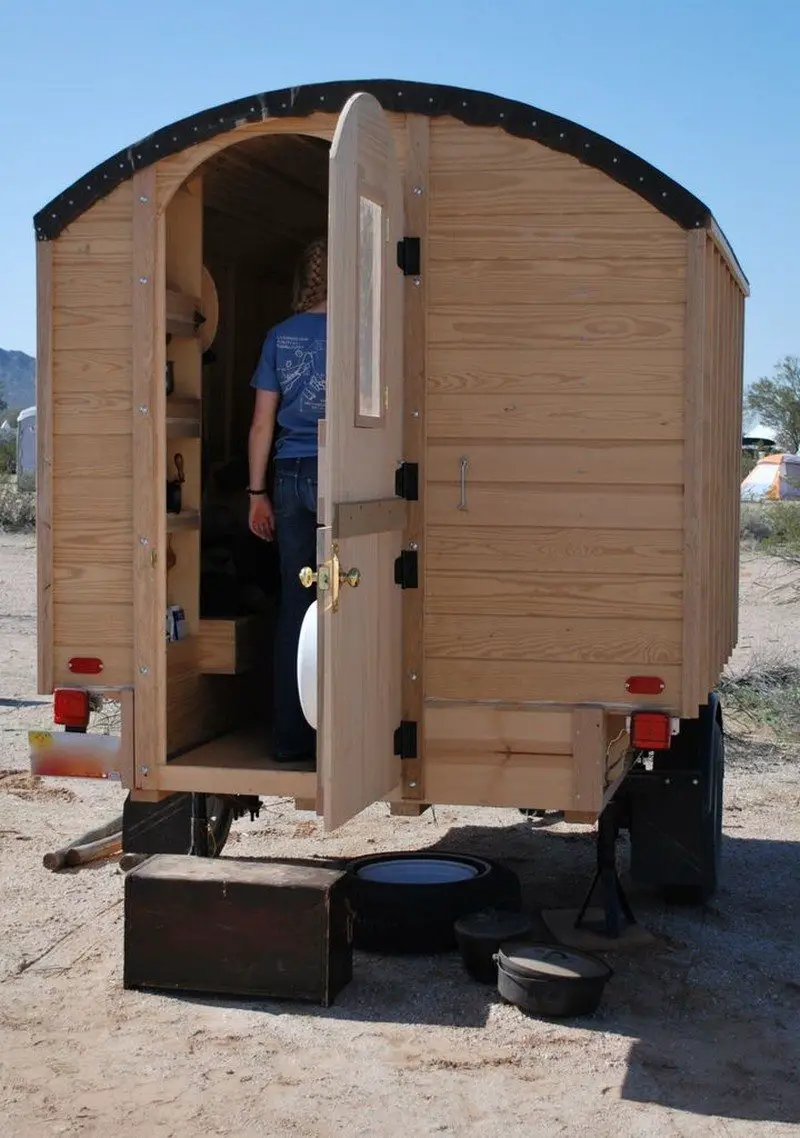
We took her on a 500 mile journey into the desert to test her out and figure out some interior layout issues. We got a base coat of oil paint on most of the body by the end of the week.
After we returned, we added an oak floor, finished the table, and added a lot of homey touches. There ample storage under the beds, but I intend to add more outside.
Step 9: Heating and Safety
Install the Stove: Create a hearth area with slate tiles and a fire shield board. Secure the stove to the floor and wall with screws and eye bolts for safety during travel.
Install the Chimney: Use a wall thimble to safely vent the stove.
Step 10: Test and Enjoy
Take It on Test Journeys: Test the wagon on short trips to evaluate its functionality and identify areas for improvement. Adjust the interior layout as needed for comfort and convenience.
Finalize the Build: Apply a final coat of paint and make any last adjustments.
Enjoy the Adventure: Take your completed gypsy wagon on the road and enjoy your custom-built retreat!
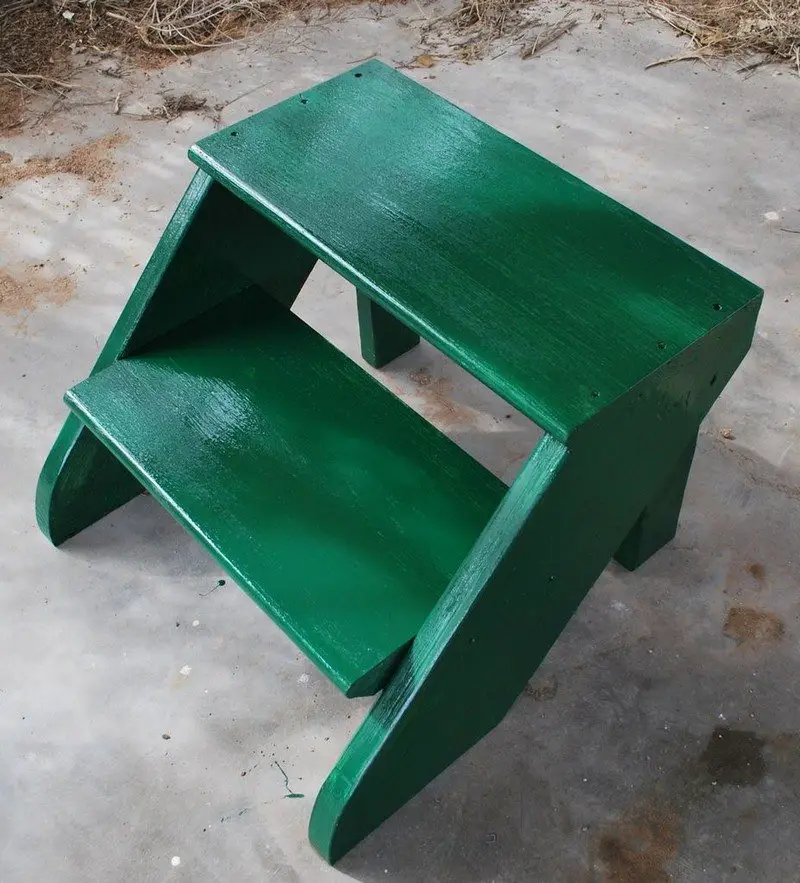
I made stairs that were built to match the Gyspsy wagon. Oak treads, fir risers. The paint was still proceeding slowly at this point but we had to take some time off to head to the ocean for a second “test” journey.
The wagon traveled across New Mexico, Arizona, and southern California through the scorching desert to the beautiful San Diego area for a week. When we got back, she got her full coat of paint, and some more interior work.
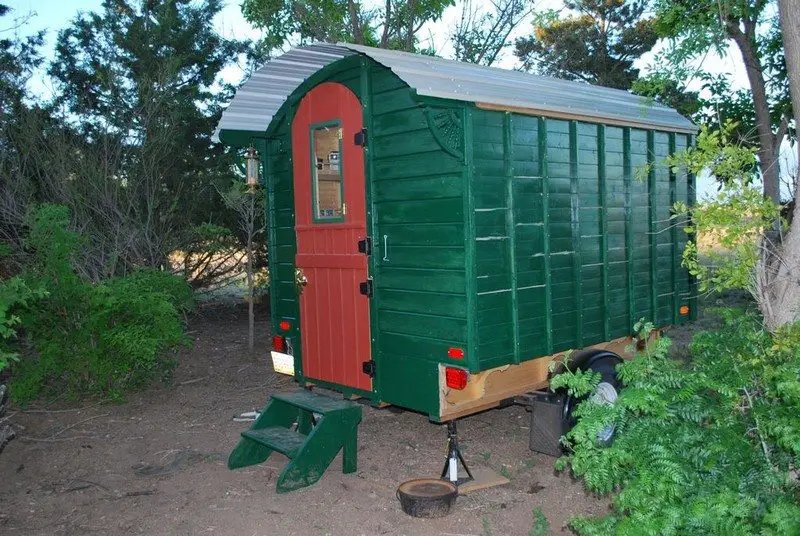
Roof: Although I didn’t photograph this step, the roof was ultimately covered in a low profile steel that was epoxy coated in the factory. It is a light color to keep some of the radiant heat out and seems to work well. It is screwed through the roof into the purlins.
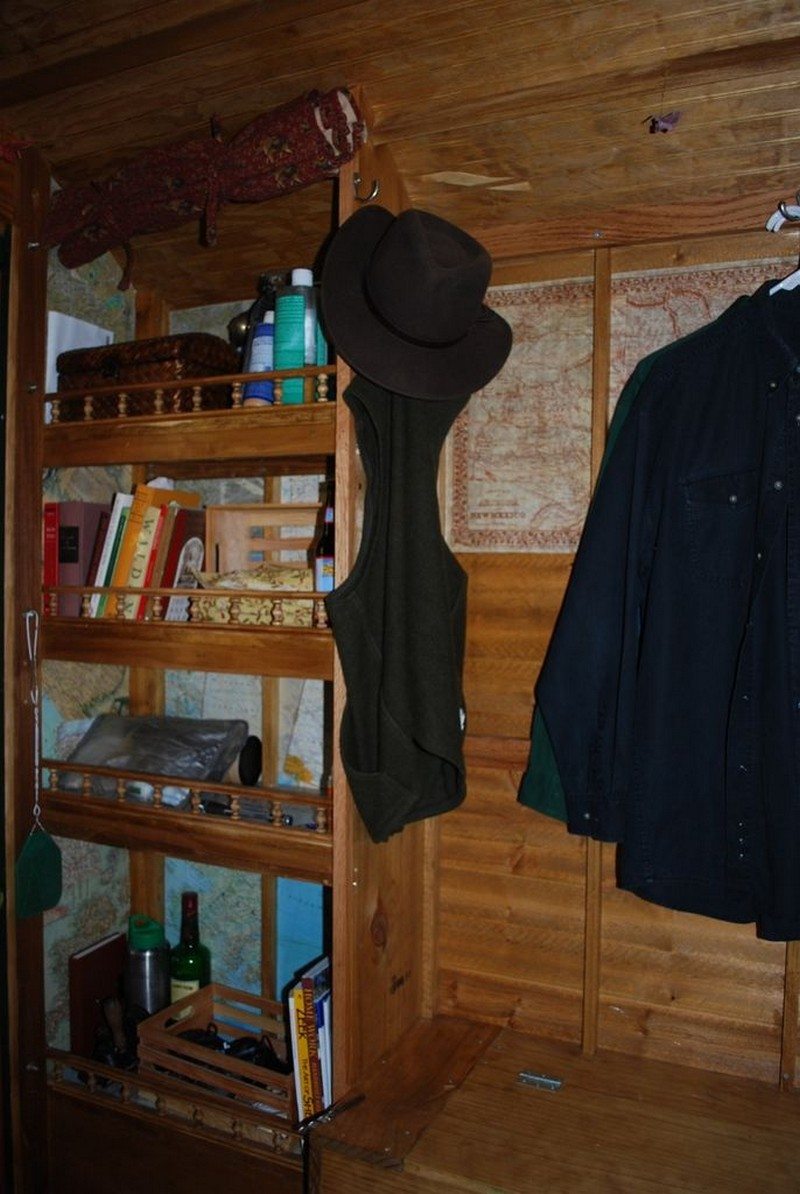
The shelves are an enormous amount of space, and can be covered by a roman shade type cover.
With autumn here I felt it was time to deal with the dreaded stove. I made a hearth area in the corner, tiled the riser with slate, covered the walls with 14 gauge flashing, covered that with fire shield board, inserted a wall thimble, and placed the pipe and stove in the wagon.
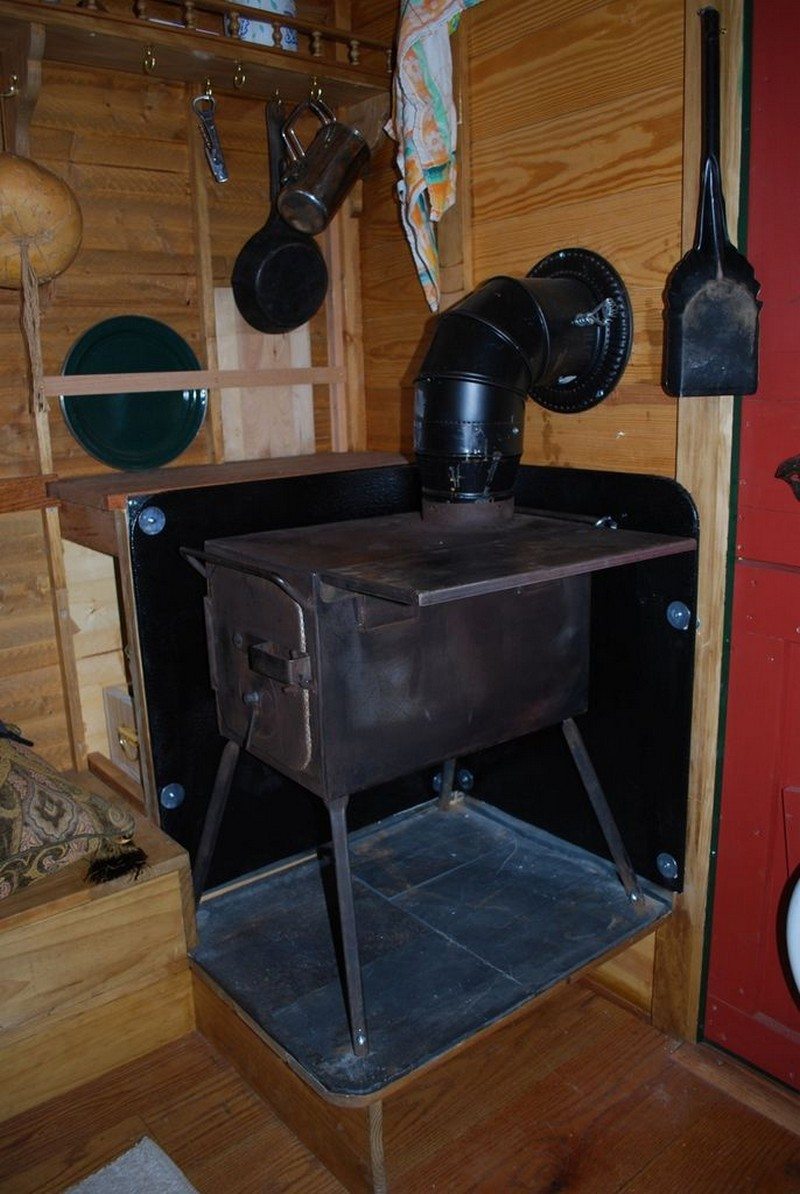
In case of rough driving conditions, the stove is screwed to the deck, and two large eye screws attach it to the back wall. It is unlikely to move in anything short of a rollover.
Only with time will the wagon really take on a personality as it get lived in and things are arranged “just so”. Like a ship or any small living space, a good deal of thought needs to go into every little detail, especially when it comes to storage.
I think it will help me minimize and is now my real “escape pod”, whether its to get to the mountains or beach, or to just someday hit the road.
Thanks to paleotool for this great project!
The Takeaway
Building your own gypsy wagon is more than just a DIY project—it’s an opportunity to create a unique space that reflects your personality and adventurous spirit. From sketching your ideas to taking it on its first journey, every step brings you closer to a mobile retreat that’s both functional and enchanting.
Whether you’re looking for a cozy escape, a tiny home on wheels, or a charming guest space, this guide provides everything you need to bring your dream to life.
Now it’s your turn! Gather your tools, channel your creativity, and start building the gypsy wagon of your dreams. Share your progress, questions, or ideas in the comments below—we’d love to see how your project unfolds. Let’s make adventure happen, one wagon at a time!

