Laundries are often the smallest room in the house (if you’re even lucky enough to have a dedicated laundry room). Every bit of space counts and should be properly utilized.
Contents
Elevating Laundry Room with DIY Washer and Dryer Pedestal
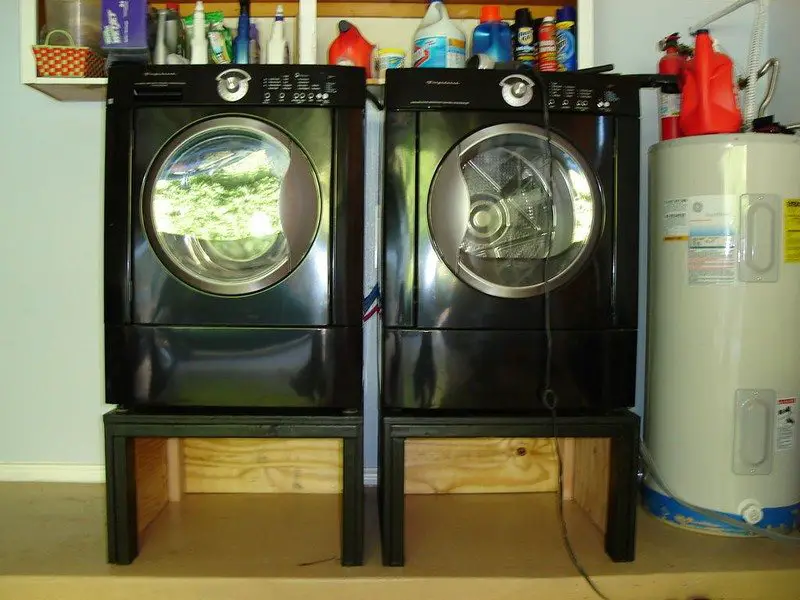
A DIY washer and dryer pedestal is a perfect way to create storage space, and allow you to easily access front-loading washing machines and dryers. However, most of the stronger pedestals you’ll find in the market today tend to be quite expensive.
DIY laundry pedestal plans will bring your machines up to a more ergonomic height while creating storage space underneath for washing baskets or other necessities. And it’s a project that won’t break the bank.
It’s a DIY project that you can accomplish easily in a day. The materials needed are inexpensive. It’s a project that will return great value from the time and effort you invest in building one.
Isn’t this a great project for the weekend?
Click on any image to start lightbox display. Use your Esc key to close the lightbox. You can also view the images as a slideshow if you prefer 8-)
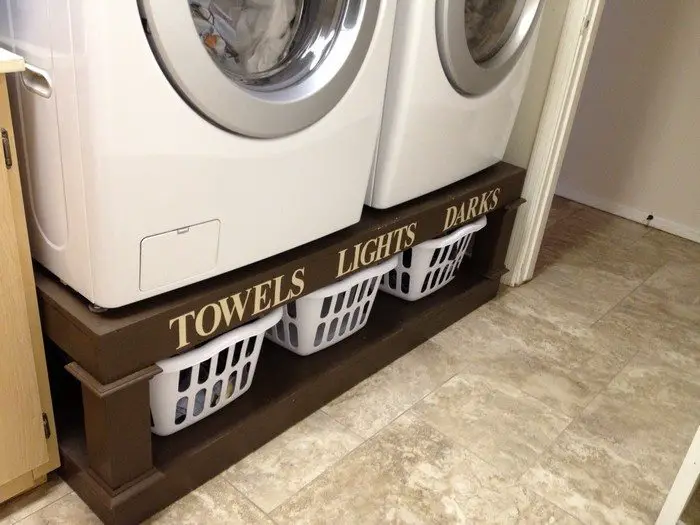
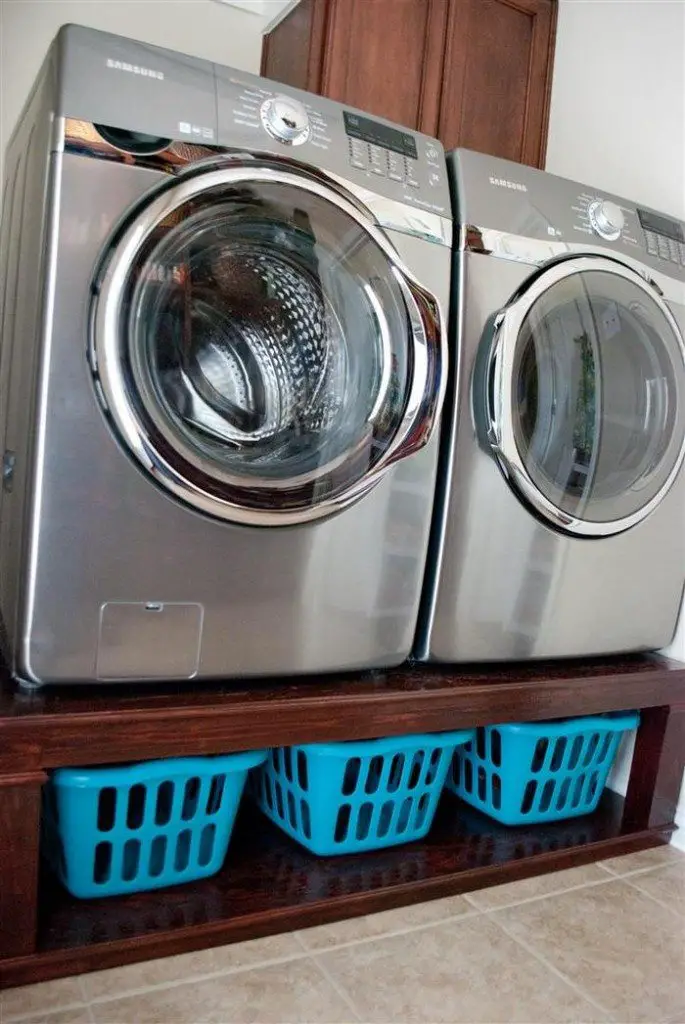
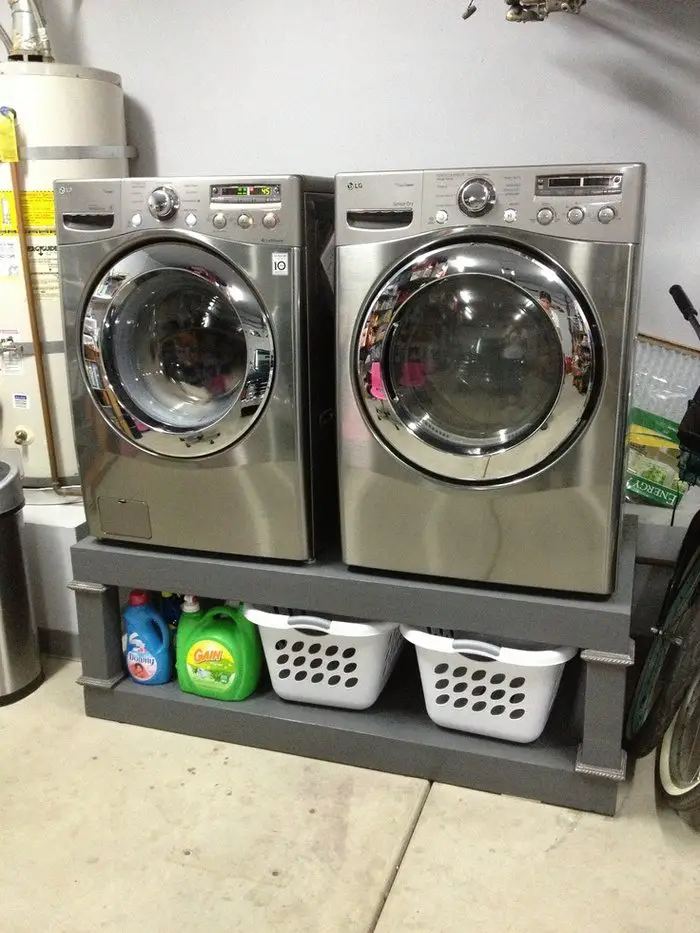
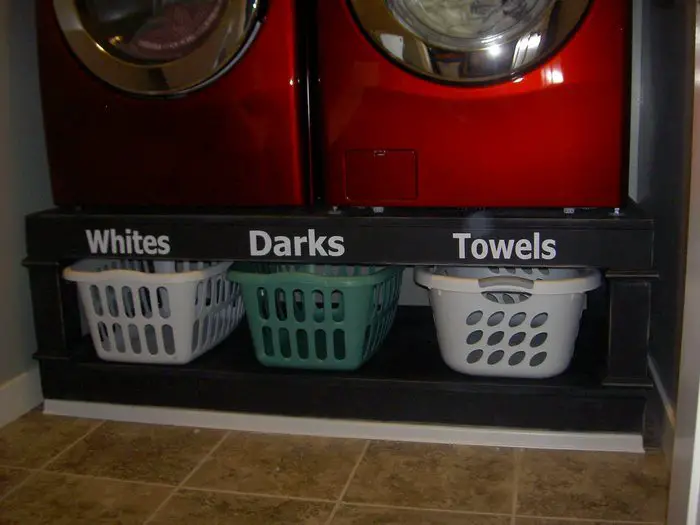
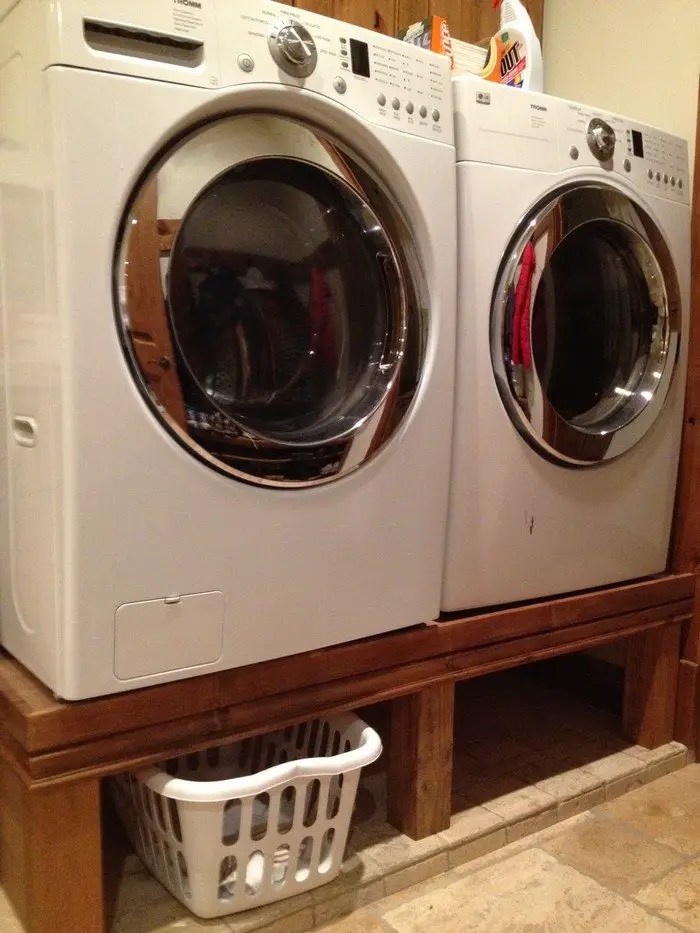
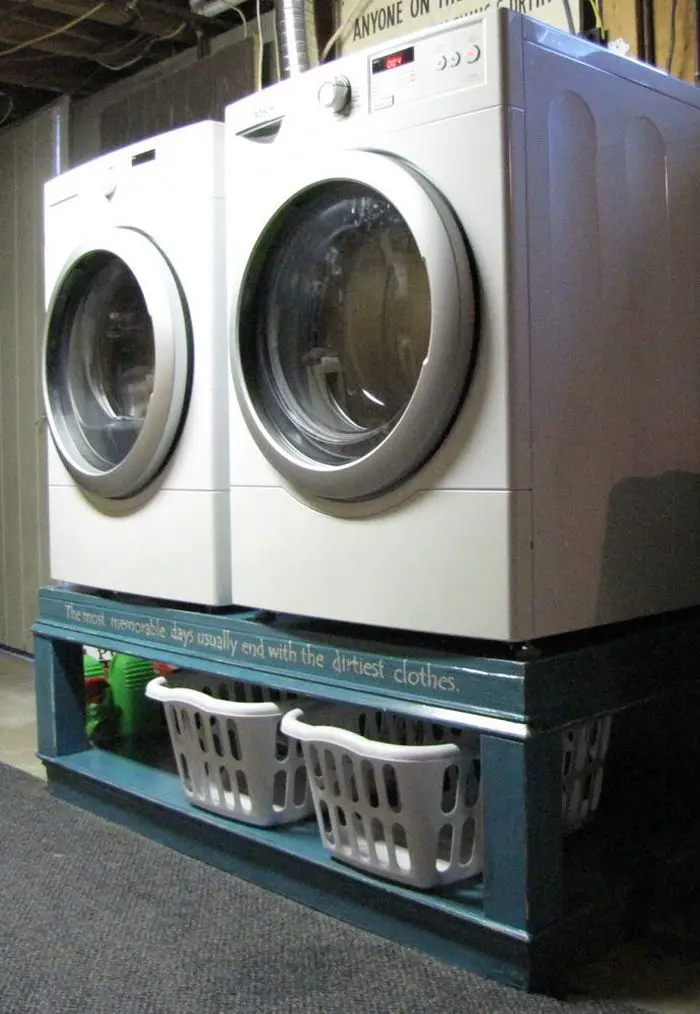
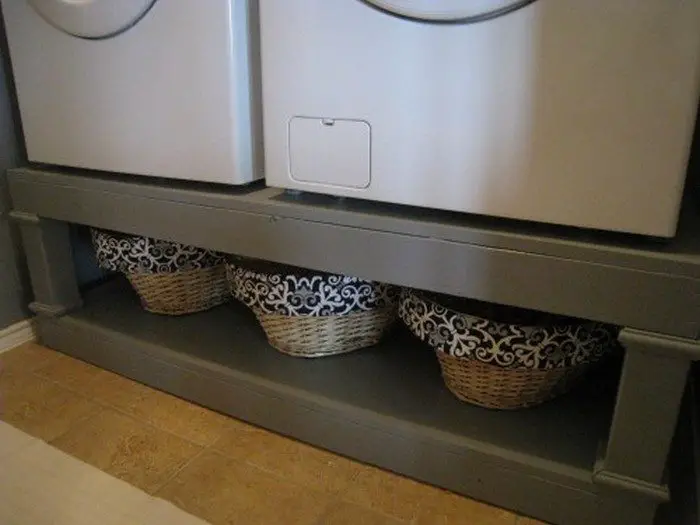
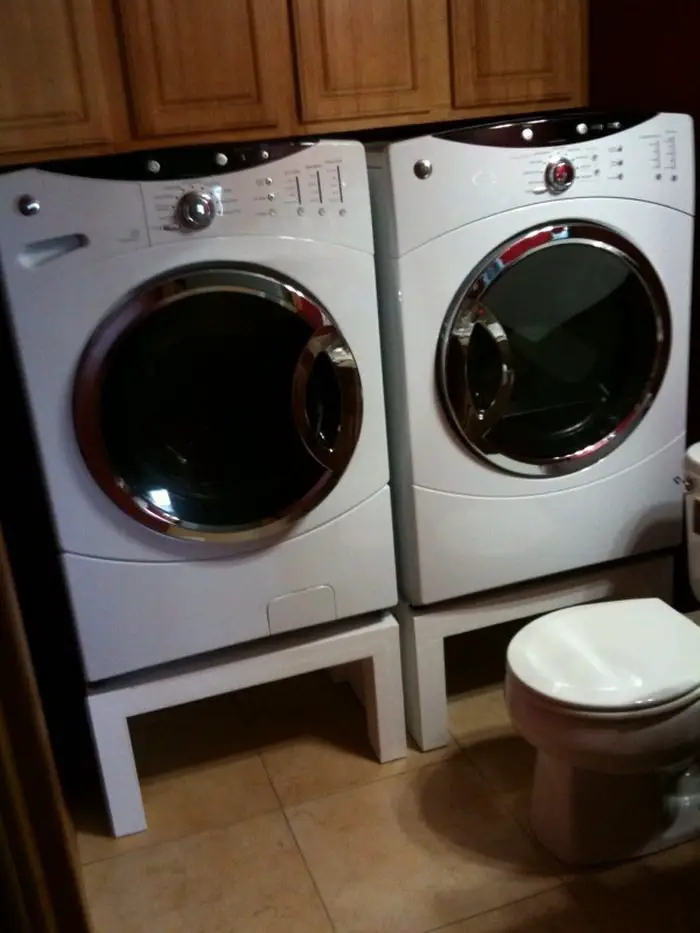
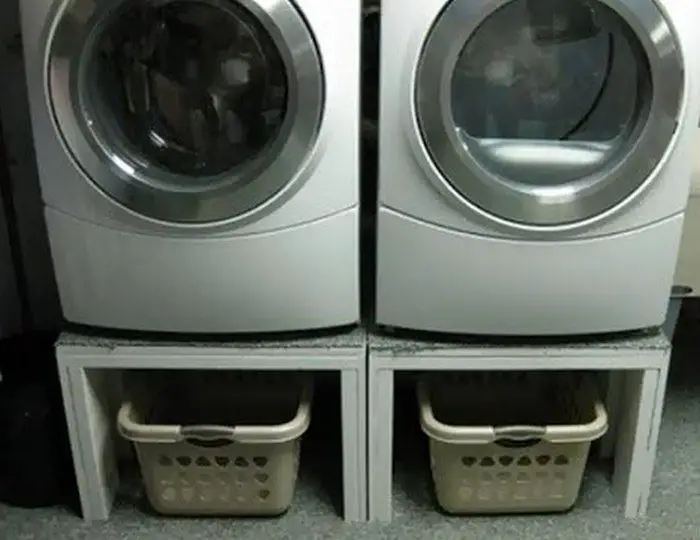
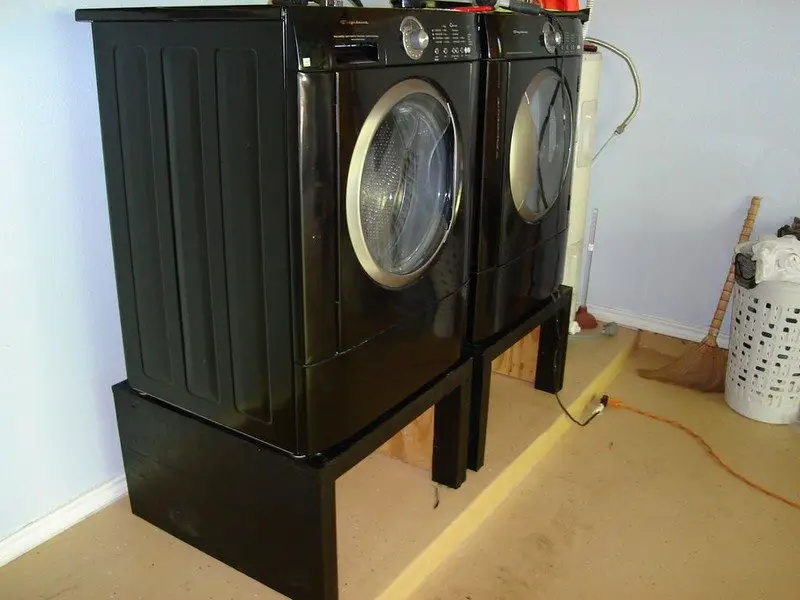
Building Your DIY Laundry Pedestal Plans
Creating a pedestal for your washer and dryer can raise them off the floor, making laundry tasks easier and providing a neat look. Follow these step-by-step instructions for DIY laundry pedestal plans, even if you’re new to DIY.
Materials
- Plywood (3/4″ thick or thicker) – for top and side panels.
- 2×4″ Wood Boards – for framing and support.
- Glossy Paint – to match or complement your washer and dryer.
- Screws (1.5″ to 2″ long) – wood screws are preferred for strength.
- Wood Glue – for extra stability (optional).
- Metal Sheet or Waterproof Coating (optional) – if using the pedestal outdoors.
Tools
- Measuring Tape – to ensure precise dimensions.
- Pencil – for marking cuts and drill points.
- Circular Saw or Hand Saw – for cutting wood to size.
- Drill – for drilling pilot holes and driving screws.
- Hammer (if using nails) – for nailing pieces together.
- Sander (optional) – to smooth out rough edges.
- Paint Brush or Spray Paint – for the finishing touches.
Steps
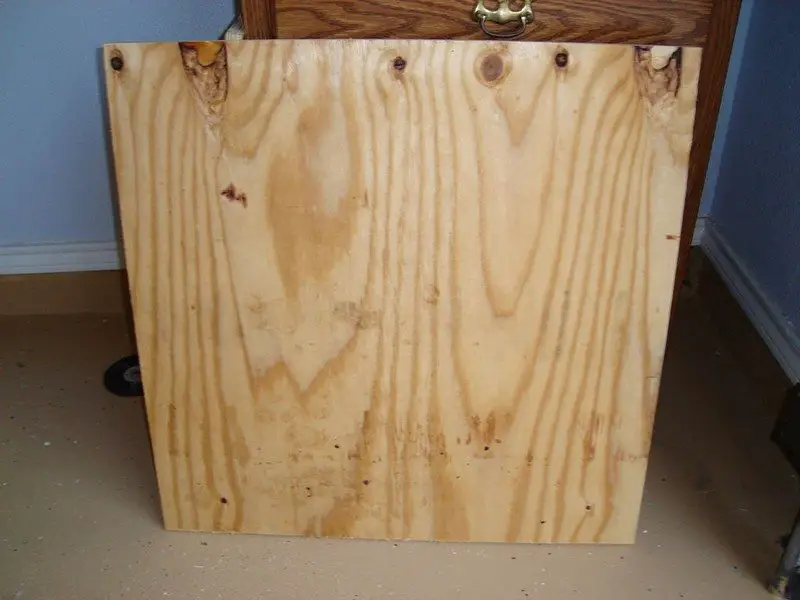
Step 1: Measure the Base Dimensions
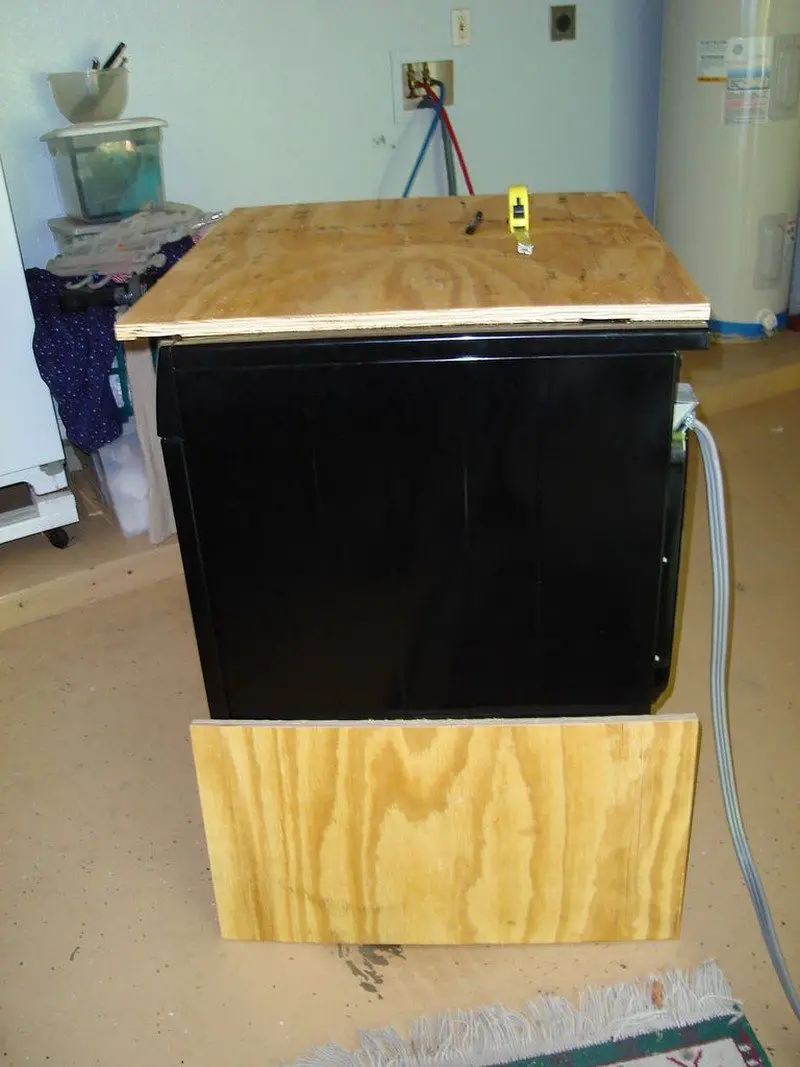
Mark this dimension on your plywood with a pencil. Measure the dimensions around the base of your washer and dryer to find the size of the top panel.
Example: If the base measures 27″ x 27″, this will be the size you’ll need for the top panel.
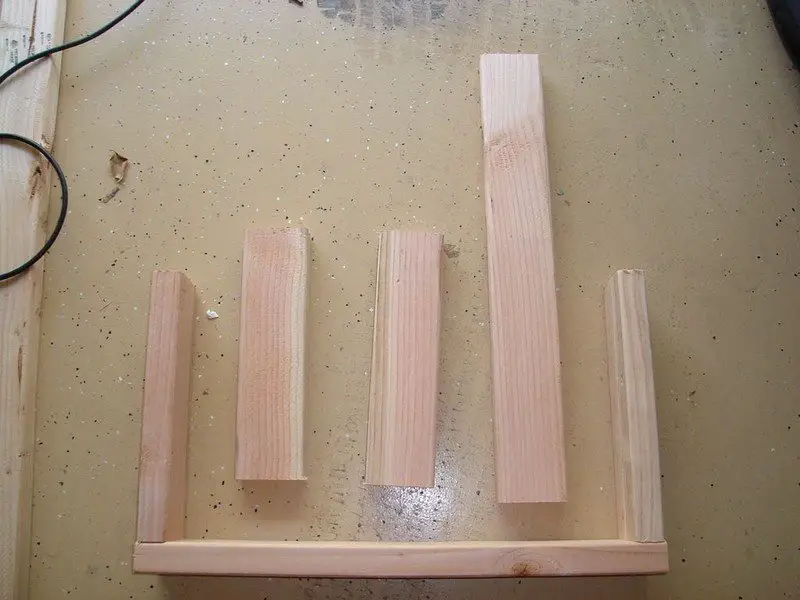
Step 2: Determine the Pedestal Height
- Decide on the height you want for the DIY washer and dryer pedestal. 15 inches is a common choice, which is ideal for most people.
- Note: Check the height to ensure it’s comfortable for you and fits your space.
Step 3: Mark and Cut the Plywood Panels
- Top Panel – Mark and cut a 27″ x 27″ square (or whatever dimensions fit your appliances).
- Side Panels – Mark and cut two 15″ x 27″ rectangles for the sides.
- Back Panel – Optional but recommended for added stability. Mark and cut a 15″ x 27″ piece.
Tip: If you’re not comfortable cutting, ask your hardware store to make these cuts for you.
Step 4: Prepare the 2×4 Support Boards
- Measure and mark your 2x4s:
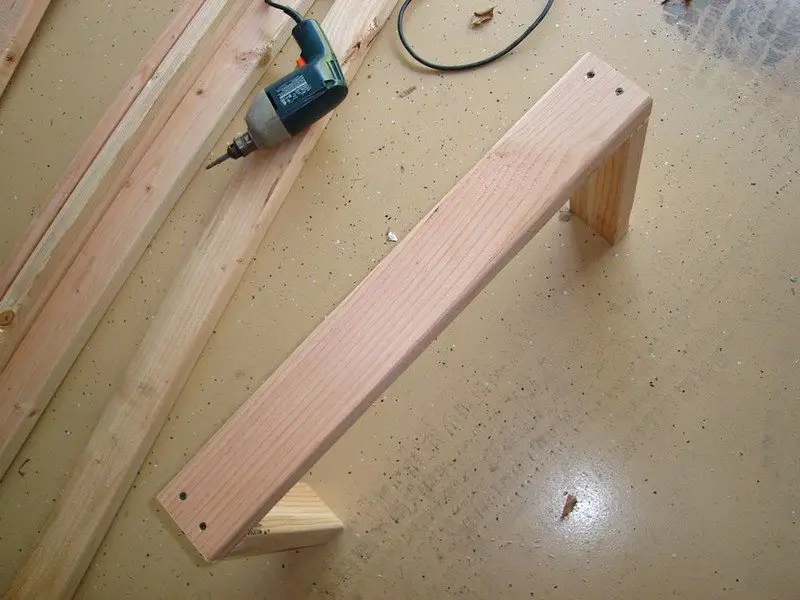
- Cut two 25″ pieces for the length (subtracting about 1″ from the 27″ width of the top panel to account for the thickness of the plywood).
- Cut four 13″ pieces for the legs.
- Double-check all measurements to ensure they’re accurate, as this will impact the stability of the pedestal.
To do this, just subtract the thickness of the 2 side panels from the main length of the base of your washer or dryer. That will be the length of your 2×4’s. Hope that made sense.
Step 5: Assemble the Frame
- Build the Frame Base:
- Attach one 25″ piece between two of the 13″ pieces to create a U-shape. Repeat for the other side.
- Drill pilot holes in each spot where you’ll drive screws to avoid cracking the wood.
- Use screws to secure the joints, ensuring a tight fit.
- Attach the Side Panels:
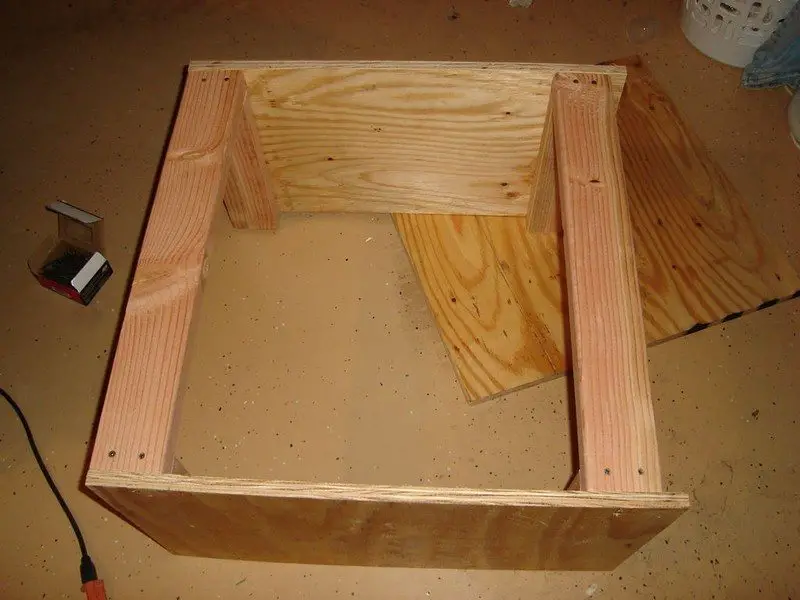
- Place one side panel against each side of the frame. Drill and screw these into the legs and base frame.
- Secure firmly to ensure the structure is stable.
Step 6: Attach the Top Panel
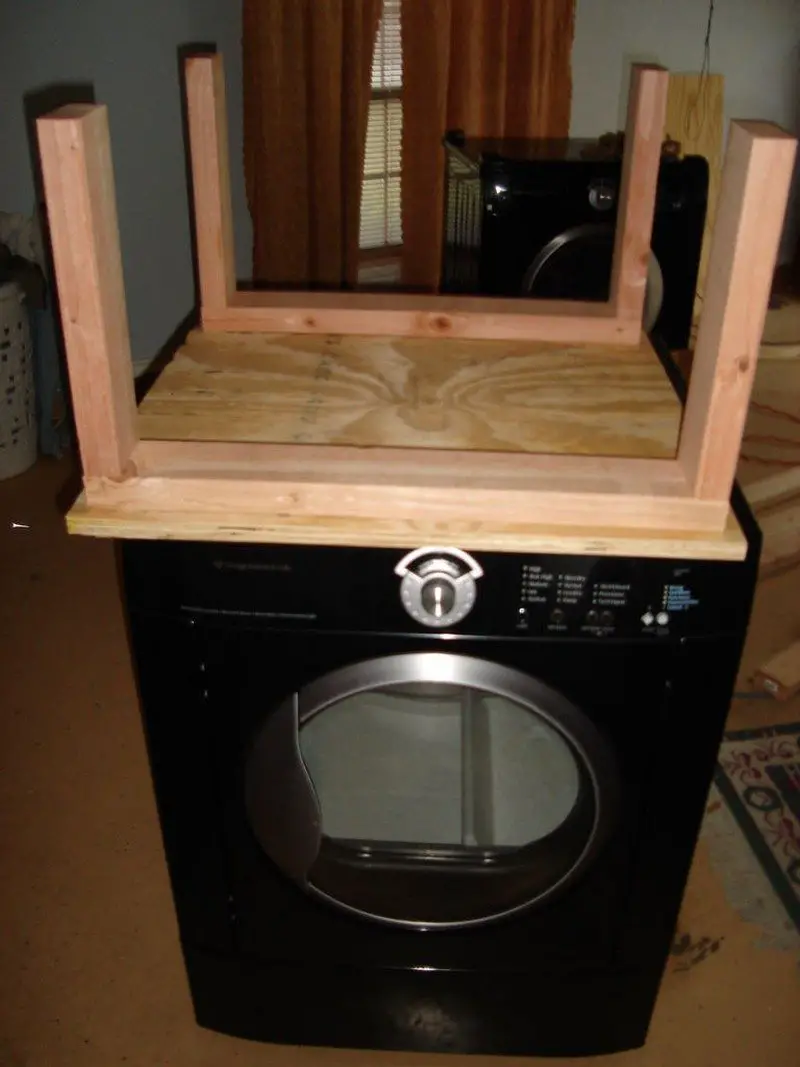
- Place the top panel on top of the frame and make sure it aligns evenly with all edges.
- Drill pilot holes along the top of the frame and screw the top panel down.
- Check that the top panel is flush with the sides and doesn’t have any overhang.
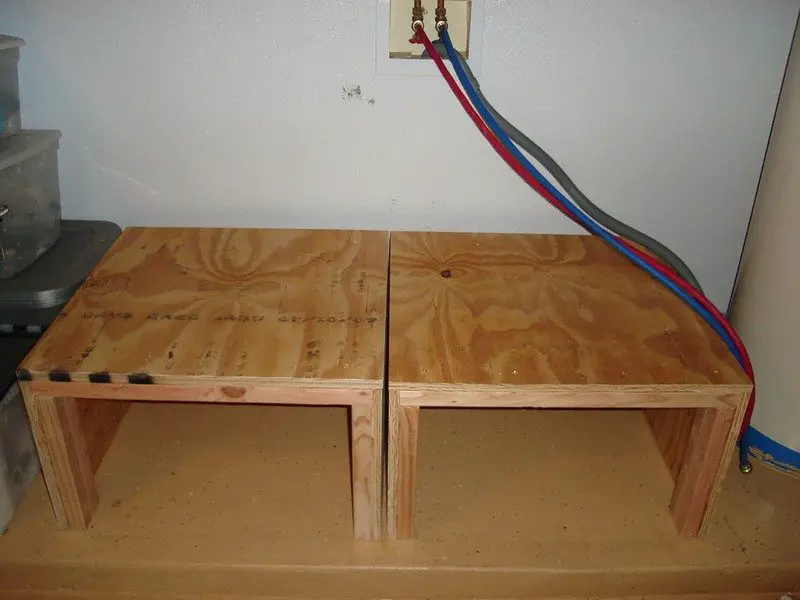
Step 8: Sand and Prepare for Painting
- Sand any rough edges on the plywood and 2x4s to prevent splinters.
- Wipe away dust with a damp cloth.
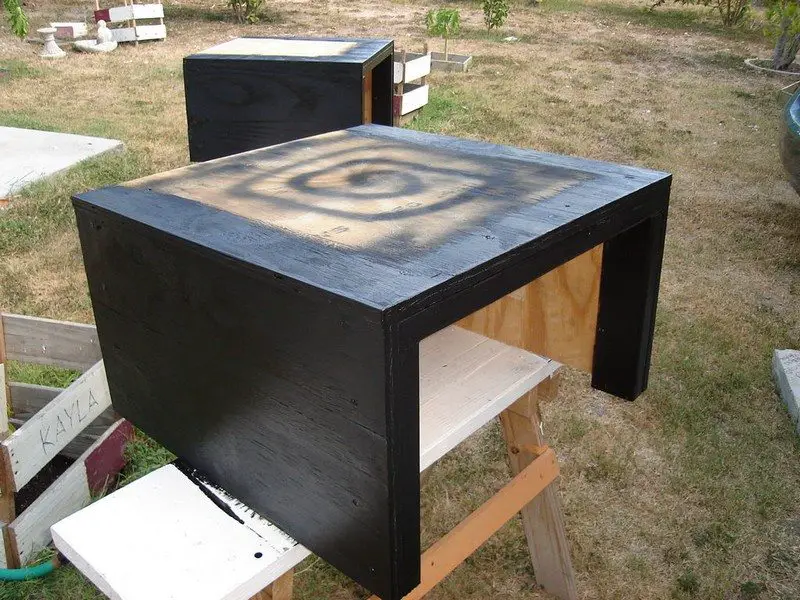
Step 9: Paint the Pedestal
- Choose a paint color that complements your DIY washer and dryer pedestal. Glossy paint is recommended as it’s easy to clean.
- You can use a brush for a solid, classic look or a spray paint for faster coverage.
- Tip: You don’t need to paint areas that will be covered by the washer, dryer, or wall.
- Allow the paint to dry completely before moving on.
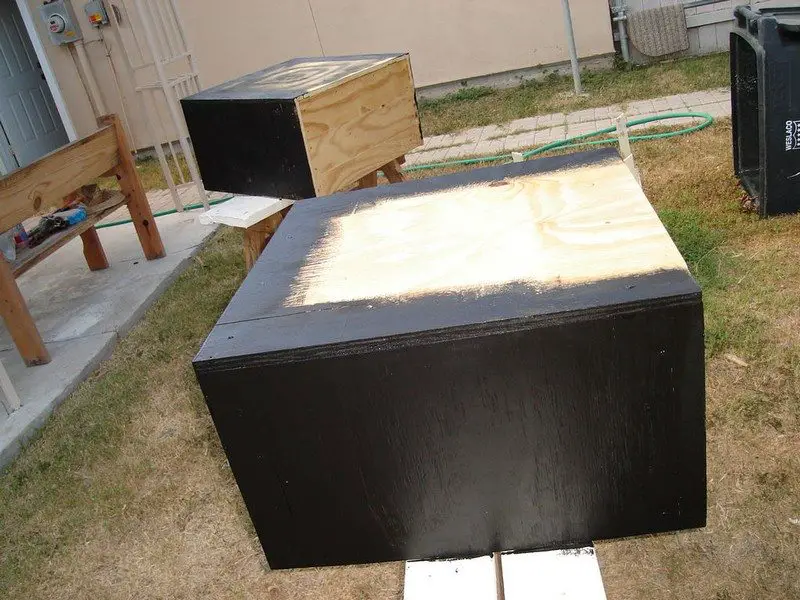
Step 10: Additional Outdoor Protection (Optional)
- If placing the pedestal outdoors or in a high-moisture area, you can:
- Attach a metal sheet around the bottom edges for extra protection.
- Apply a waterproof coating to the entire pedestal for weather resistance.
And you’re done!
Are your laundry machines located outdoors, in a more open area? Even perfect! These pedestals could serve as protection for the bottom parts of your electronics. It would keep them nice and clean, away from dirt.
To make this more suitable outdoors, finish it with some metal sheet at the bottom edges or apply waterproof coating on the entire pedestal.
Thanks to raxel for this great project!
Customization Ideas for Pedestals
DIY washer and dryer pedestals are not just functional; they’re an opportunity to add a personalized touch to your laundry room. Customizing these pedestals can help integrate them into your home’s decor and make laundry tasks more enjoyable.
Whether you’re a seasoned DIY enthusiast or a beginner, these ideas will inspire you to transform a simple pedestal into a statement piece that complements your space and needs.
- Add Color with Paint
- One of the simplest ways to customize your washing machine and dryer pedestal is by painting it to match or contrast with your laundry room’s color scheme.
- Choose a durable, moisture-resistant paint that can withstand the humid environment of a laundry room. For a modern look, consider sleek black or white gloss.
- If you prefer something more vibrant, pastel shades or bold colors can add a fun pop of color.
- Incorporate Decorative Panels
- For those who appreciate fine details, adding decorative panels to the sides of your washing machine and dryer pedestal can elevate its appearance.
- Use stencils to create patterns or faux panel lines with paint. Alternatively, you can attach moldings or wood appliques available at craft stores, then paint over them to integrate with the rest of the pedestal.
- Build in Storage Options
- Enhancing your washing machine and dryer pedestal with built-in storage can drastically improve its functionality.
- Consider adding drawers or shelves beneath the pedestal. Drawers are perfect for storing laundry essentials out of sight, such as detergent, fabric softener, and dryer sheets.
- Open shelving, on the other hand, can be used to neatly organize baskets for sorted laundry or items waiting to be ironed.
- Use Alternative Top Surfaces
- Changing the top surface of your washing machine and dryer pedestal can not only customize its look but also improve its usability.
- Instead of plain plywood, consider using a butcher block for a warm, rustic touch or a laminated surface for a more contemporary feel.
- These materials are not only visually appealing but also durable enough to withstand the weight and vibration of the machines.
- Enhance with Smart Technology
- In an age where technology integrates into every aspect of our homes, why not upgrade your washing machine and dryer pedestal with smart features?
- Installing a small, waterproof touchscreen or a built-in charging station for devices can make your laundry experience more efficient.
- You could display laundry tips, track cycle times, or simply keep entertained while you fold clothes.
- Personalize with Artwork
- For a truly unique washing machine and dryer pedestal, consider personalizing it with artwork. This could be anything from hand-painted designs to decoupage with fabric or wallpaper remnants.
- Choose a theme that matches your laundry room or something whimsical to brighten the mundane task of doing laundry.
These customization ideas for your DIY washer and dryer pedestal are just the beginning. With a bit of creativity and DIY spirit, you can create a pedestal that not only supports your appliances but also enhances the aesthetics and functionality of your laundry space.
Safety Considerations and Tips
Not only does the lifetime of your appliances depend on ensuring the safety of your DIY washer and dryer pedestal, but everyone in your house depends on it as well.
A correctly constructed and installed pedestal will help to keep your laundry equipment stable and stop mishaps. These are some basic safety issues and advice to keep in mind while handling dryer and washing machine pedestalls.
Secure Installation
Securing your DIY washer and dryer pedestal firmly to the wall or ground will help to guarantee its safety. This keeps the pedestal from tilting over or shifting, particularly in the washers’ high spin cycles. Use sturdy, long fasteners and think about adding brackets to ground the pedestal to wall studs. To guarantee that the washer and dryer are exactly horizontal, always verify the alignment and level of the pedestal, so helping to reduce too strong vibration.
Material Durability
Select materials able to handle the heavy weight of a dryer and washing machine. For maximum longevity, the pedestal should be constructed from premium wood, such as plywood or solid hardwood—or even metal. Every component, including screws and joints, must be strong enough to withstand operating stress without loosening over time.
Moisture Resistance
Given that washing machines involve water, it’s vital to consider the moisture resistance of your DIY washer and dryer pedestal. Use materials that are treated for water resistance to prevent warping, swelling, or mold growth.
Applying a waterproof sealant to wood surfaces can help protect them from moisture damage. Additionally, ensure good air circulation around the pedestal to keep the area dry and reduce humidity-related issues.
Anti-Slip Surface
An anti-slip surface to the top where the appliances sit will help to improve the safety of your washing machine and dryer pedestal. Attaching rubber mats or anti-slip pads will help you to accomplish this. Crucially for preserving stability, these materials help to absorb vibrations and stop the washing machine and dryer from moving while running.
Regular Maintenance
The long-term safety and operation of your pedestal depend mostly on regular inspection and maintenance. Look for any wear or damage on a regular basis, that is, cracks, loose screws, or water damage. Tighten any loose fittings and quickly replace broken components. Maintaining good condition of the pedestal guarantees not only its lifetime but also its safety for use.
Following these safety issues and advice will help you to guarantee that the pedestal of your washing machine and dryer stays a strong and safe basis for your laundry appliances. This proactive approach not only guards your machinery but also helps to create a safer house.
Conclusion
Building a DIY washer and dryer pedestal is an affordable and practical solution to enhance both the functionality and aesthetics of your laundry room. By elevating your appliances, you not only make laundry tasks more ergonomic but also create valuable storage space underneath.
Remember, with the right materials, safety considerations, and a bit of creativity, you can build a pedestal that will make your laundry routine more efficient and enjoyable.
So, why not take on this weekend’s project? Your back—and your laundry room—will thank you! Ready to get started? Gather your materials and transform your laundry space today!
FAQ: DIY Laundry Pedestal Plans
- Why should I build a DIY washer and dryer pedestal?
- Building your own pedestal can save you a significant amount of money compared to purchasing a commercial one. Commercial pedestals can be costly, often over $300, while a DIY version typically costs under $150 to build. Additionally, you can customize the size and style to fit your laundry room perfectly, whether you want extra storage or a specific height.
- How high should a DIY washer and dryer pedestal be?
- The height of your pedestal will depend on your personal preferences and storage needs. Most DIY pedestals raise appliances by 12 to 16 inches, which provides a comfortable working height and allows you to store baskets or other items underneath.
- How can I prevent my washer from vibrating off the pedestal?
- To prevent movement, ensure that the pedestal is level and sturdy. You can add rubber pads or create shallow holes in the top panel to place the washer and dryer feet into. This helps to stabilize the appliances, particularly during high-spin cycles.
- Can I add storage to my washer and dryer pedestal?
- Yes! Many DIY designs include built-in drawers or shelves for extra storage. Drawers are great for holding laundry supplies like detergent, dryer sheets, and fabric softener, while open shelves can store baskets for sorted laundry.
- How do you construct and fit the bottom shelf of a washer dryer pedestal?
- To construct a sturdy bottom shelf for a washer dryer pedestal, start by measuring and cutting 3/4″ plywood to fit snugly within the pedestal frame. Position the shelf, confirm it is level, and secure it with screws or nails, using pilot holes to prevent splitting. Reinforce the joints with wood glue for added strength, wiping away excess for a clean finish.
- How to ensure structural integrity?
- Ensuring that the corners are at right angles is crucial for structural integrity. This alignment prevents wobbling and supports even weight distribution.
- What additional materials are needed for assembly?
- In addition to screws, wood glue is applied to the joints. This adhesive adds extra bonding strength, ensuring the structure remains intact over time.
- How are the components joined together?
- Components are joined by drilling pocket holes into the ends of the supports, then securing them to the legs with 2 1/2″ screws. This method ensures a strong, clean connection.
- What materials should be used for the legs and frame?
- Use sturdy 4×4 lumber for the legs to ensure a solid foundation, while 2×4 lumber is suitable for constructing the rest of the frame, providing a balanced blend of strength and manageability.
- What is the recommended method for fitting the exterior walls of a washer dryer pedestal?
- To cover the back of the washer dryer pedestal, measure the width between the side panels and cut 15″-high pieces of 3/4″ plywood. Attach the panels to the back and sides with evenly spaced 1 1/4″ screws, ensuring a flush fit to eliminate gaps. Use wood glue along the edges for extra durability and a polished, stable finish.


