Guitars can get pretty expensive depending on the type, brand, and make. One of the best ways to take care of your instrument is to keep it out of reach of young children. So how do you do that? You put it in a place they couldn’t reach. But you’d still want it easily accessible for you.

Getting a guitar hanger is an excellent way for you to properly store your guitar. You simply mount in on a wall and the task is done. There are guitar hangers sold at most guitar stores but if you have time to spare and available materials at home, why not make your own? You get the freedom to customize it just the way you want.
With this project, no fanfare is involved, just pure woodworking skills. If you have excess wood from a previous project, you can make several of these and give them out to your guitar-playing friends.
So, you’ve got this awesome axe that’s your soulmate in sound, right? When you’re not jamming out, it’s just lying around, lonely and vulnerable. It’s time to give it the love and respect it deserves with a kickass DIY guitar hanger! But hold up, before you dive into this project, here are 5 crucial things you should remember to make sure your guitar hangs safe and sound:
1. Strength is Key:
Your guitar isn’t a featherweight, it’s a rockstar! So, your hanger needs to be as sturdy as your riffs. Opt for strong, durable materials like solid wood or metal. Ain’t nobody got time for flimsy hooks that might drop your precious six-string mid-solo! Reinforce the mounting points too – you don’t want your masterpiece crashing down mid-shred.
2. Measure Twice, Drill Once:
We’ve all been there – eyeballing measurements and ending up with a wonky setup. Don’t be that guy! Take precise measurements of your guitar and the space where you want to hang it. Mark those spots meticulously, and double-check before drilling. A little extra effort now saves you from heartbreak later when your guitar takes a dive.
3. Mind the Neck Angle:
Your guitar’s neck is its lifeline, so treat it with care. When designing your hanger, ensure the neck sits at a gentle angle, not too steep or too flat. You want it to cradle the neck comfortably, like a supportive hand under its head. This not only looks sleek but also prevents unnecessary strain on the neck joint. Your guitar will thank you with smoother tunes!
4. Protect the Finish:
That glossy finish on your guitar isn’t just for show – it’s part of its personality! When crafting your hanger, add padding or felt wherever the guitar makes contact. This cushioning acts as a buffer, shielding your baby from scratches and dings. Plus, it adds a touch of luxury to your DIY creation. Who said practicality can’t be classy?
5. Location, Location, Location:
Where you hang your guitar matters more than you think. Avoid spots exposed to direct sunlight, extreme temperatures, or moisture. These villains can warp your guitar’s body and mess with its tuning stability. Opt for a cool, dry area away from windows and heating vents. And if you live with clumsy roommates or hyperactive pets, go the extra mile and hang your guitar out of harm’s way. Safety first, rockstar second!
With these five golden rules in your DIY arsenal, you’re ready to craft the ultimate guitar hanger that’ll make your instrument feel like the rockstar it is. So, grab your tools, unleash your inner craftsman, and let’s give your guitar the throne it deserves!
Contents
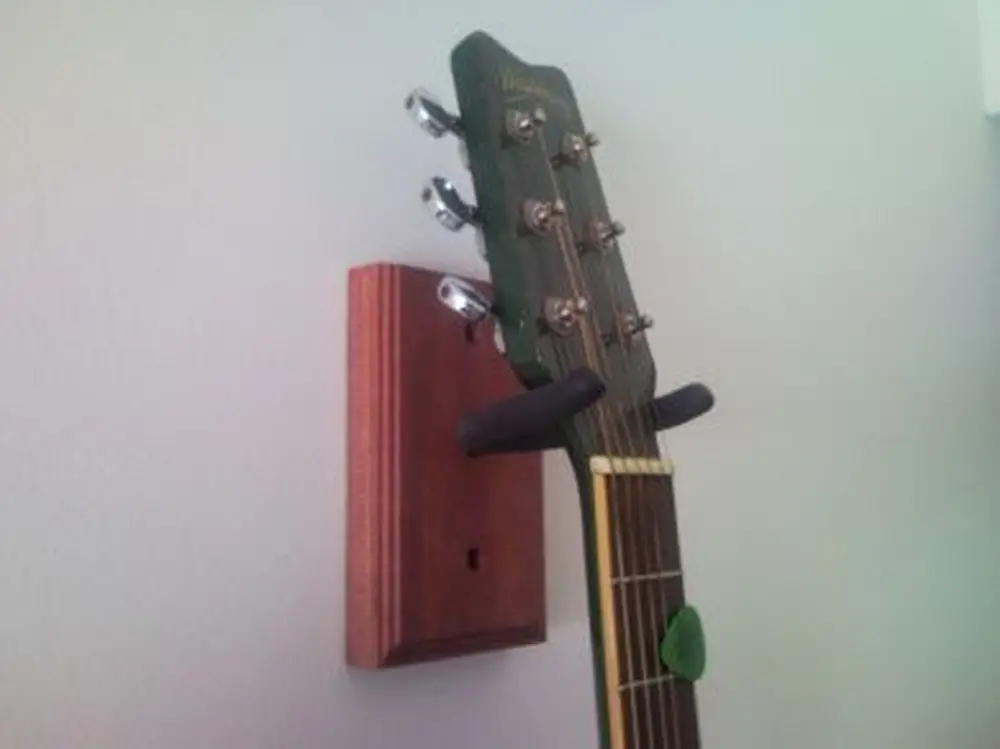
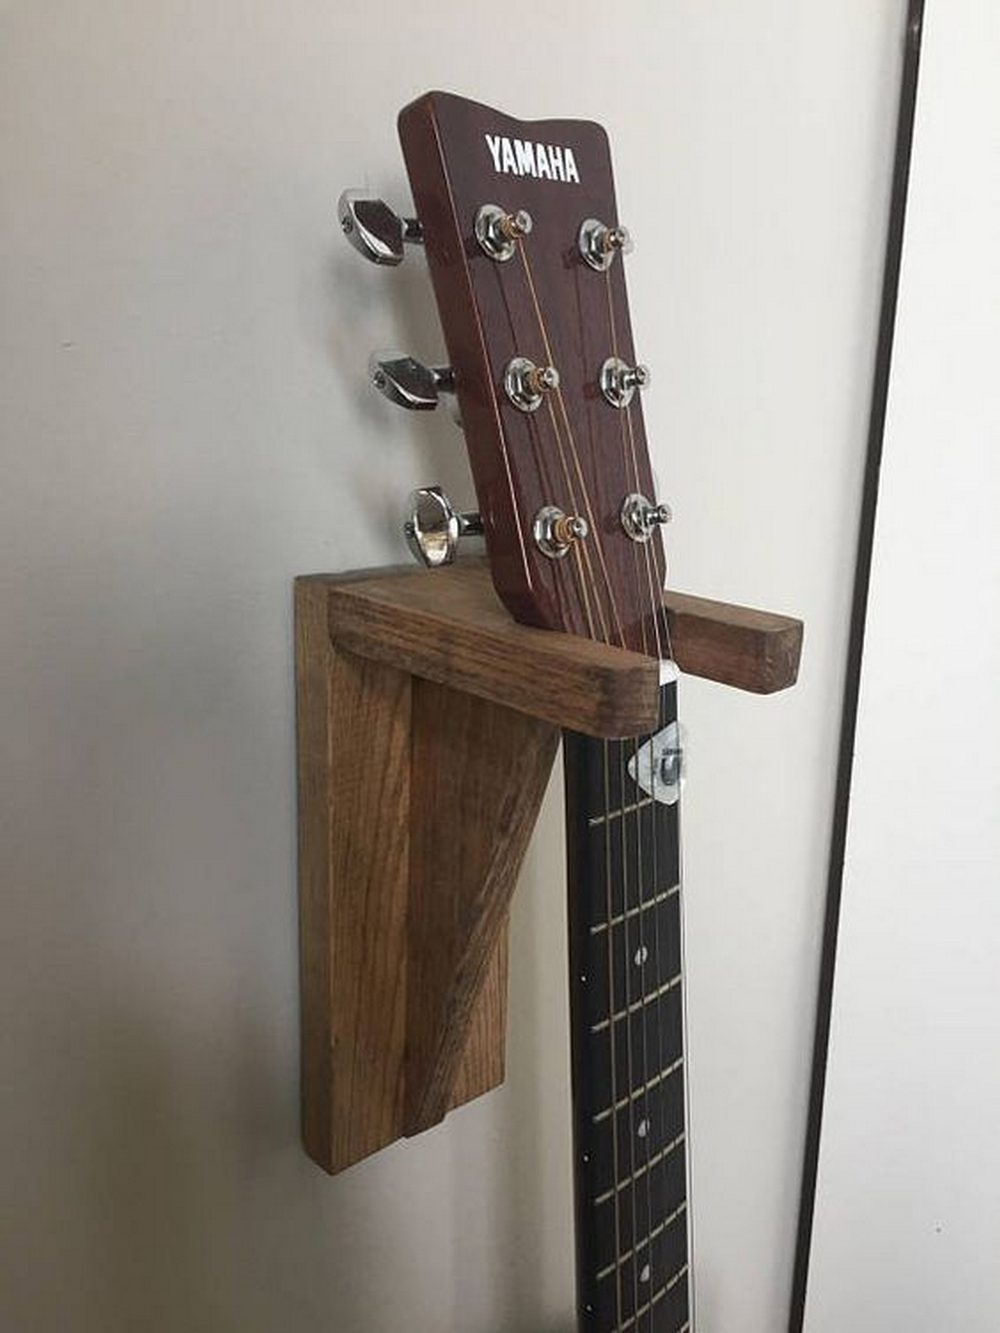
Building a Guitar Hanger
Alright, fellow music mavens, let’s crank up the volume on your DIY game because today, we’re diving into the art of crafting your very own guitar hanger! Say goodbye to cluttered corners and hello to a display that’ll make your guitar feel like the rockstar it truly is.
Materials:
- Wood
- Screws
- Lacquer
Tools:
- Drill with a drill bit
- Table saw
- Measuring tape
- Pencil
- Ruler
- Circular saw
- Belt sander
- Sandpaper
Click on any image to start the lightbox display. Use your Esc key to close the lightbox.

Watch this video to learn how to build your guitar hanger.
Rock-Solid DIY: Safety First for Your Guitar Hanger Adventure
Hey, DIY rockstars! Ready to dive into the ultimate project – crafting your guitar hanger? Before you start shredding through wood and hammering those hooks, let’s talk safety. We’re all about keeping the rhythm smooth and the fingers intact, so here are some must-know safety precautions to rock your DIY guitar hanger game!
1. Gear Up Like a Pro:
First things first, suit up for safety! Rock those safety goggles to protect your eyes from flying debris, slip on some sturdy gloves to shield your hands, and make sure you’re sporting closed-toe shoes to keep those toes tapping safely. Remember, safety gear is your backstage pass to DIY success!
2. Master Your Tools:
Your tools are your trusty bandmates on this DIY journey, so get to know them inside out. Whether it’s a drill, saw, or hammer, familiarize yourself with how each tool works and any safety features it boasts. And always use the right tool for the job – leave the improvisation for your guitar solos!
3. Measure Twice, Cut Once:
Precision is the name of the game when crafting your guitar hanger masterpiece. Take your time with measurements, and double-check before making any cuts or drills. We’re aiming for rock-solid accuracy here, not an off-key tune!
4. Rock-Safe Workspace:
Before you plug in that power tool, scan your workspace for potential hazards. Clear away clutter, secure loose items, and ensure you’ve got plenty of room to rock out. And don’t forget to crank up the lighting – we’re aiming for a stage-worthy setup, not a dimly lit dive bar!
5. Power Up with Care:
Power tools are like amplifiers – they can crank up the volume, but they demand respect. Always plug your tools into a grounded outlet, and never yank the cord to unplug them. When swapping blades or bits, make sure the tool is unplugged and the power switch is off. Safety doesn’t take a solo – it’s a group performance!
6. Keep Those Fingers Safe:
Your fingers are the stars of the show, so keep them safe from harm. When using sharp tools like saws or knives, cut away from your body and keep those digits clear of the blade. And if you’re working with tight spaces, consider using clamps or vices to keep things steady – your fingers will thank you for it!
7. Hydrate and Take Breaks:
Crafting the perfect guitar hanger is a marathon, not a sprint. Take regular breaks to rest those hands and hydrate with plenty of water. And if you start to feel fatigued or lightheaded, listen to your body and take a breather – you’re the headliner, and your safety is top billing!
8. Encore: Clean Up Like a Pro:
Once you’ve rocked your DIY guitar hanger to perfection, it’s time for the grand finale – cleaning up! Put away your tools, sweep up any sawdust or debris, and store your materials safely. A clean workspace isn’t just for show – it’s the encore that ensures your DIY journey ends on a high note!
With these safety precautions in your DIY toolkit, you’re ready to rock out with confidence as you craft the ultimate guitar hanger. So grab your gear, crank up the tunes, and let’s make some DIY magic happen – safely and soundly!
Advantages of DIY Guitar Hangers
Are you tired of tripping over guitar cases or constantly moving your prized instruments out of harm’s way? Say hello to your solution: DIY guitar hangers! These nifty contraptions not only keep your guitars safe and secure but also add a touch of style to your space.
Ready to rock? Here are seven reasons why DIY guitar hangers are a must-have for any musician or music enthusiast:
1. Customization Galore: One of the most significant advantages of DIY guitar hangers is the ability to customize them to your heart’s content. Whether you’re into rustic vibes, sleek modern designs, or quirky shapes, the possibilities are endless.
Get creative with materials like reclaimed wood, metal pipes, or even recycled materials from around your home. Not only will you have a practical storage solution, but you’ll also have a unique piece of decor that reflects your personality.
2. Cost-Effective: Why break the bank on expensive guitar hangers when you can make your own for a fraction of the cost? DIY guitar hangers are budget-friendly and allow you to repurpose materials you may already have lying around.
Plus, you’ll get the satisfaction of knowing you created something functional and stylish without emptying your wallet.
3. Tailored to Your Space: No two spaces are alike, so why settle for generic guitar hangers that may not fit your specific needs? With DIY hangers, you have the freedom to tailor the size, shape, and design to suit your space perfectly.
Got an awkward corner that needs some sprucing up? Whip up a custom hanger that not only stores your guitars but also enhances the aesthetic appeal of the room.
4. Showcase Your Collection: If you’re proud of your guitar collection, why hide it away in cases or closets? DIY guitar hangers allow you to proudly display your instruments like the works of art they are.
Whether you have one guitar or a dozen, make a stunning wall display that showcases your collection and becomes a conversation starter for anyone who walks into the room.
5. Space-saving solution: Living in a small apartment or studio? No problem! DIY guitar hangers are a space-saving godsend. By utilizing vertical wall space, you can free up valuable floor space and create a clutter-free environment.
Install hangers above doorways, in tight corners, or even on the ceiling to maximize every inch of space.
6. Protect Your Investment: Your guitars are more than just musical instruments—they’re investments that deserve to be treated with care. DIY guitar hangers help protect your guitars from damage caused by accidental bumps, knocks, or falls.
By keeping them securely mounted on the wall, you can rest easy knowing your precious instruments are safe from harm.
7. Sense of Accomplishment: There’s something incredibly satisfying about building something with your own two hands. DIY guitar hangers provide a sense of accomplishment and pride that you just can’t get from store-bought alternatives.
From conceptualizing the design to putting the finishing touches, every step of the process is a testament to your creativity and craftsmanship.
DIY guitar hangers offer a multitude of advantages that make them a worthwhile addition to any musician’s space. From customization and cost-effectiveness to space-saving solutions and the satisfaction of a job well done, these homemade hangers tick all the boxes. So why wait? Roll up your sleeves, grab your tools, and get ready to rock your space with DIY guitar hangers!
If you’ve been vibing with this project, get ready to turn up the volume on your DIY skills! Check out how to groove into crafting your DIY guitar shelf. It’s the next level jam to elevate your space and give your guitars the spotlight they deserve. Keep the creativity riffing and let’s rock this DIY journey!
Strumming Up Success with Your DIY Guitar Hanger
Congratulations on diving into the world of DIY guitar hangers! You’ve just completed a crash course in crafting your very own rockstar-worthy storage solution. Let’s jam through the key points one more time:
Before you unleash your inner guitar hero, make sure you’re geared up with safety equipment and working in a secure environment. Your fingers are your best friends, so keep them safe while you’re busy crafting your masterpiece.
Precision is the name of the game when it comes to creating the perfect fit for your guitars. Take the time to measure accurately and double-check your dimensions before making any cuts. Trust us, your guitars will thank you for it!
From sturdy hardwood to sleek metal, the choice of materials can make or break your DIY project. Opt for high-quality materials that can withstand the weight of your guitars and the test of time. After all, your guitars deserve a safe and stylish home.
Don’t be afraid to put your spin on the design. Whether you’re adding a pop of colour, incorporating decorative elements, or experimenting with different shapes, let your creativity run wild. Your guitar hanger should be as unique as your musical style.
Once your guitar hanger is assembled and ready to go, it’s time to put it to the test. Hang your guitars with confidence, knowing that you’ve created a secure and stylish storage solution. Sit back, admire your handiwork, and get ready to rock out like never before.
With these five essential strategies in your arsenal, you’re well-equipped to tackle the challenge of building your guitar hanger. Whether you’re a seasoned DIY enthusiast or a newbie crafter, this project is sure to strike a chord with your inner rockstar.
But remember, the journey doesn’t end here. Keep exploring new projects, refining your skills, and pushing the boundaries of your creativity. Who knows? Your next DIY creation could be even more epic than your guitar hanger.
So grab your tools, crank up the tunes, and get ready to rock your DIY guitar hanger like never before. Your guitars will have a stylish new home, and you’ll have a sense of accomplishment that’s truly worth strumming about. Keep on rocking, and may your DIY adventures be filled with endless inspiration and creativity!
FAQs: Your Guitar Hanger Journey Unraveled!
1. Do I need to be an experienced builder to make my guitar hanger?
Not at all! While some basic woodworking skills can be helpful, our guide is designed to be beginner-friendly. With clear instructions and handy tips, even first-time builders can rock their guitar hanger.
2. What tools will I need to build a guitar hanger?
The tools you’ll need depend on the design you choose, but common tools include a saw, drill, screwdriver, measuring tape, and sandpaper. Don’t worry if you’re missing a tool or two – improvisation is part of the DIY spirit!
3. Can I customize my guitar hanger to fit my style?
Absolutely! We encourage it. Whether you want to add decorative accents, paint it in your favourite colours, or tweak the design to suit your space, the sky’s the limit when it comes to customization.
4. How do I ensure my guitar hanger is strong enough to hold my instruments securely?
Choosing sturdy materials and following our recommended measurements are key to ensuring your guitar hanger can handle the weight of your instruments. Additionally, be sure to securely attach the hanger to a stud or other solid surface for extra stability.
5. I’m worried about damaging my walls. Any tricks for hanging my guitar hanger safely?
To minimize the risk of damage, use appropriate wall anchors or screws designed for your wall type. If you’re unsure, consult with a hardware store expert or a professional handyman for advice tailored to your specific situation.
6. Can I use my guitar hanger for other instruments besides guitars?
Absolutely! While our guide focuses on guitar hangers, you can adapt the design to accommodate other stringed instruments like ukuleles, mandolins, or banjos. Just adjust the dimensions accordingly to ensure a proper fit.
7. I live in a rental apartment. Is it okay to install a guitar hanger on the wall?
Before drilling any holes, check your lease agreement or consult with your landlord to ensure you’re allowed to make modifications to the walls. If permanent installation isn’t an option, consider alternative mounting methods such as adhesive hooks or freestanding hangers.


