
Drill (2) 1″ holes on the center of the two sides of the box. These will end up holding up the box in its final location
Pre-drill and install (2) screw eyes (one on each side) about 2″ off-center. These will be used to hold up the box to wire.
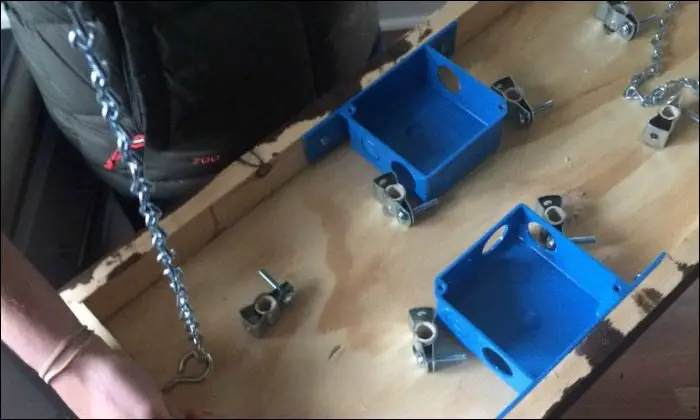
I installed 2 electrical junction boxes inside so all wires could be pulled to this location in the next step.
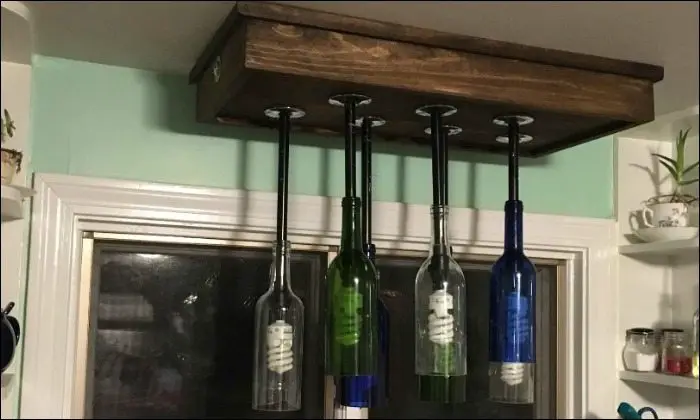
Hanging and electrical wiring: To wire the fixture in place, I wanted to first hang the fixture so one did not have to hold in place (since it is fairly heavy). This would also make it easier to replace a bottle if needed etc.
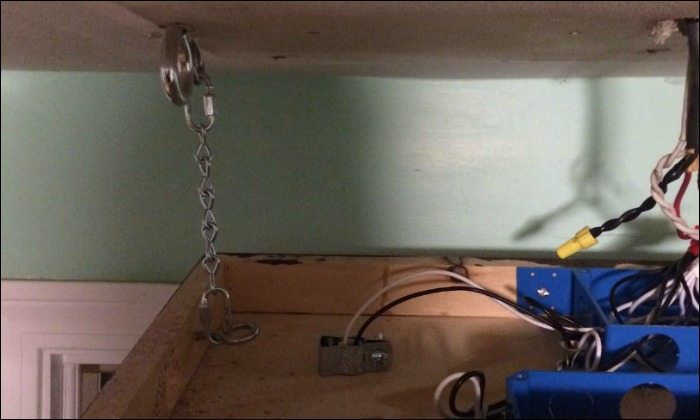
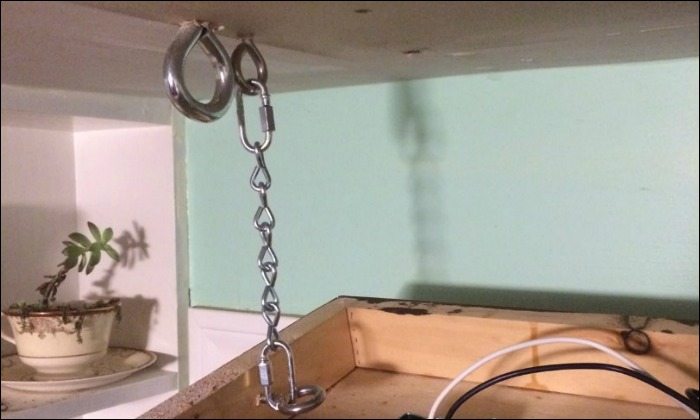
Pre-drill and screw 2 hooks into the ceiling directly inside the footprint of the box’s final location. Doesn’t necessarily matter where, but I recommend about 2″ off-center of each side. I was fortunate to have the whole ceiling covered with in-wall blocking, but you will want to check and ensure you hit something solid when you install these hooks as they will be holding the fixture’s weight
Using the quick links and chain, attach the hooks in the box, to the hooks in the ceiling.

Let go and test that the chain/fixture strength to make sure it holds.
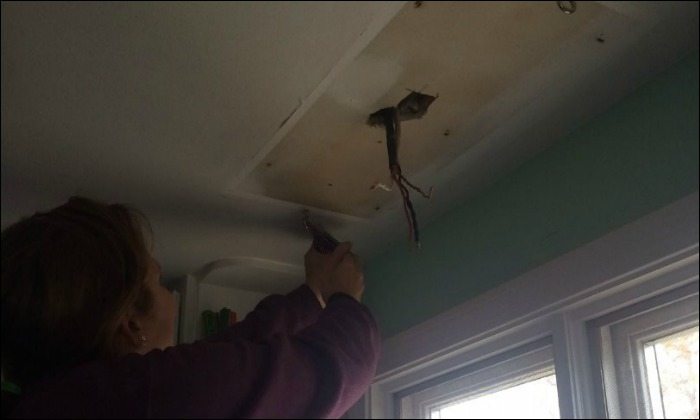
Once it is secure, turn off the power to the circuit and check out the wiring. My fixture was power fed from the ceiling, with wires going to the light switch from there. This is not a normal situation (and one I had to discover through trial and error).
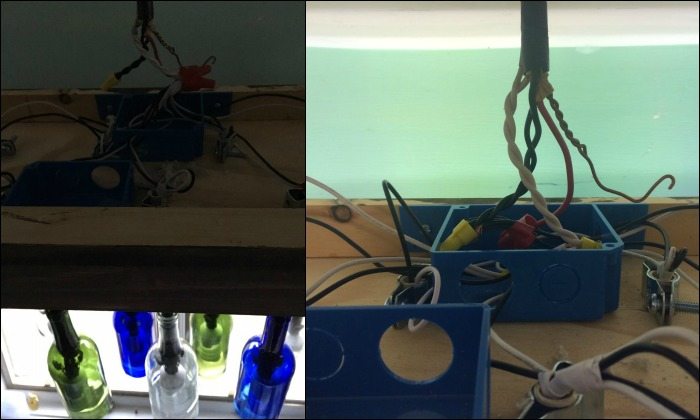
Thread the light sockets through the bottle/conduit so all the wires extend into the box. Pull all the wires into the junction box closest to the wires in the ceiling. Using electrical tape, tape together all of the white wires, and all of the black wires and make sure the wires are all connected.
If some of the bulbs hang down further than desired when pulled to the junction box, pull to the desired height, then overlap the wires and wrap electrical tape around the top to hold it in place.
In my scenario, the black wire was the power, that fed to the switch, and the red wire came from the switch. So for the light switch to operate, all the black wires from the light bulbs had to be attached to the red wire, not the black. I capped the black wires from the ceiling and attached the white bundle, to the white in the ceiling, and as mentioned before, the black bundle to red using wire nuts. Once the nuts were on securely, wrap electrical tape around them to ensure there are no exposed threads. If your fixture is not powered from the ceiling, you should just be able to attach black to black and white to white.
For the ground, I wrapped it around a screw I placed inside the box, making sure it could not touch any other metal.
Turn the circuit and switch on to make sure the fixture works properly.
Installing in a final location: This was another tricky part, that took some serious thought on how I wanted to attach it directly to the ceiling. Many factors came into play.
- Due to the tight nature of my cabinets to the fixture, a dowel that went through the whole length of the fixture was not possible since I would not have been able to get it in/out without jamming into the cabinets
- I live right near a train station, and the house shakes on occasion, so I didn’t want to just use a pin since it could ‘wiggle’ out
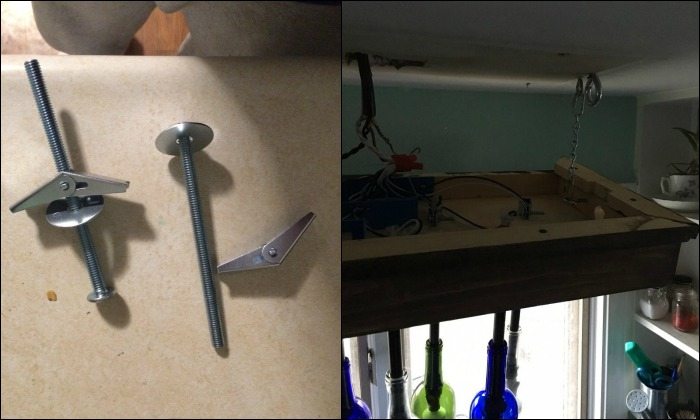
In discussing the dilemma with a friend, and gentlemen at HomeDepot, I came up with the following idea that uses drywall toggle bolts. These can be threaded through the holes in the box, then through hooks on the ceiling, and tightened. The bolt then could not ‘wiggle’ out, but by unscrewing it, can come off to access the inside of the box.
Pre-drill and install the (2) screw eyes on the ceiling in the center of the final location of the sides of the box (should match up perfectly with the existing holes in the side of the box from the previous step).
Measure the distance from the ceiling to the bottom of the eye-opening and from the top of the box, to the bottom of the drilled hole. These dimensions should match up. (I had to add some trim to the top of the box for them to line up).
Lift the box into location, and thread the toggle bolt (adding a washer so the head of the bolt wouldn’t go through the hole as well) through the side of the box, then through the eye. Do the same to the other side, then tighten them down. To remove, simply unscrew the toggle bolts and the box will drop down to the chains again.
Editorial Note:
Please be mindful that electricity is very unforgiving. In some countries, it is illegal to make a mains power electrical connection without an appropriate license.
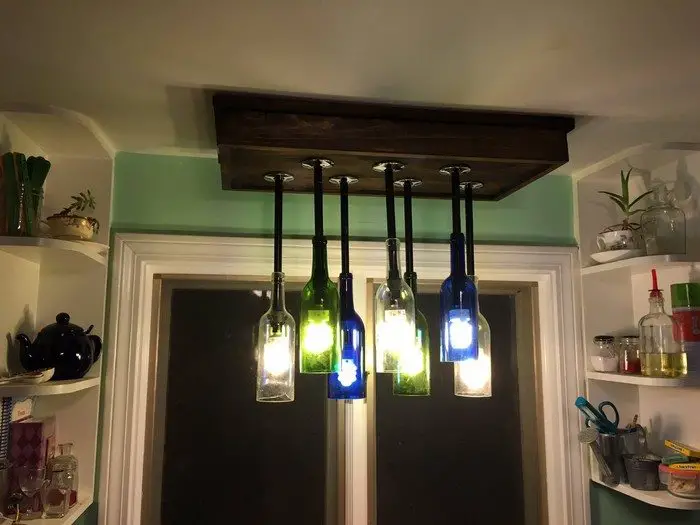
And you’re done! Enjoy!
Thanks to campbesj7 for this great project!


